Homemade Gummy Peach Rings (made with Real Fruit and Gelatin)
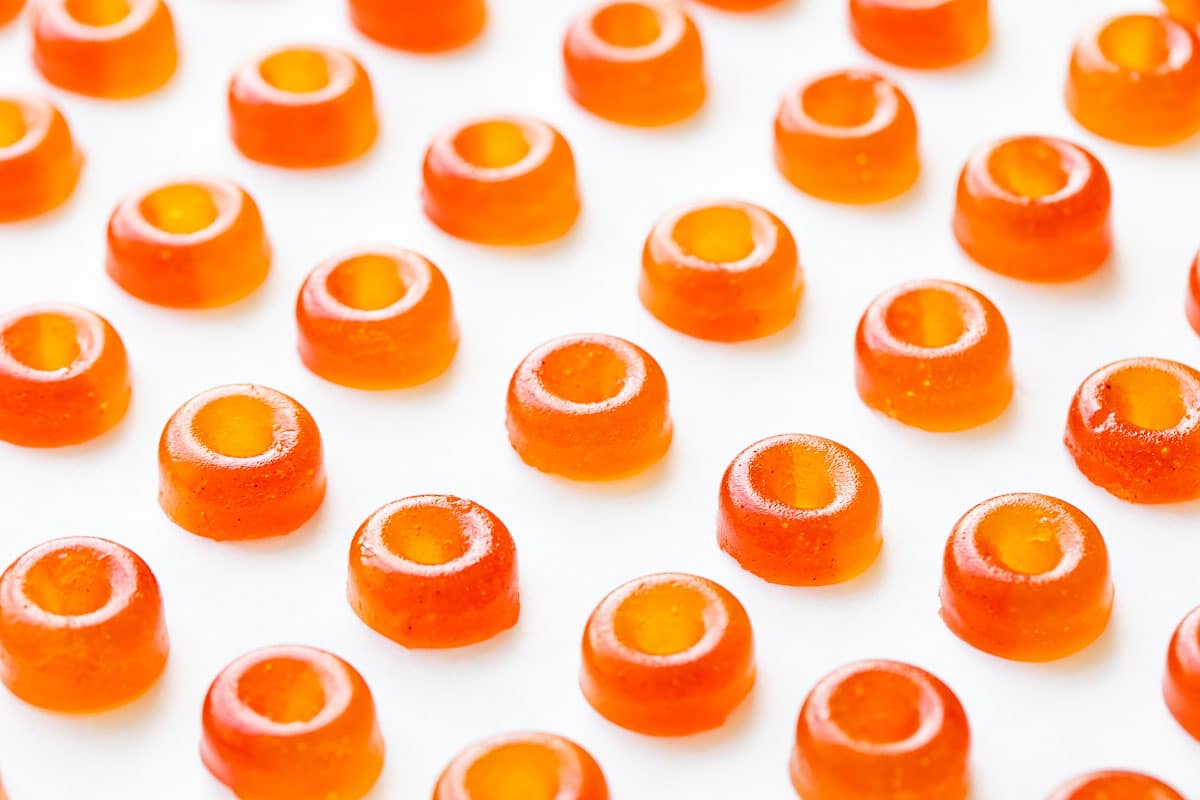
These homemade peach rings are bursting with bright, summery peach flavor—made with real fruit and set with gelatin for that perfect bouncy, stretchy gummy texture. Any gummy candy lover is surely familiar with peach rings, the bi-colored peach-flavored rings...
 ShanonG
These homemade peach rings are bursting with bright, summery peach flavor—made with real fruit and set with gelatin for that perfect bouncy, stretchy gummy texture.
Any gummy candy lover is surely familiar with peach rings, the bi-colored peach-flavored rings of jellied delight. And now you can make them at home using real fruit for a fresh peach flavor that pops.
Back on my candy-making train… this year the focus is peach, most notably, a homemade version of the classic peach ring.
Unlike my previous strawberry and raspberry gummy recipes, this recipe is gelatin based instead of pectin; my ultimate goal was to achieve the ultra stretchy, bouncy texture of a gummy bear, and you simply can’t do that with pectin alone. (I’m curious what a combo pecin-and-gelatin gummy might be, but that’s another recipe for another day).
The results are well worth the many rounds of tests it took me to get there, with a bright and peachy flavor and a stretchy texture that’s incredibly satisfying.
Do plan to give yourself a solid 2-4 days to complete the whole process, as the gummies need plenty of time to set and then to cure. That said, it’s only about 60 minutes of total active time involved, even if it is spread out over the course of a few days.
As I’ve mentioned, these are gelatin-based gummies, compared to the pectin base of my strawberry and raspberry gummy recipes.
What’s the main difference, you ask?
Gelatin gives gummies the classic stretchy texture of a gummy bear, whereas pectin creates more of a toothsome, gumdrop-like texture.
There are other differences besides just the final texture, however.
• Gelatin gummies need to cure or dry out after unmolding. This is a very important step, and makes the difference between a jello-like texture and a true bouncy, ultra-stretchy gummy.
• Both types of gummies do require you to cook the fruit and sugar mixture to a specific temperature (at least my recipe does). In this case the temperature is slightly lower than the pectin gummies, as we’re mostly relying on the gelatin for our set.
• Because gelatin melts at fairly low temperatures, gelatin gummies are not as warm-weather stable as pectin gummies; leave them in a hot car for too long and they will melt into a single giant gummy (don’t say I didn’t warn you!)
But they are also a bit easier to make, I think, since the liquid candy mixture stays liquid longer, allowing you more time you get the candy into the molds (pectin gummies, if you’ve attempted them, get very thick, very fast, so you don’t have much time at all to pour the mixture into your molds). With these gummies you can take your time; and if the liquid candy does start to cool and gloop up on you, just set the squeeze bottle in a hot water-bath to warm it back up again.
• Additionally, the acid in this recipe is solely for flavor, not for set (whereas pectin gummies require a very specific pH in order for the pectin to fully activate and set). What this means is you can be a little more loosey goosey with your use of citric acid, feel free to add more or less to taste, or even swap the peaches for different fruits entirely (since we’re not tied to a specific acidity/pectin content of a particular fruit).
You can also swap lemon juice for the citric acid, 1 tablespoon per 1/4 teaspoon of citric acid as called for. I personally prefer the citric acid here as it is flavor-neutral, whereas adding 1/4 cup of lemon juice will impart a noticeable lemon flavor to the final gummies.
• In the con column, gelatin gummies are not vegetarian as gelatin is an animal-derived product. If you’re looking for vegan or vegetarian gummies, I recommend using a pectin base instead of trying to adapt this recipe. Vegetarian gelatins will NOT give you the same results in this recipe.
Gelatin gummies are made with a similar process to pectin gummies, though you don’t have to worry as much about the starting and ending pH since gelatin, unlike pectin, doesn’t depend on a specific pH in order to set.
While many gelatin gummy recipes out there just call for warming the mixture just enough to dissolve the sugar and melt the gelatin, I prefer cooking the candy base to a soft-ball sugar stage of 230-235ºF. Cooking the candy base to this temperature reduces the water content of the gummy, resulting in a chewier, stretchier texture.
You will definitely need an accurate candy thermometer for this recipe (have you calibrated yours recently?), as temperature is really the best indicator of doneness (it’s not something you can easily visualize).
Altitude adjustments: As with any other cooked sugar recipe, if you live at high altitude you’ll want to adjust the target temperature accordingly. For every 1,000 feet of elevation, reduce the target temperature by 2ºF. For example, if you live at 3,000 feet, your target temperature will be 6º less, or 224-229ºF.
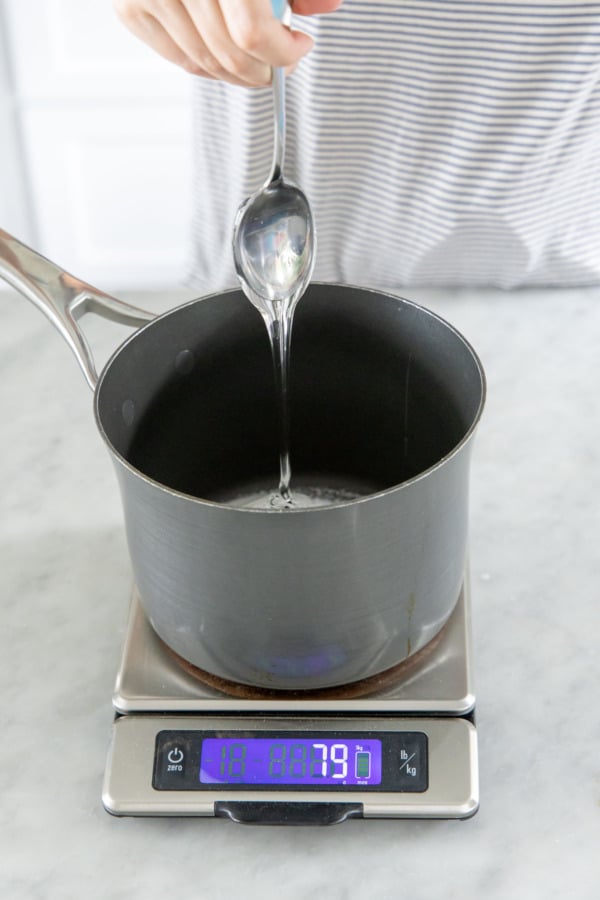 Combine sugar and glucose syrup in a medium saucepan (tip: use a scale to measure the glucose as it is very sticky!)
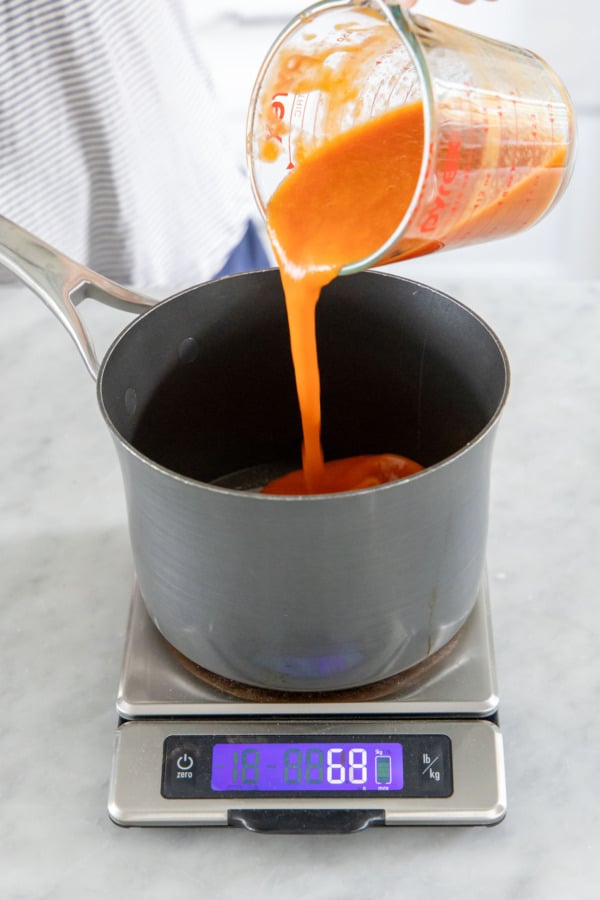 Add peach puree (from blended peeled fresh peaches or frozen peaches) and lemon juice.
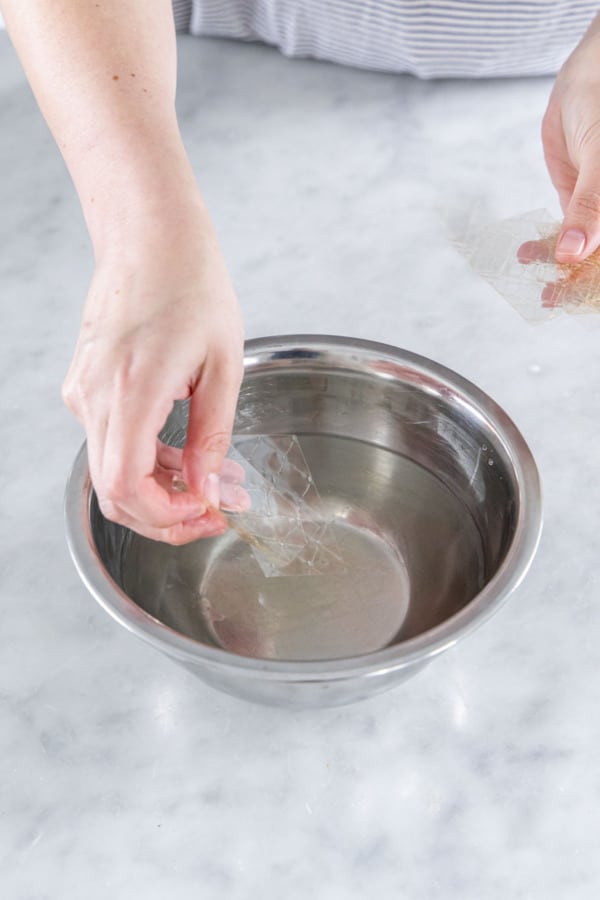 Cut gelatin sheets into strips, then separate and soak in a bowl of cold water for at least 5 minutes to soften.
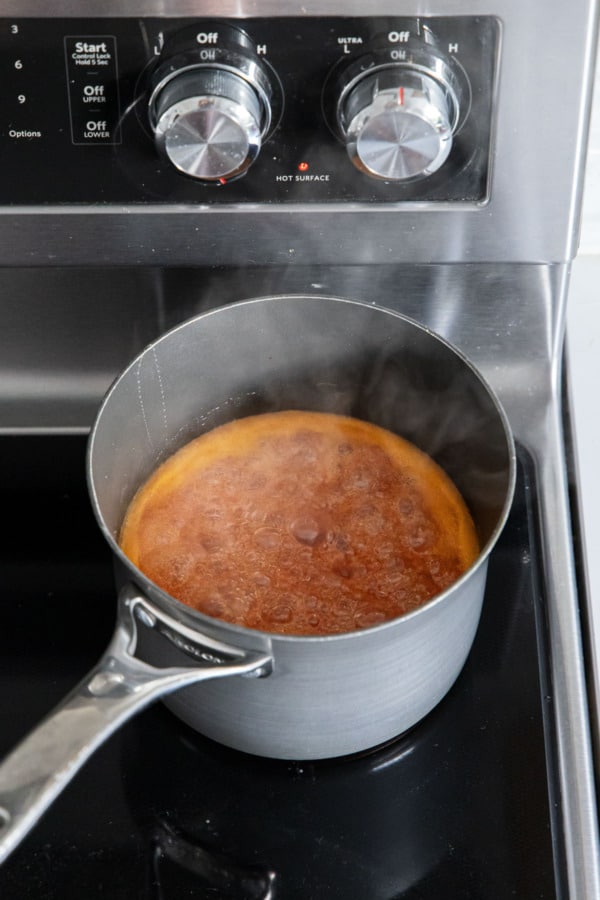 Bring the peach candy mixture to a gentle simmer.
 Continue to cook, stirring frequently to prevent burning, until the liquid candy measures 230-235ºF on a digital thermometer.
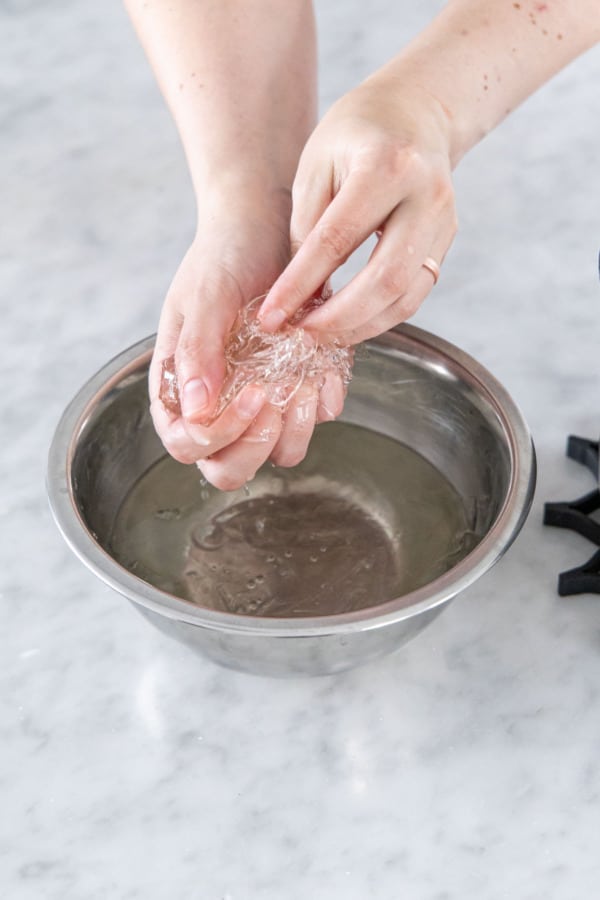 Squeeze and wring out excess water from the softened gelatin.
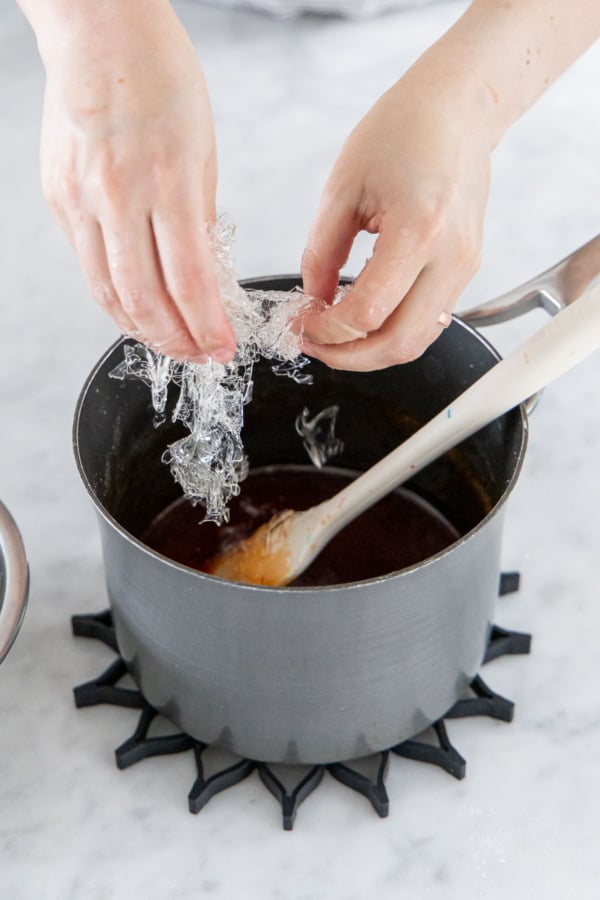 Add softened gelatin to hot liquid candy mixture, stirring until completely melted and incorporated.
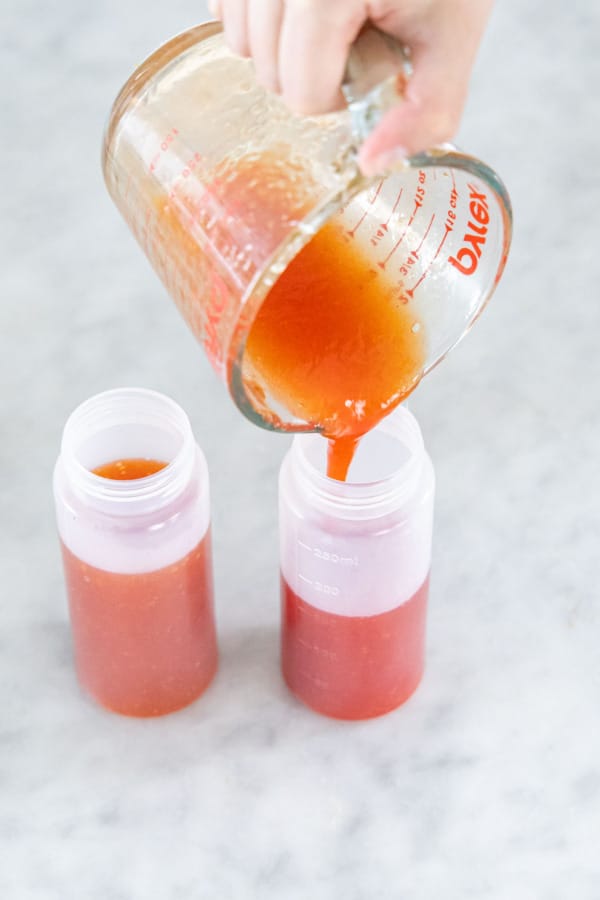 Transfer the liquid candy into two squeeze bottles, adding a few drops of red food coloring to one to achieve the two-toned color effect.
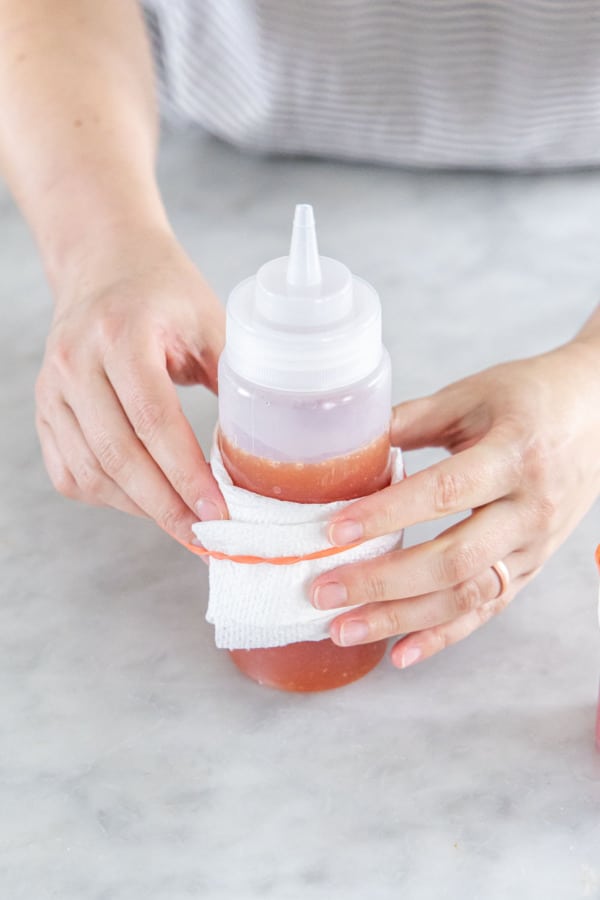 Because the liquid candy is still very hot, wrap the squeeze bottle in a towel (or use potholders) to protect your hands.
 Squeeze the two colors of liquid candy into the silicone molds at the same time to achieve the two-toned color effect.
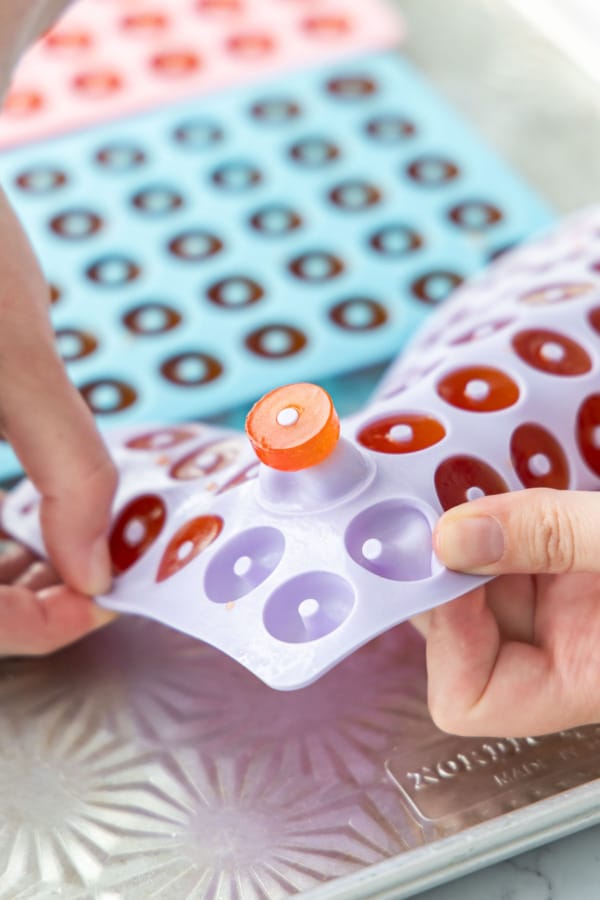 After refrigerating overnight, pop the gummies out of the silicone molds.
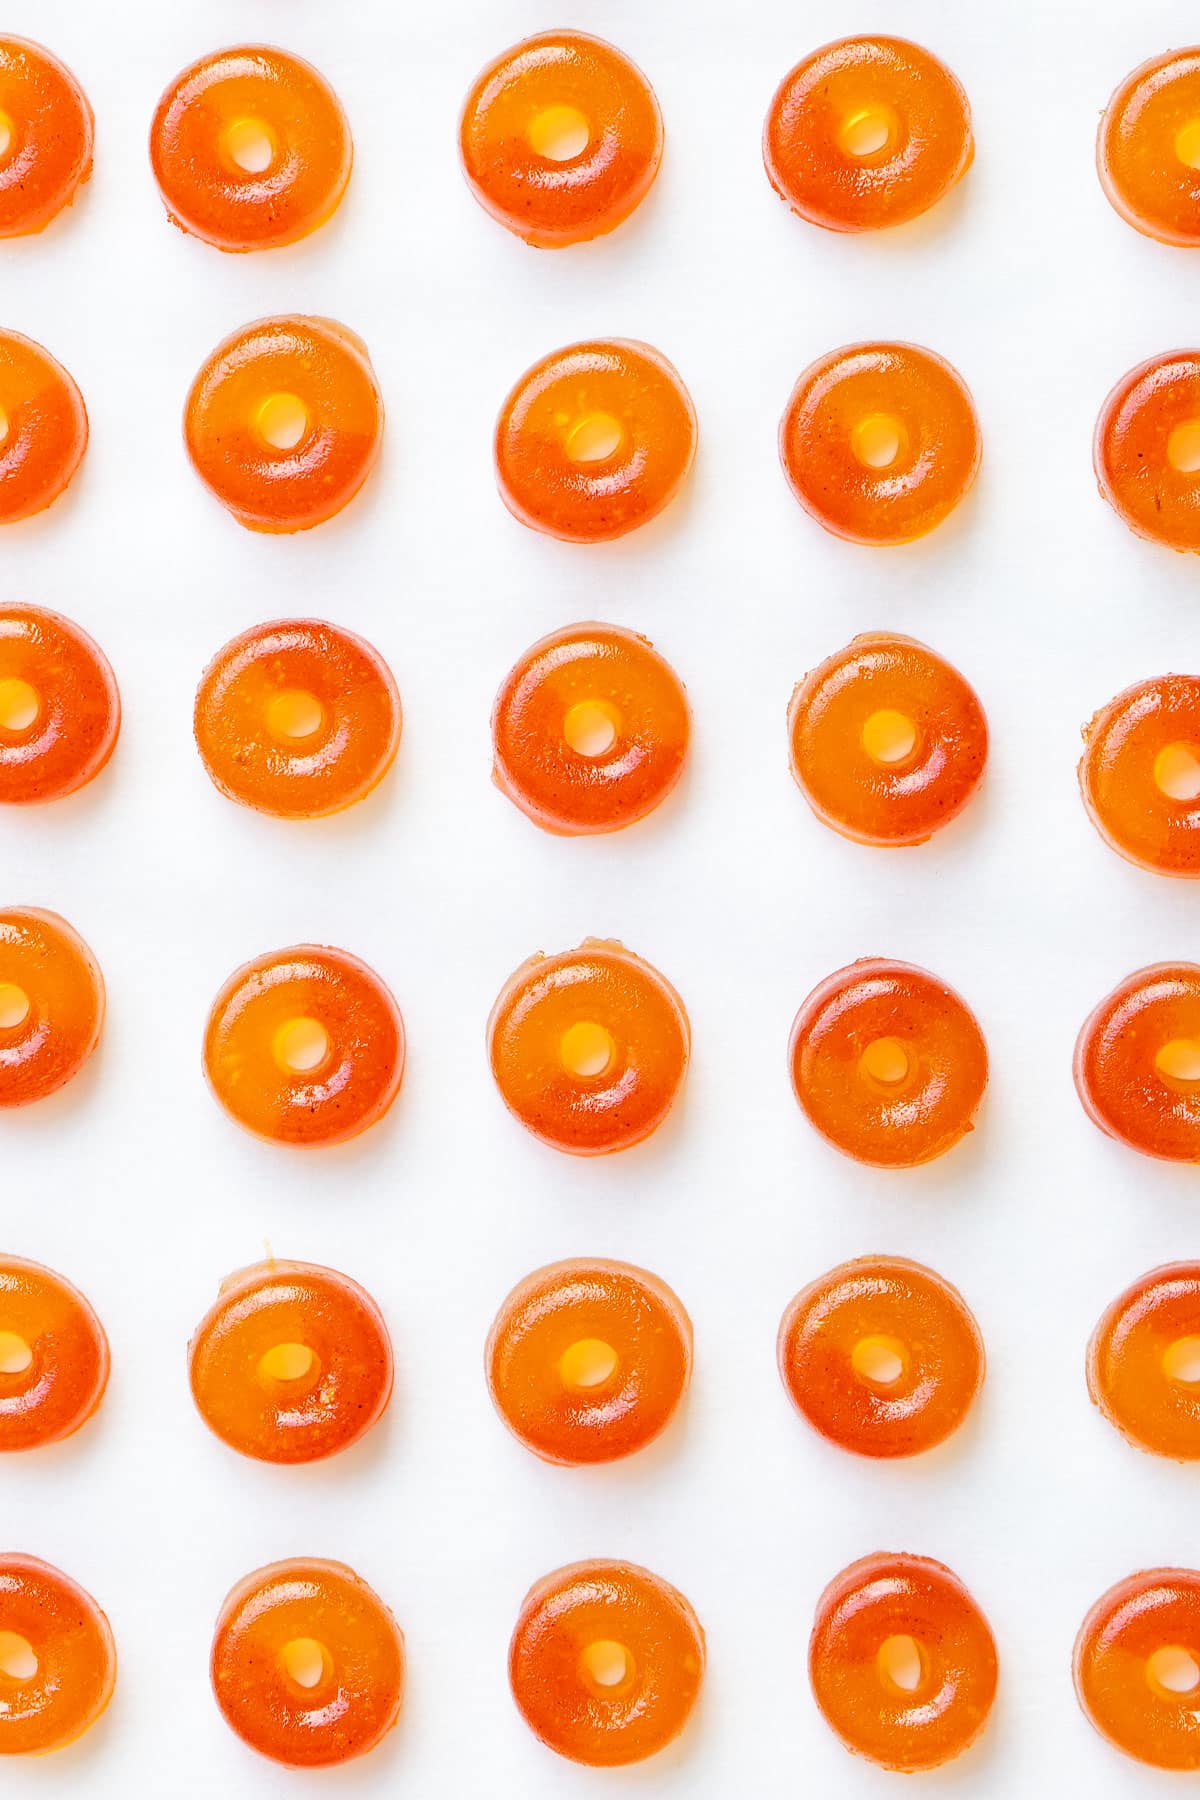
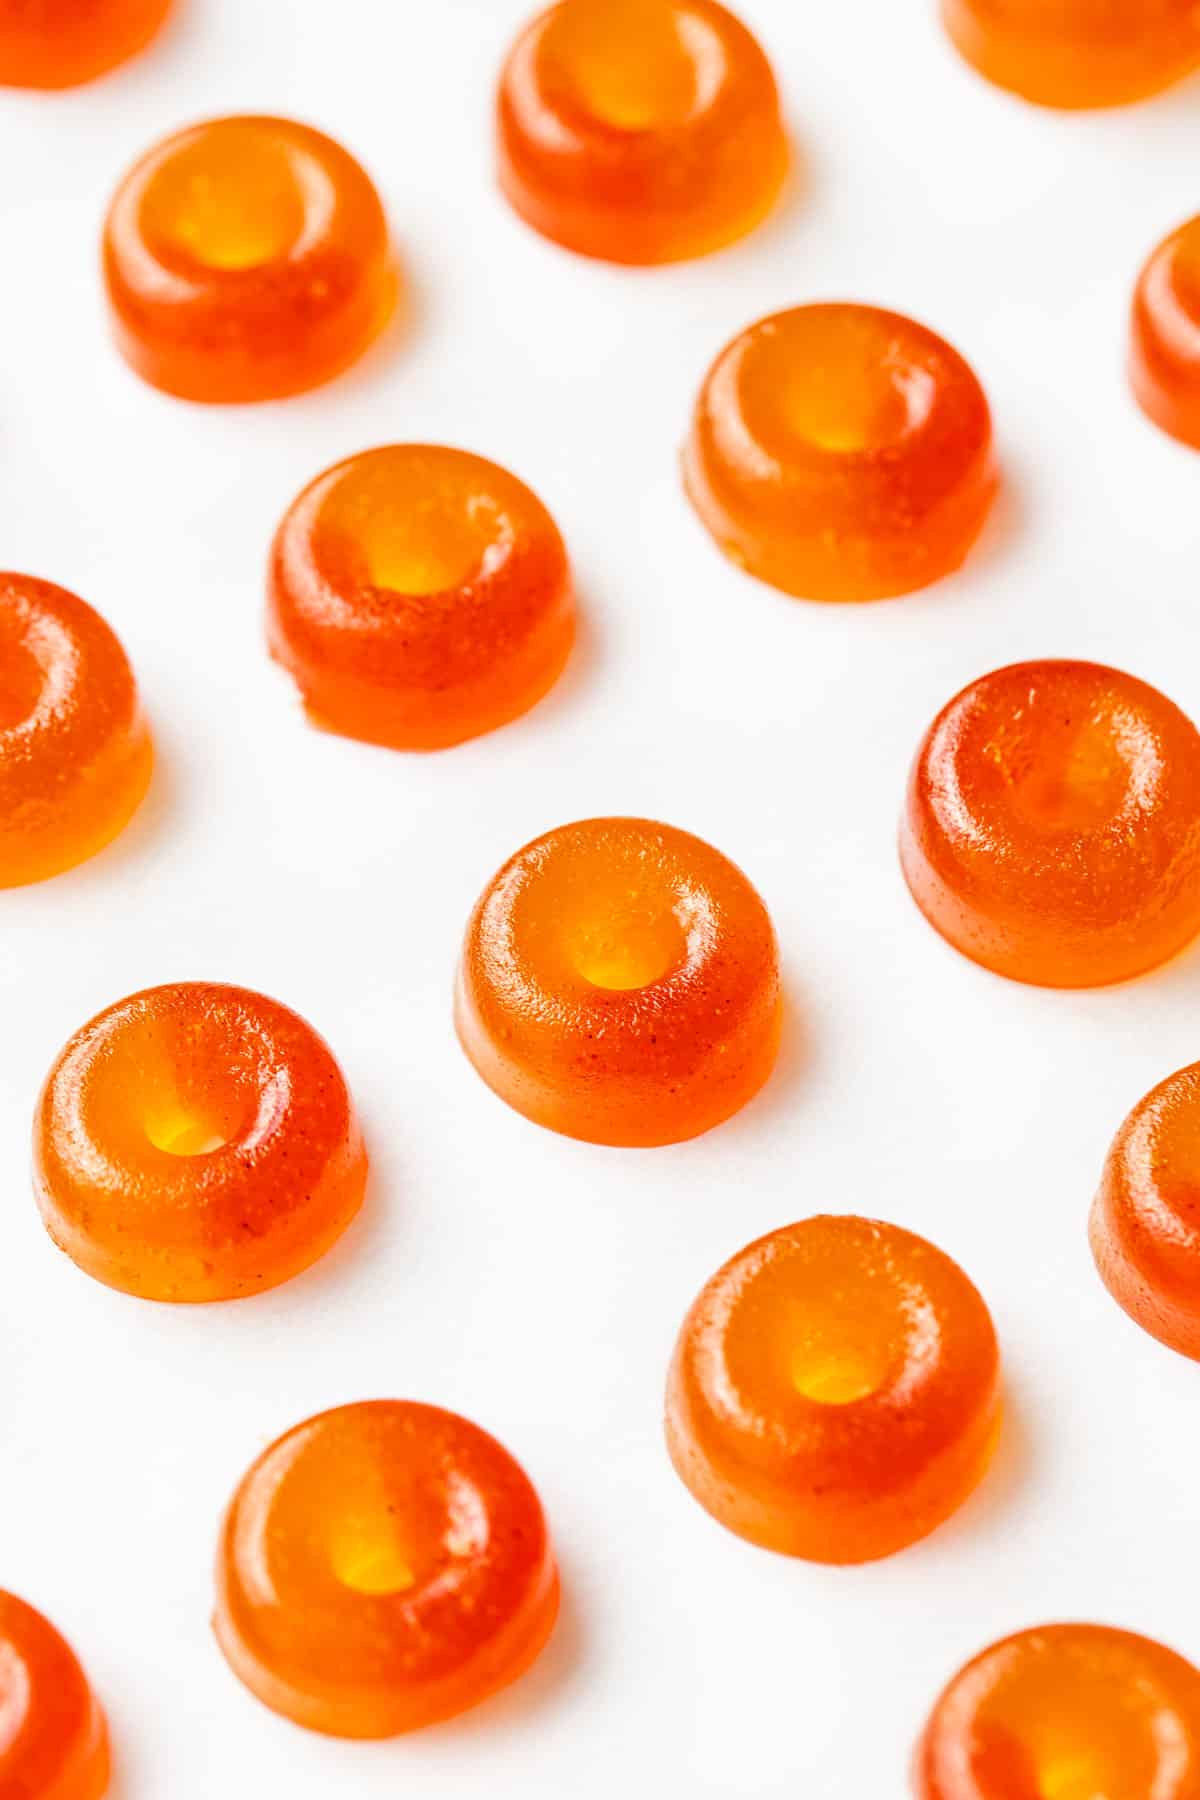
 Arrange gummies on a sheet of parchment and set out to dry for at least 24 hours (or chill uncovered in the refrigerator if you live in a hot/humid climate).
Two-Tone Color
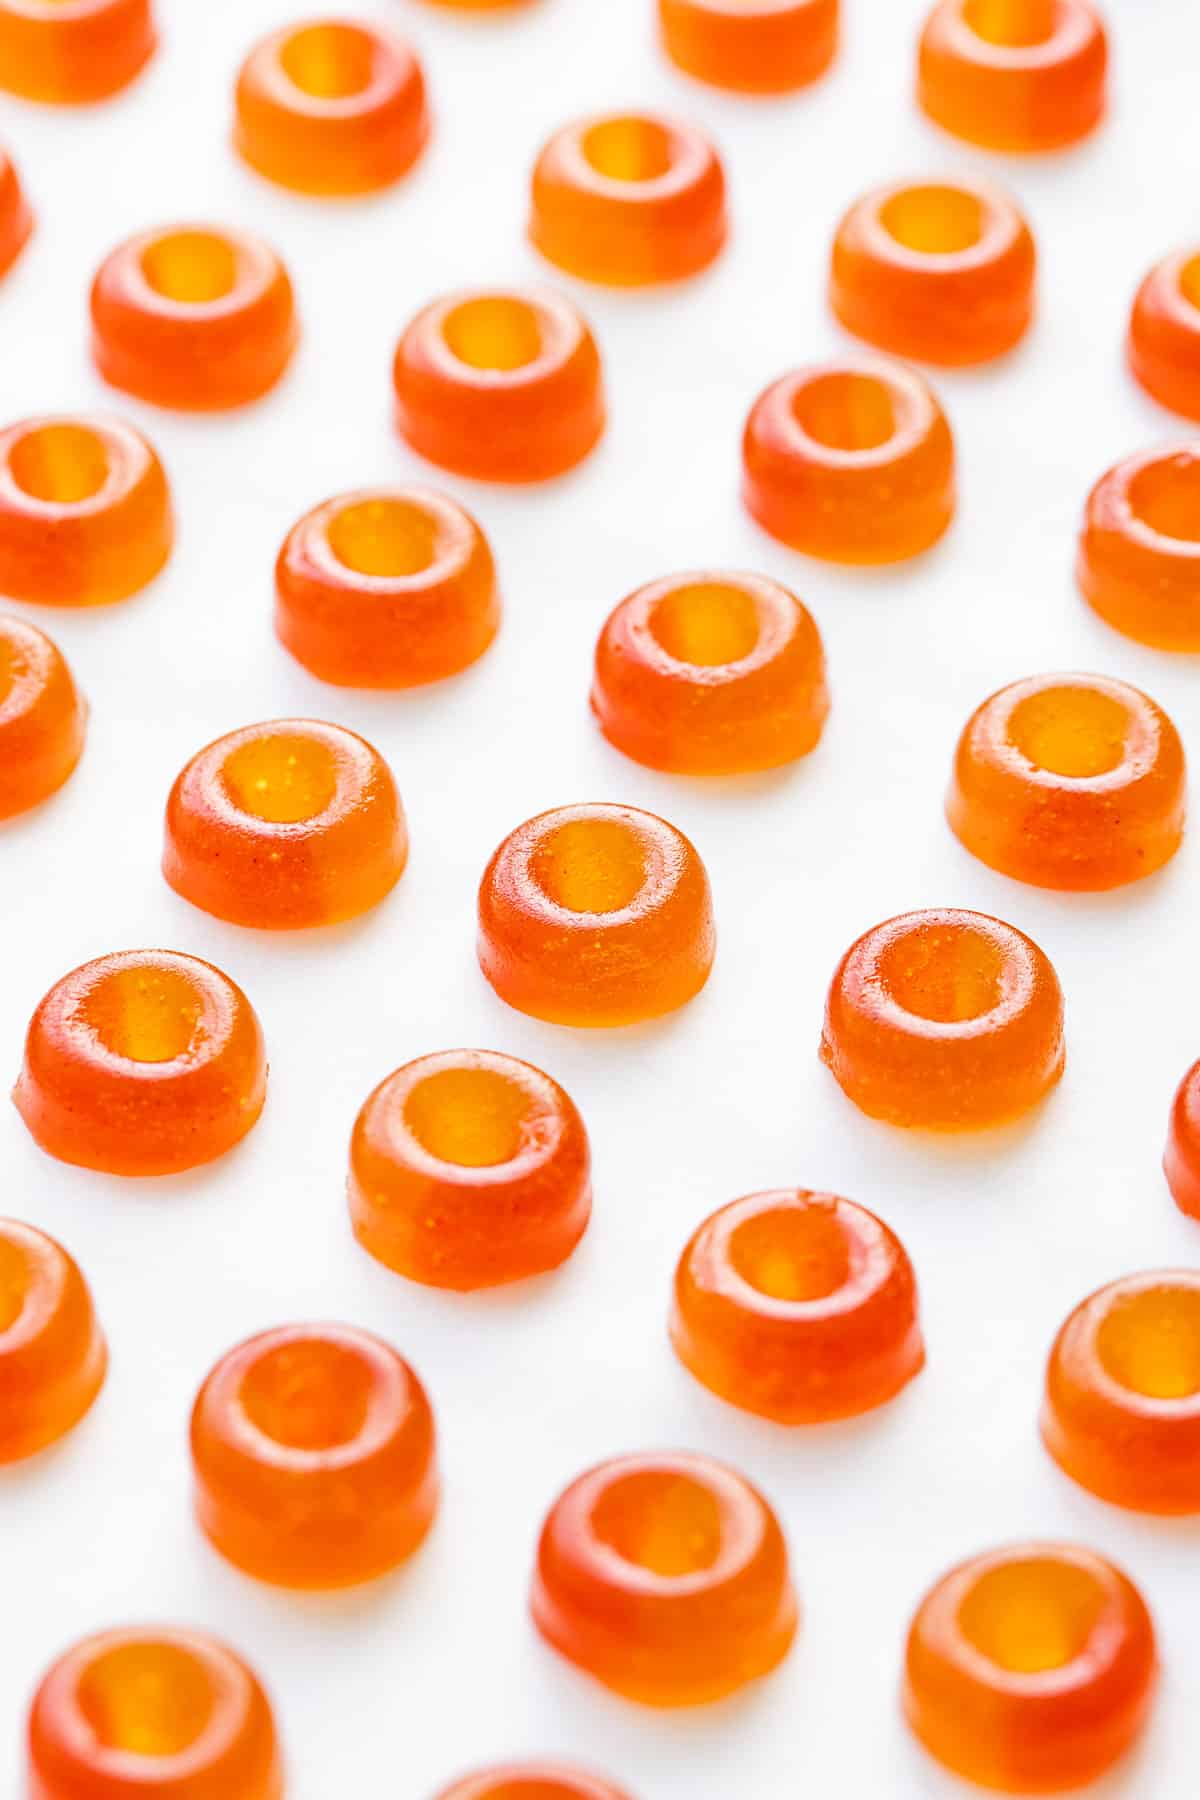
Classic peach rings have a two toned color appearance, with half orange and half red-orange to mimic the natural blush coloring of peaches. (They sometimes also have a white ‘cream’ layer, but that’s another level of complexity I didn’t want to deal with today.)
To achieve the two-toned color, split the liquid gummy mixture between two squeeze bottles, and then add a few drops of red or pink food coloring to half of it. You’re going to squeeze the molten candy into the molds using both bottles at the same time (a real test of dexterity to squeeze both at the same rate… or you can always enlist a helper to squeeze the second bottle).
If you want natural color, you can find natural food colorings (like beet-based color, for example). Or you can also add up to 1 tablespoon of raspberry, strawberry or cherry puree, or some sort of red fruit concentrate like grenadine or tart cherry concentrate or syrup. Adding up to 1 tablespoon of liquid at the end of the process will not affect the final texture of the gummy (though adding fruit will change the flavor—the test batch I made using raspberry puree had a noticeable berry flavor which somewhat overpowered the mild peach, which is why I didn’t write this in to the final recipe).
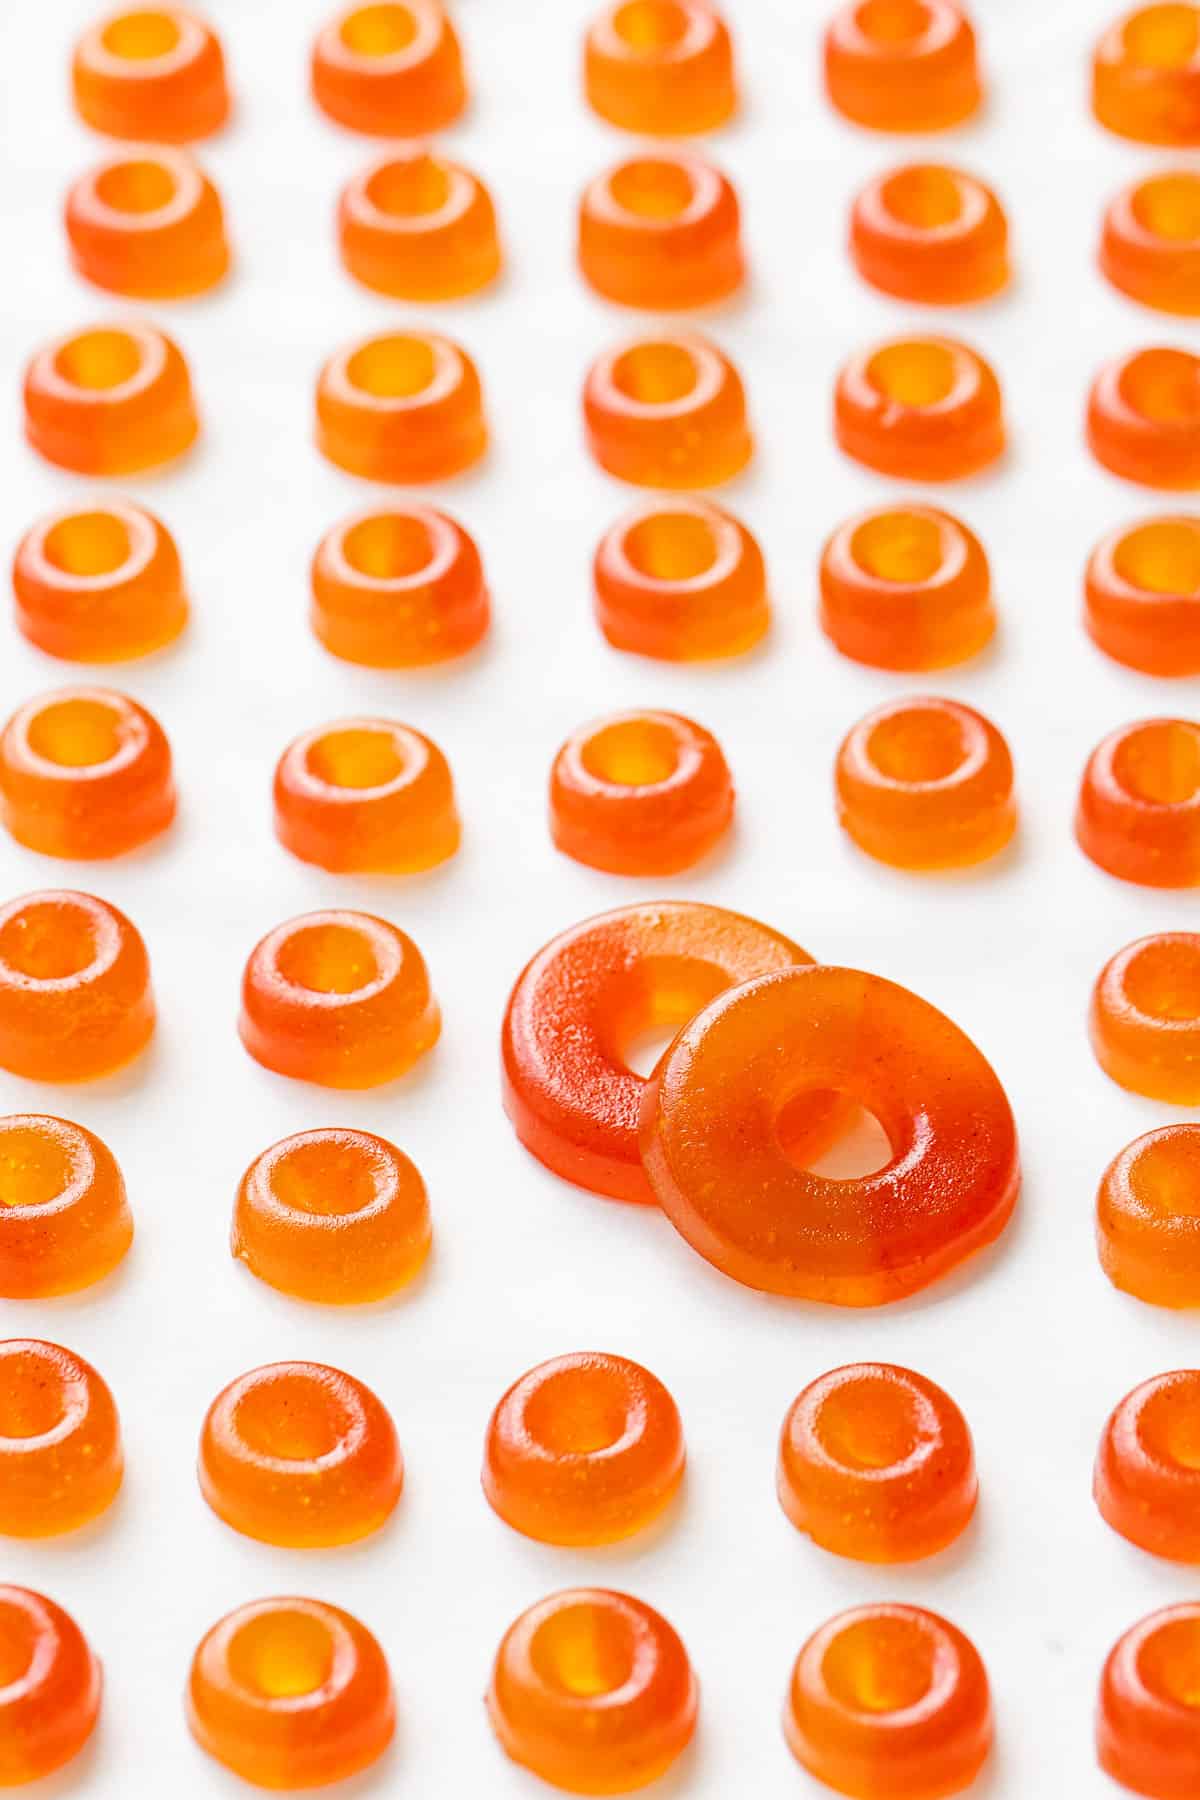
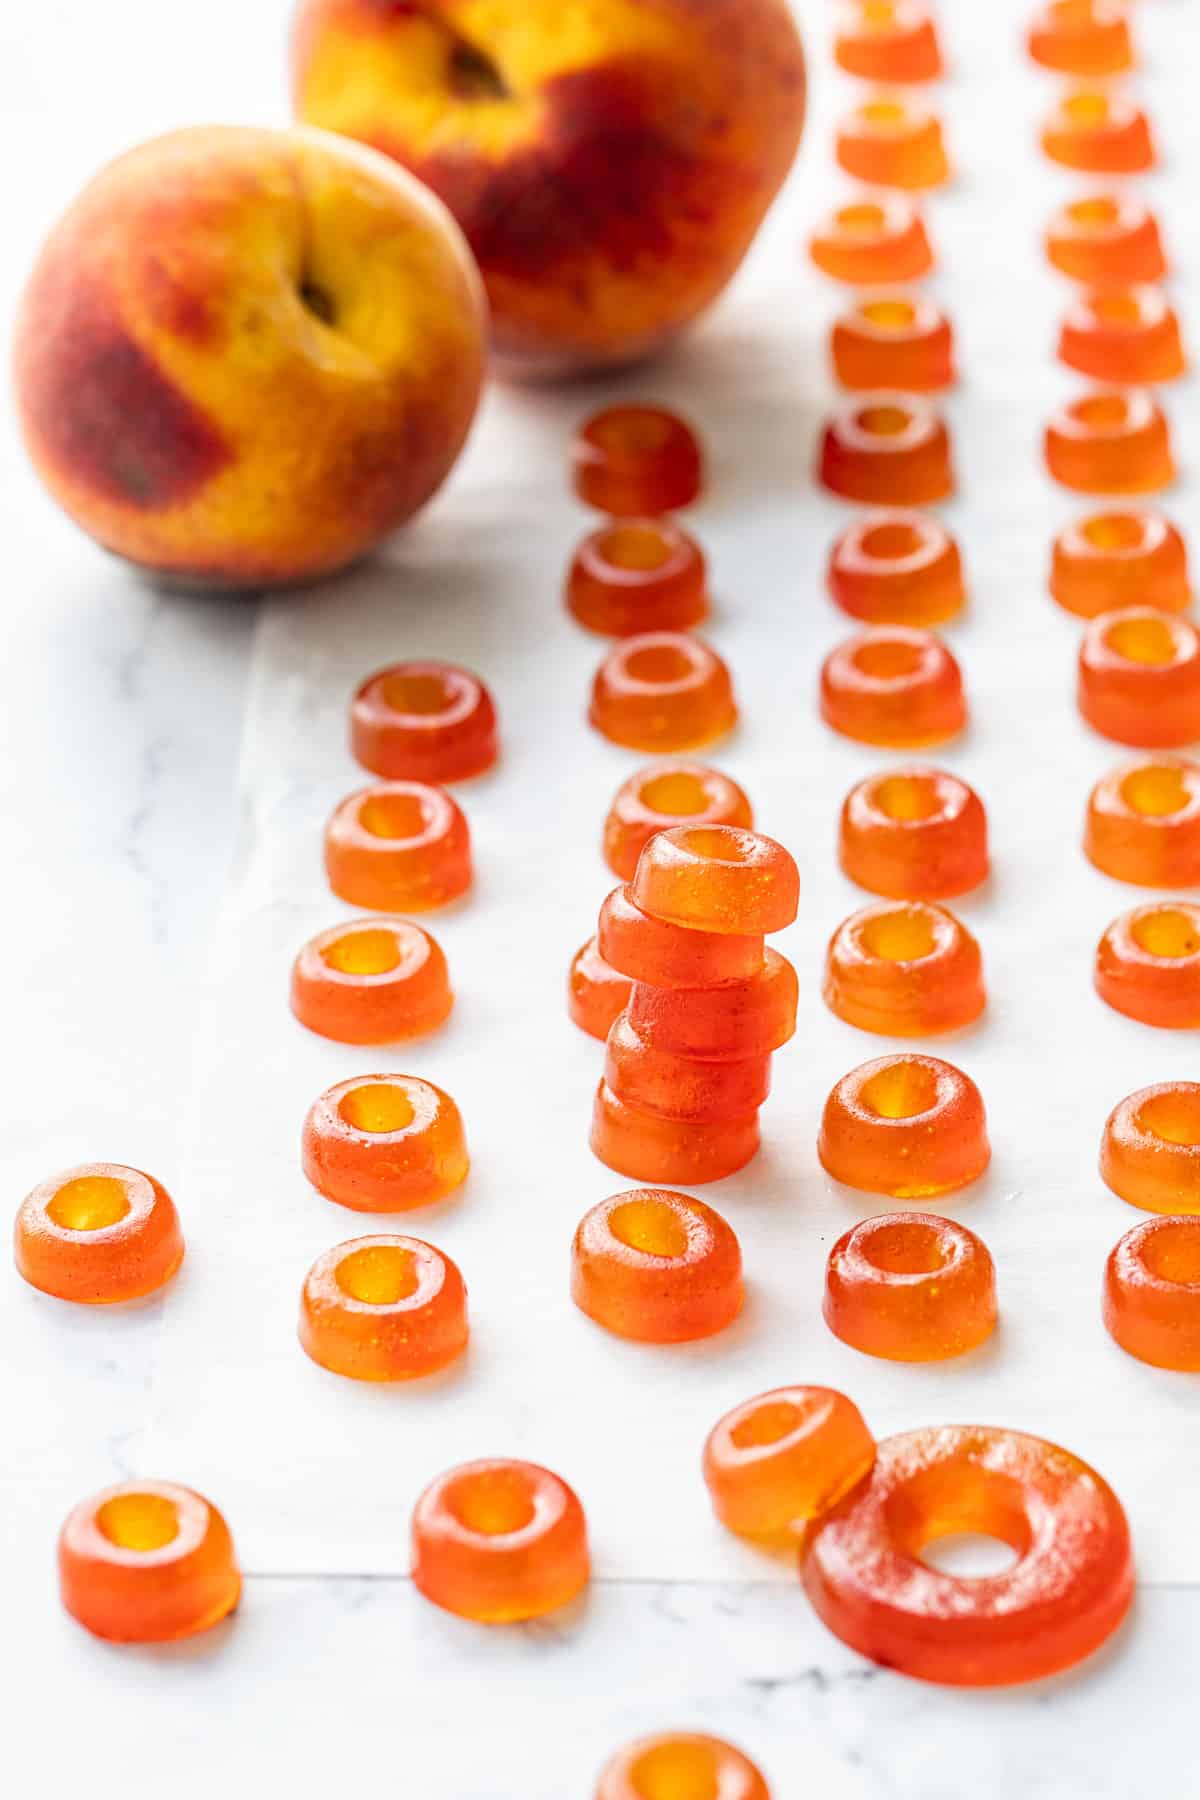
I made a few batches of these gummies with both smaller and larger silicone ring/donut molds (the 3D donut shape is called a torus if you want to get technical about it). I wish I could have found an in-between size, as the small ones were a bit too small and the larger ones slightly too large. You can use either for this recipe, or any other shape really—from bears to squares to gumdrops.
The small silicone donut molds I used had about a 2.5mL capacity, while the larger silicone donut molds held about 7mL each (oddly, the center posts in the large molds were much lower than the outer edges, so I only filled them to the top of the center post to avoid overflow).
Overall this recipe will make about 420-440mL of liquid candy, so calculate as needed to figure out how many molds you need for a single batch.
Many of these silicone mold sets come with droppers, but just go ahead and toss them because they don’t work very well at all. Instead, I recommend using 8oz plastic squeeze bottles, which allow you to precisely squeeze the liquid candy into the molds without making a huge mess (though prepare yourself, making gummies is sticky business and it’s almost impossible to avoid getting it everywhere).
Unlike the pectin-based gummies, the gelatin gummy base stays fluid much longer so it is far easier to work with and get into your molds; if you find the mixture thickening too much, just place the squeeze bottle in warm water to re-heat and make it fluid again.
I’ve had mixed results with silicone molds; I don’t know if it’s just cheap silicone vs high quality stuff, but sometimes the gummies pop right out and other times they are stubborn and some sticks behind. For that reason I recommend lightly brushing your silicone molds with vegetable oil before you begin; I just used a dry pastry brush to swirl a super thin coating of oil inside the molds (there shouldn’t be any visible oil droplets). Even using your fingers to swipe a little oil into the molds would work!
The Sure Cure
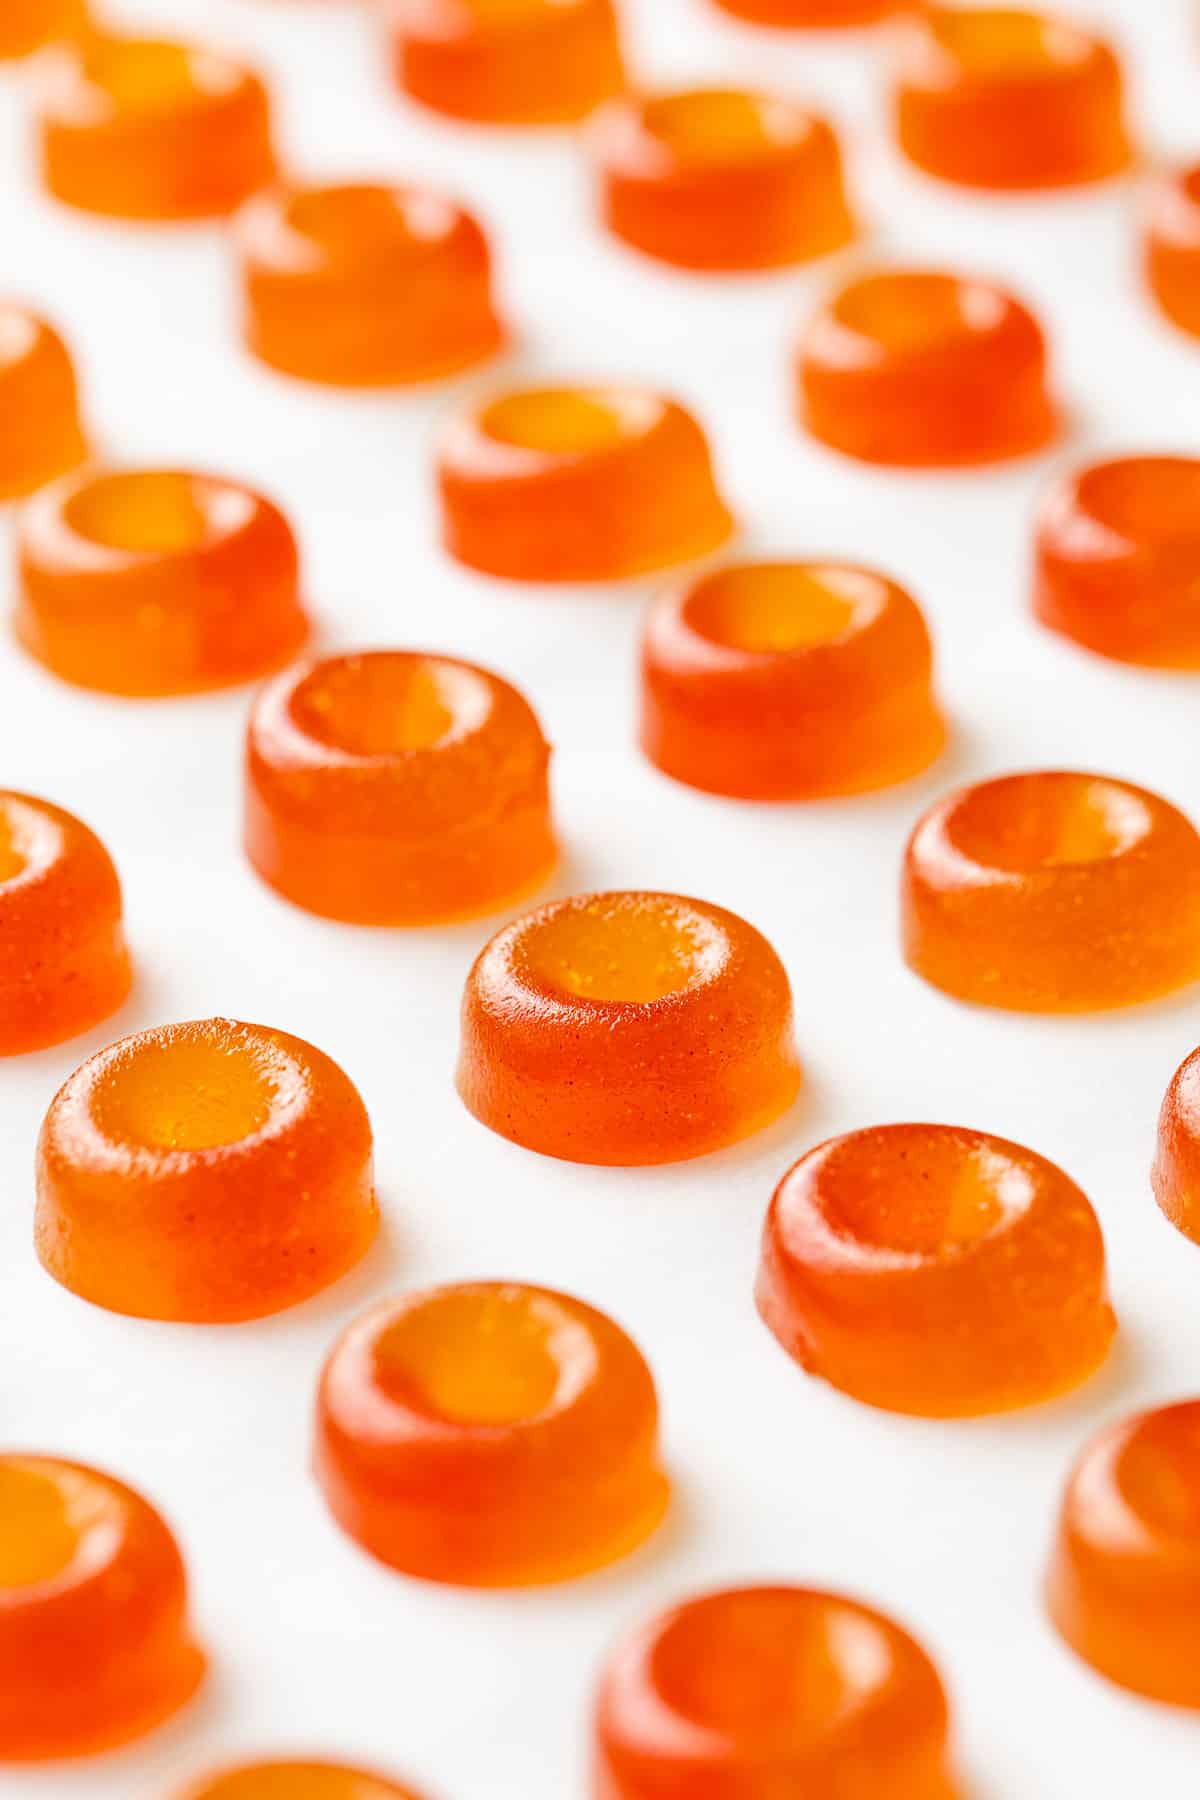
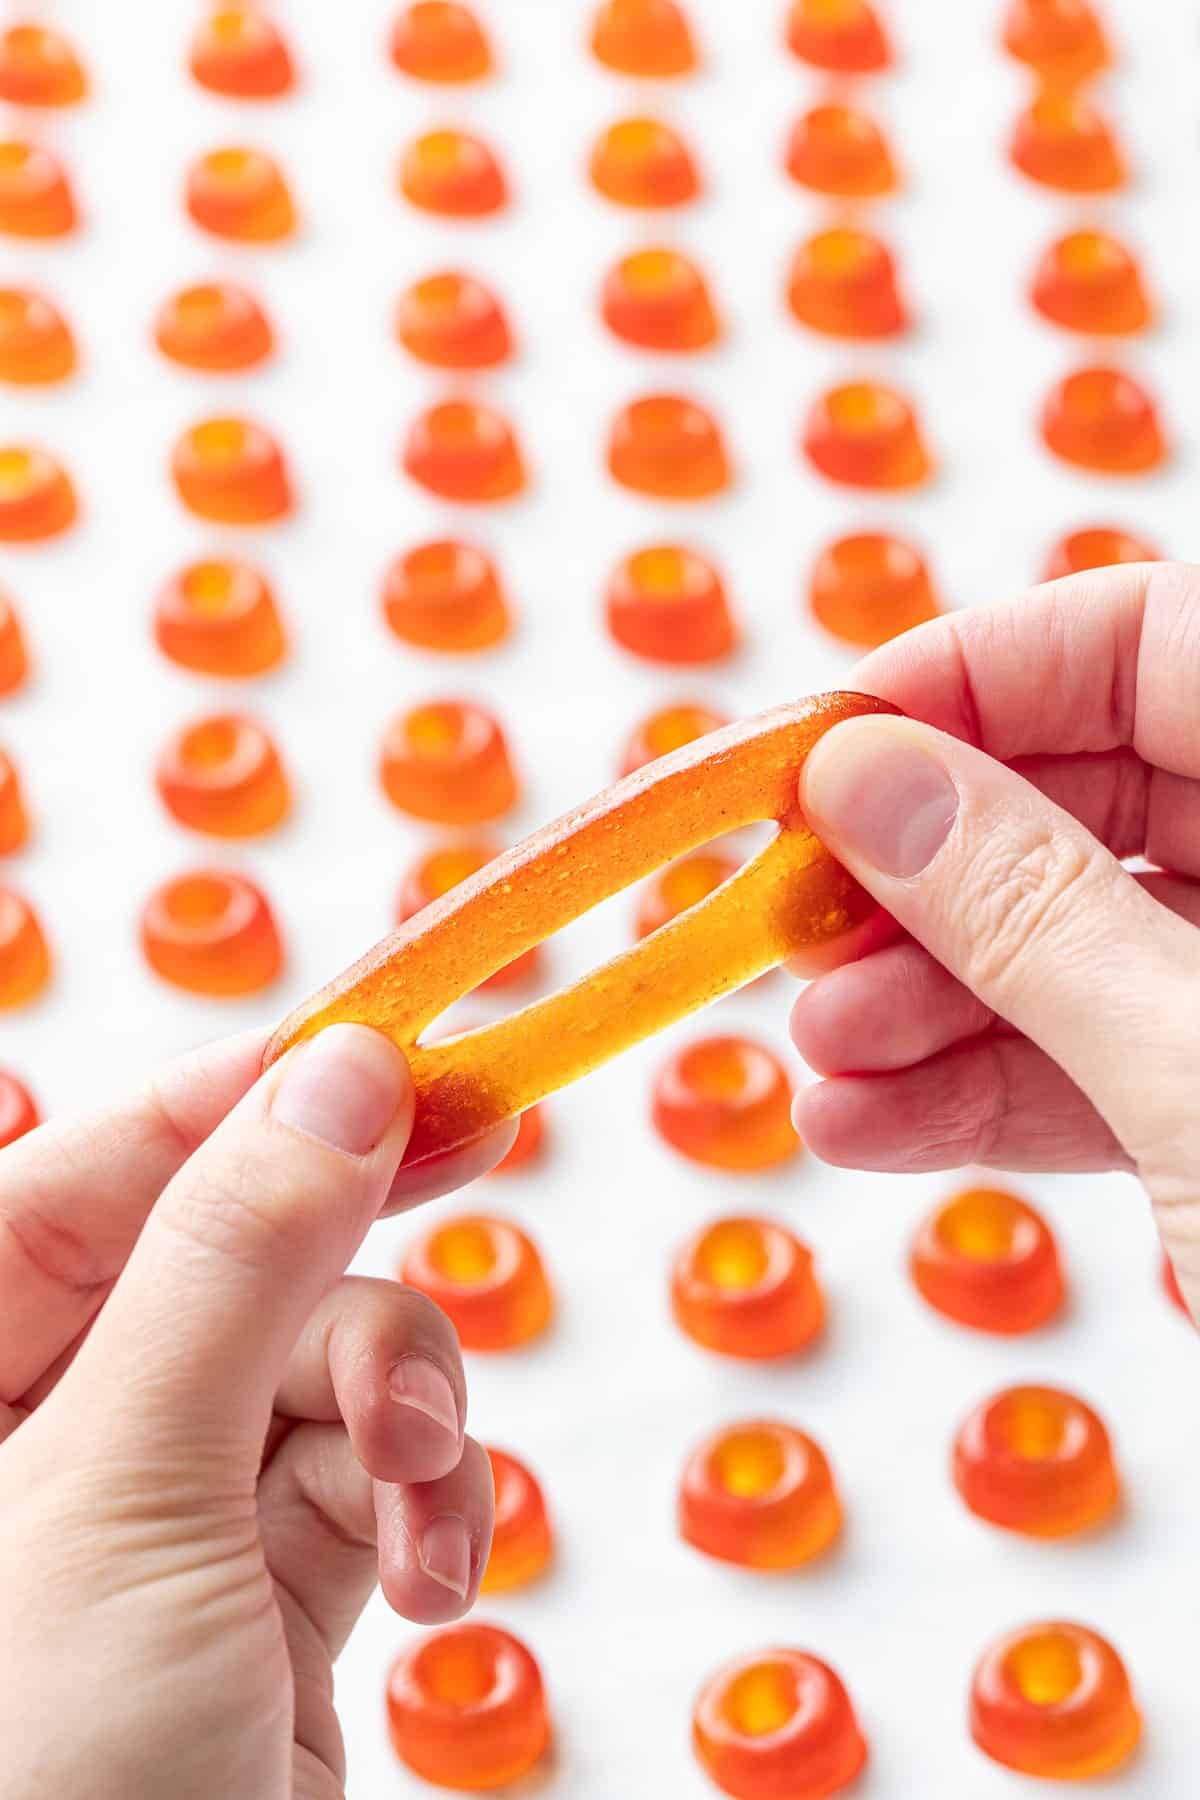
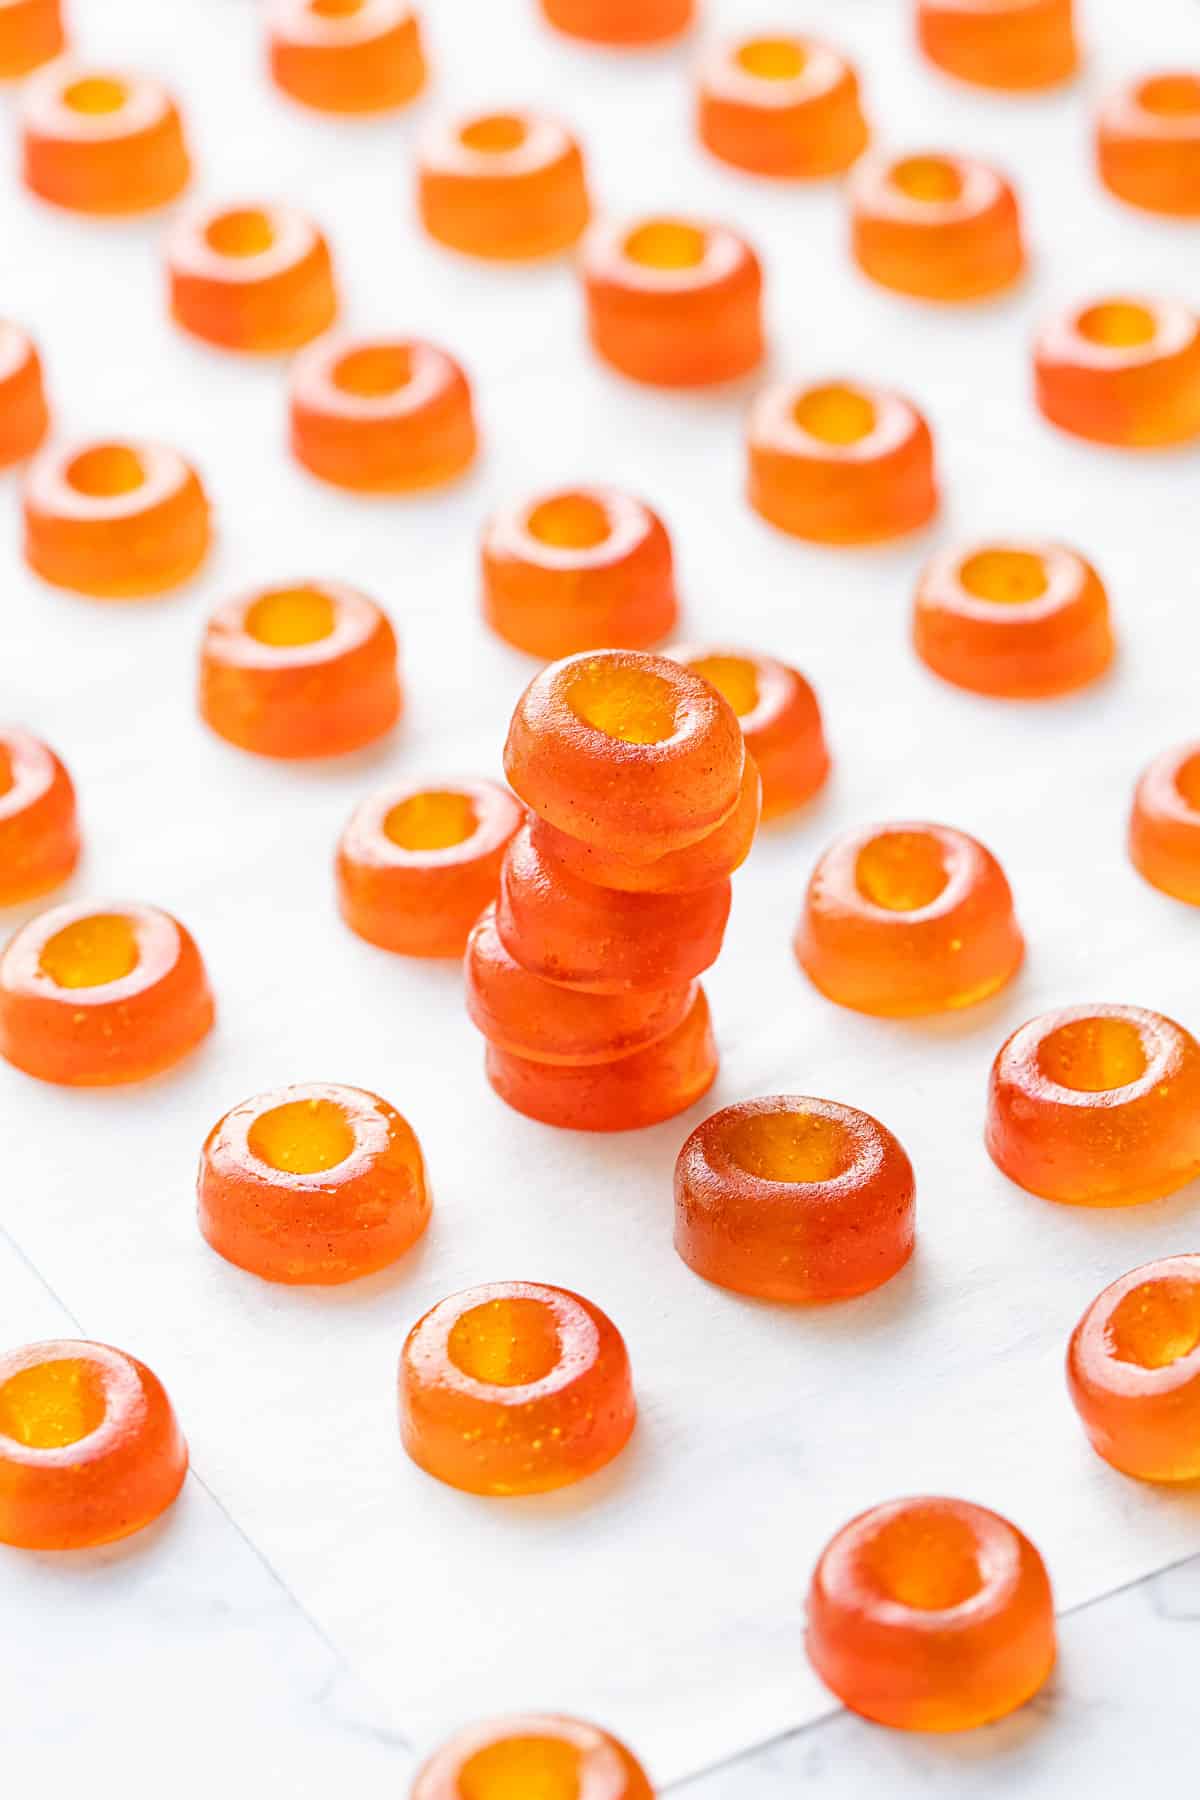
Straight out of the molds, the texture of these candies is more like very firm jello. Curing the gummies matures the gelatin, firms the exterior, and dries out the excess moisture, transforming them into the bouncy, stretchy texture of a classic gummy bear.
Cure gummies by letting them air dry at cool room temperature, ideally in a low-humidity environment with good air circulation, for 1 to 3 days until they are no longer sticky.
For those of you who, like me, live in humid climates, I find that curing the gummies uncovered in the refrigerator (or a wine fridge would be perfect if you have one) will work much better than leaving them out in the humid air. A low-temp dehydrator will work as well, just be sure it doesn’t get over 100 degrees as the gelatin will melt.
Do sugar-coat it.
If, even after 3 days of drying, your gummies are still a little bit sticky, or if you plan to package them in bags or another way where they will be touching, you’ll need to coat the candies in sugar or starch so they don’t stick together.
When it comes to coating sticky gummies, my preferred coatings are tapioca starch and plain granulated sugar.
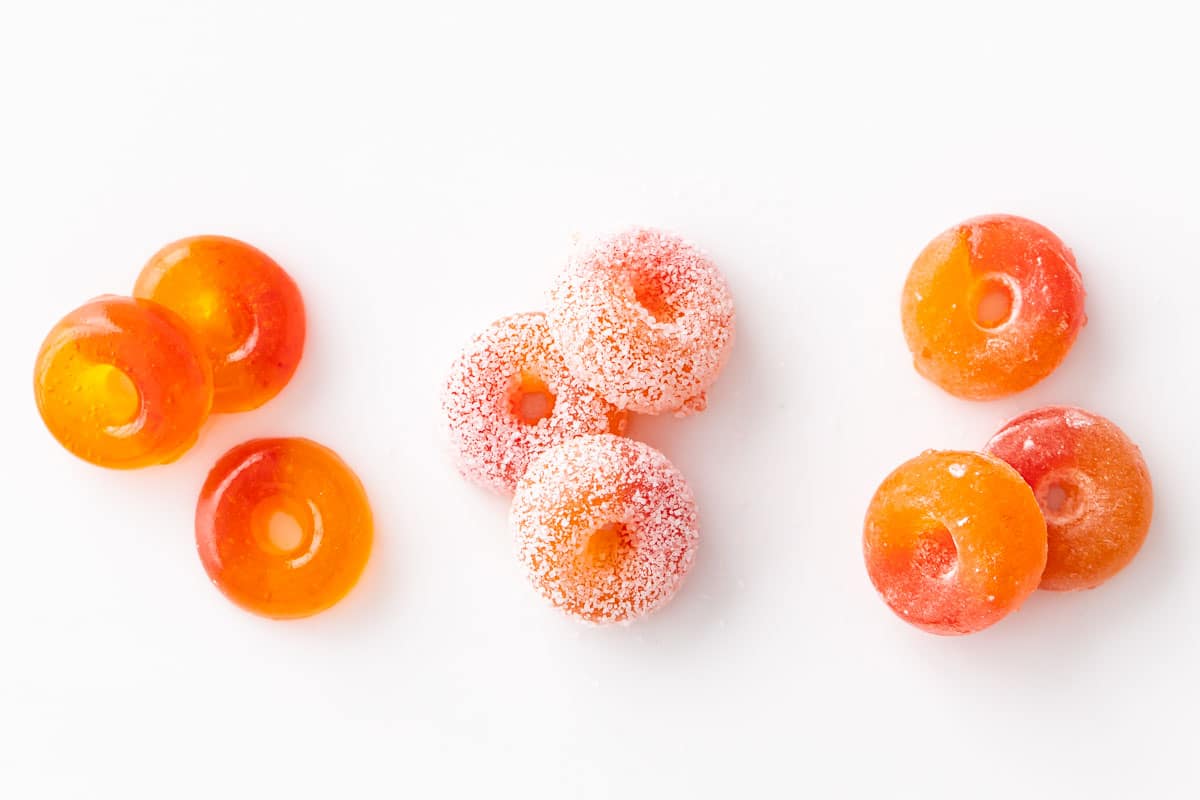 Uncoated, granulated-sugar coated, and starch-coated gummies.
For granulated sugar coating, you can toss the gummies in sugar immediately after removing them from the molds (before curing/drying) while they are at their stickiest. Toss to coat fully in granulated sugar, then arrange in a single layer on a piece of parchment paper and allow air-dry for 1 to 3 days. They’ll have a lovely crystalized coating that gives the gummies a nice crunchy finish.
The starch coating should be added after curing, just toss with tapioca starch until fully coated; shake off the extra starch in a fine mesh sieve, and then use a dry pastry brush to brush off what’s left. Cornstarch will work too, however I didn’t care for the aftertaste (which I don’t notice with tapioca).
I do not recommend coating in plain powdered sugar (mixed 50/50 with corn or tapioca starch it might be ok), nor do I recommend a citric acid-and-sugar combo like I used for my sour strawberry gummies—both of these options resulted in minor ‘weeping’, causing sticky spots to form on the surface.
Coated gummies won’t showcase the two-tone colors or the glass-like appearance quite as well, but in lieu of a dry climate it’s really the only way to keep the gummies from sticking together.
Ingredient Notes & Substitutions
Peaches: You can use fresh or frozen peaches in this recipe, not canned or jarred in syrup. For fresh peaches you’ll need to peel them first, then blend to a smooth puree; strain if desired. You can also use any other fruit puree in this recipe!
To peel peaches: cut a shallow X through the skin on the bottom of each peach. Submerge in boiling water for 30 to 40 seconds, then use a slotted spoon to transfer to an ice bath. Once cool enough to handle, the skin should peel off easily.
Sugar: Granulated sugar, cooked to a specific temperature, is what helps give this candy it’s stretchy texture. Do not reduce the sugar in this recipe! Doing so will NOT actually result in a less-sweet final product, rather you’ll just have to cook the mixture longer to reach the desired temperature/sugar concentration (resulting in overcooked fruit and a lower yield).
While I have seen gelatin gummy recipes that call for sorbitol in place of sugar, I have not tested this substitution myself and cannot say how it will behave in this recipe (most of the sorbitol recipes I saw did not use fresh fruit and were not cooked to a specific temperature/sugar stage—I don’t even know if that’s possible with sorbitol). Attempt at your own risk.
Liquid Glucose: glucose syrup is an invert sugar sugar syrup that contributes to the chewy gummy texture and helps keep the candies from crystalizing. You can use another invert sugar like corn syrup or golden syrup if you prefer; I don’t recommend honey as it’ll impart too strong a flavor on the final product.
Note that glucose syrup is considered gluten-free, even if it is derived from wheat (it’s essentially just the sugars extracted from the grain). However, if you’re particularly concerned, you can use corn or golden syrup or seek out a glucose syrup made from potatoes or corn instead (check the labels).
Gelatin: I used Platinum (230 bloom) sheet gelatin; you will need 12 full sheets for this recipe. I’ve also used Gold (200 bloom) sheet gelatin which works too, the final candies are just a little softer.
To use powdered gelatin, just use an equal amount by weight (so 24g, or about 3 ½ packets). Powdered gelatin needs to bloom in liquid first, and that liquid will get added to the final gummy mixture (compared to sheet gelatin which is squeezed/drained). So gummies made with powdered gelatin won’t be as chewy due to the added hydration; they’ll also have more of a solid/opaque appearance instead of a transparent/glass-like one.
If you’re looking for a vegetarian/vegan gummy, I recommend a pectin-based gummy recipe instead of gelatin. Unfortunately vegetarian gelatin substitutes will NOT work well in this recipe; you really need real, actual gelatin to get that classic gummy texture.
Citric Acid: made from citrus fruit, citric acid powder adds acidity which amplifies and brightens the natural flavor of the peach. You can substitute with additional lemon juice, 1 tablespoon per 1/4 teaspoon of citric acid as called for, added at the very end with the gelatin. Note you will have a noticeable lemon flavor in the final product (one reason I prefer citric acid as it has a neutral flavor profile).
Homemade Peach Rings Gummies
Prep Time: 30 minutes
Cook Time: 30 minutes
Total Time: 2 days
These homemade peach rings are bursting with peach flavor made with real fruit and set with gelatin for a true bouncy, stretchy gummy texture.
Set silicone molds on a cookie sheet on a heat-proof surface (the candy will be very hot when it goes into the molds, you don't want to melt your countertops). Optionally, brush insides of molds with a very thin coating of vegetable oil (there should be no visible droplets, just a very thin film). I find a very light coating of oil helps the candies come out of the molds more cleanly, though this step is optional.
In a medium, heavy-bottomed saucepan, combine 1 cup of peach puree, sugar, glucose syrup, and lemon juice (if using powdered gelatin, the lemon juice goes in a separate bowl, see notes*). Stir to combine and set over medium heat.
While the peach mixture is heating up, cut the gelatin sheets into 1-2" strips, then submerge in a bowl of cold water, separating the layers so they don't stick together. Allow to soften for at least 5 minutes. (If using powdered gelatin, sprinkle evenly over 1/4 cup of lemon juice in a wide, shallow bowl to bloom; there should be enough liquid to saturate all the gelatin, but if you see bits of dry powder still, you may need to stir it or add a little more water or lemon juice).
Once the peach mixture starts to boil, attach a candy thermometer to the side of the saucepan. Reduce heat to medium and continue to cook, stirring frequently to avoid burning, until the temperature reaches 230°F – 235ºF (**see notes for altitude adjustments); this will take about 10-20 minutes depending on the thickness of your pan and the intensity of your stove. The liquid candy will be noticeably thickened, falling off the edge of the spatula in thick sheets, but you really need to measure the temperature to know when it's done.
Once the mixture hits the desired temperature, remove from heat and stir in citric acid. Wring out softened gelatin sheets, squeezing out as much water as possible, then add to the saucepan with the hot peach mixture and stir until completely melted. For powdered gelatin, you can melt it briefly in the microwave (4-5 seconds max), and then stir into the hot peach mixture.
Let hot liquid candy cool for 5 minutes or so, until it comes down to about 150 degrees F (any hotter and it'll melt your plastic squeeze bottle). Transfer half of the mixture to one squeeze bottle and set aside. Add a few drops of red or pink food coloring to the remaining candy, stirring until evenly incorporated (see notes in post about using fruit puree or other methods for coloring), then transfer to a second squeeze bottle. Wrap the bottles with a paper towel or cloth or use potholders to handle them as the liquid candy is still very hot.
Carefully squeeze liquid candy into prepared molds, squeezing both bottles into opposite sides of the molds at the same time to achieve the dual-color effect. (For reference, this recipe will make about 420 mL/14 fl.oz of liquid candy, if you need to calculate how many molds you'll need to fill.)
Refrigerate until fully set, at least 4 hours or ideally overnight. Once set, you should be able to pop the candies cleanly out of the molds.
Arrange demolded candies on parchment paper, then leave out to dry in a cool, dry place for 1 to 3 days until no longer sticky, flipping them once or twice to ensure even drying. If you live in a hot and humid climate, I'd recommend drying the candies overnight (uncovered) in the refrigerator or, even better, a wine fridge (50-60 degrees being the ideal temperature for curing the gummies).
If you find that your candies are still sticky, you can opt to coat them in sugar or starch. Simply toss in your desired coating, shaking them in a large mesh sieve and then brushing off any excess start with a pastry brush. This will prevent the candies from sticking together, though it will give them a more opaque, powdery appearance.
Store candies uncovered or lightly covered at cool room temperature for up to 1 week, or lightly covered in the refrigerator (separate with layers of parchment) for up to 2 weeks.
All images and text ©
for Love & Olive Oil.
Let us know what you think! Leave a Review below or share a photo and tag me on Instagram with the hashtag #loveandoliveoil.
There may be affiliate links in this post. We are a participant in the Amazon Services LLC Associates Program, an affiliate advertising program designed to provide a means for us to earn fees by linking to Amazon.com and affiliated sites.


-1.png)