Advanced Yoga Poses: 15 Challenging Poses, Step-by-Step Instructions, and Safe Progressions
⚡ Quick Answer BoxAdvanced yoga poses are asanas that require significant combinations of strength, flexibility, balance, body awareness, and breath […]
 KickT
KickT
⚡ Quick Answer Box
Advanced yoga poses are asanas that require significant combinations of strength, flexibility, balance, body awareness, and breath control developed through years of consistent practice. They include arm balances (Crow Pose, Handstand), deep backbends (Wheel Pose, King Pigeon), advanced inversions (Headstand, Forearm Balance), and deep hip openers (Full Splits, Lotus Pose). Most advanced poses require 1–3 years of foundational practice before they become safely accessible. The key to mastering advanced yoga poses is progressive preparation — building the specific strength, flexibility, and proprioception each pose demands before attempting it.
You have been practicing yoga for a year or two. Mountain Pose feels like home. Your Warrior sequence flows. Downward Dog is a resting pose now — genuinely restful.
And you find yourself looking at Handstand. At King Pigeon. At the yogi in the front row whose body seems to defy what you thought bodies could do. And you wonder: could that be me?
The answer, for most dedicated practitioners, is yes — with the right preparation, the right progressions, and the right understanding of what advanced yoga poses actually require from the body.
This guide covers 15 of the most important advanced yoga poses — what they require, how to build toward them safely, step-by-step instructions for each, and the specific preparatory poses that make the difference between injury and breakthrough.
Advanced yoga is not about ego or performance. It is about the depth of practice — the moment when years of patient work suddenly becomes a pose that seemed impossible, held with breath and steadiness and genuine ease.
That moment is available to you. This guide shows you how to build toward it.
What Makes a Yoga Pose “Advanced”?
Advanced yoga poses are not simply “harder” versions of basic poses. They represent qualitatively different demands on the body — requiring specific combinations of physical capacities that take years to develop simultaneously.
A pose is genuinely advanced when it requires three or more of the following capacities at once:
| Extreme flexibility | Range of motion beyond everyday movement | Full Splits, King Pigeon |
| Full body strength | Muscular power to support and control the body | Handstand, Crow Pose |
| Balance and proprioception | Precise body awareness in unstable positions | One-Arm Balance, Warrior 3 |
| Breath control | Maintaining calm, regulated breath under physical demand | All inversions, deep backbends |
| Body alignment awareness | Sensing and correcting alignment without a mirror | Forearm Balance, Headstand |
| Core integration | Deep core engagement as structural foundation | All arm balances |
| Mental focus | Sustained concentration overriding fear and discomfort | Handstand, advanced backbends |
When a pose demands most or all of these simultaneously — that is what separates an advanced pose from a challenging intermediate one.(1)
How Long Does It Take to Achieve Advanced Yoga Poses?
This is the most commonly asked question — and the most honestly answered one:
Most advanced poses require 1–5 years of consistent practice to achieve safely. Some — like full Handstand or King Pigeon — may take longer depending on individual anatomy, baseline flexibility, and training frequency.
Here is a realistic timeline:
| Beginner | 0–6 months | Basic standing poses, forward folds, gentle backbends |
| Intermediate | 6 months–2 years | Warrior sequence, Crow Pose, basic inversions (Headstand prep) |
| Advanced Beginner | 2–3 years | Crow Pose, Headstand, Wheel Pose, basic arm balances |
| Advanced | 3–5 years | Handstand, Forearm Balance, King Pigeon, advanced backbends |
| Expert | 5+ years | One-arm balances, extreme backbends, advanced binds |
The single most important truth about advanced yoga poses: The journey toward them — the preparatory work, the incremental strength building, the developing body awareness — is where most of the physical and mental benefit of yoga lives. The pose itself is the destination. The preparation is the practice.
The 5 Prerequisites for Advanced Yoga Poses
Before attempting any advanced pose in this guide, confirm that you have genuinely developed these five foundations. Skipping them is the primary cause of yoga-related injury.
Prerequisite 1: A Strong, Stable Core
Every advanced yoga pose — arm balances, inversions, deep backbends, advanced hip openers — requires a deeply engaged, functional core. Not six-pack aesthetics — functional stability from the transverse abdominis, multifidus, and pelvic floor working together.
Test: Can you hold Plank Pose with perfect alignment (no hip sag, no shoulder shrug) for 90 seconds while breathing normally? If not, build this first.
Prerequisite 2: Shoulder Girdle Strength and Stability
Arm balances and inversions place the full weight of the body on the shoulder girdle — a joint designed for mobility, not load-bearing. Developing the rotator cuff, serratus anterior, and shoulder blade stabilizers before loading them in inversions prevents the most common advanced yoga injury.
Test: Can you hold Downward Dog for 2 full minutes with perfectly stable, non-shrugging shoulders? Can you lower through Chaturanga with full control — elbows tracking back, body in one line?
Prerequisite 3: Spinal Flexibility and Strength
Advanced backbends require the spine to move through its full range of extension — and crucially, to do so with the surrounding musculature both flexible enough to allow the movement and strong enough to control it.
Test: Can you hold Wheel Pose (Urdhva Dhanurasana) with straight arms, open chest, and normal breathing for 5 breaths?
Prerequisite 4: Hip Flexibility
Deep hip openers, splits, and many binding poses require hip flexor, hip rotator, and inner thigh flexibility that typically takes 2–3 years of consistent work to develop safely.
Test: Can you hold Pigeon Pose with your front shin parallel to the top of the mat and your hips level — without props — for 10 breaths?
Prerequisite 5: Inversions Comfort
Many advanced poses require comfort with being upside down — managing blood flow changes, proprioceptive disorientation, and the psychological challenge of inverted positions.
Test: Are you comfortable in Headstand (Sirsasana) for 20+ breaths without wall support?
15 Advanced Yoga Poses: Step-by-Step Instructions
These 15 poses are organized by category. Each includes the specific physical requirements, preparatory poses, complete step-by-step instructions, key alignment cues, and modifications.
CATEGORY 1: ARM BALANCES
Arm balances develop extraordinary upper body strength, core integration, and mental focus. They are among the most rewarding advanced yoga poses because the progression from first attempt to first hold is clearly felt and measured.
1. Crow Pose (Bakasana)
Crow Pose is the gateway arm balance — the first advanced pose most practitioners achieve, and the foundation for every other arm balance in yoga.
What it requires: Core strength, hip flexor activation, shoulder stability, wrist strength, and the mental courage to shift weight forward past the tipping point.
Preparatory poses: Plank Pose, Chaturanga Dandasana, Boat Pose (Navasana), Malasana (Garland Pose)
Step-by-step:
Begin in Malasana (deep squat) — feet hip-width apart, heels on the floor or on a folded blanket Place your hands flat on the mat shoulder-width apart — fingers spread wide, index fingers parallel Bend your elbows slightly — creating a “shelf” with your upper arms Place your knees on the backs of your upper arms — as high toward the armpits as possible Come onto your tiptoes and begin shifting your weight forward into your hands Engage your core strongly — draw your navel toward your spine Look forward (not down) — your gaze point prevents nose-diving Lift one foot, then the other — squeezing your knees against your arms Draw your heels toward your buttocks — the tighter the tuck, the more stable the balance Hold for 5–10 breaths, breathing steadily throughoutKey alignment cue: The arms are not just resting places for the knees — they are actively pressing into the knees while the knees press back. This mutual engagement creates the stability of the pose.
Common mistake: Looking down at the mat. This shifts weight backward and causes you to fall back to your feet. Always look 6–12 inches forward of your fingertips.
Progression from Crow: Once Crow is stable for 10+ breaths, explore: straightening the arms (Crane Pose / Kakasana), transitioning from Crow to Chaturanga, or lifting into Crow from a headstand.
2. Side Crow (Parsva Bakasana)
Side Crow adds a spinal twist to the arm balance — demanding greater rotational core strength and a more precise weight distribution than standard Crow.
What it requires: Established Crow Pose, rotational core strength, deeper wrist strength, and refined proprioception of the center of gravity.
Preparatory poses: Crow Pose, Seated Twist (Ardha Matsyendrasana), Plank with rotation
Step-by-step:
Begin in a low squat with feet together Twist your torso strongly to the RIGHT — bringing both knees toward the right side of your body Place both hands on the mat to the RIGHT of your body — shoulder-width apart Bend your elbows — creating the same “shelf” as Crow Pose Stack BOTH knees onto the back of your RIGHT upper arm Shift your weight forward into your hands — more than in standard Crow Lift both feet — keeping legs tightly together and knees stacked on one arm Your body will be at a diagonal — this is correct Hold 3–5 breaths, then switch sidesKey alignment cue: Both knees stack on ONE arm (not spread across both). The outside hip lifts and the body creates a diagonal line — not a straight line as in standard Crow.
3. Eight-Angle Pose (Astavakrasana)
Eight-Angle Pose is one of yoga’s most visually striking arm balances — combining a lateral leg extension with arm balance in a pose named after the sage Astavakra, who was born with eight bends in his body.
What it requires: Strong Crow Pose, hip flexibility, hamstring length, shoulder strength, and the ability to hook one leg behind the opposite arm.
Preparatory poses: Crow Pose, Fire Log Pose (Agnistambhasana), Thread the Needle stretch, Pendant Pose (Lolasana)
Step-by-step:
Sit on your mat with legs extended Draw your right knee to your chest and hook your right arm under your right knee — so the knee rests on the back of the upper arm Place both hands on the mat — right hand beside your right hip, left hand further left Cross your left ankle over your right ankle — squeezing the feet together Lean forward, shifting weight into your hands Extend both legs to the RIGHT — parallel to the floor Straighten your arms as much as possible — extending the legs is the final stage Hold 3–5 breaths, then lower slowlyKey alignment cue: The extension of the legs comes AFTER the arm balance is established — not simultaneously. Establish the balance first, then extend.
4. Firefly Pose (Tittibhasana)
Firefly is the arm balance that most directly demands hamstring flexibility alongside upper body strength — making it one of the most challenging combinations in the arm balance family.
What it requires: Full hamstring flexibility (forward fold with straight legs), shoulder strength, core strength, and wrist stability under load.
Preparatory poses: Wide-Legged Forward Fold, Crow Pose, Pendant Pose, seated hamstring stretches
Step-by-step:
Stand with feet wider than hip-width apart Forward fold deeply — bringing your torso through your legs Place your hands flat on the floor behind your heels — fingers pointing forward Bend your knees and lower your hips — hooking your shoulders behind your knees Press your thighs onto the backs of your upper arms (as high as possible) Lean forward into your hands — shifting your full weight Straighten your legs — extending them to the sides Lift your feet off the floor and extend the legs fully Hold 3–5 breathsKey alignment cue: The arms must be completely straight before attempting to extend the legs. Bent arms collapse under the leg load.
CATEGORY 2: ADVANCED INVERSIONS
Inversions build confidence, develop full-body strength, and shift perspective — literally and metaphorically. Advanced inversions go beyond Headstand to challenge balance, strength, and spatial awareness.
5. Headstand (Sirsasana) — King of Asanas
Headstand is called the “king of all asanas” in traditional yoga. It is the foundational advanced inversion from which all other inverted arm balances develop.
What it requires: Strong shoulder girdle, core strength, cervical spine awareness, comfort with inversion, and the ability to find balance in an unfamiliar spatial orientation.
Preparatory poses: Dolphin Pose, Forearm Plank, Downward Dog (held 2+ minutes), Child’s Pose
Step-by-step:
Kneel and interlace your fingers — place your forearms on the mat shoulder-width apart Place the crown (top) of your head on the mat — the back of your head rests in your interlaced hands Tuck your toes and lift your hips — walking your feet toward your face (Dolphin-like position) Draw one knee toward your chest, then the other — finding balance before lifting Slowly extend both legs toward the ceiling — stacking hips over shoulders over elbows Engage your core and press your forearms firmly into the mat (70% of the weight should be in your forearms — not your head) Point your toes toward the ceiling — creating one long vertical line Hold for 20–30 breaths, then lower with control — never crashing downCritical safety note: The majority of your weight must be in your forearms. If you feel significant pressure on your head or neck — come down immediately. Build forearm strength with Dolphin Pose before attempting full Headstand.
Wall support: Practice with your back 6 inches from a wall for your first 3–6 months. The wall should be a safety net — not a support you lean on continuously.
6. Forearm Balance (Pincha Mayurasana)
Forearm Balance — also called Feathered Peacock Pose — is the inversion that most seriously challenges shoulder stability and requires the most precise alignment of the shoulder girdle.
What it requires: Shoulder flexibility (specifically, the ability to externally rotate the upper arms), forearm strength, core strength, and the spatial awareness to find vertical alignment upside down.
Preparatory poses: Dolphin Pose, Forearm Plank (2 minutes), Downward Dog, Headstand
Step-by-step:
Place your forearms on the mat — elbows shoulder-width apart (use a strap around your upper arms to prevent them from splaying) Spread your fingers wide — press firmly through the full length of each forearm and finger Tuck your toes and lift your hips into Dolphin Pose Walk your feet in toward your elbows — getting your hips as far over your shoulders as possible Kick one leg up toward the ceiling — using momentum to bring the second leg up Stack your hips directly over your shoulders — your body should be in one vertical line Engage your core, press your forearms down, and reach your toes toward the ceiling Hold for 5–15 breathsKey alignment cue: The elbows must stay shoulder-width apart throughout. Splaying elbows is the most common cause of collapse in this pose. Use a strap around the upper arms for your first months of practice.
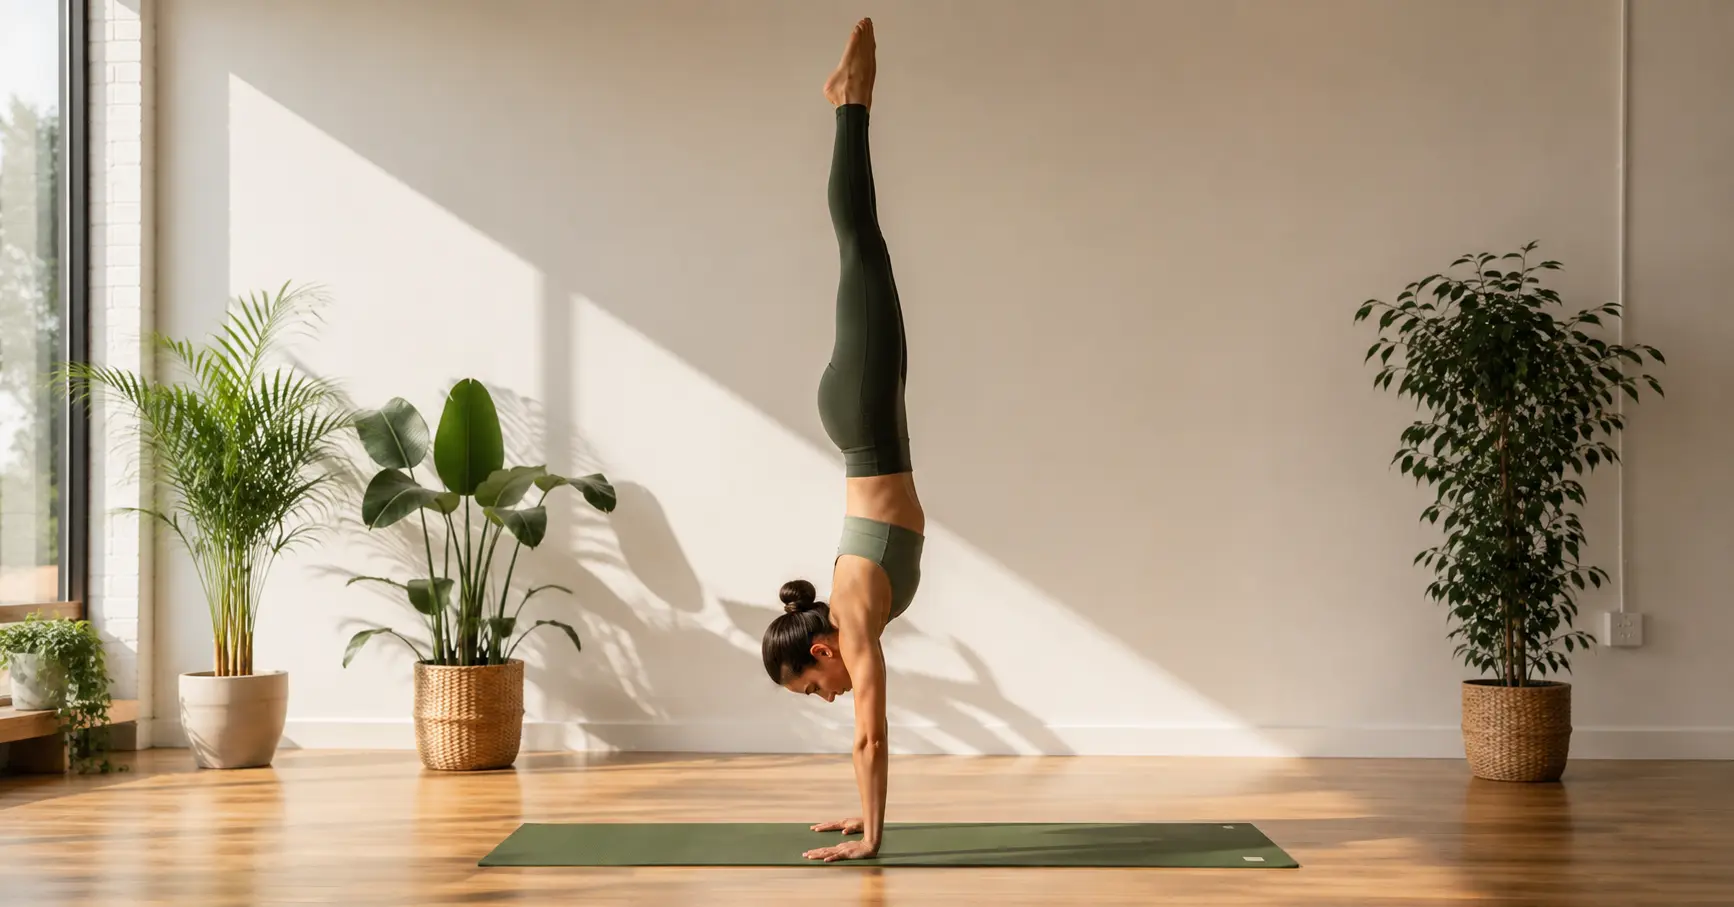
7. Handstand (Adho Mukha Vrksasana)
Handstand is the pinnacle of the inversion family — requiring the most complete integration of shoulder strength, core stability, wrist strength, and proprioceptive precision.
What it requires: 90-second Plank with perfect form, controlled Chaturanga, strong Crow Pose, shoulder external rotation flexibility, and significant wrist strength.
Preparatory poses: Crow Pose, Forearm Balance, L-shaped Handstand at wall, Pike position
Step-by-step — Wall-Assisted Handstand:
Place your hands 6 inches from a wall — shoulder-width apart, fingers spread, index fingers parallel From Downward Dog, kick one leg up toward the wall — using momentum to bring both legs to the wall Press your hands firmly into the mat — especially through the knuckles (not just the heel of the hand) Engage your core and glutes strongly — creating one long line from wrists to toes Press your shoulder blades apart (protract them) — this creates the shoulder stability needed Hold for 10–30 breaths Lower one leg at a time — with controlFree-standing progression:
Practice “kicking up” against the wall — aim to tap the wall lightly and return, rather than resting on it Practice “tuck handstand” — bringing both knees to chest in the air briefly Progress to brief free-standing holds — 1 second, then 3, then 5Key alignment cue: Press the floor AWAY — actively push through your hands as if trying to push the mat through the floor. This shoulder protraction is the key to a stable handstand and is the element most beginners miss.
CATEGORY 3: ADVANCED BACKBENDS
Advanced backbends require spinal mobility, hip flexor length, and the shoulder flexibility and strength to support deep chest opening simultaneously.
8. Wheel Pose (Urdhva Dhanurasana)
Wheel Pose is the threshold advanced backbend — the pose that determines whether a practitioner has developed the spinal mobility, shoulder openness, and quad/hip flexor flexibility that deeper backbends require.
What it requires: Hip flexor flexibility, thoracic spine mobility, shoulder flexibility (external rotation and overhead reach), wrist strength, and core strength to protect the lumbar spine.
Preparatory poses: Bridge Pose (active), Camel Pose, Cobra Pose, thoracic spine mobilization on a foam roller
Step-by-step:
Lie on your back — knees bent, feet hip-width apart and close to your hips Place your hands beside your ears — fingers pointing toward your shoulders, elbows pointing toward the ceiling Press your feet into the floor and on an inhale — lift your hips, then press through your hands to lift your chest Straighten your arms — coming onto the crown of your head briefly before pressing fully up Roll your shoulder blades toward each other — opening the chest between the arms Press your hips toward the ceiling — creating the highest arch available to your spine Breathe naturally — 5–10 breaths To come down: tuck your chin, bend your elbows, and lower your head, then back, then hips — with controlKey alignment cue: The opening must be distributed evenly through the THORACIC spine — not concentrated in the lumbar spine. If you feel compression in the lower back, your thoracic spine is not yet mobile enough. Build thoracic mobility first.
Common mistake: Feet and knees splaying outward — this compresses the lumbar spine and sacroiliac joints. Keep feet parallel and knees tracking over the second toe.
9. King Pigeon Pose (Kapotasana)
King Pigeon — the full expression of Pigeon Pose — is one of yoga’s deepest backbends. It combines extreme hip flexor length, full thoracic spine extension, and the shoulder flexibility to reach the foot overhead.
What it requires: Full Wheel Pose, Camel Pose held easily, hip flexor flexibility well beyond standard Pigeon Pose, and shoulder flexibility to reach the foot from a kneeling position.
Preparatory poses: Camel Pose, Wheel Pose, Pigeon Pose with back foot elevated, Reclined Hero Pose (Supta Virasana)
Step-by-step:
Kneel on your mat with knees hip-width apart Bring your hands to your lower back — fingers pointing down Inhale and lift your chest toward the ceiling Begin to arch backward from the thoracic spine — not the lumbar Reach your hands to the floor behind you — walking them toward your feet Your goal is to reach your heels with both hands — bending your elbows and drawing your forearms toward the floor Eventually, your hands hold your ankles — head dropping toward your feet Hold 5–8 breaths To exit: press through your hands, engage your core, and slowly return to upright — inhaling to riseKey alignment cue: The backbend in King Pigeon happens primarily in the thoracic spine (mid-back) — not the lumbar spine (lower back). If you feel any sharp compression or pain in the lower back, come out immediately and build more thoracic mobility.
Important: This pose requires significant preparation. Never force it. Work with a qualified yoga teacher for your first attempts.
10. Scorpion Pose (Vrschikasana)
Scorpion combines a full inversion (Forearm Balance) with a deep backbend — bringing the feet toward the head from a handstand or forearm balance position. It is among the most demanding advanced yoga poses, requiring simultaneous mastery of inversion and backbend.
What it requires: Stable Forearm Balance (held 30+ seconds), Wheel Pose, King Pigeon preparation, and the spatial awareness to find the feet-toward-head position while upside down.
Preparatory poses: Forearm Balance against wall, Wheel Pose, Camel Pose, backbend drop-overs from standing
Step-by-step (wall-assisted):
Come into Forearm Balance with your heels against the wall Once stable — begin to arch your back, allowing your feet to peel away from the wall Bend your knees and let your feet drop toward your head Keep your core engaged — the arch should be controlled, not collapsed Hold 3–5 breaths Press your feet back to the wall to exit safelyKey alignment cue: Enter Scorpion ONLY after you can hold free-standing Forearm Balance for 20+ breaths. The balance must be completely stable before adding the backbend.
CATEGORY 4: ADVANCED HIP OPENERS
Advanced hip openers require years of gradual, patient hip flexor, hip rotator, and inner thigh lengthening. They cannot be rushed — the connective tissue changes that make them possible develop slowly.
11. Full Splits (Hanumanasana)
Full Splits — Hanumanasana — named after the monkey god Hanuman — requires complete hip flexor length in one direction and complete hamstring length in the other simultaneously.
What it requires: Hip flexors that can extend fully (front leg behind), hamstrings that can lengthen completely (front leg forward), and the ability to maintain a level pelvis throughout.
Preparatory poses: Low Lunge (held 2 minutes), Pyramid Pose, Reclining Hand-to-Big-Toe Pose, Lizard Pose variations
Step-by-step:
Begin in a Low Lunge — right foot forward, left knee on the mat Shift your right foot forward as you lower your left knee — sliding both toward the split position Use blocks under your hands for support throughout Flex your right foot — protecting the hamstring by engaging the quadricep Square your hips toward the front of the mat — do not let the right hip open outward Lower slowly — stopping the moment you feel a strong (not painful) stretch Hold where you are — even if you are 6 inches off the floor — for 10–15 breaths Use a block under the front hip if needed for pelvic levelingKey alignment cue: The pelvis must be level — both hip points at the same height. A tilted pelvis puts uneven stress on the hip joints and sacroiliac joint. Use a block under whichever hip is dropping.
Timeline: Full Splits typically requires 6–18 months of dedicated daily hip flexor and hamstring work. Attempting to force it faster risks hamstring attachment injury at the sit bone.
12. Lotus Pose (Padmasana)
Lotus Pose is one of yoga’s most recognized advanced poses — and one of the most commonly forced, which causes significant knee injury. It requires deep hip external rotation that cannot be created through knee manipulation.
What it requires: External hip rotation far beyond everyday range — specifically in the ball-and-socket hip joint, not through the knee. The rotation must come from the HIP, not be created by levering through the knee.
Preparatory poses: Half Lotus, Fire Log Pose (Agnistambhasana), Reclined Pigeon, Baddha Konasana held daily for months
Step-by-step:
Sit in Sukhasana (Easy Pose) — assess your natural hip rotation Draw your RIGHT foot toward your left hip — letting it rest wherever it naturally falls If and only if the right knee is comfortable and low — draw your LEFT foot toward your right hip Neither foot should be forced. The outer edges of BOTH feet rest on the opposite thighs Sit tall — spine lengthening from the tailbone through the crown Hands rest on your knees in a mudra of your choice Hold for 5–10 minutes if comfortableCritical warning: If either knee lifts significantly off the floor OR you feel any sensation in the knee joint (as opposed to the hip and inner thigh) — stop immediately. Lotus Pose knee injuries are among the most common serious yoga injuries, and they occur exclusively when practitioners force external rotation through the knee rather than developing it in the hip.
13. One-Legged King Pigeon Pose Variation (Eka Pada Rajakapotasana)
This advanced variation of Pigeon Pose adds a back foot bind — requiring simultaneous hip flexor length, quadricep flexibility, shoulder flexibility, and spinal extension.
What it requires: Easy Pigeon Pose with front shin parallel to the mat, back foot quad stretch accessible, and shoulder flexibility to reach the foot overhead.
Preparatory poses: Pigeon Pose, Reclined Hero Pose, Camel Pose, Bow Pose (Dhanurasana)
Step-by-step:
Begin in Pigeon Pose — right shin forward and parallel (or near-parallel) to the mat Ensure your hips are level — left hip forward, right hip not dropping Bend your left knee — drawing the left foot toward the ceiling Reach your left hand back to hold the left foot If accessible — reach your right arm overhead and back to also hold the left foot Draw the foot toward the back of the head — this is the advanced expression Hold 5–8 breaths, then switch sidesKey alignment cue: The left hip must stay squared toward the mat throughout. As the foot draws toward the head, there is a strong tendency for the left hip to lift and rotate — this must be consciously resisted.
CATEGORY 5: ADVANCED STANDING BALANCES
Advanced standing balances combine strength, flexibility, and extreme proprioceptive precision — often in ways that reveal asymmetries between the left and right sides of the body.
14. Standing Split (Urdhva Prasarita Eka Padasana)
Standing Split combines the hamstring flexibility of a forward fold with the single-leg balance of advanced standing poses — requiring both simultaneously while maintaining spinal length.
What it requires: Single-leg hamstring flexibility (the standing leg), hip flexor flexibility (the lifted leg), and the balance and core strength to maintain the position.
Preparatory poses: Standing Forward Fold, Warrior 3, Half Moon Pose, Pyramid Pose
Step-by-step:
Begin in Standing Forward Fold — hands on floor or blocks Shift your weight onto your RIGHT foot Inhale and lift your LEFT leg toward the ceiling — as high as available flexibility allows Keep your hips level (left hip does not need to open — this is not a lateral pose) Draw your chest toward your right shin — creating maximum length between your lifted heel and your crown Hold your right ankle or calf for stability Hold 8–10 breaths, then lower and switch sidesKey alignment cue: This pose is NOT the same as side-body opening like Warrior 3. The hips remain squared toward the floor — both hip points facing down. The height of the lifted leg is secondary to the squareness of the hips and the length of the spine.
15. Warrior 3 (Virabhadrasana III) — Advanced Expression
Warrior 3 in its full expression — arms extended overhead, body completely parallel to the floor, standing leg straight — is one of the most demanding standing balance poses in yoga.
What it requires: Single-leg strength in the standing leg (quad, glute, and ankle stabilizers), hamstring flexibility in the lifted leg, core integration, and the refined proprioception to find perfect horizontal alignment.
Preparatory poses: Warrior 1, Half Moon Pose, Standing Forward Fold, single-leg exercises (Bulgarian split squats, single-leg deadlifts)
Step-by-step:
Begin in Warrior 1 — right foot forward, left foot back Shift your weight onto your right foot — bending the right knee deeply Hinge your torso forward as you simultaneously lift your left leg behind you Find the position where your torso and left leg are parallel to the floor Straighten your right leg — engaging the quadricep fully Extend your arms forward alongside your ears — creating one long line from fingertips to left heel Flex your left foot — engaging the entire left leg Hold 8–10 breaths, then step forward and switch sidesKey alignment cue: The hips must be level — both hip points facing the floor. The left hip has a strong tendency to open toward the ceiling. Actively rotate the left hip down by internally rotating the lifted leg slightly — this levels the pelvis and protects the lumbar spine.
Advanced progression: From Warrior 3, transition directly into Standing Split (pose 14), then into Half Moon Pose — creating a three-pose balance sequence.
How to Build a Safe Advanced Yoga Practice: 8-Week Progression Plan
The most common reason advanced yoga poses cause injury is insufficient preparation. This 8-week plan builds the specific prerequisites for the poses above safely.
Weeks 1–2: Foundation Audit
Assess your current capacity honestly:
Plank hold: 90 seconds? ✅ or build to it Chaturanga: controlled with straight body? ✅ or build to it Wheel Pose: straight arms, 5 breaths? ✅ or build to it Pigeon Pose: front shin parallel, hips level? ✅ or build to itWeeks 3–4: Strength Specificity
Forearm Plank: 3 × 60 seconds daily Crow Pose attempts: 10 minutes daily Chaturanga repeats: 10 controlled reps Dolphin Pose: 3 × 20 breaths (Headstand/Forearm Balance prep)Weeks 5–6: Flexibility Deepening
Low Lunge: held 2 minutes each side daily (Splits prep) Thoracic spine mobilization: foam roller or supported fish daily (backbend prep) Fire Log Pose: held 3 minutes each side (Lotus prep) Reclined Hero: held 5 minutes (King Pigeon prep)Weeks 7–8: Pose Attempts
Attempt target advanced poses with all prerequisites confirmed Use props freely — blocks, straps, walls Practice with a qualified teacher whenever possible for first attempts Document your practice — video yourself monthly to track alignment progressSafety Rules for Advanced Yoga Poses
Rule 1: Never skip preparatory poses. Every advanced pose has specific prerequisites. The preparatory poses exist because the advanced pose demands what they build. Skipping them is the primary cause of yoga injury.
Rule 2: Pain is a stop signal — not a “push through” signal. Discomfort from deep stretching is part of yoga. Sharp, sudden, or joint-located pain is not. Exit any pose that produces it immediately.
Rule 3: Practice inversions near a wall for the first year. The wall is not a crutch — it is a safety tool. Practice Headstand and Forearm Balance with your back 6 inches from the wall for your first 6–12 months.
Rule 4: Never practice Lotus by manipulating the knee. All rotation in Lotus Pose must come from the hip joint. If you need to lever your foot into position using your hands on your knee — your hip is not ready. Build Hip rotation with Fire Log Pose instead.
Rule 5: Work with a qualified teacher. For your first attempts at inversions, advanced backbends, and arm balances — an experienced teacher’s eyes are worth more than any written guide. They see the compensations you cannot feel.
Rule 6: Warm up fully before advanced poses. Advanced poses should never be the first poses of a session. Build at least 20–30 minutes of progressive warm-up — including the preparatory poses listed under each advanced pose.
Props for Advanced Yoga Poses
Props are not signs of limitation — they are tools that expand what is safely accessible.
| Yoga blocks (2) | Splits, Standing Split, Crow, Triangle | Brings the floor closer, enables correct alignment |
| Yoga strap | Firefly, King Pigeon bind, Lotus prep | Extends reach without forcing flexibility |
| Wall | Headstand, Forearm Balance, Handstand | Safety support during inversion development |
| Yoga bolster | Wheel Pose prep, thoracic opening | Passive thoracic extension for backbend prep |
| Blanket under knees | Camel Pose, King Pigeon, Lotus | Protects knee joint from mat pressure |
| Upper arm strap | Forearm Balance | Prevents elbow splay |














.jpg&h=630&w=1200&q=100&v=1a56ad72fe&c=1)