Growing Mushrooms At Home Is Easier Than You Think With Our Newbie Guide
You know you've always wanted to try.
 Tekef
Tekef

Our editors have independently chosen the products listed on this page. If you purchase something mentioned in this article, we may earn a small commission.
February 20, 2022 — 10:26 AM
Chances are, you love to eat mushrooms—but have you ever considered growing them? Turns out, the little fungi grow quickly and are relatively low-maintenance, depending on the variety. Here's what you need to know to grow mushrooms from the comfort of your home.
Can you grow mushrooms at home?
Growing mushrooms at home may seem counterintuitive since many varieties grow in forests, on trees, or underground, but there are many varieties you can cultivate indoors. Once you get the setup down, with any luck, you'll have edible delights within a couple of weeks.
"Growing mushrooms is great as an activity for kids, adults who have free time and want to start to grow their own food, or anyone in between," says Brian Chau, a food scientist and fungal fanatic.
What to know before starting.
Though it doesn't take up much room, growing mushrooms at home does require a dark, humid location, explains Matthew Tutt, a part-time mushroom grower. As such, Chau recommends scouting out a small (around 2 square feet) spot in your home that you'll remember to spritz with water twice a day.
You won't need much else to get the hobby going, other than mushrooms and your substrate. While vegetables and fruits grow from seeds, mushrooms grow from microscopic spores. Spores grow in different types of substrates such as wood, sawdust, compost, or straw.
What type of mushrooms are best for growing at home?
There are a plethora of mushrooms that people can grow at home, but if you're new to growing fungi, you'll want to start with these beginner-friendly varieties:
1. Blue oyster mushrooms.
"The blue oysters grow relatively fast and are the easiest to maintain," says Chau. Blue oyster mushrooms are one of several varieties of oyster mushrooms and can be used in a variety of dishes, such as pastas, soups, or sauces.
2. Lion's mane mushrooms.
In addition to blue oysters, Andrew Carter, the CEO and co-founder of Smallhold, a network of mushroom farms throughout the USA, considers lion's mane a great variety for beginners. "They are the most forgiving in terms of growing conditions, so they usually do well in most people's homes," he says. Lion's mane is known as a medicinal mushroom and is delicious when grilled, braised, roasted, or sauteed.
3. Grey oyster mushrooms.
Another low-maintenance variety of oyster mushrooms, Tutt says that "Grey oyster mushrooms are not fussy at all and don't require much special treatment, or any kind of special substrate." They are prominently featured in Asian cuisine, and Tutt notes that they are a great "gateway" mushrooms thanks to their mild taste.
What conditions do mushrooms need to grow?
Cool, dark, and damp are a mushroom's favorite words. "They need to be kept at room temperature—or even a bit cooler—and misted constantly," says Carter. Since they require twice-daily misting, he notes that you might want to put them in a room that you pass through often, such as the kitchen. Basements, bathrooms, garages, or even under sinks are also good humid environments for them, as long as you remember to mist them.
These supplies can be purchased at your local nursery, garden center, or even home improvement store. Note: Mushroom grow kits do the work of colonizing for you, so you can also purchase one of those to skip steps 1 to 4 of the growing process.
How to actually grow the mushrooms:
Step 1: Fill container with substrate.
Start with a tray or a long container that is at least 6 inches deep. Fill the tray or container with your substrate, and then spread the spawn on top. Cover the spawn with another inch or so of the substrate you're using.
Step 2: Place substrate in a warm area.
"To get the mushroom spawn to colonize the substrate, you need to place it in a warm spot to speed up this process—usually anywhere between 30 and 90 degrees Fahrenheit, but it will depend on the exact type of species you are looking to grow," explains Tutt.
Step 3: Ensure the substrate stays moist.
You'll need to spray the substrate with water to keep it moist but not soaking wet. "At the very least, they need to be misted directly two to three times a day," says Carter. You may want to cover the substrate with a plastic bag or large plastic box to maintain a humid environment from your shrooms.
Step 4: Chill your mushrooms down.
After a few days, you should see tiny white thread-looking growths (mycelium) start to form on top of your substrate. At this point, the mushrooms have colonized, and Tutt recommends placing your tub in the fridge or an area that's below 30 degrees Fahrenheit for a short period before moving it to that cool, dark, and damp spot in your home for the final "fruiting" stage.
Keep misting your mushrooms daily to keep their surrounding humidity high, and they should be ready to harvest within a couple of weeks.
Caring for your mushrooms.
Here's how to watch over your mushrooms to ensure a successful harvest.
Generally, mushrooms don't need much light since they prefer dark environments. It's important to keep in mind that direct sunlight is never a good idea.
Although mushrooms thrive in damp and humid environments, they don't need to drink lots of water. "Spritzing or misting twice a day works just fine," says Chau. "Do not drown nor dry the mushroom block."
And as you notice mushrooms starting to form, Carter recommends misting around them rather than spraying them directly.
A humid environment is an essential component for the success of growing mushrooms, especially when you reach that final fruiting stage. "It's vital to keep it humid—but not soaking wet," says Tutt.
Harvesting and storing your mushrooms.
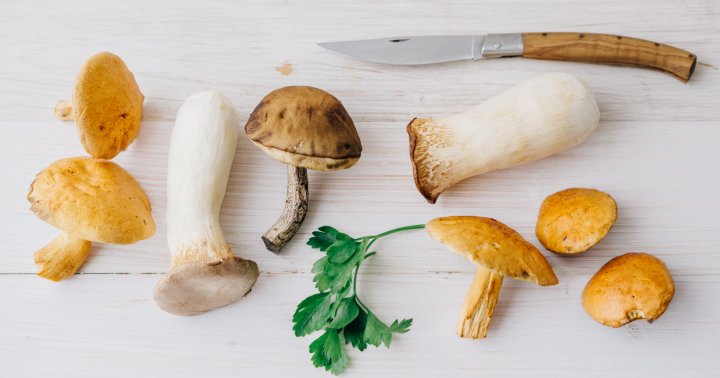
"Mushrooms are usually ready for harvest when their cap has finished forming and is just about to start unfurling," says Tutt. However, they may not look like the fungi you're used to seeing. "They're perfectly safe to eat but aren't the picture-perfect mushroom that most people are used to," says Carter.
Once they're ready, you can handpick your mushrooms or use a knife to harvest them. Since these beauties are grown in a controlled home environment, you don't need to go through the pain of washing them before storing. "When harvested, store mushrooms in the fridge for up to two weeks in a paper bag," says Chau.
And voilà! You're ready to start incorporating your homegrown mushrooms into decadent soups, "steaks," salads, and everything in between. Packed with minerals and vitamins, they'll provide a delicious way to support your immune system, too.
Now that you know how to get started growing mushrooms at home, you'll be reaping the rewards of these delectable fungi in no time. Next homesteading challenge: Pair them with homegrown avocado from your very own avocado tree!