How to Do Downward Dog Pose in Yoga—Proper Form, Variations, and Common Mistakes
The post How to Do Downward Dog Pose in Yoga—Proper Form, Variations, and Common Mistakes appeared first on The Yoga Nomads.
 BigThink
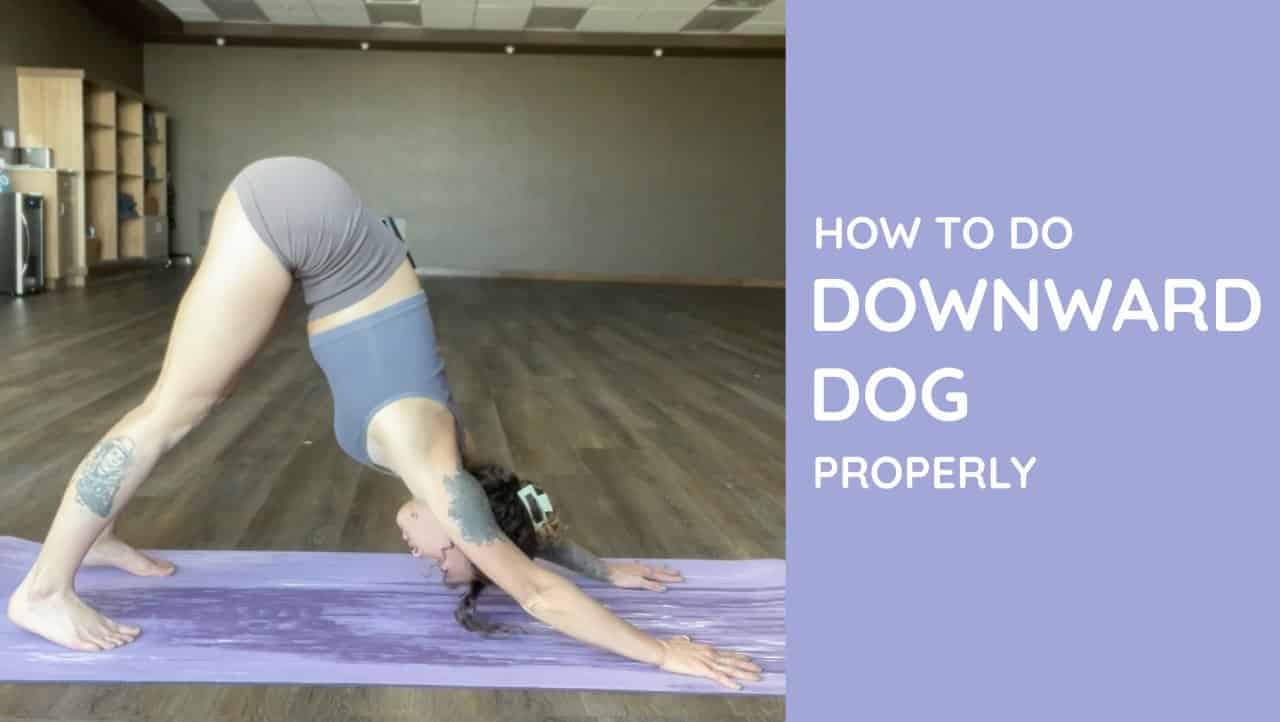
If you haven’t already, you will probably do Downward Facing Dog (Adho Mukha Svanasana) a million times during your yoga journey. This foundational yoga pose is the backbone of Sun Salutations, Hatha sequences, Vinyasa Flows, and the Ashtanga Primary Series. It is a subtle inversion with extraordinary benefits for your entire body, plus plenty of stress-relieving properties.
Whether you’re feeling tense, tight, or tired, this canine-inspired pose is just the way to wake up and let loose. Let’s dig into everything you need to know about the proper form, variations, and mistakes made in down dog.
Prefer video? Here’s a very detailed explanation on how to do Downward dog:
Down Dog Pose Benefits
Inspired by sleepy puppy stretches, Downward Facing Dog is a gentle yet highly effective asana. As your hamstrings lengthen and your tailbone reaches toward the sky, this pose allows you to enjoy a nice heart opening and tension relief between your shoulder blades. Relaxing your neck and face down toward the mat makes this a mild inversion, which adds to the already-impressive list of unexpected benefits. The more you practice this iconic yoga pose, the more you can experience:
 Deep hamstring stretching: The most notable benefit of Down Dog is a big stretch in your hamstrings. Depending on how close you move your feet toward your face, this asana can elongate the back of your legs as you push your heels toward the floor.
Sports Recovery: Whether you lift weights, run, or play team sports, Downward Dog is the go-to recovery pose for relieving tightness and soothing sore muscles.
Stress relief: Bringing your head below your heart is scientifically proven to reduce stress by activating your parasympathetic (“rest and digest”) nervous system and reducing cortisol levels. As you breathe deeply in this upside-down position, you might feel more relaxed and clear.
Improved blood flow to the brain: Another benefit of bringing your head upside down is the improved energy and focus from channeling blood flow toward your brain. While most inversions are advanced postures, Down Dog allows you enjoy the benefits of going upside down without lifting your feet off the ground.
Improved upper body strength: Anyone who has held Downward Dog for an extended period of time will notice their shoulders and biceps starting to burn. When held for long periods of time, this pose can tone and strengthen your entire upper body.
Spinal elongation: If you want to counteract the effects hunching over a desk all day, a quick Downward Dog lengthens the space between your vertebrate and can help improve your posture.
Strengthened hands, wrists, and fingers: As the foundation for this pose, your hands and joints are strengthened by widening your fingers and pressing into your knuckles. If you have weak wrists, it may take time to build up the strength to support your body in Down Dog.
Neck pain relief: People who struggle with upper back and neck pain may find that Downward Facing Dog is a juicy spinal relief. However, you can also kink your neck if you try to look upward instead of down between your hands. Carefully correct with the mistake adjustments below!
Deep hamstring stretching: The most notable benefit of Down Dog is a big stretch in your hamstrings. Depending on how close you move your feet toward your face, this asana can elongate the back of your legs as you push your heels toward the floor.
Sports Recovery: Whether you lift weights, run, or play team sports, Downward Dog is the go-to recovery pose for relieving tightness and soothing sore muscles.
Stress relief: Bringing your head below your heart is scientifically proven to reduce stress by activating your parasympathetic (“rest and digest”) nervous system and reducing cortisol levels. As you breathe deeply in this upside-down position, you might feel more relaxed and clear.
Improved blood flow to the brain: Another benefit of bringing your head upside down is the improved energy and focus from channeling blood flow toward your brain. While most inversions are advanced postures, Down Dog allows you enjoy the benefits of going upside down without lifting your feet off the ground.
Improved upper body strength: Anyone who has held Downward Dog for an extended period of time will notice their shoulders and biceps starting to burn. When held for long periods of time, this pose can tone and strengthen your entire upper body.
Spinal elongation: If you want to counteract the effects hunching over a desk all day, a quick Downward Dog lengthens the space between your vertebrate and can help improve your posture.
Strengthened hands, wrists, and fingers: As the foundation for this pose, your hands and joints are strengthened by widening your fingers and pressing into your knuckles. If you have weak wrists, it may take time to build up the strength to support your body in Down Dog.
Neck pain relief: People who struggle with upper back and neck pain may find that Downward Facing Dog is a juicy spinal relief. However, you can also kink your neck if you try to look upward instead of down between your hands. Carefully correct with the mistake adjustments below!
Step-by-Step Instructions
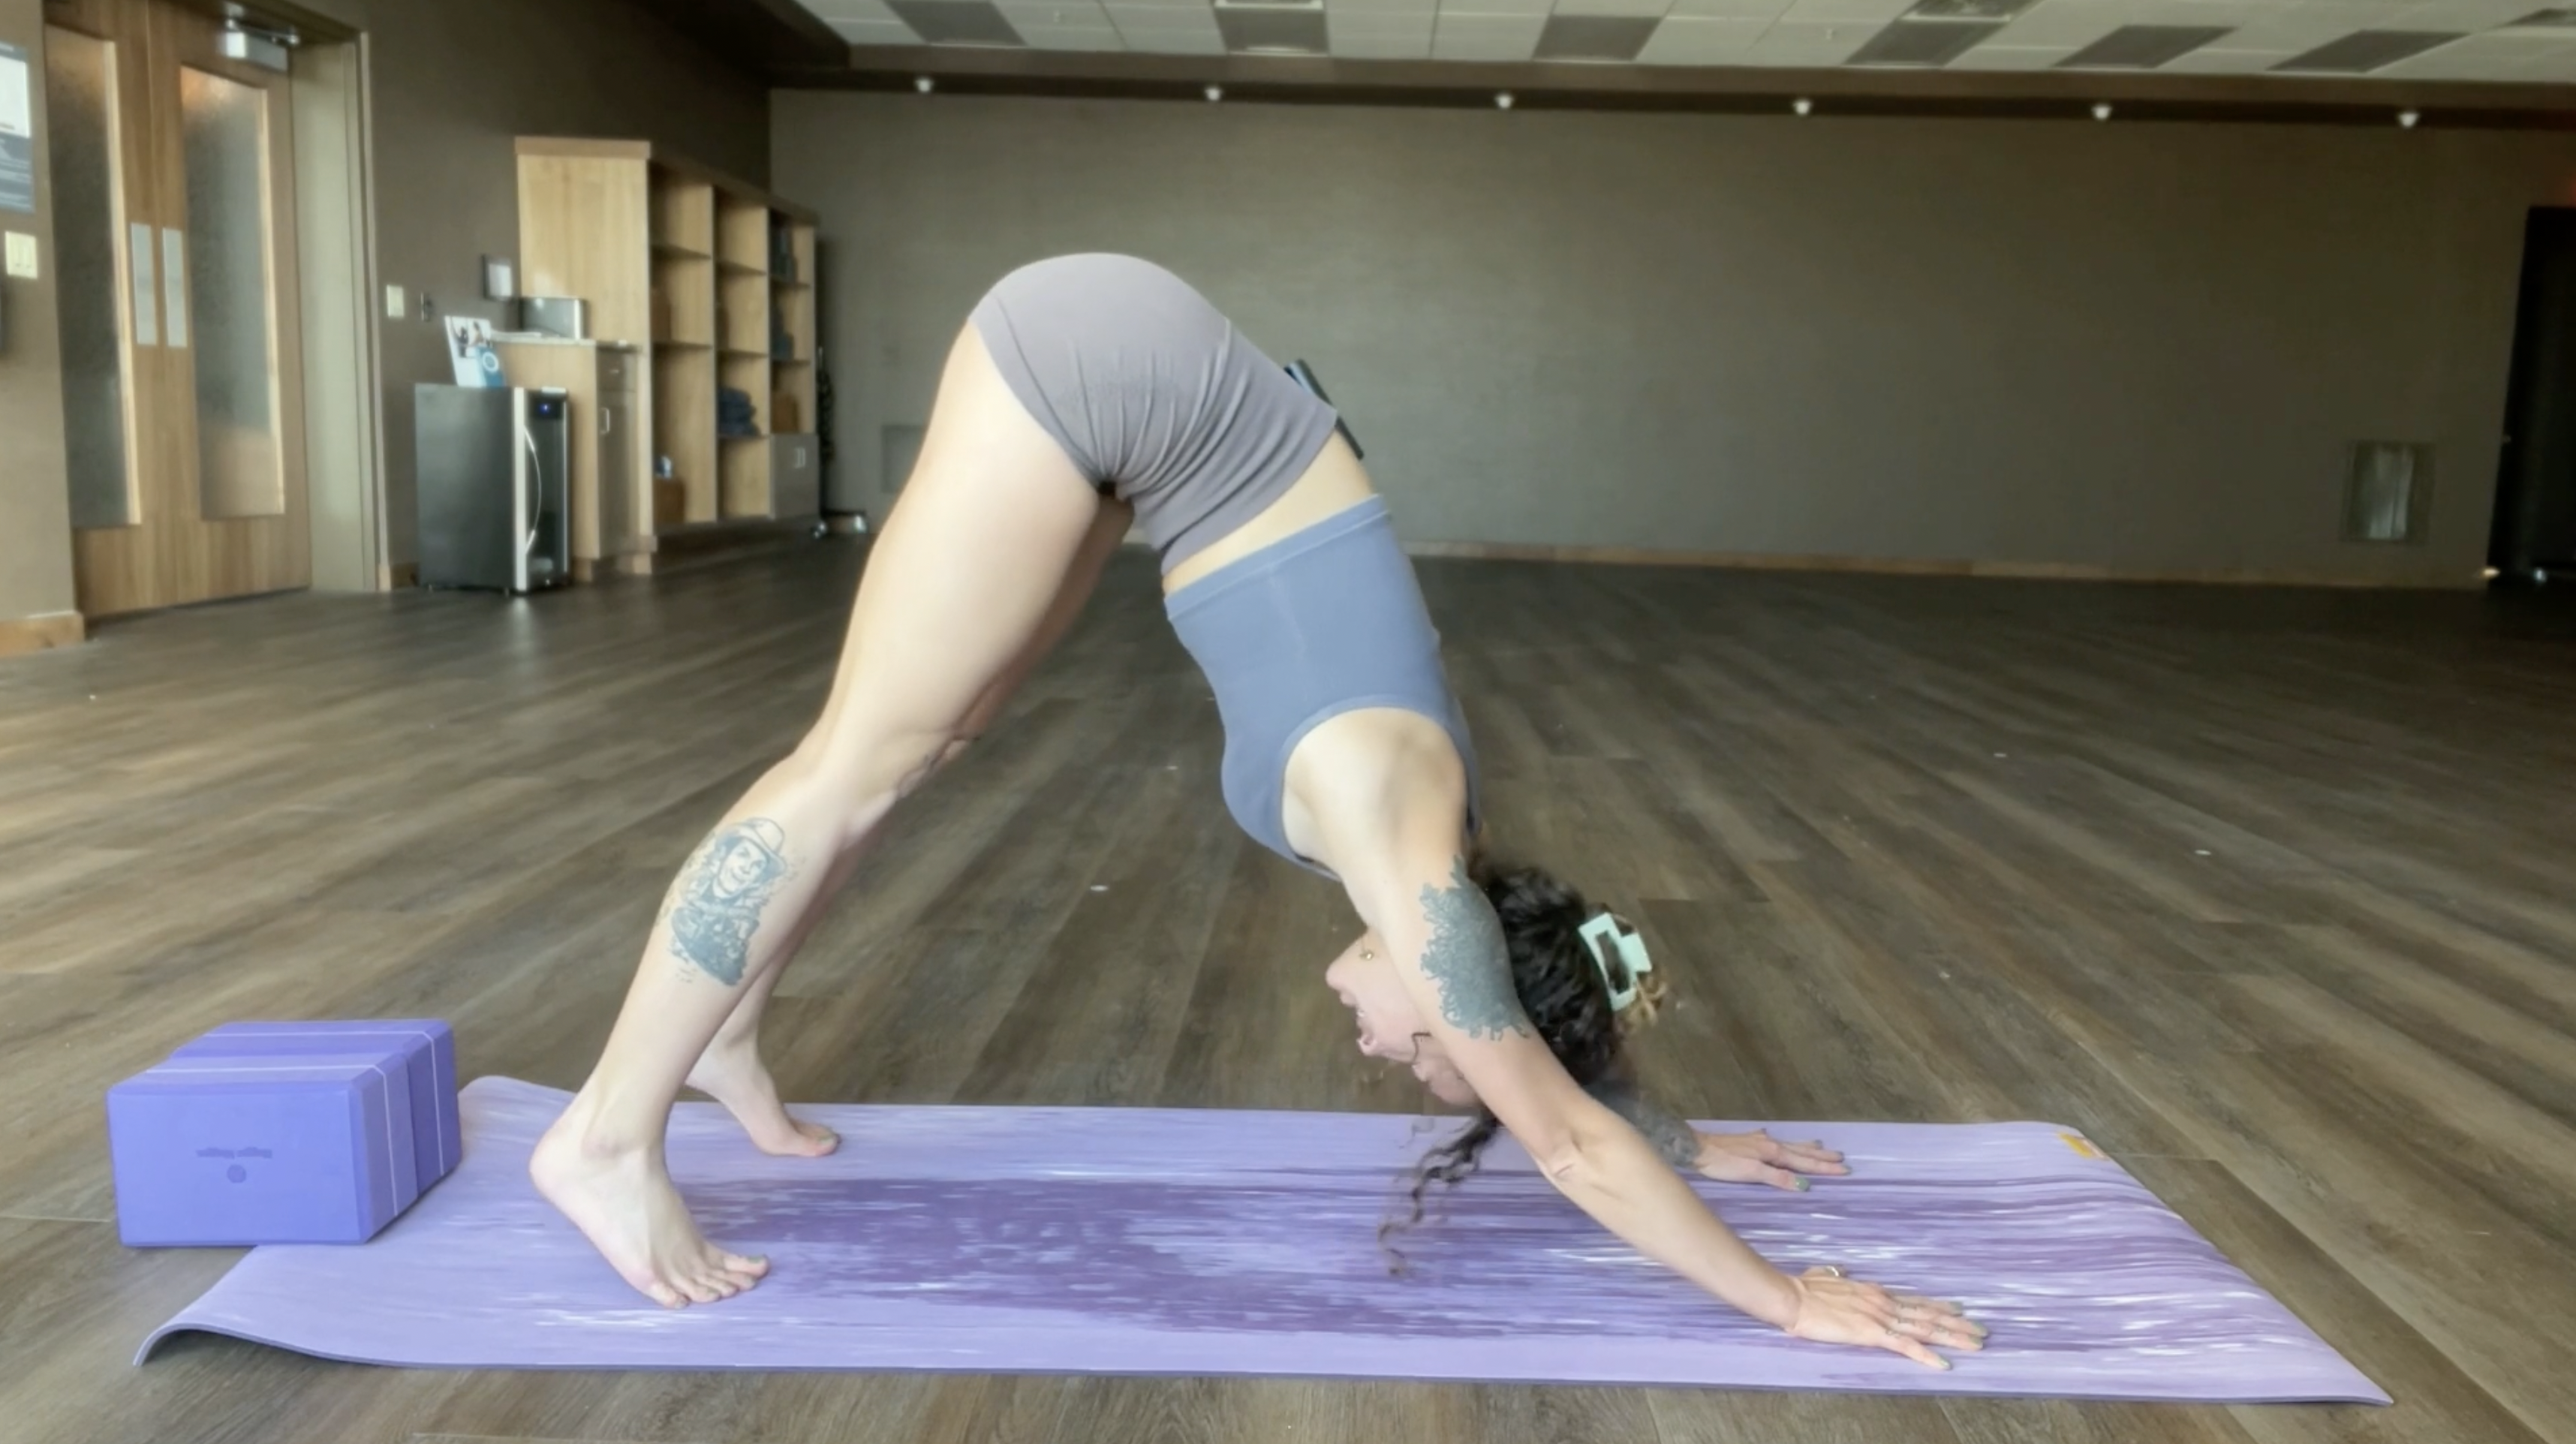
Getting into Adho Mukha Svanasana (Downwarding Facing Dog) is very simple and beginner-friendly. You can enter the pose from tabletop position or form a forward fold. Either way, be sure to check your alignment before going deeper.
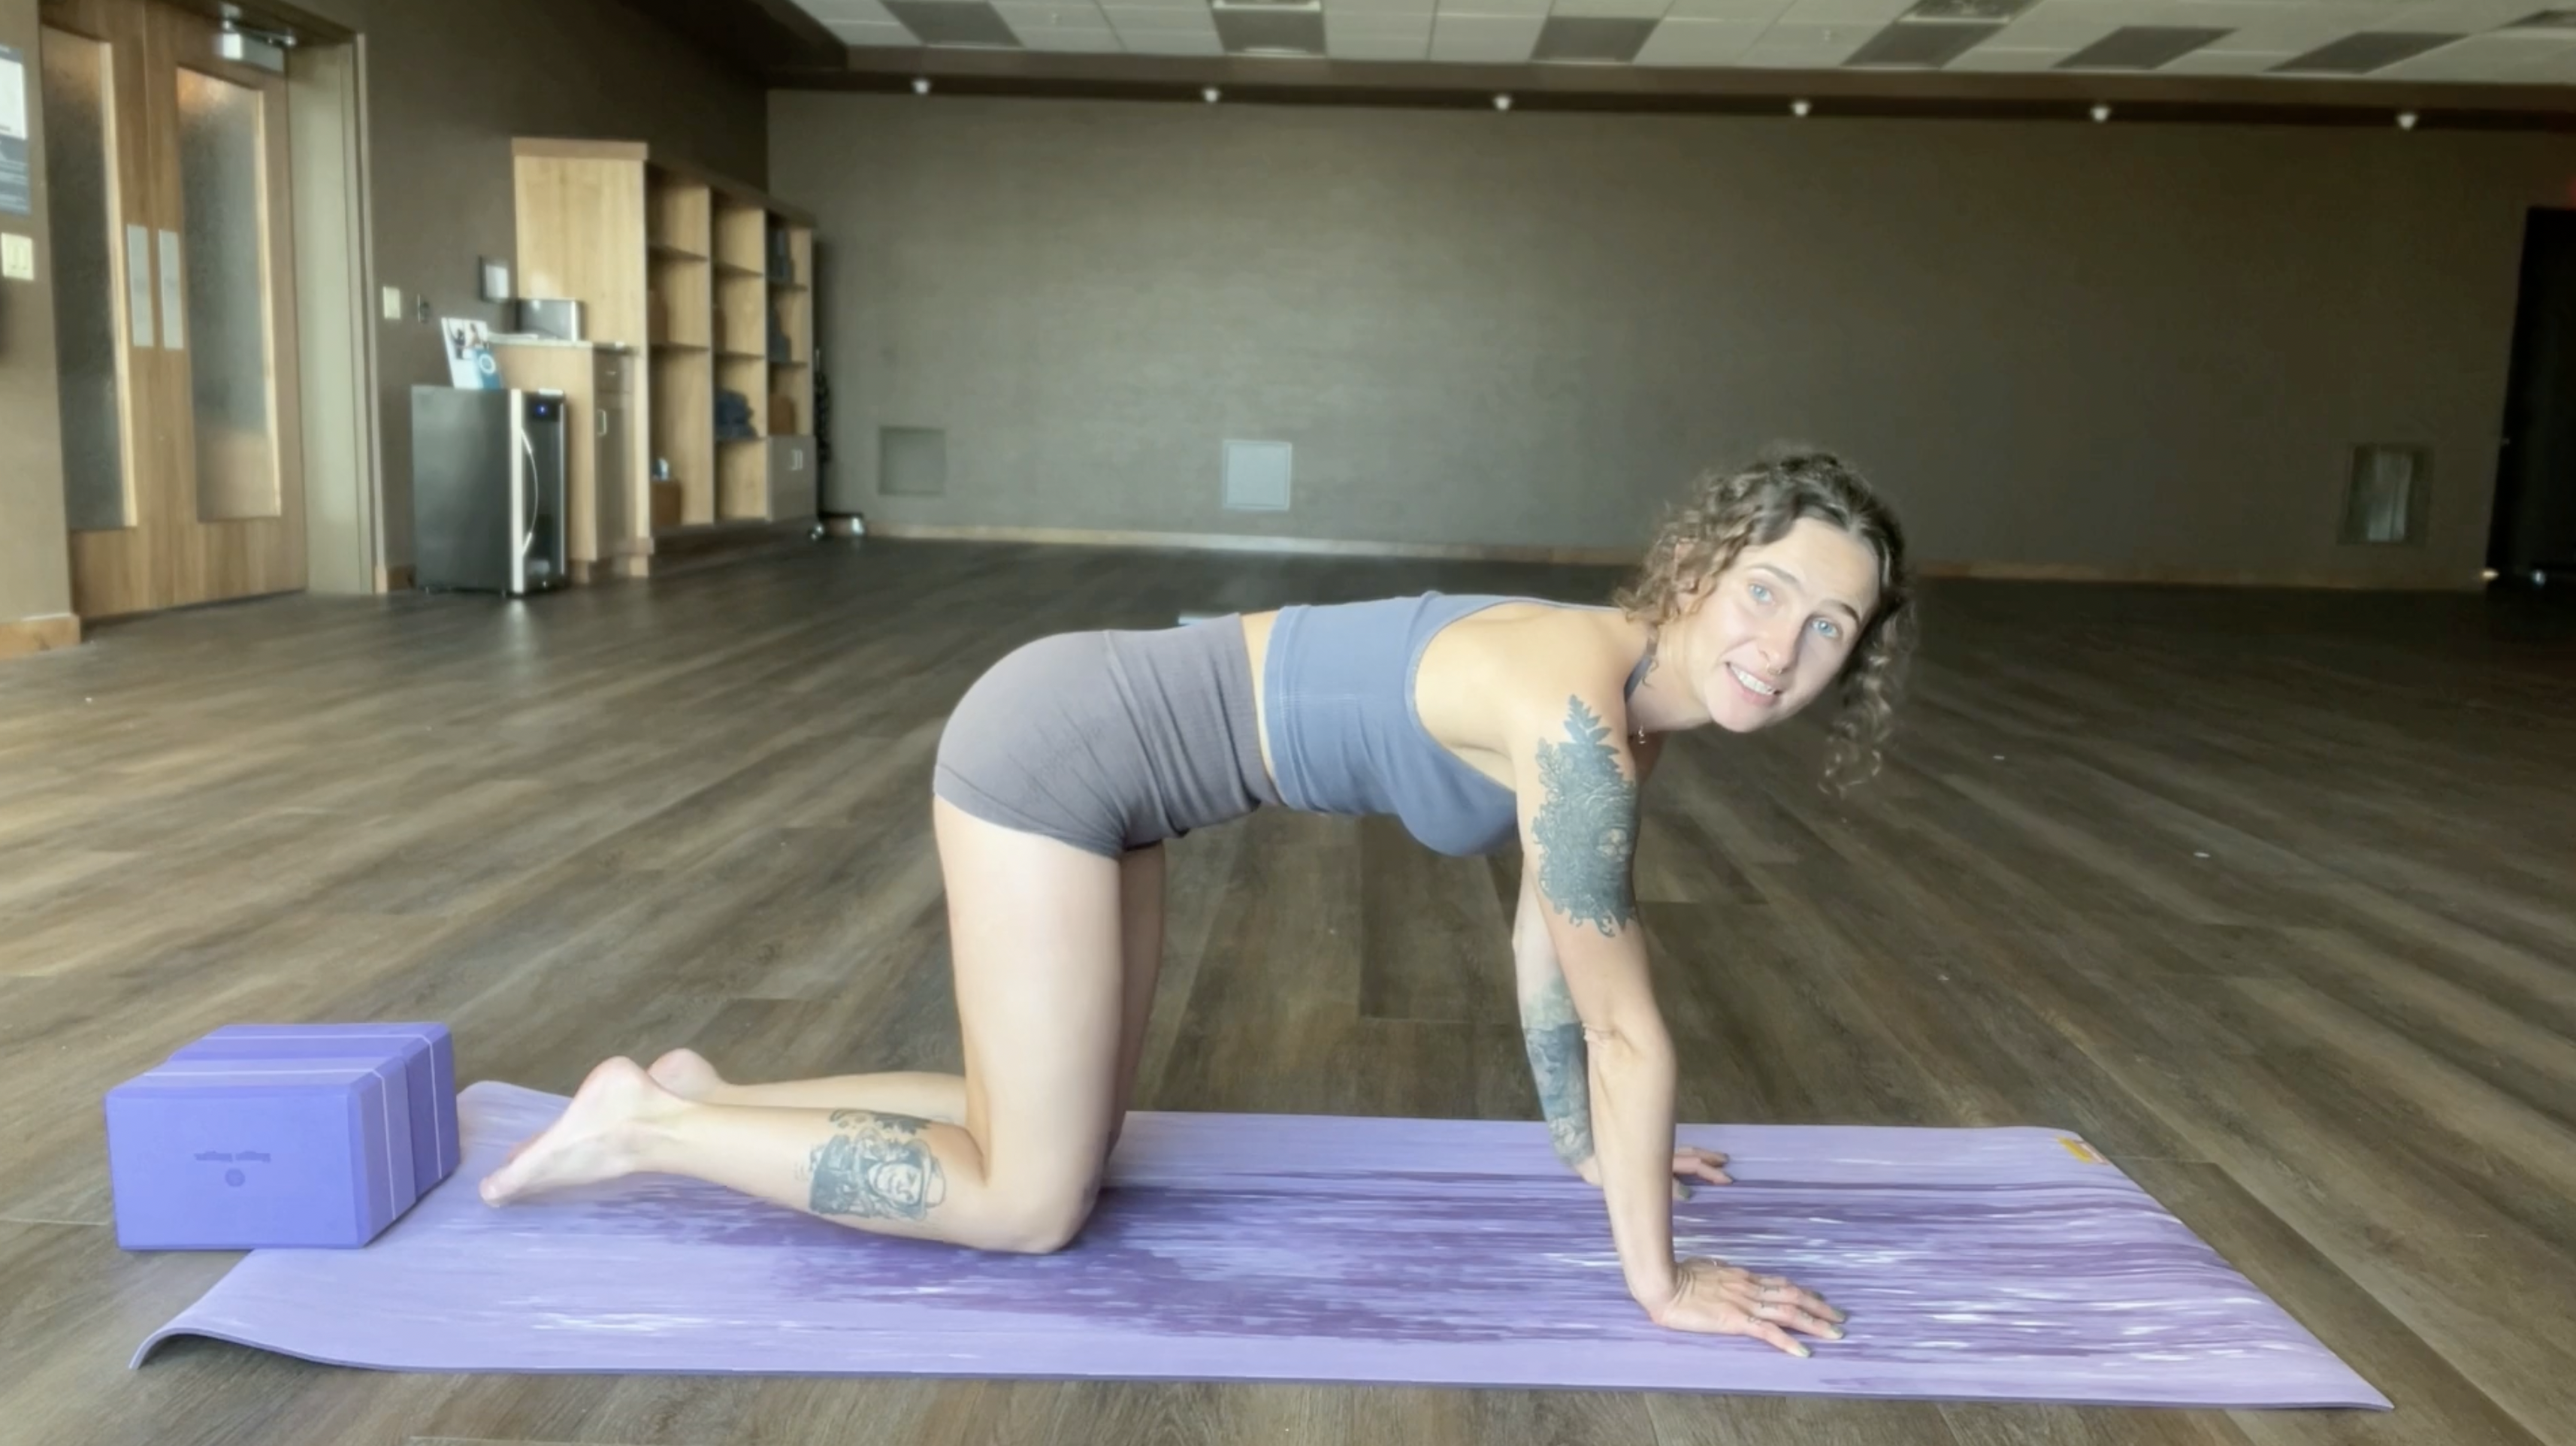 From a tabletop position, walk your hands slightly forward and spread your palms. Root down through all corners of your hands.
Curl your toes under and on an inhale, lift your knees from the mat. Ensure that your toes are facing directly forward.
Press your heels downward and back as your tailbone reaches toward the sky. Your knees don’t have to fully straighten out. Your body should be in the shape of an upside down “V”.
On an exhalation, begin to push your chest and thighs backwards, allowing your heels to sink down. Reach your hips toward the sky.
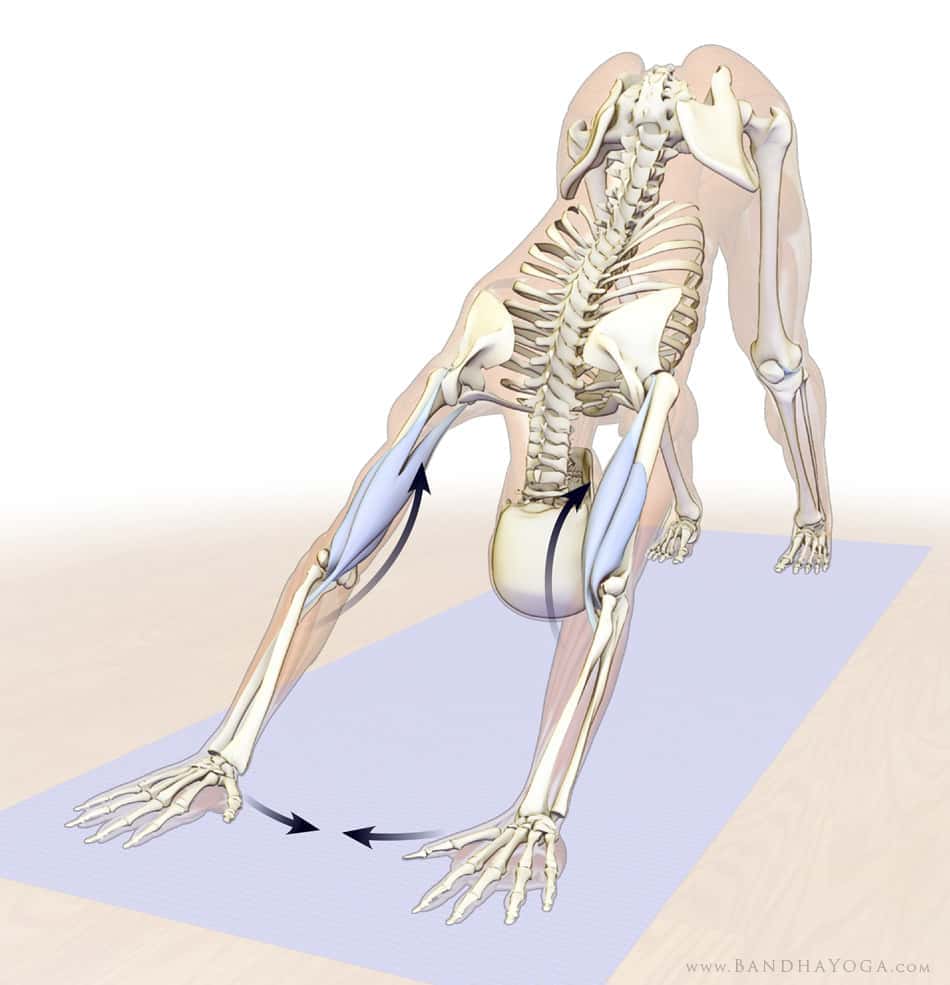
Strengthen your arms and press the knuckles of your fingers actively into the floor as you push up and back.
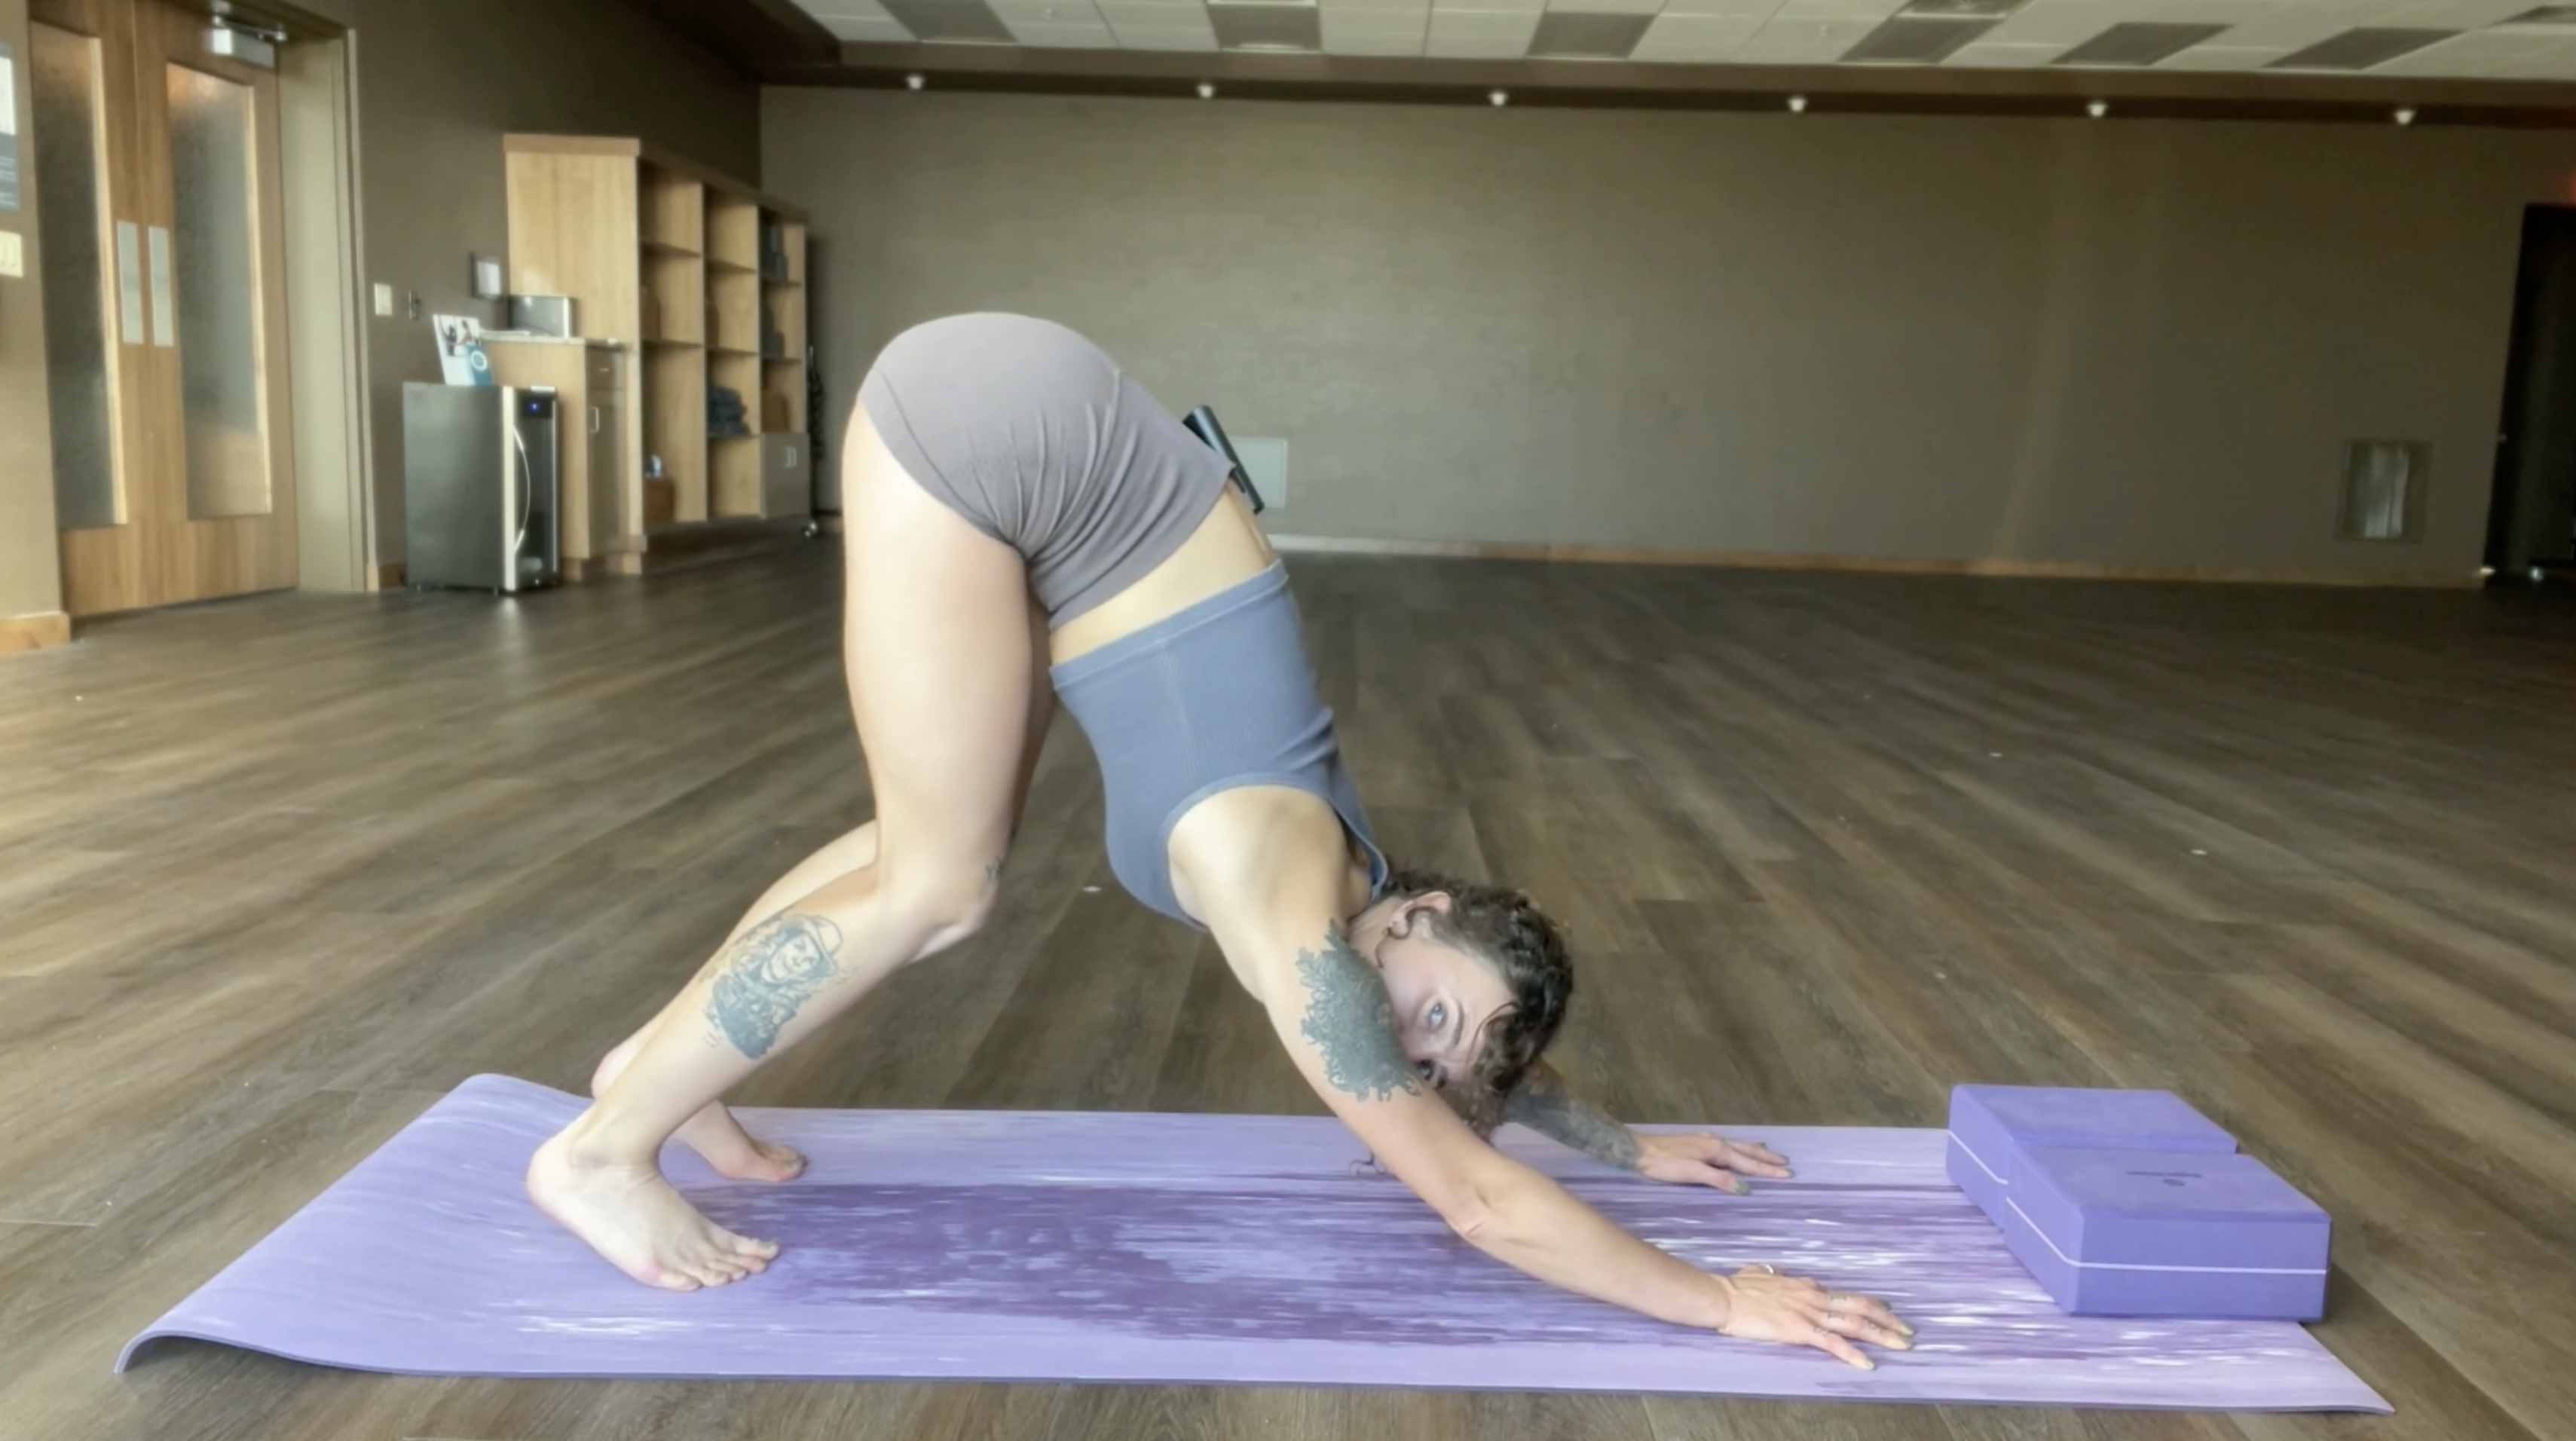
Allow your shoulder blades to push toward each other as your neck drops downward. Your head can hang between your upper arms. Your gaze should be back between your legs.
Optionally, you can “walk the dog” by slowly lifting one heel then the other.
On each inhale, lengthen your spine. On each exhale, sink farther into the pose to stretch your hamstrings and open your heart back.
Hold the pose for 5-10 breaths, then move into a sequence or exit by dropping your knees back to tabletop.
From a tabletop position, walk your hands slightly forward and spread your palms. Root down through all corners of your hands.
Curl your toes under and on an inhale, lift your knees from the mat. Ensure that your toes are facing directly forward.
Press your heels downward and back as your tailbone reaches toward the sky. Your knees don’t have to fully straighten out. Your body should be in the shape of an upside down “V”.
On an exhalation, begin to push your chest and thighs backwards, allowing your heels to sink down. Reach your hips toward the sky.
Strengthen your arms and press the knuckles of your fingers actively into the floor as you push up and back.
Allow your shoulder blades to push toward each other as your neck drops downward. Your head can hang between your upper arms. Your gaze should be back between your legs.
Optionally, you can “walk the dog” by slowly lifting one heel then the other.
On each inhale, lengthen your spine. On each exhale, sink farther into the pose to stretch your hamstrings and open your heart back.
Hold the pose for 5-10 breaths, then move into a sequence or exit by dropping your knees back to tabletop.
Tips for Mastering the Pose
Downward Dog can feel awkward for beginners and people with tight hamstrings. You may not have the perfect “heels to the floor” position right off the bat. Don’t worry! It’s perfeclty natural to ease into this pose and allow your body to open up over time. Use these tips to master your Down Dog for seamless flows and a flexibility release:
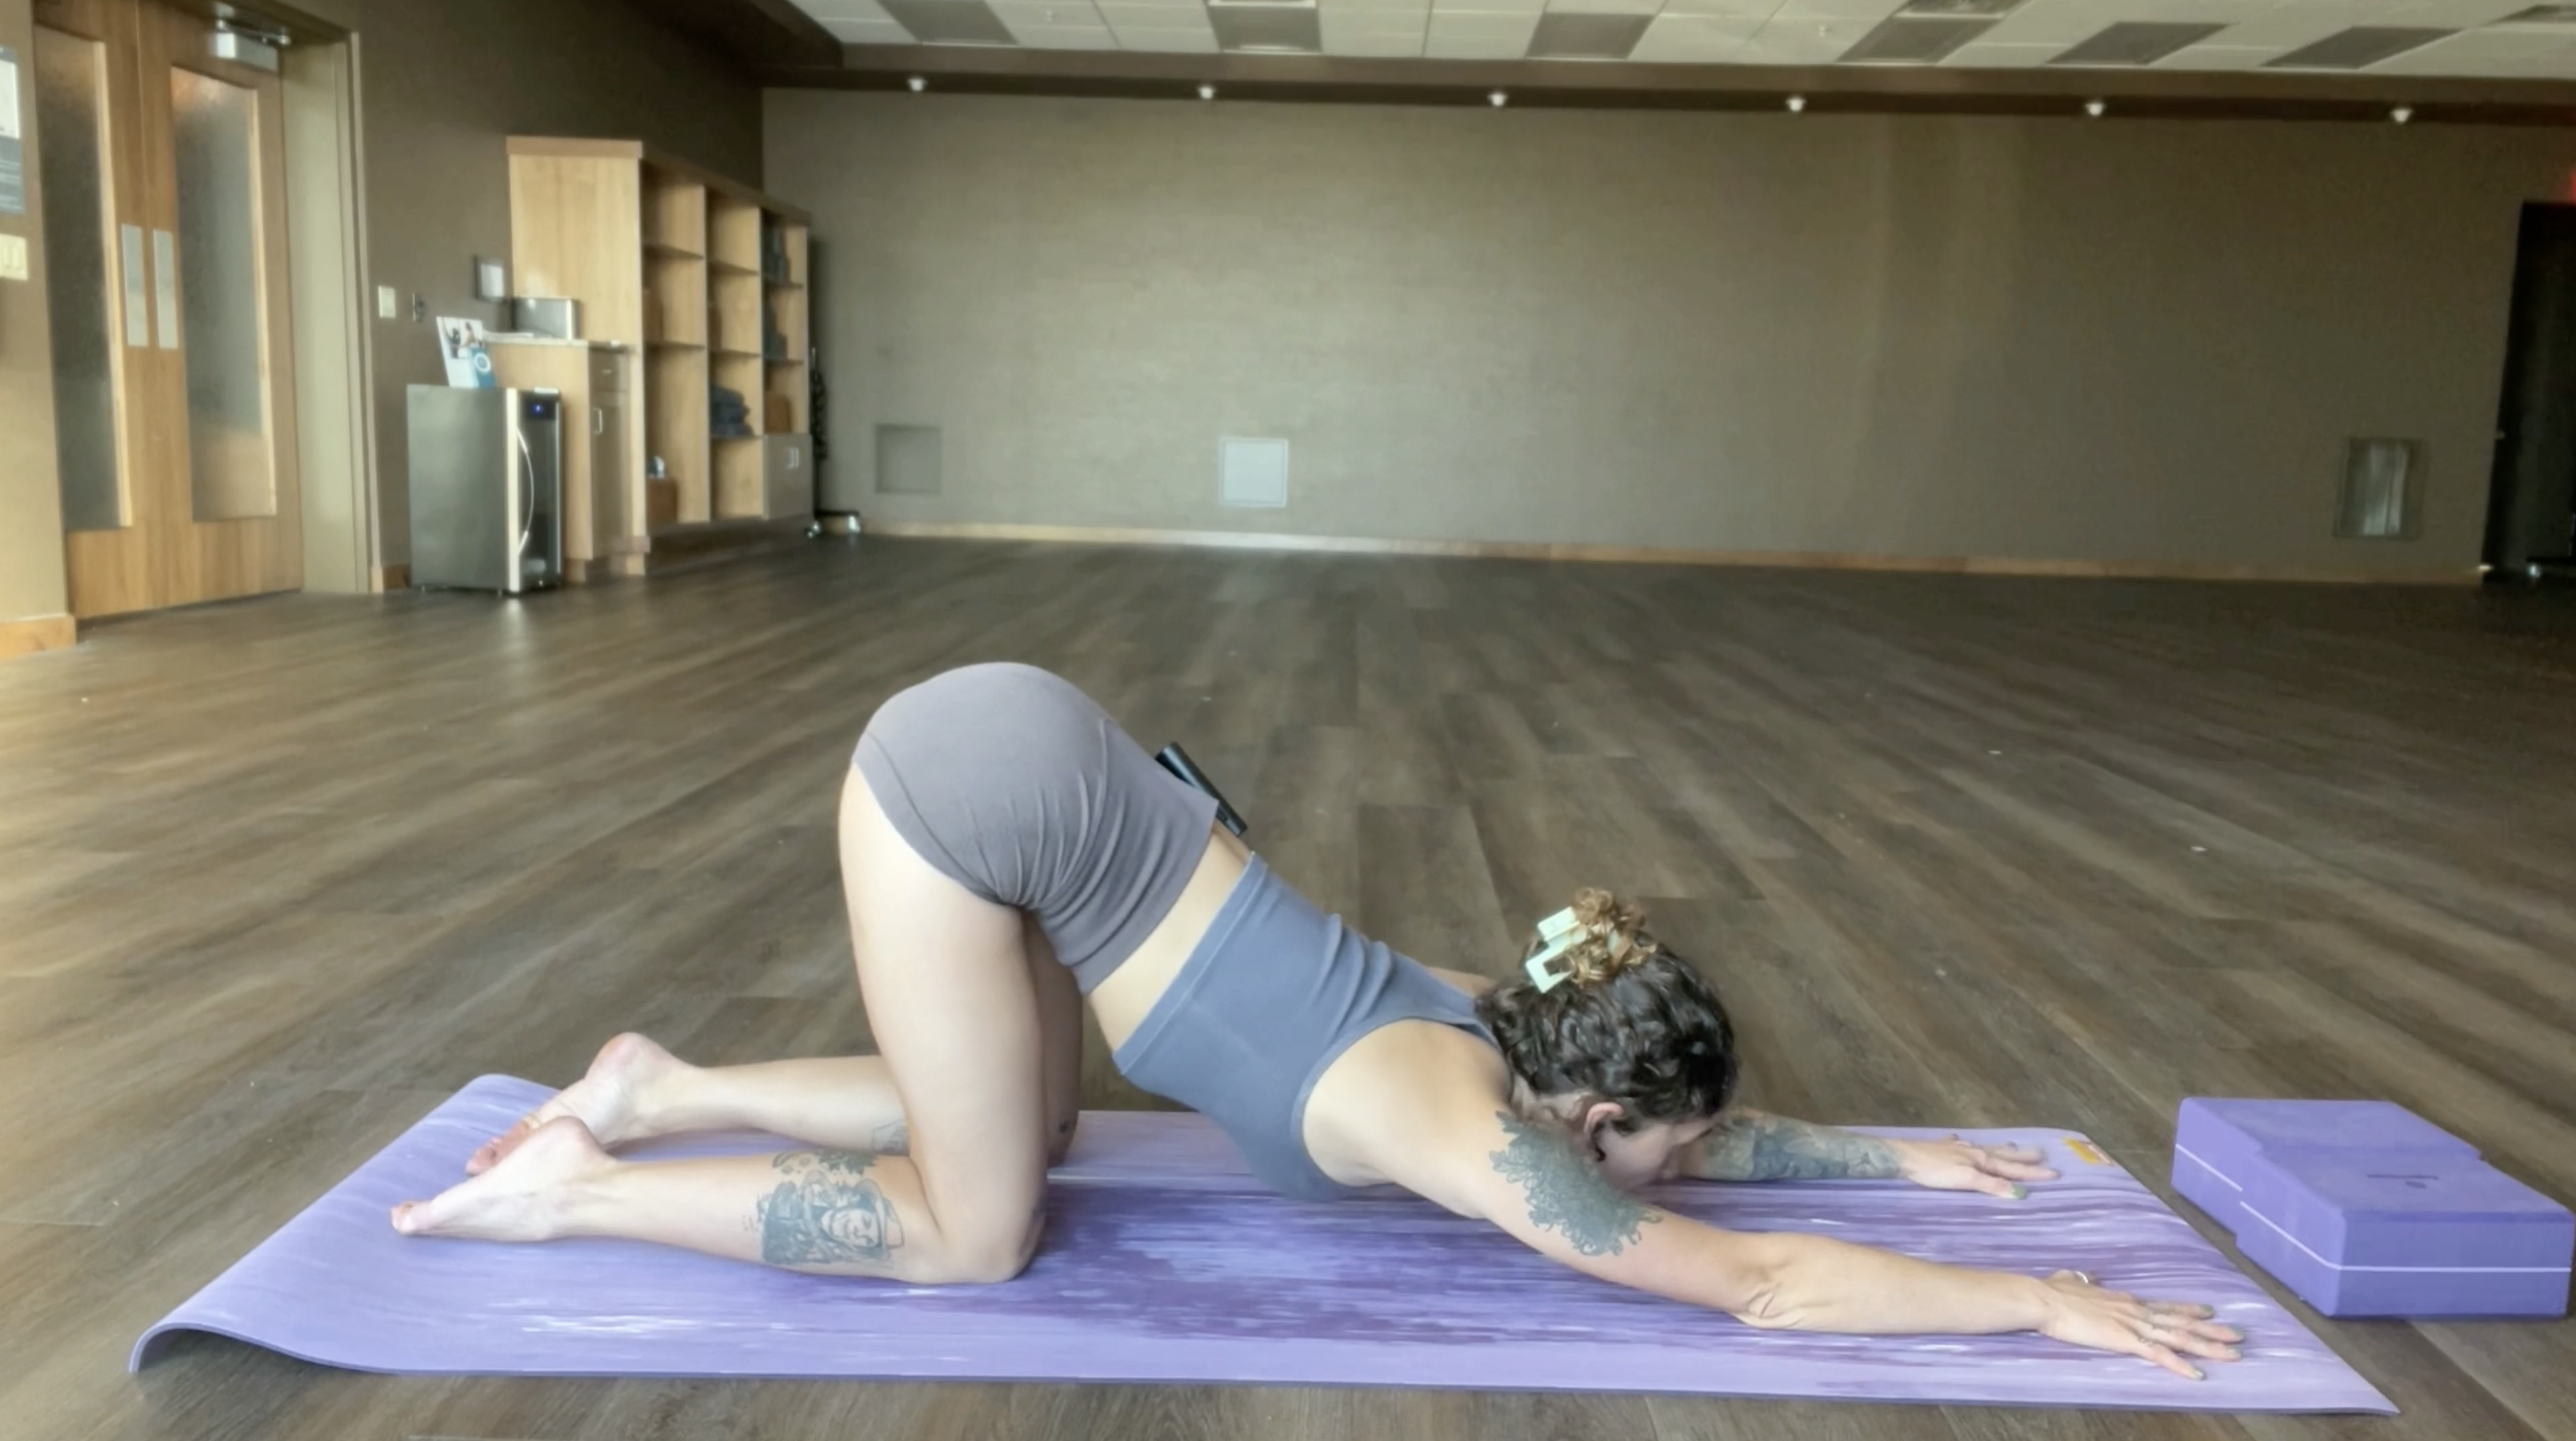
Tip #1: For Rounded Spine or Low Back Pain, Bend Your Knees
It is a common misconception that your legs have to be perfectly straight in poses like Downward Dog. In actuality, a micro-bend or even a deep knee bend is better for people with back problems. If you are trying to force your heels down without the full extension in your back, your spine can end up rounded and your pelvis curled under like a dog with their tail tucked.
When you are feeling any lower back tension during this pose, try coming up on the balls of your feet and bending your knees towards your face. Then, press your stomach toward your bent legs. As your pelvis untucks and your tailbone reaches upward, this simple bend in your knees can will quickly fix any alignment issues such as a rounded spine.
Tip #2: For Tight Hamstrings, Walk The Dog
If you have really tight hamstrings or soreness in the back of your legs, you may want to “walk the dog”. This saying is often used by yoga teachers to describe lifting your heels one by one to warm up and deepen the Down Dog stretch. On an inhale, lift up your right heel and press into your left. On an exhale, lower your left heel and lift your right.
Alternate between the two as if you are walking. Instead of holding completely still and hoping for your hamstringts to open up, the movement will build warmth. “Walking the dog” is especially helpful during morning yoga flows when your body still feels tight from sleep.
Tip #3: For Tight Shoulders, Adjust Your Hands
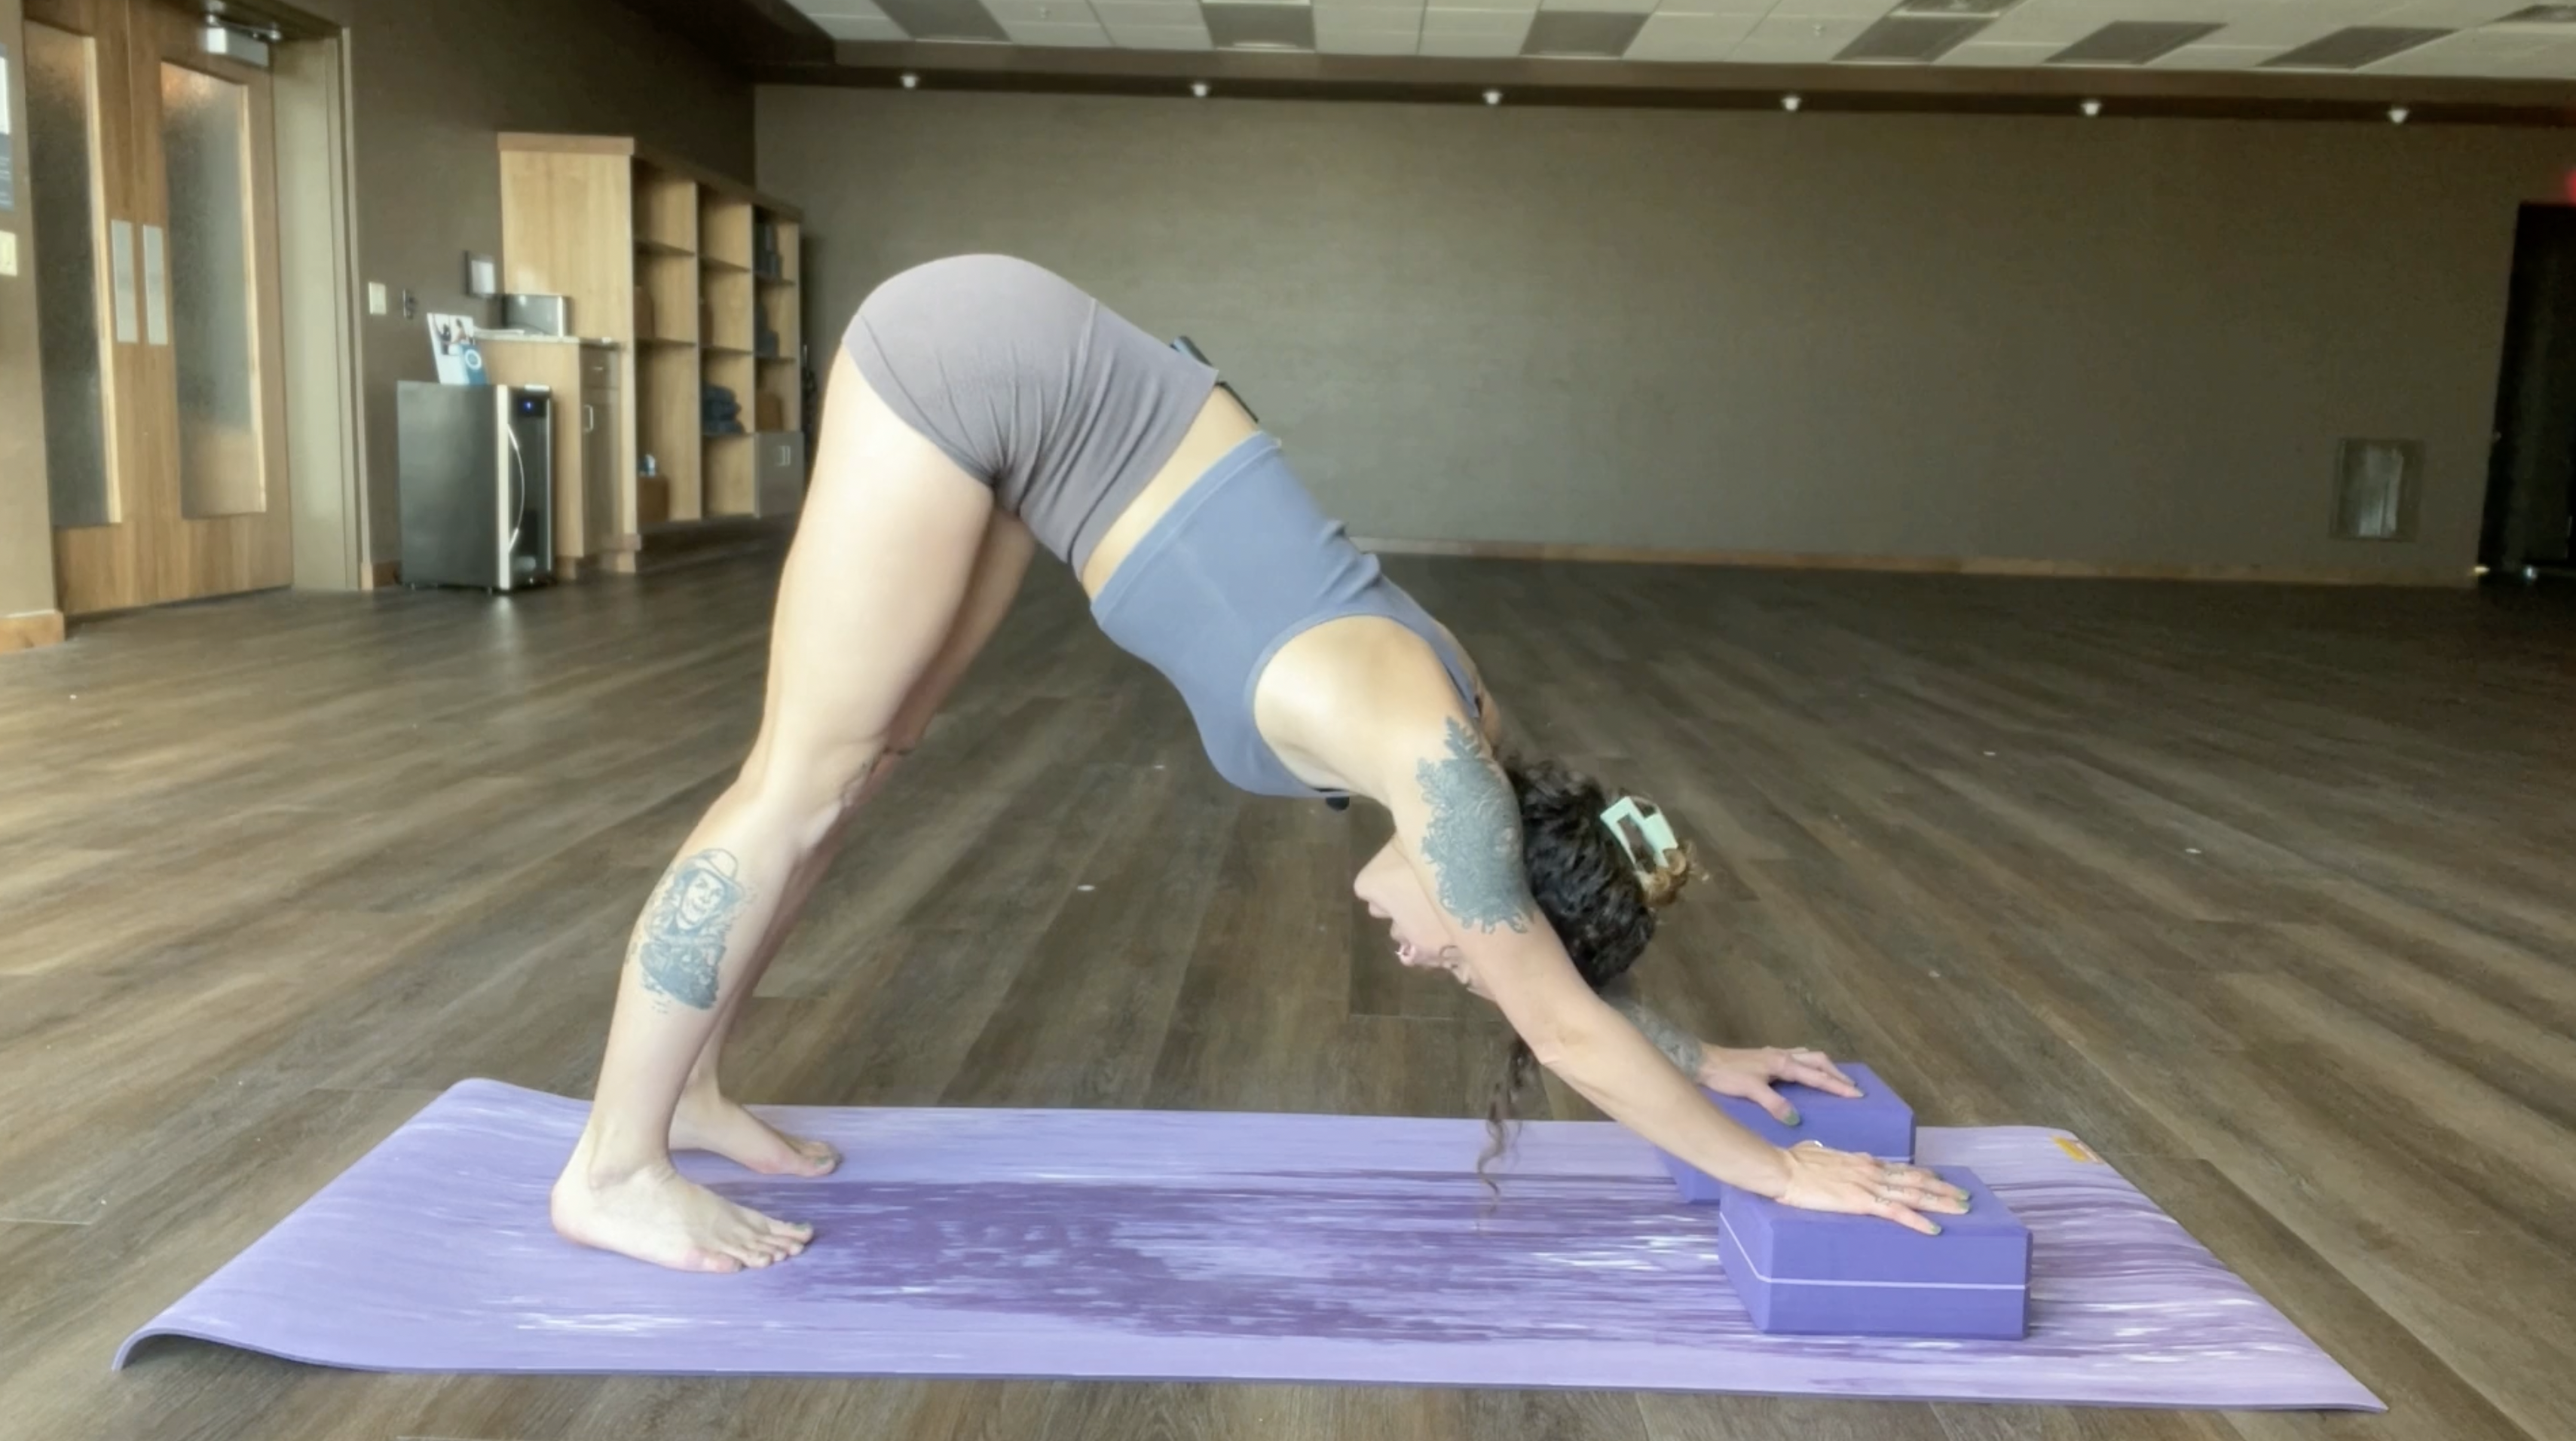
Some yogis feel too much tension in their shoulders to fully enjoy the heart-opening of Downward Dog. To fix it, simply adjust your hands. Move your palms away from your head or slightly wider than your shoulders. You can also rotate your hands outward to find a more comfortable position.
Tip #4: For More Traction, Try These Tricks
As your feet and hands press in opposite directions during Downward Facing Dog, it is very common to feel slippery or unstable. You can quickly use your zen as you try to balance your body in the upside down “V” shape while your feet and hands seem to slide all over the place. These quick fixes can make a world of difference:
First, make sure you have a quality yoga mat. This is especially effective for cork yoga mats or high quality synthetic mats like Lululemon’s The Reversible Mat or Alo Yoga’s Warrior Mat. add a spray of water (or sweat) to your mat to improve the stickiness. Some also prefer a 50/50 mix with white vinegar to strengthen your grip on the mat surface. If you need more grip during hot or sweaty yoga sessions, you may want to try a high-traction yoga towel. If you are still slipping, you can always try yogi gloves or yogi socks to increase your grip.Tip #5: For Sore Wrists, Widen and Press Through Your Knuckles
When you do a million Downward Dogs, your wrists can start to get sore from holding your body up. This is super common during Sun Salutations and Ashtanga sequences! To fix it, take some stress off your wrists and spread your upper body weight throughout your hands.
Press the mounds and center joints of your index fingers and thumbs into the mat. Then, ground through the outside of your palms. Feel your wrists lift up slightly as your hand muscles take on more of the load. This is an excellent pose for strengthening you wrists, hands, and lower arms to help prevent repetitive use injuries you might get at a desk job.
Common Downward Dog Mistakes
While Downward Dog looks easy at a glance, there are still many mistakes that can be made in this position. If you want to master this pose as the foundation of all future yoga practices, check that your alignment and positioning are free of these errors.
Common Mistake #1: Spine Curved and Pelvis Tucked Under
Have you ever seen a dog with a tucked tail? They appear frightened and defensive. They can’t be their joyful, tail-wagging self! This same thing can happen when you try to force your heels down prematurely during Downward Dog. Your spine isn’t quite ready for the full extension and you end up “tucking your tail”, curving yoru spine, and misaligning your pelvis.
When you are still working on your flexibility, it’s normal to try to push your body into what seems like the “right” position that you see everyone else doing in a yoga class. But yoga is not about picture-perfect poses! It’s about the benefits for your body and mind. When you try to match the perfect Downward Dog of the yogi with 10 years of experience, you could actually be robbing yourself of the benefits of this pose.
How to Fix It: Come up on the balls of your feet, bend your knees, and send your tailbone to the sky. Let your spine straighten out as you press your torso down toward the top of your thighs. Slowly lower your heels as your flexibility increases, but don’t let your tailbone and pelvis curve downward.
Common Mistake #2: Tension in Neck
Don’t forget to tuck your chin! Downward Dog can be extremely uncomfortable if you keep your neck arched forward. One of the most noticeable mistakes you’ll see in yoga classes is the people who are trying to keep looking up at the teacher while in their Down Dog. This can kink your neck and harm your alignment.
How to Fix It: Release your neck so that your spine is a straight line from your tailbone to the base of your skull. Let your head dangle between your arms and move your drishti (gaze) to the wall behind you or look at your feet. Imagine your neck as an extension of your spine and never hold it at an unnatural angle.
Common Mistake #3: Hyperextended Joints
As a rule of thumb, you should never lock out your arms or legs during yoga. Some yogis have hyper-mobility that causes them to overextend joints backwards. Hyperextended joints can place unnecessary stress on your joint cartilage and potentially lead to injury if you fall from the position.
How to Fix It: If you feel your knees or elbows “locking” during this pose, ease out of the position and create a micro-bend at the joints. Then, engage your leg and arm muscles. Imagine your hands and feet pressing toward each other on the mat as your surrounding muscles push up and back.
Strengthening the muscles around the joint and slightly bending will prevent you from overextending. People who are “double-jointed” should be especially careful to counterbalance their deep stretching by engaging the muscles.
Common Mistake #4: Stance Too Wide or Too Close
The width of your Downward Dog “V” shape will drastically impact your comfort and success in the pose. Your stance depends on your flexibility and experience. If your stance is too wide, you will feel unstable and potentially wobbly in your core, almost as if you are in a wide Plank Pose. If your stance is too close, you won’t enjoy as deep of a stretch and the pose gets “too easy”. A shorter stride is less work for your upper body because more weight is in your legs. You also can’t have the pelvis and spine fully extended upwards.
How to Fix It: Start in Plank Pose and keep your hands and feet where they are. Then, send your hips backwards and up. This is an ideal length of distance for your Down Dog. If you can, try to avoid walking forward to shorten your stance. However, you can also adjust your feet slightly until you find a position that is comfortable yet still moderately challenging.
Variations
There is more than one way to do the infamous Downward Dog Yoga Pose. If you’re slipping, tensing up, or feeling pain, here are a few modifications you can make to find more length and strength in Adho Mukha Svanasana.
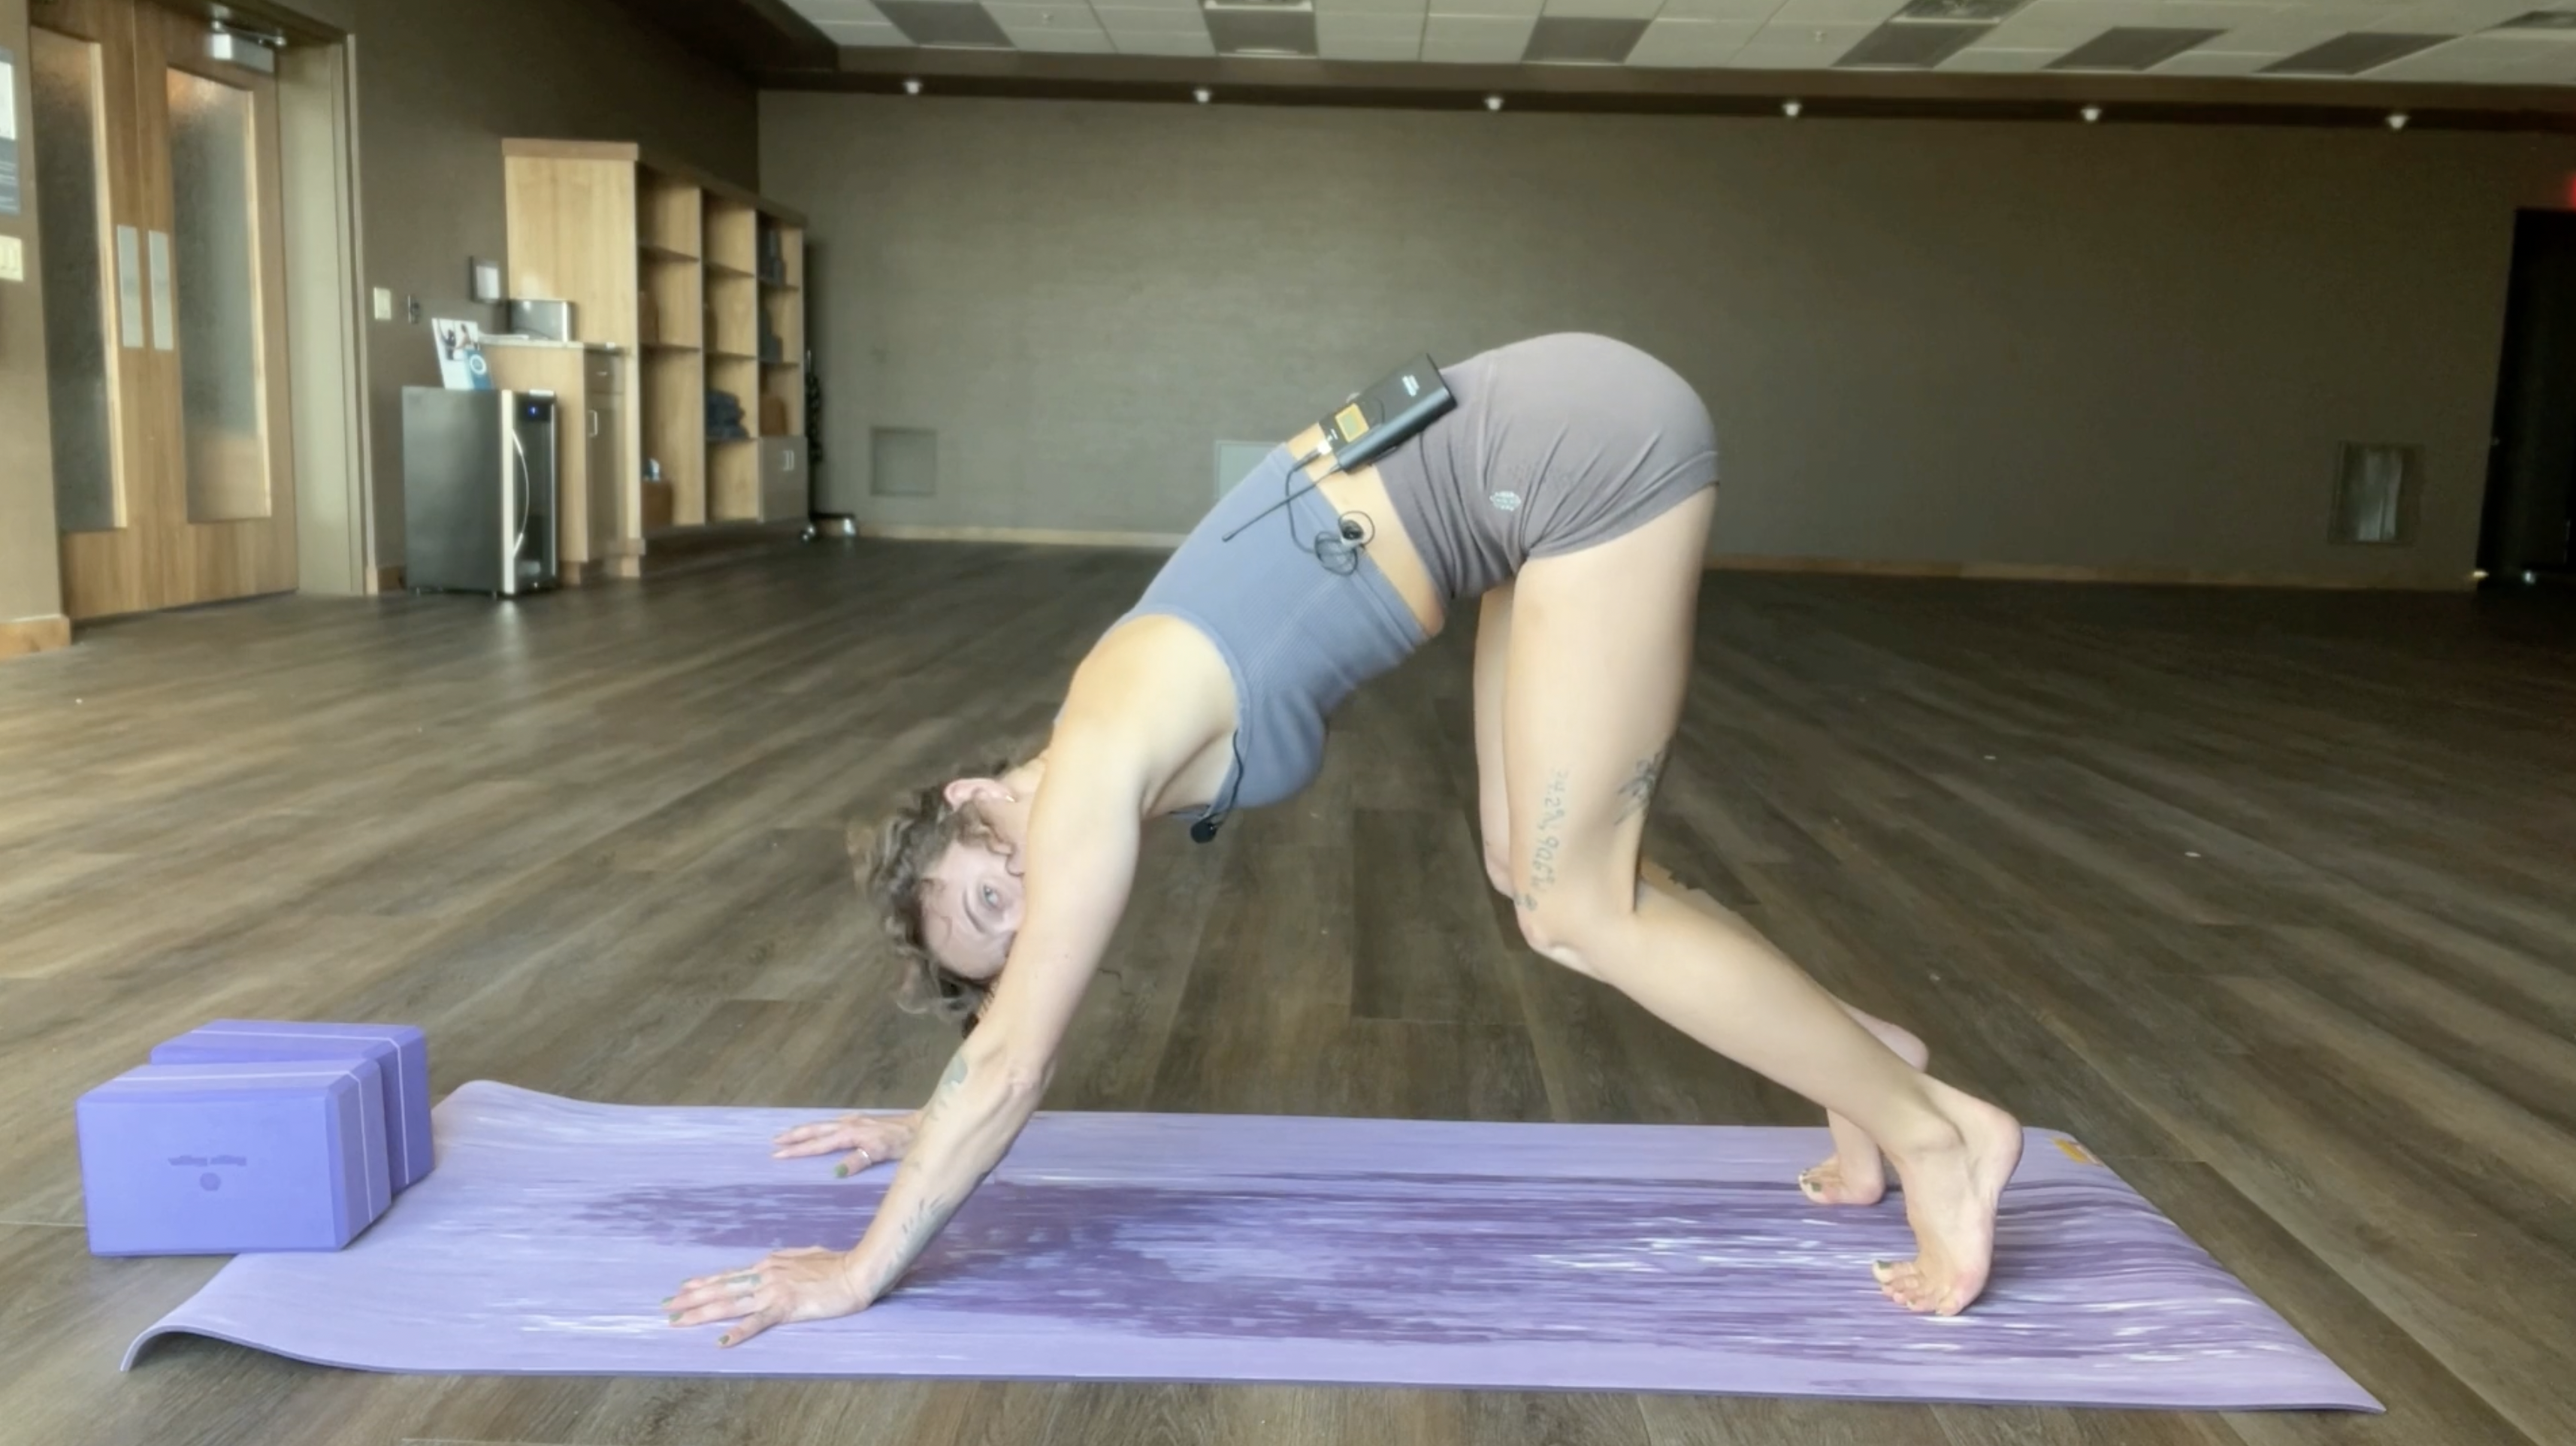
Bent Knee Downward Facing Dog
Whether you start in Plank Position or Tabletop, getting into Bent Knee Down Dog is as simple as pushing your hips to the sky and staying on the ball of your feet. Don’t worry about your heels touching the floor. Instead, keep your knees bent focus on your upper body pushing down and back as your spine completely flattens.
Wide Legged Downward Facing Dog
If it feels difficult to balance or maintain a straight back in Down Dog, you may find more freedom in this wide-legged version. To do it, press up to a Downward Dog as normal. Then, lift onto your tip toes and step your feet outwards to the full width of the mat. Keep your feet parallel to the sides of your mat. The heels should be grounded and toes remain actively engaged as you press into the floor.
Wall-Supported Down Dog
If you need a quick stretch at your desk or in public, this heart-opening back stretch gives many of the benefits of Down Dog without having to get on the floor. Place your hands on a wall at chest height with your arms straightened. On an exhale, step backward as your palms stay in place. Let your neck and heart release between your arms so that your shoulder blades are pushing together and your upper back is opening. Maintain engagement by pressing into the wall with your palms and into the floor with your feet. You can slightly bend your knees or keep your legs straight, as long as your toes remain facing forward.
Safety and Precautions
Down Dog is a overhwelmingly safe pose for children and adults alike. However, you should avoid this asana if you have underlying health conditions that might cause dizziness or problems when upside-down. If you have a hamstring injury, avoid stretching too deply in Downward Dog. Don’t collapse your shoulders or lock out your joints. Instead, keep the arm, leg, and core muscles active. If you feel nauseous or dizzy, come out of the pose immediately.
Teaching the Pose
If you want to teach others how to do Downward Dog, try these cues and reminders to keep students safe.
Start in the tabletop position. Check that your palms are shoulder width apart and wrists are slightly in front of your shoulders. Look down to the floor to straighten your spine. On an inhale, curl your toes under and draw your belly inward. On an exhale, push through your palms and the balls of your feet to press your tailbone up to the sky. Keep your legs bent if needed or press your heels to the floor for a deeper stretch. Check that your spine is straight and your pelvis is toward the back of the room. Don’t tuck your tail! To exit, simply exhale and bring your knees back to the mat.If you want to make adjustments, always ask first. The most common adjustments include gently placing your hands on the hips to push them back, or helping the student lengthen their spine.
Preparatory Poses
Downward Facing Dog is often in the very beginning of a yoga class, but it still helps to prepare your body with these beginner-friendly poses:
Child’s Pose (Balasana) Cat/Cow Pose (Marjaryasana/Bitilasana) Mountain Pose (Tadasana) Puppy Pose (Uttana Shishosana) Plank Pose (Phalakasana)Counter Poses
After a nice Downward Dog stretch, follow up with these asanas:
Standing Forward Bend (Uttanasana) to deepen the hamstring stretch Dolphin Pose (Ardha Pincha Mayurasana) to relieve sore wrists Child’s Pose (Balasana) to release your hip flexorsConclusion
Downward Facing Dog is an easy, universal pose, but that doesn’t mean it comes naturally! There are plenty of mistakes and adjustments needed to make this pose for you. Thankfully, you’ll have plenty of time to practice your Down Dogs in just about every yoga flow you do. As you progress, you should notice a deeper hip, back, and hamstring release. Just don’t forget to keep your spine straight and neck relaxed.
Namaste!


.jpg&h=630&w=1200&q=100&v=f776164e2b&c=1)