How to do Pigeon Pose in Yoga – Proper Form, Variations, and Common Mistakes
The post How to do Pigeon Pose in Yoga – Proper Form, Variations, and Common Mistakes appeared first on The Yoga Nomads.
 Hollif
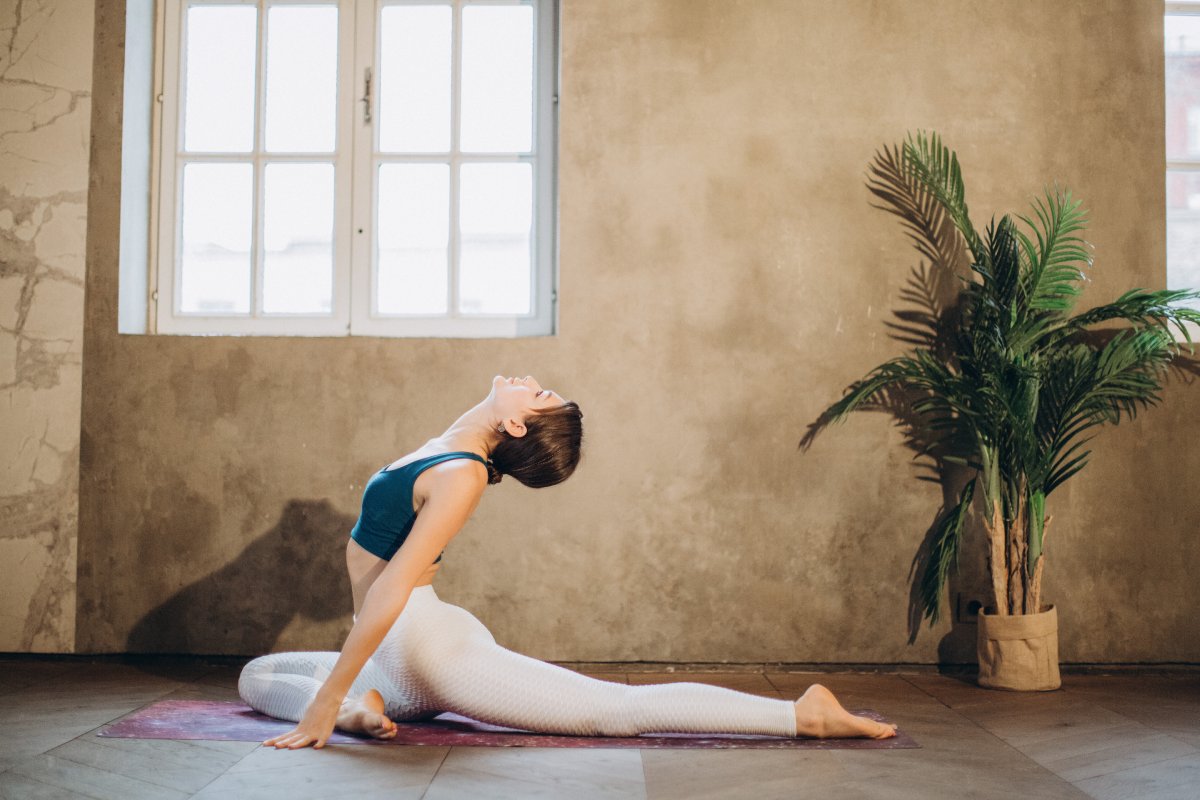
If you crave a release from tight hips or lower back pain, downward-facing Pigeon Pose (Ado Mukha Kapotasana) can feel like a dream come true. This beginner or intermediate hip-opening pose has an abundance of benefits for your body and mind. However, proper alignment is essential for preventing muscle strains or injuries in yourself or your yoga students.
Here is everything you need to know about practicing and teaching Pigeon Pose, including proper alignment, variations, and fixing common mistakes.
Pose Benefits
Sometimes called “the king of hip opener asanas”, downward-facing Pigeon Pose is actually a preparation for One-Legged King Pigeon Pose (Eka Pada Rajakapotasana), which involves lifting the back leg, reaching for the foot, and arching the back into the backbend.
Fortunately, you can enjoy all benefits of Pigeon Pose as a beginner- no flexy, bendy backbends necessary!
This deep stretch externally rotates one hip abductor while elongating the psoas muscle of the back leg.
As you melt your upper body over the top, you can feel a lovely release throughout the thighs, gluteals, and lower back. The result is a thoroughly relaxing pose that:
Lengthens and stretches hip flexorsSupports hip joint mobilityIncreases overall flexibilityImproves digestion through a gentle stretch and movement of the lower abdomen, promoting peristalsis (movement of digested food through your GI tract)Alleviates stress and promotes mental wellbeingTraditionally known to open the Svadistahana (sacral chakra), which is associated with creativity, sexuality, and pleasureMay help relieve lower back painMay help relieve sciatic painCounteract the effects a sedentary lifestyleWith a half split and externally rotated knee, pigeon pose stretches all those areas of the hips that become strained or sore after long periods of sitting or working at a desk. It also has the added benefit of preparing your yogi body for more advanced poses such as King Pigeon Pose (Eka Pada Rajakapotasana), Lotus Pose (Padmasana), and Lord of the Fishes (Matsyendrasana).
Step-by-Step Instructions
Pigeon Pose is commonly integrated into Vinyasa flows and standard Hatha sequences, however, you can practice this pose at any time during your yoga routine or even in the middle of the day for a quick hip release.
From a tabletop position, square your body and align your hands beneath your shoulders and knees bent beneath the hips.On an inhale, bend your right knee and bring your leg forward until the knee is just behind your right wrist.Next, slide the right foot under the left side of your body.Slide your left leg straight backward with the left foot facing the ground. This back leg remains straight out on the floor behind you with the left thigh slightly engaged throughout the pose. Slide it backward until your right ankle is beneath your left hip.You will begin to feel the outer hip of your front leg externally rotating as the knee splays outward. Adjust the right foot as needed to find a comfortable position.Keep your hips square and level toward the front of the mat. Do not allow your hips to twist or rock to one side.Your right knee should be aligned under your right armpit and the right heel should be directly under your left hip.For a deeper stretch, begin gently folding your chest forward and placing your elbows on the floor.Stretch your arms forward with palms together or facing downward. Rest your forehead on the floor.Keep your weight evenly distributed, feeling a compression on inside of the right hip and a deep stretch throughout the outside of the hip abductor.Exhale and let gravity draw your upper body down over the bent knee.Switch sides and repeat the process with the left knee bent and left foot under the right hip.Tips for mastering the pose
Pigeon Pose is a beginner-friendly asana that is great for home practice. If possible, try practicing your first Pigeon Pose in a studio under the guidance of a certified yoga instructor who can help you make proper adjustments.
With a few simple tips, you can work towards mastering this pose and expanding your hip flexibility over time.
Keep your hips square
Like many poses, the key to Pigeon Pose is proper alignment. It is crucial to keep your hips square toward the front of the mat. This means that both hip bones and shoulders are facing forward.
If you allow your weight to roll to one side, your body will fall out of alignment. Your sacrum and pelvis will be uneven (one side dipping closer to the floor than the other), which could lead to injury later on. You may also lose your balance while in the seated position and find yourself reaching to each side to stay stabilized.
Understand hip anatomy
There are 21 different muscles in the hip joint. Pigeon Pose is one of the most effective hip opener asanas because it targets so many parts of the hips.
The hip flexors are a core pivot point for your body. They are the group of muscles close to the hip socket where the lower lumbar vertebrae attach to your pelvis and the top of your thigh bone. These muscles are vital for bringing the leg forward while walking or running.
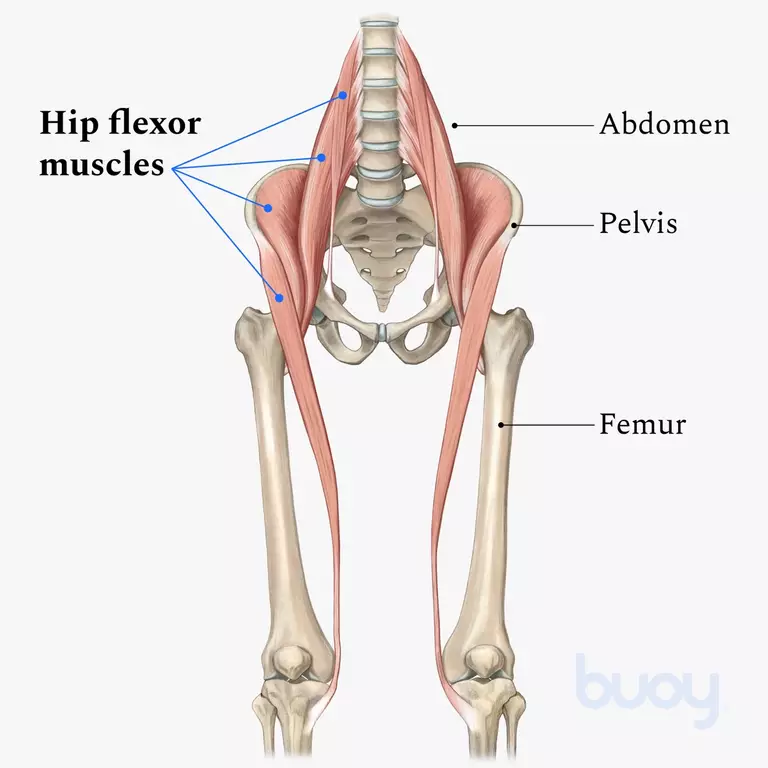
When strained or weakened (especially from an injury or from long periods of sitting), hip flexor pain can manifest in the groin, hips, and lower back and negatively impact your mobility.The psoas muscle translates to “muscle of the loin” in Greek. It connects the upper and lower half of the body, making it a major player in external rotation of the hip joint as well as stretching the lower back.
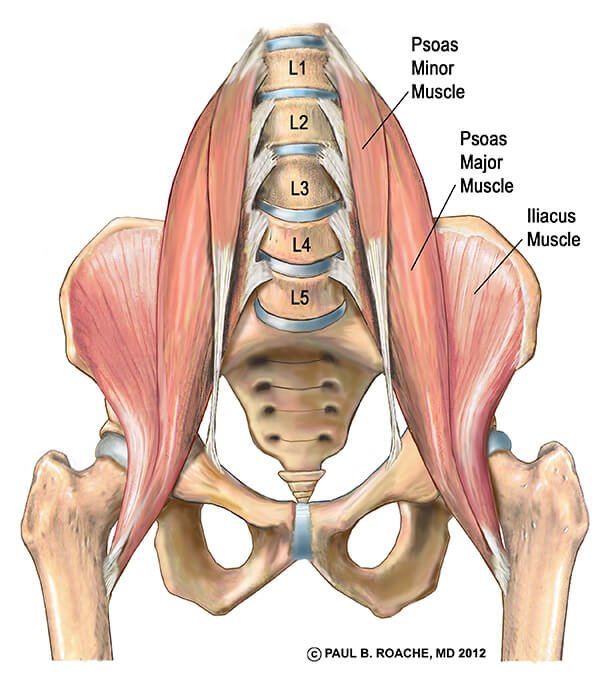
Pigeon Pose helps relieve tension from the hip flexors, gluteal muscles, and psoas muscles for more relaxation and freedom of motion.
Practice evenly on both sides
As with all parts of your yoga practice, balance is crucial for maintaining harmony and equilibrium in the body. In order to enjoy the full range of benefits of Pigeon Pose, you must hold it for an even amount of time on both sides.
Ease into it
It’s important to ease into this asana by adjusting the front knee as needed and moving the front foot closer or farther to adjust the intensity of the hip stretch. Use deep breaths to inhale and back out, then exhale and stretch further.
If Pigeon Pose causes any hip pain or extreme discomfort, you should back out of the pose immediately.
Use props if needed
For those of us with tight hips, props like a yoga bolster, block, or yoga strap can make Pigeon Pose tremendously more enjoyable.
Place the bolster or yoga block under the bent glute and hips or beneath your elbows to prevent the upper body from folding too far forward.
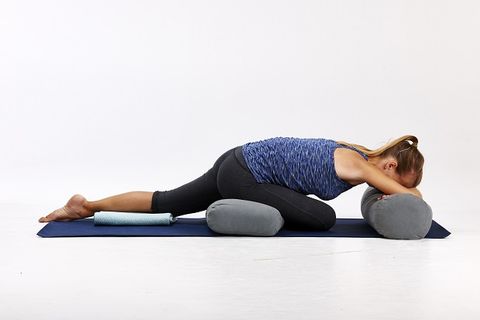
You can combine supported pigeon pose with other restorative bolster-supported asanas to relax after an intense workout or stressful day at the office.
When it comes time to try out King Pigeon, a yoga strap will also come in handy for reaching toward your rear leg without overextending the back.
Common Mistakes
Pigeon Pose is often a misunderstood asana because it’s easy to melt into the position and forget about maintaining alignment and activation in the muscles. Check your body for these easy-to-fix mistakes in Ado Mukha Kapotasana.
Mistake: Crooked Hips
When you first try out Pigeon Pose, the hip of your straightened leg tends to veer backward, creating misalignment.
How to Fix It: Bring your outer hip forward as you simultaneously push the other hip (of the bent front leg) backward.
Tip: Imagine your hips as headlights of a car. You want them to be perfectly parallel and shining forward.
Mistake: Over-Arched Back
Sometimes yogis who are trying to remain sitting up will find their back hurting in Pigeon Posture. However, this asana should never cause a strain or overextension in the lower back.
How to Fix It: Engage your core and imagine your belly button pulling toward your spine.
Tip: Fold your body forward and keep your abs contracted as your low back releases.
Mistake: Hips Don’t Touch the Floor
If one or both of your hips are lifted from the floor, this is a sign that you need to support your body until it develops enough flexibility.
How to Fix It: Use a bolster or folded towel beneath your outer hip to bring it down and into alignment.
Tip: Adjust your hips to be seated at a comfortable height that allows your hip to relax into the prop.
Mistake: Knee Too Close
Pigeon Pose was designed to externally rotate the hips, but in the process, some people may find themselves putting excess pressure on rotating their bent knee. When the knee is overly bent, it can cause a risky acute angle for the joint.
How to Fix It: Bring the shin away from you, keeping it as parallel as possible to the front of the mat.
Tip: Never force your knees into uncomfortable positions. If you feel pain in your knees at any point, back out of the posture or adjust the foot away from your body.
Modifications and Variations
What most of us think of us just “Pigeon Pose” is in fact a variation on a whole “family” of postures. You can try out several different versions of this asana to find what feels best for your body.
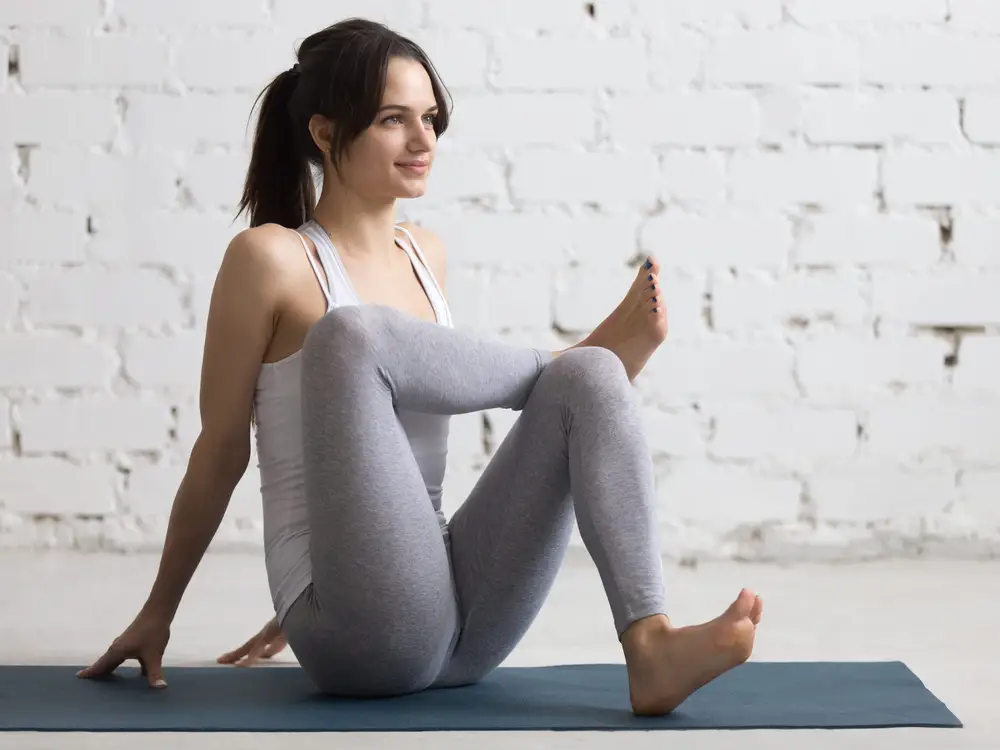
Beginner Variation: Seated Pigeon Pose
When you aren’t quite ready to lay your whole body weight on top of your tense hip, try out this seated variation that involves bending the right knee, placing the left foot atop the right leg, and pushing the left knee forward to open the outer hip. Hold and repeat on both sides for 5-10 breaths.
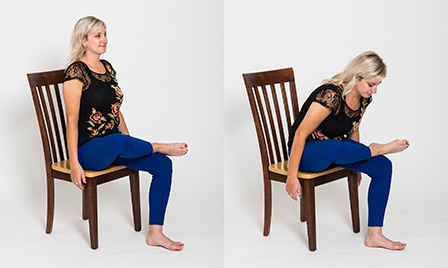
Chair Modification: Seated Pigeon with a Chair
Perfect for practicing at the office or helping yogis with a knee injury, these seated postures like Chair Pigeon are low-risk and easy to do anywhere.
Restorative Variation: Reclined Pigeon Pose
If you’d prefer to relax into your hip opening, try out a reclined variation while laying on your mat. You can use your knee to pull the externally rotated hip toward your body for the perfect amount of stretch. Be sure to keep your tailbone grounded to the floor throughout the posture.

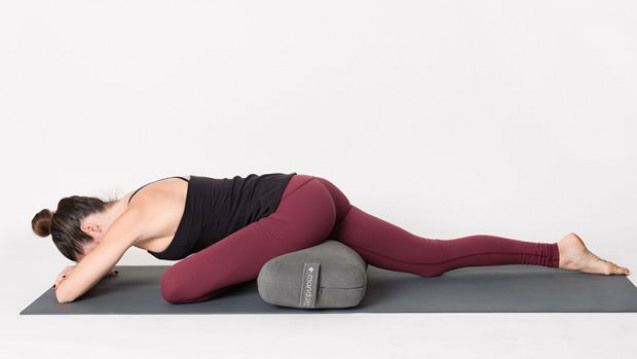
Bolster Modification: Downward-Facing Pigeon Pose
When your hips don’t quite reach the ground, a bolster is the perfect way to modify Pigeon Pose for more comfort and better alignment.
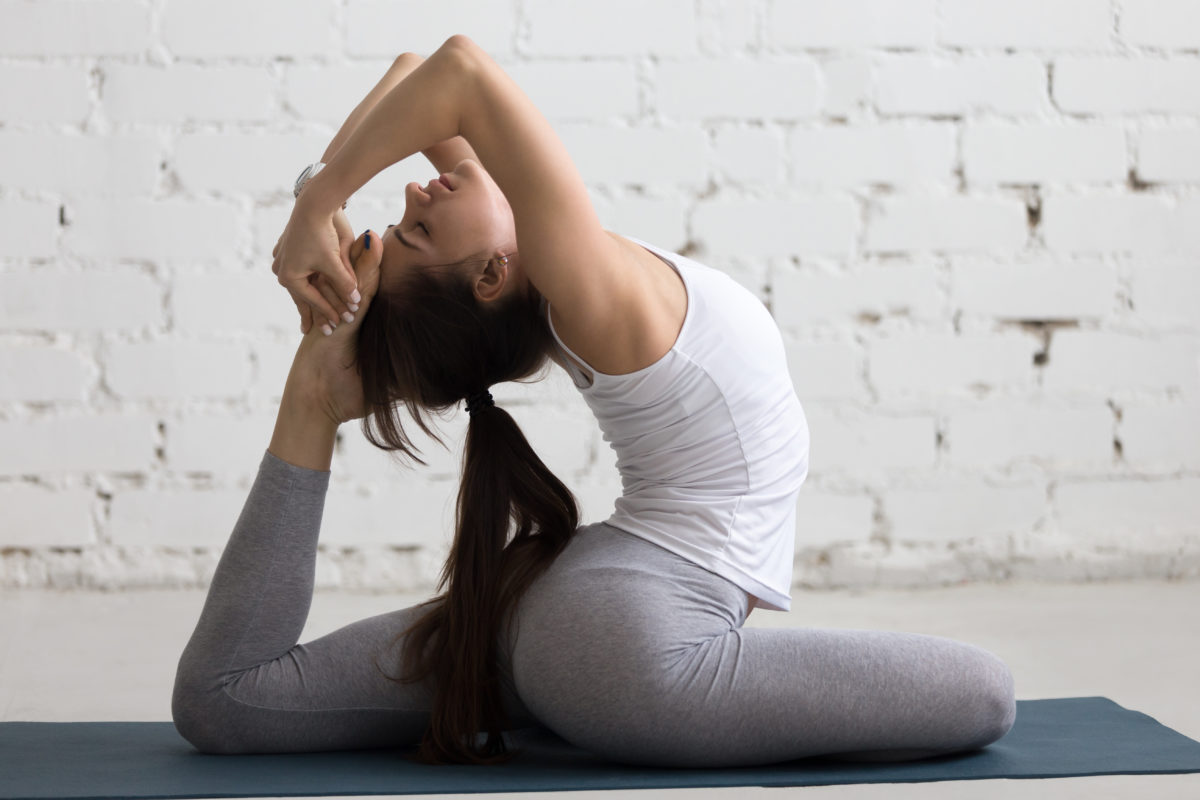
Intermediate Variation: Mermaid Pose
As you progress in Pigeon and notice your front hip feeling more loose and comfortable, you may want to try out Mermaid Pose as a stepping stone toward the full expression of One-Legged King Pigeon.
From the downward facing position, slowly push your body up, square the hips, and engage the core. Bend the back leg and reach to the side to tuck your left foot into your left elbow. Be sure not to crunch into the back or lose your hip-squared position as you attempt this variation.
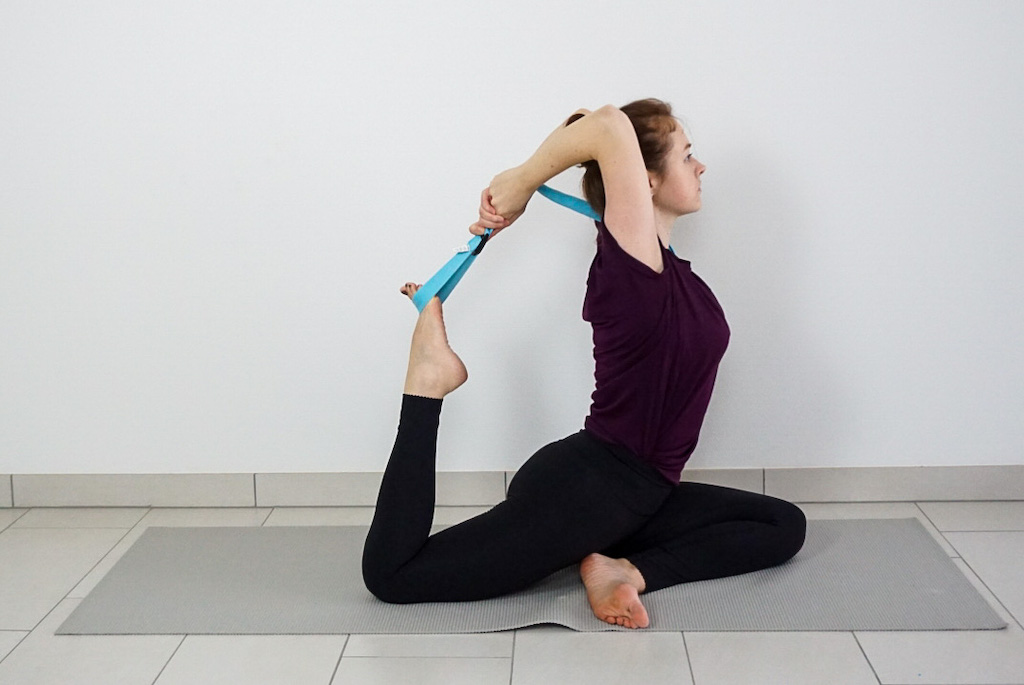
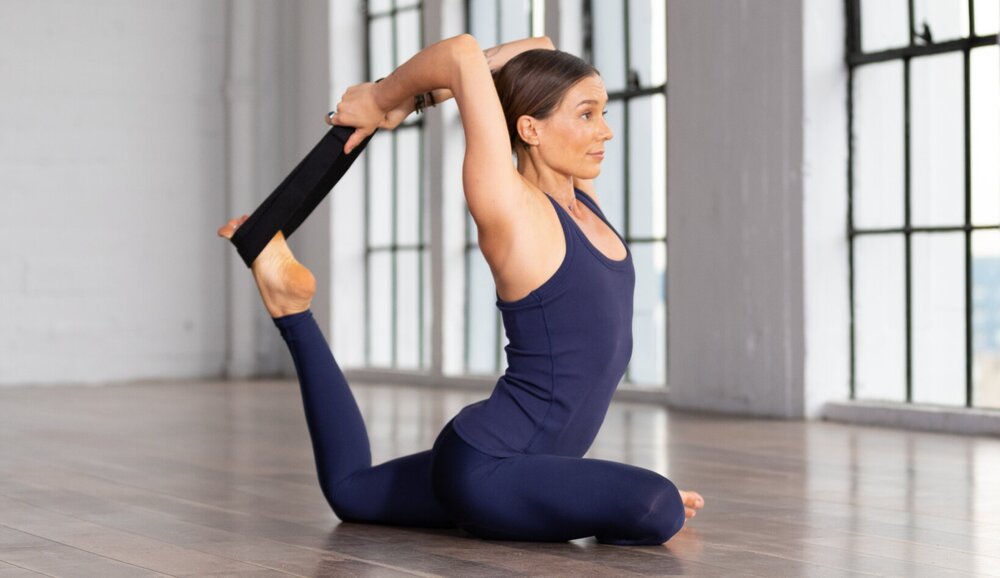
Strap Modification: Preparatory King Pigeon
As you progress toward the full expression of King Pigeon Pose, using a yoga strap is the easiest way to extend your arms and slowly work on your back flexibility.
Due to the back opening and intense quad stretch of this variation, be sure that you have properly prepared your body with warm up yoga poses and the guidance of a registered yoga instructor.
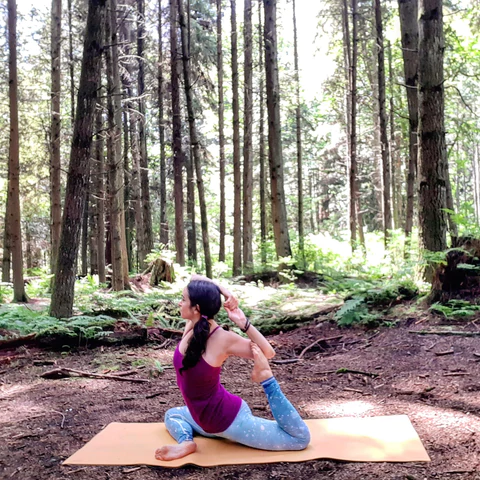
Advanced Variation: Eka Pada Rajakoptasana
The final advanced manifestation of King Pigeon is a full backbend with the bottom of the foot touching the tip of the head. This is a beautiful but intense asana that requires a lot of diligent practice and preparation.
 Beautiful young woman working out indoors, doing yoga exercise on blue mat, stretching with closed eyes, Eka Pada Rajakapotasana Pose, One-Legged King Pigeon Posture, full length, side view
Safety and Precautions
Pigeon is generally a safe posture to practice, however opening the hips too intensely can weaken, strain, or overstretch your tendons.
Avoid practicing Pigeon Pose variations or consult a professional before attempting this asana if you have any of the following conditions:
Hip injuryKnee injuriesChronic low back painSciaticaPregnancyKey Precaution: Knee Alignment
To prevent knee pain or over-compression in Pigeon Pose, your shin should remain parallel to the front edge of your mat as much as possible when practicing this asana.
Teaching the pose – Help your students with these cues
Teaching Pigeon Pose can be a bit awkward because of confusion around which foot, knee, or hip should be where. Use these cues to help demystify the pose for your yoga students:
If students are struggling to align their hips…
Return to tabletop position and re-square your hip bones so they are both directly above the knees.Bring your left knee to touch your left wrist. Keep the left thigh parallel to the mat.Inch your left heel over the right side and position it beneath your right hipbone.Now slide the right leg back behind you until the right shin is resting on the floor.To realign your hips, look back over your left shoulder and feel the right hipbone pulling forward to align the pelvis.Engage your right buttock and feel the lower body square towards the front of the mat.Turn your upper body back towards the front.If students have knee pain…
Your knee should not feel any pain or tension during this asana. If it does, begin making adjustments to widen the angle of your knee…First, try inching your front shin toward the front of the mat, opening the knee.Next, consider placing a bolster under the hips and glutes to lift the body up and take tension off the knee.If the knee is still struggling, place a block directly beneath it to prevent too much external rotation of the joint.If the stretch is too deep for students with tense hips…
Walk your left leg toward the front of the mat so the shin and foot are farther from the body.Bring your left foot farther over to the right side of the mat to reduce the intensity.Place a bolster or two stacked blocks under your elbows to bring the floor closer to your body.Optionally, place another bolster under the hips.Preparatory poses
It’s important to warm up the hip muscles before attempting a deep hip stretch like Pigeon Pose.
Beneficial poses for warming the hips include:
Sun SalutationsDownward Facing DogChild’s PoseButterfly Pulses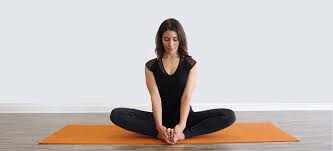 Low LungeLunge with Quad StretchReclined Pigeon/Needle Pose
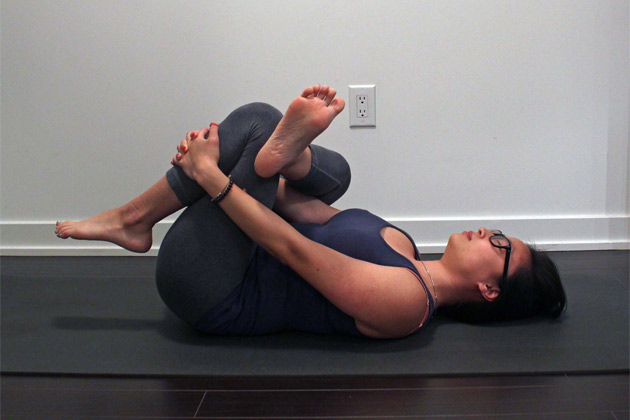 Forward FoldFrog Pose
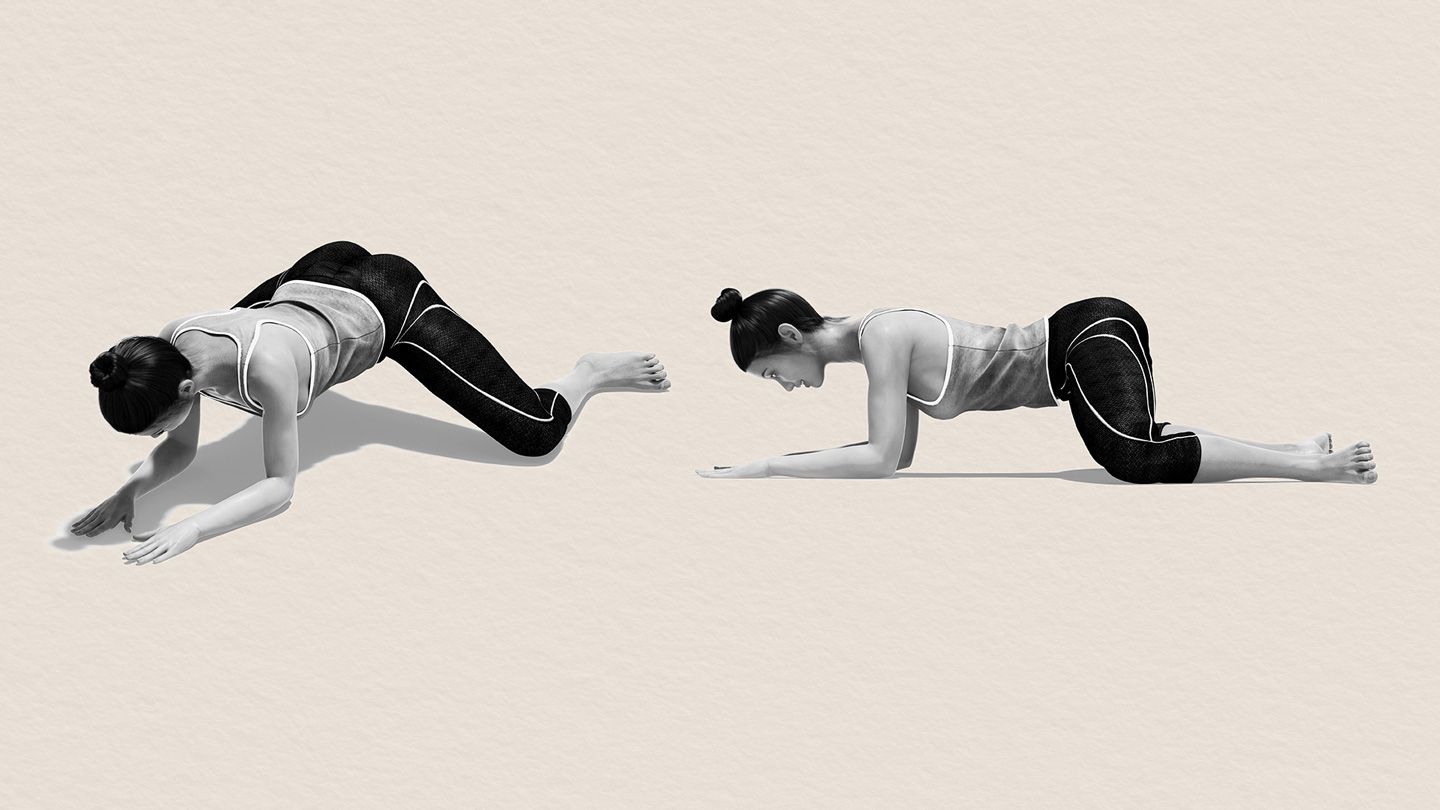
Counter poses
After holding Pigeon for 5-10 breaths, it helps to release the hips with a few counterposes:
Seated TwistKnees-to-Chest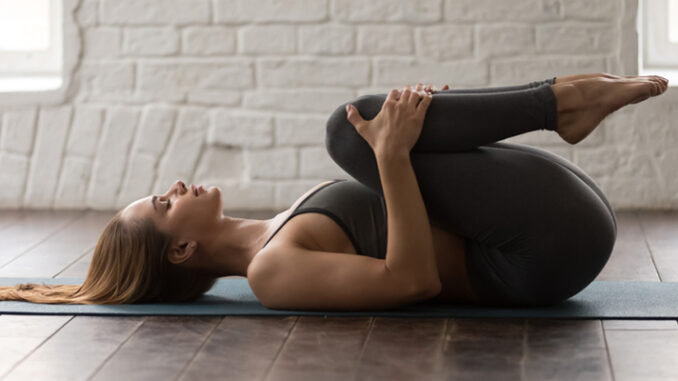 Reclined TwistChild’s Pose
Conclusion
Downward-facing Pigeon Pose (Ado Mukha Kapotasana) is an extraordinary release for tense hips, low back pain, sciatica, and even digestive complaints. As long as proper alignment is cued and maintained, this asana is safe for beginners and advanced yogis alike. When in doubt, use props like bolsters and blocks to support a great stretch and mental relaxation.