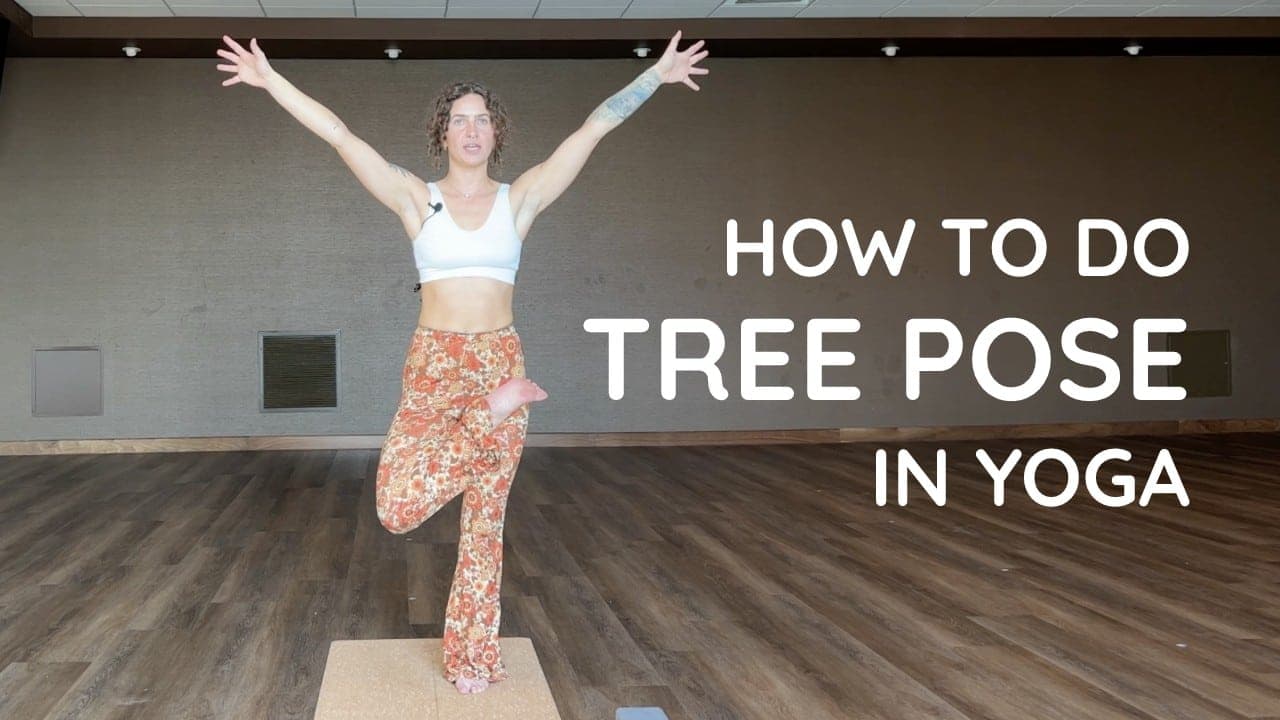
How to Do Tree Pose in Yoga (Vrikshasana) – Proper Form, Variations, and Common Mistakes
The post How to Do Tree Pose in Yoga (Vrikshasana) – Proper Form, Variations, and Common Mistakes appeared first on The Yoga Nomads.
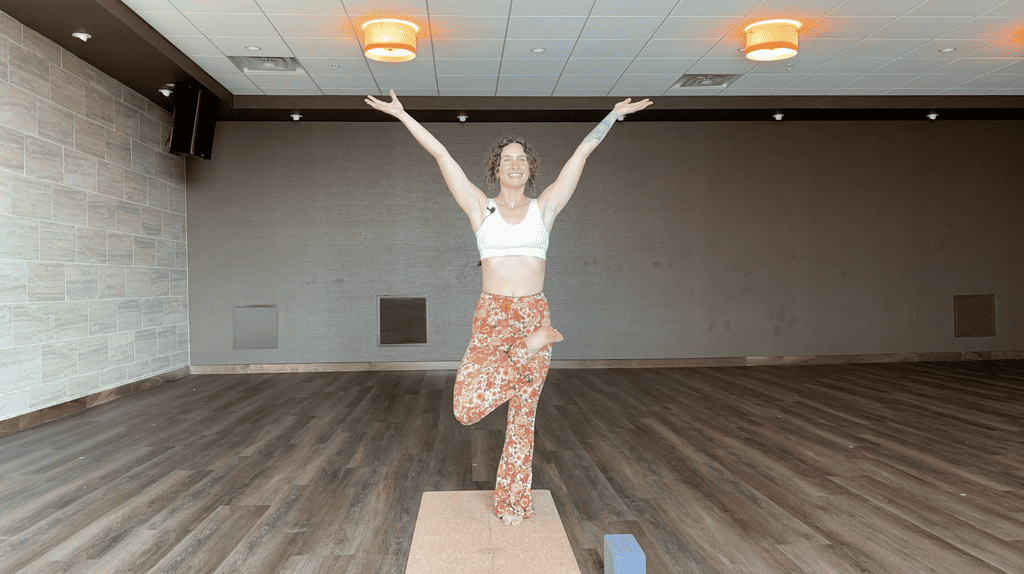
If you are need in of grounding or balance, Tree Pose encourages you to root into the Earth and harness your inner power. Depending on your flexibility, this beginner-friendly pose can be practiced with your foot on your calf, knee, or hip.
As it challenges your balance, Tree Pose also strengthens your legs and feet, opens your hips, and aligns your spine. Here is everything you need to know about mastering this pose and enjoying all the benefits of Tree Pose.
Prefer video? Here’s our complete tutorial on how to perform Tree pose:
Pose Benefits
Mental and physical balance are two sides of the same coin. If you find yourself struggling with work-life balance or finding peaceful harmony in daily life, you may need to cultivate more balance in your yoga practice. Inspired by noble, strong-standing tress, Vrksasana (Tree Pose) challenges your focus while strengthening the lower body. The benefits of Tree Pose include:
Boosts energy and confidence: As you stabilize and channel your inner tree, this strengthening posture can send a sparkle of renewed energy and self-esteem through your body. Improves balance: Standing on one leg in Tree Pose is undoubtedly a test of your balance. It activates all the smaller muscle groups that build your coordination and stability. Strengthens your core muscles: Any yoga pose that calls for stabilizing and alignment will strengthen your core. A strong Tree Pose includes an active, engaged core to keep your body steady. Stretches your feet: As you root into your mat with one foot, this asana strengthens and lengthens the tendons and ligaments in your feet. Hip opening: The lifted leg in Tree Pose actively stretches open your groin and externally rotates your hip flexors for a nice relief from any hip tension.Step-by-Step Instructions
Vrksasana is one of the most beginner-friendly balancing asanas with plenty of opportunity for advancement. Here’s how to do it:
Stand strong in Mountain Pose with your feet hip width apart. Spread your toes and press into the mat. Feel the balls of your feet and your heels root into the mat while engaging your foot arches upward. Inhale deeply, lift your chest, then exhale and roll your shoulder blades down your back. Find a drishti (focal point) directly in front of you to focus on. Engage your legs and slightly bend your right knee, then shift your weight into the right foot. Optionally, put your hands on your hips or spread out to the sides to help balance. Lift the left leg up and place the sole of your foot on the inside of your calf muscle. If you are more flexible, move the foot up to your knee joint or thigh. It is natural for your pelvis to tilt as you lift one leg. Tune into your alignment and tighten your core to shift your hips so they are square toward the front of the room. Bring your palms together at heart center or extend your branches up above your head and out to the sides. Keep your gaze directly forward with your spine straight. For the deepest hip opener modification, bring the lifted leg up higher and rotate the sole of your foot outward, placing the top of your foot high onto your opposite hip bone. Engage the glutes to realign the hips forward. Hold for several breaths as you create resistance between the downward rooting and upward reaching. Gently lower the lifted leg and repeat on the other side.Tips for Mastering the Pose
Every tree needs a strong trunk to support its flowering branches. The quickest way to master Tree Pose is to build a solid foundation before moving into more challenging variations.
Tip #1: Find a focal point
Where your eyes go, your focus flows. The yogic practice of drishti is all about concentrating on your gaze on a focal point so you can heighten your awareness in the present moment. In a balancing pose like Vrksasana, your drishti helps you stay as stable as possible.
Keep your gaze directly forward and slightly up. Find a place on the wall, window, or a specific item to stare at. This tip alone will drastically improve your balance. Don’t look at the ground or dart your eyes around to different places.
Tip #2: Keep your hips square
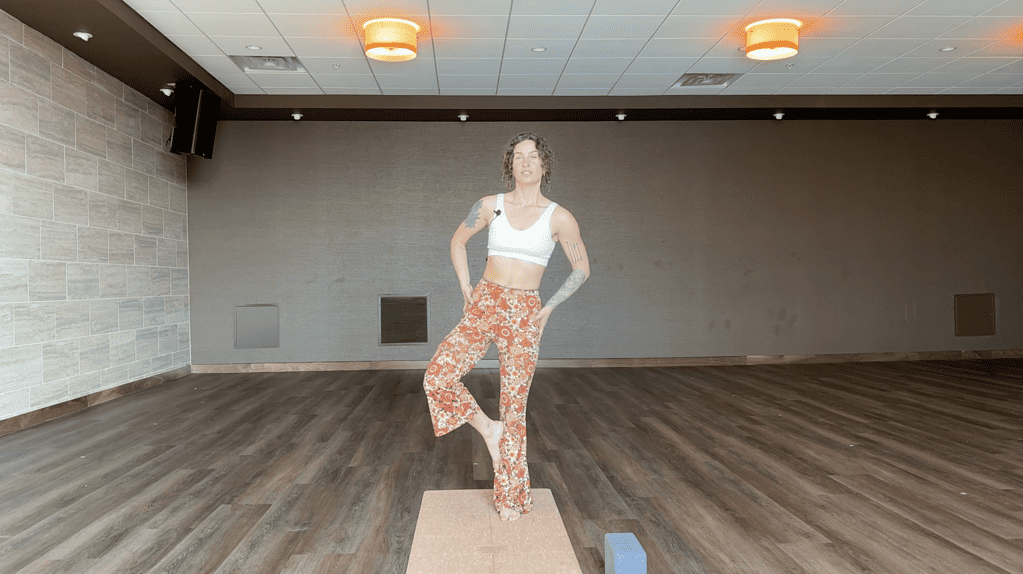
Pelvic alignment is absolutely key for a stable Tree Pose. When you lift one leg, it is natural for your body to sway slightly to the side. You may notice one hip is higher than an other. Practicing in front of a mirror will make this tilt more evident.
To square your hips back to a stable, aligned position, engage your lower belly by imagining your belly button pulling back toward your spine. Place your hands on your hips and engage your glutes to actively lower the lifted hip back down. This will return your pelvis to the same position as it would be if you were standing evenly on both legs.
Tip #3: Don’t force your knee
The most common reason people fall out of Tree Pose is because they are forcing their knee into an awkward angle before they are ready. If your hip-opening capacity is limited, that’s OK!
Simply keep your foot at a lower point so that the knee can bend comfortably and your hips can stay facing forward. If you force your foot up the leg and splay the knee joint, it can twist your pelvis and mess up your alignment.
Tip #4: Find a center of gravity before progressing
Imagine a center line through your body running from the top of your head down to the middle of your feet. Your center of gravity is regulated by your core engagement. Before you dive into a full Tree Pose, practice centering your “trunk” and grounding the standing leg. You can do this while hovering the lifted leg above the ground and focusing solely on your balance.
Tip #5: Laugh when you fall and try again
This tip applies to every balancing pose. Laughter is essential to your yoga practice! If you wobble and fall out of Tree Pose, just giggle and keep trying. Asanas are not supposed to be overly serious or competitive.
If you want to try “flowing with your fall” simply reach your arms out and get a little “wavy” as you try to rebalance yourself. Remember, a flexible bendy trunk is more resilient than a rigid one. It’s nice to be a little playful when you wobble and try to find ways to stabilize without letting your foot hit the ground. Think of it like a game!
This is a great metaphor to apply to life as well. When things get hard, try to flow with it rather than fight the challenge. The more mental balance and emotional flexibility we have, the easier it is to confront life’s inevitable tests and obstacles.
Common Mistakes
At first glance, Tree Pose looks very simple. However, holding this posture can become overly complicated if you don’t address your alignment and foundation.
Common Mistake #1: Wobbly standing leg
Beginner Tree Pose is often met with a wobbly, swaying motion like a young tree in the wind. Many people forget to anchor their base leg before attempting to balance. The result is an unstable balancing posture. This is perfectly normal, but it can be fixed to make your Tree Pose stronger and more enjoyable.
A massive redwood tree cannot grow to its fullest glory without a strong trunk. The trunk of a tree is built slowly over time and we need to harness that same patience to establish a robust standing leg before lifting into full Vrksasana.
How to Fix It: Activate before you lift! Slightly bend that standing leg and barely hover the other leg off the ground. Tighten the calf, squeeze the quad, and engage the glute. Feel the strength of all those muscles engaged around the knee and ankle joints.
Root through your standing foot by gripping the mat with the ball of your foot and your heel. The arch of your foot may lift and engage. The toes should be spread wide. Shift all the weight of your body into this strong foundation.
Before lifting your other leg, you should feel steady and 100% grounded.
Common Mistake #2: Shrugged shoulders
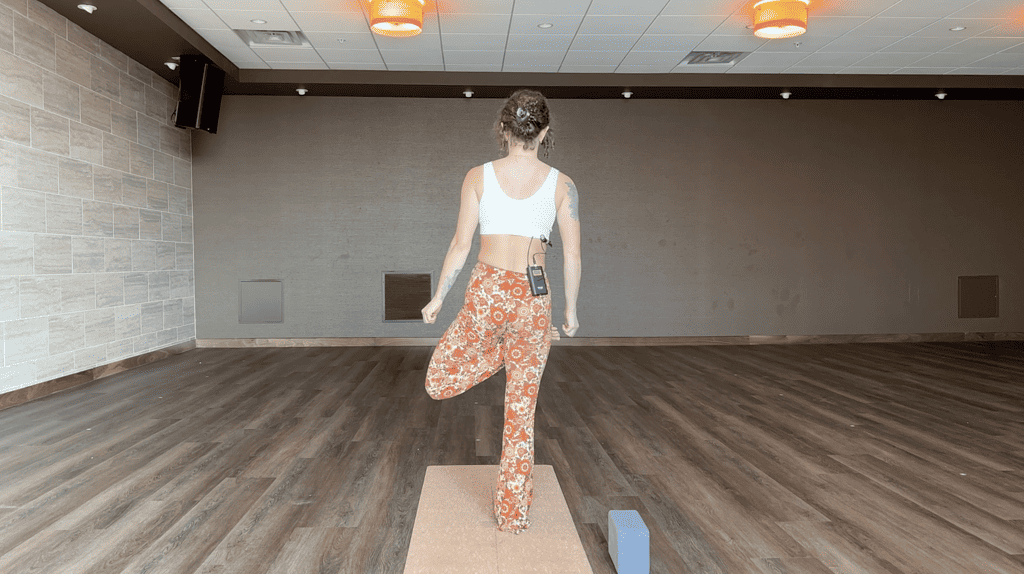
In most balancing poses, we get so focused on not falling that we forget to address the upper body. Once you feel rooted down, it’s time to shift your attention to the arms and shoulders. Whether your hands are in prayer position or you lift your arms overhead like spread branches (either way is great)… be sure that your shoulders aren’t shrugged up toward your ears. Tense, heightened shoulders can result in neck pain and improper alignment.
How to Fix It: Imagine your shoulders rolling back and down. Tree Pose requires a perfectly straight spine to improve your posture and keep the body straight. On an exhale, feel your shoulder blades should roll down your back so they touch in the middle of your back. This will expand your chest and slightly open your heart to make your Tree more powerful!
Our joints are the crux of every yoga pose. We want our yoga practice to stretch and strengthen them, not hurt them! Many beginners place their raised foot on the knee and press into it to help balance. Not only can this cause pain, but it can push your knee joint into a very awkward position.
For example, if you are standing on your right foot, you want to place your left foot either above or below the right knee. If the foot is pushing directly into the knee, your form may be compromised.
How to Fix It: Tree Pose has a variety of anchor points for your lifted leg, but your knee should always be avoided. Instead, make sure the sole of your lifted foot is placed on one of these safer locations:
Beginner: The lower calf Intermediate: The inner thigh Advanced Tree: The top of the foot presses into the hip as the ankle rotates and the foot sole faces outwardYour knees should never be locked out or feel any pressure. Keep a slightly bent leg at all times.
Common Mistake #4: Darting eyes causing imbalance
If you are looking around the room as you try to balance, you probably won’t last long in Tree Pose. A darting gaze diverts your center of gravity. This is the same reason why you don’t look down when you are climbing upward. Where our attention goes, our focus flows. As we mentioned above, drishti (your focal point) is key for strong balancing asanas.
How to Fix It: Find a spot in to focus on and fixate your eyes in that position. Choose a focal point that is not moving or changing. In a yoga room, it’s usually best to pick a spot on the wall a few feet to a few yards in front of you. When practicing outdoors, the horizon or a part of the landscape are reliable visual anchors.
As you breathe a lift, keep your eyes fixed on this point and do not waiver. Let any movement around the focal point blur and drift into the distance. Notice how you feel steady and grounded.
Common Mistake #5: Arched back
Sticking your butt out in Tree Pose will only hurt your lower back. Similarly, too much arch in the upper body can feel unnatural and unsteady. Your spine should feel elongated and straight as you stand tall in Vrksasana.
How to Fix It: Imagine your butt tucking slightly forward and down. As the glutes activate and squeeze together, the lower back will straighten. This will rotate your pelvis slightly forward as well, which can help with hip positioning.
Engage your abdominal muscles and imagine your belly button reaching back toward your spine. This will help you gain balance and further straighten your back.
Variations
Depending on your hip mobility and balance, you can modify Tree Pose to meet you right where you are.
Low Block Beginner Tree Pose
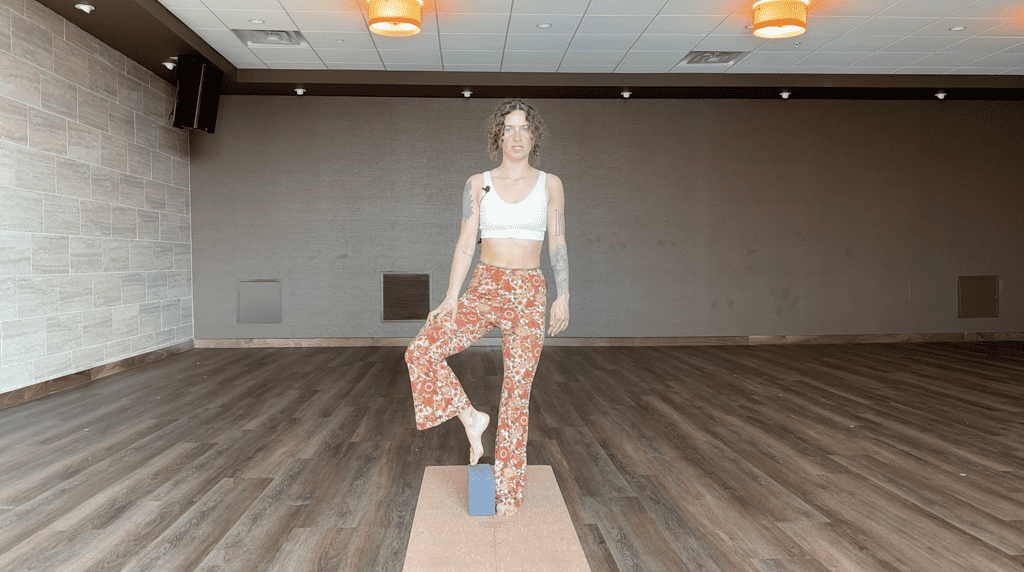
For those who aren’t ready to completely balance on one leg, a yoga block is the best way to start practicing! If you can’t quite lift your foot high on your leg, you can still enjoy the benefits of Tree Pose with this low-key assisted variation:
Stand tall in Mountain Pose with feet hip width apart. Place a block directly between your feet. Slightly bend your right knee and engage all the muscles in your right leg. Feel your right foot anchor into the mat. Lift your left leg and place the ball of your left foot on the yoga block. Allow the arch of your left leg to mould to your right ankle bone. Shift your hips to ensure they are square and even. Practice incrementally lifting the foot from the block to feel your weight shift into the right leg. Hold for 5-10 breaths and repeat on the other side.Calf Tree Pose
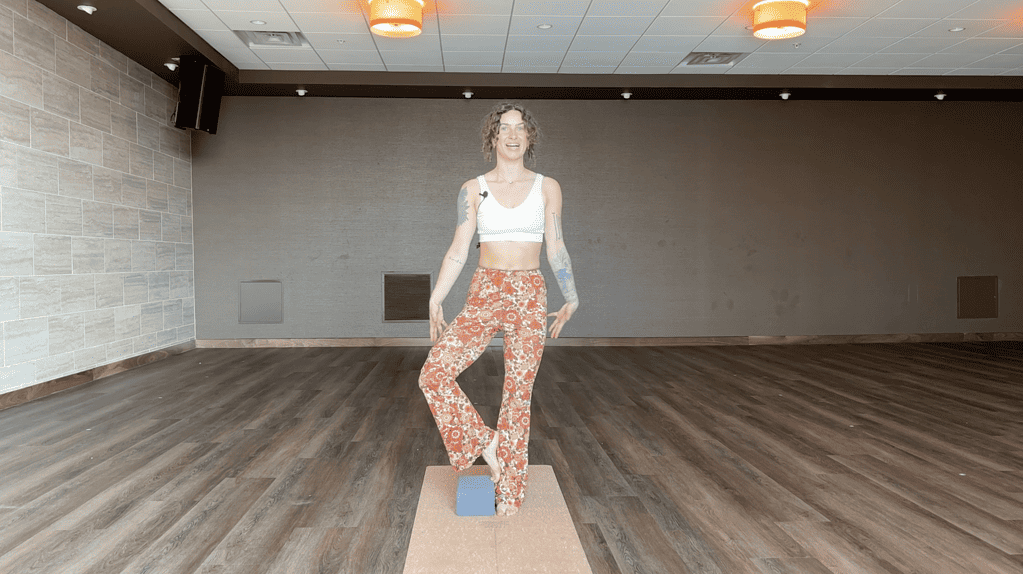
For intermediate-level Tree Pose, you can move the foot up so that your arch molds to the natural curve of your calf.
Stand tall in Mountain Pose with your ankles, knees, and hips aligned and stacked on top of each other. Shift your weight into your left foot and create a strong foundation in the leg. Place the bottom of your right foot on your calf just below the left knee. Avoid pressing the foot too close to the knee. Find where your body’s curves naturally fit together. Engage and the core and elongate through the spine as you stand tall. Continue pressing the foot into your calf and press your palms together in prayer position. Hold for 5-10 breaths and repeat on the opposite side.Inner Thigh Tree Pose
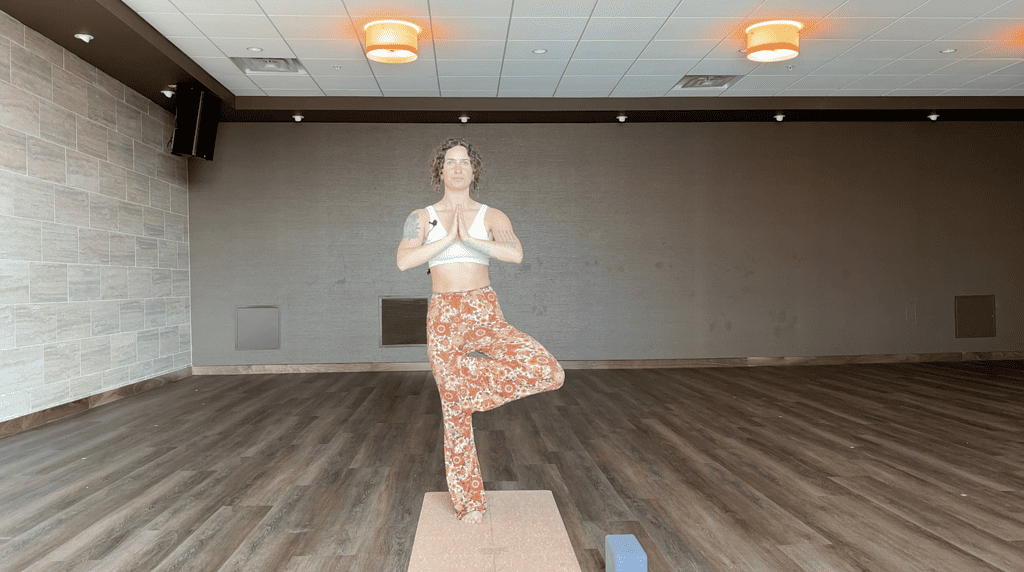
An inner thigh placement marks the final variation before progressing into a full hip-opening Tree Pose.
From Mountain Pose, shift your body weight into the left foot and leg. On an inhale, stand tall and lift your right leg. Use your hands to adjust your right leg into a comfortable position. Avoid bending over if possible. A mirror helps! Press the sole of your right foot into the left inner thigh. Optionally, grasp your foot with your hand and lift higher onto your left hip. Hold for 5-10 breaths. Repeat on the other side.Safety and Precautions
All balancing poses come with the risk of falling. If you feel unstable or risky attempting to balance on your own, always practice next to a wall so that you can catch yourself. Once you feel steady, move slowly away from the wall so just your fingertips can reach it.
Avoid practicing Tree Pose if you feel lightheaded or dizzy, have low blood pressure, or have a hip injury.
You should also avoid Vrksasana if you struggle with insomnia or any severe leg or thigh injuries.
Teaching the Pose
When teaching Tree Pose, yoga instructors should use the bulk of their instruction time by patiently guiding students into the strong foundation of the pose. Emphasize grounding, engaging, and stabilizing before lifting. Always provide a demonstration from multiple angles so that students can understand the importance of micro-bending their standing leg and maintaining proper hip alignment.
Once in the pose, remind students to breathe deeply and maintain focus on their drishti. Avoid moving around the room during the full expression so that students can focus on their balance. If you notice someone struggling, you can stand next to them and offer your shoulder as a means of balancing support.
Preparatory Poses
Warm up your body for Vrksasana with these easy preparatory poses:
Tadasana (Mountain Pose) Adho Mukha Svanasana (Downward Facing Dog) Standing Wind Release Pose (Standing Knee to Chest) Virabhadrasana II (Warrior 2)Counter Poses
These are some great follow up asanas for a strong, grounded Tree Pose:
Uttanasana (Standing Forward Bend) Utthita Hasta Padangusthasana (Standing Hand to Big Toe) Parivrtta Hasta Padangusthasana (Revolved Hand to Big Toe)Conclusion
Ultimately, Tree Pose (Vrksasana) is a test of balance in both the body and mind. As we build strong trunks and stabilize our core, we can grow our confidence and expand into the highest version of ourselves.
Namaste!

 JimMin


