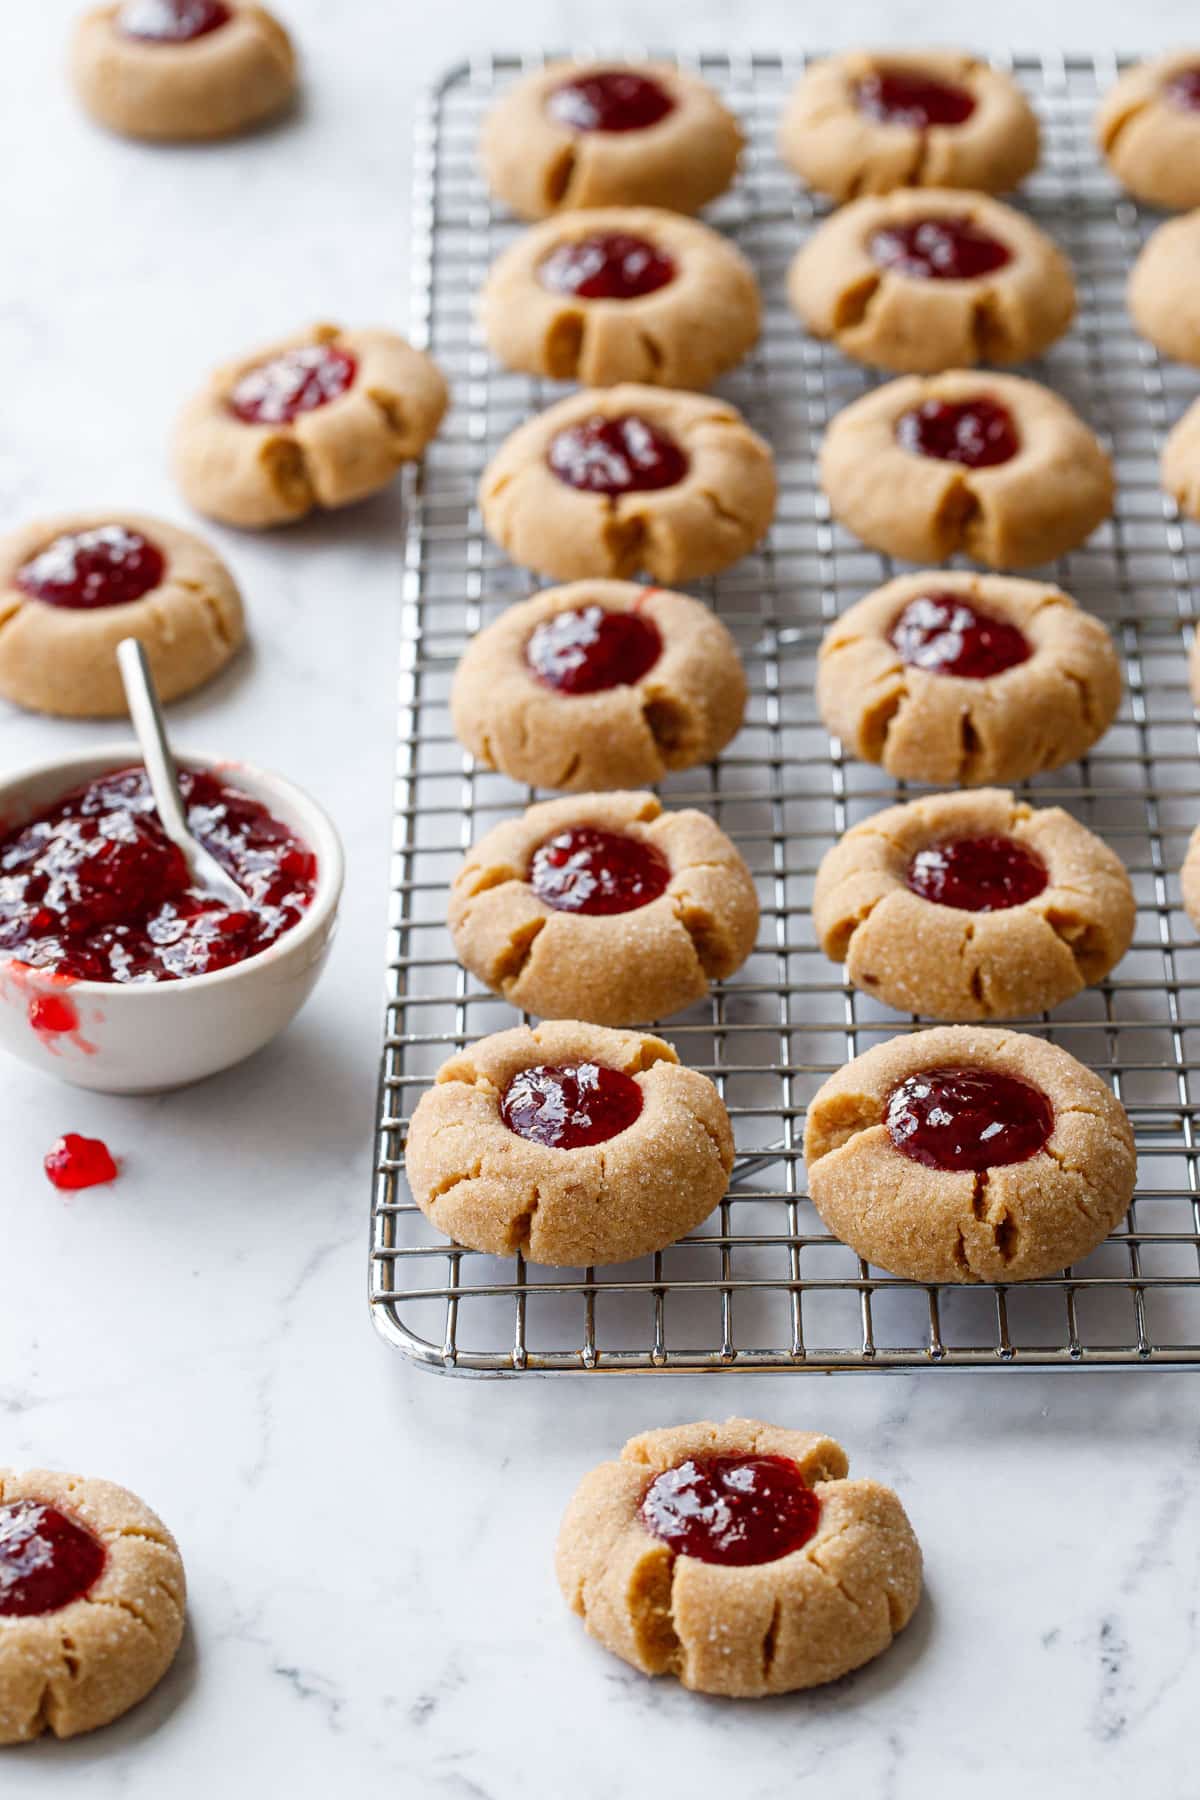
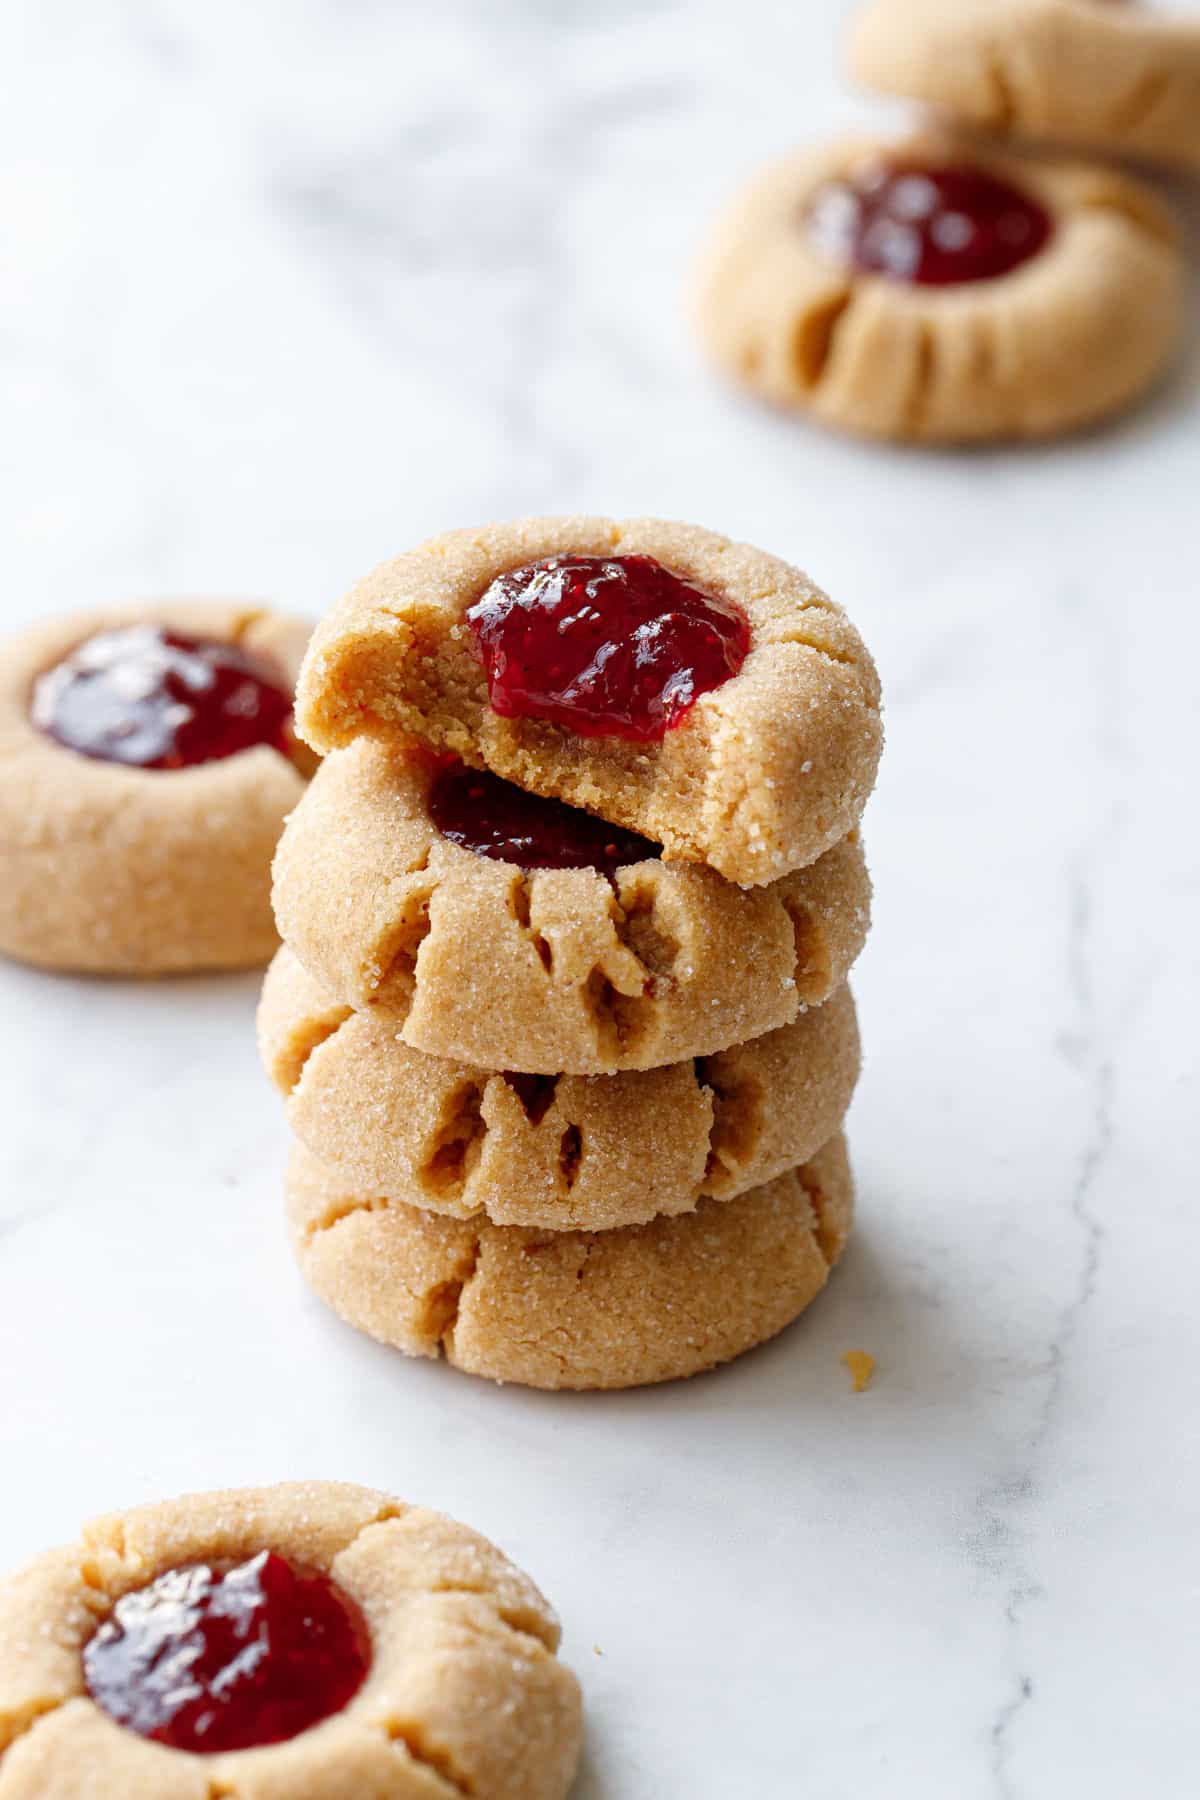
Peanut Butter & Jam Thumbprint Cookies
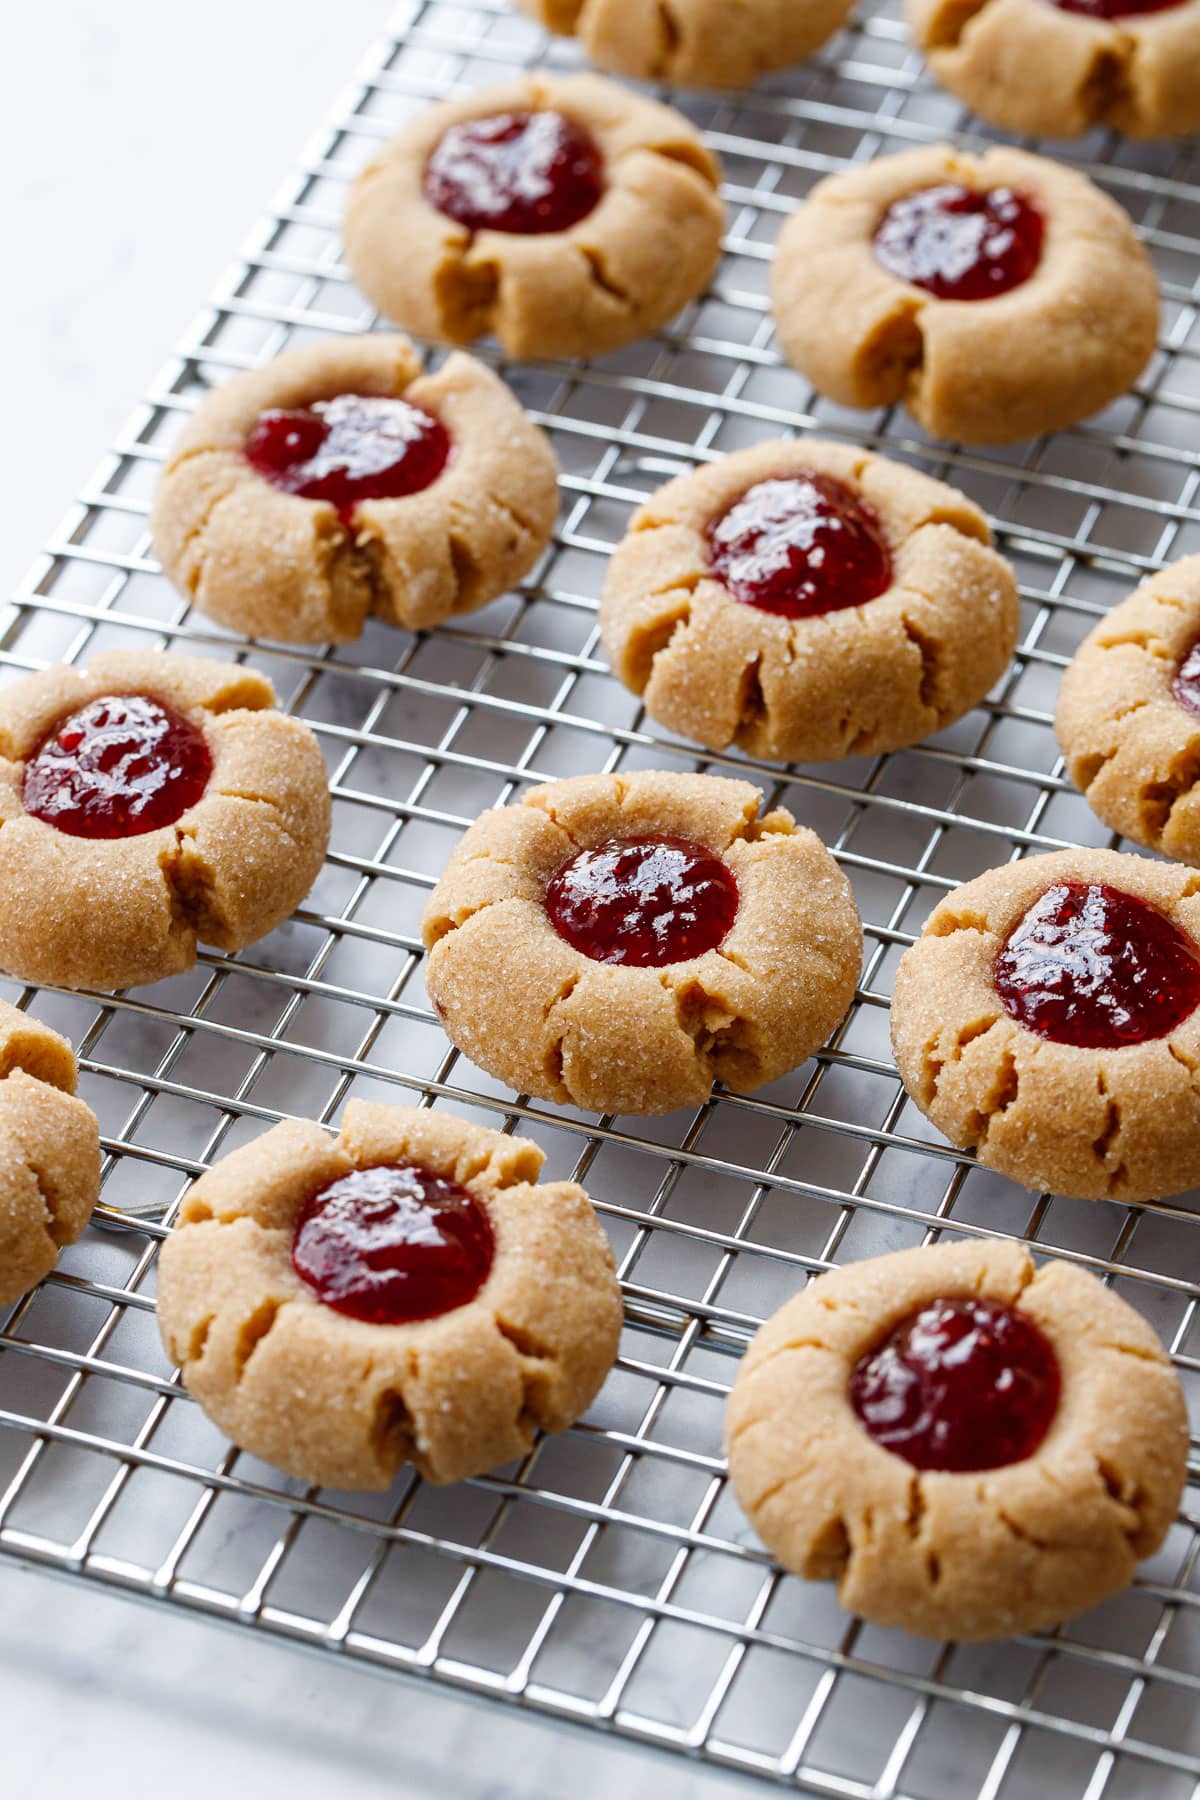
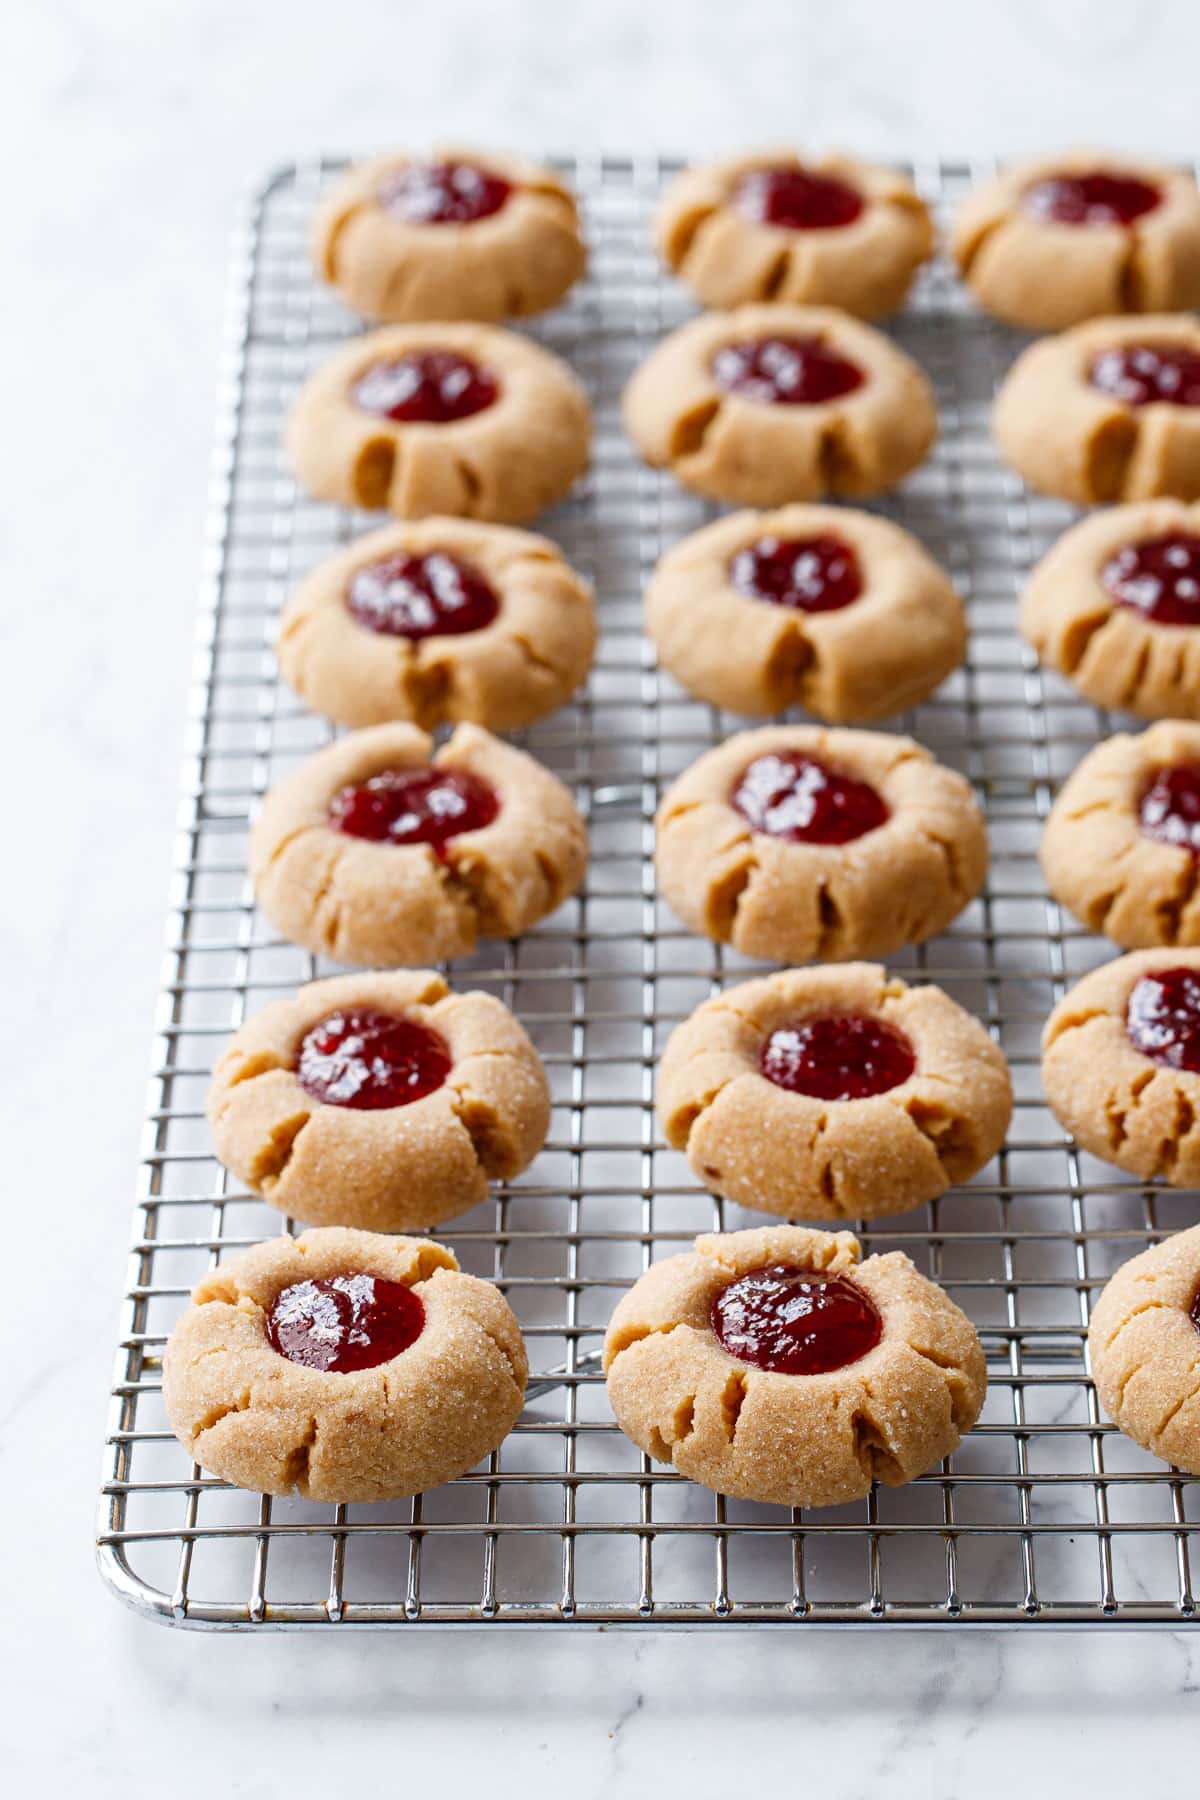
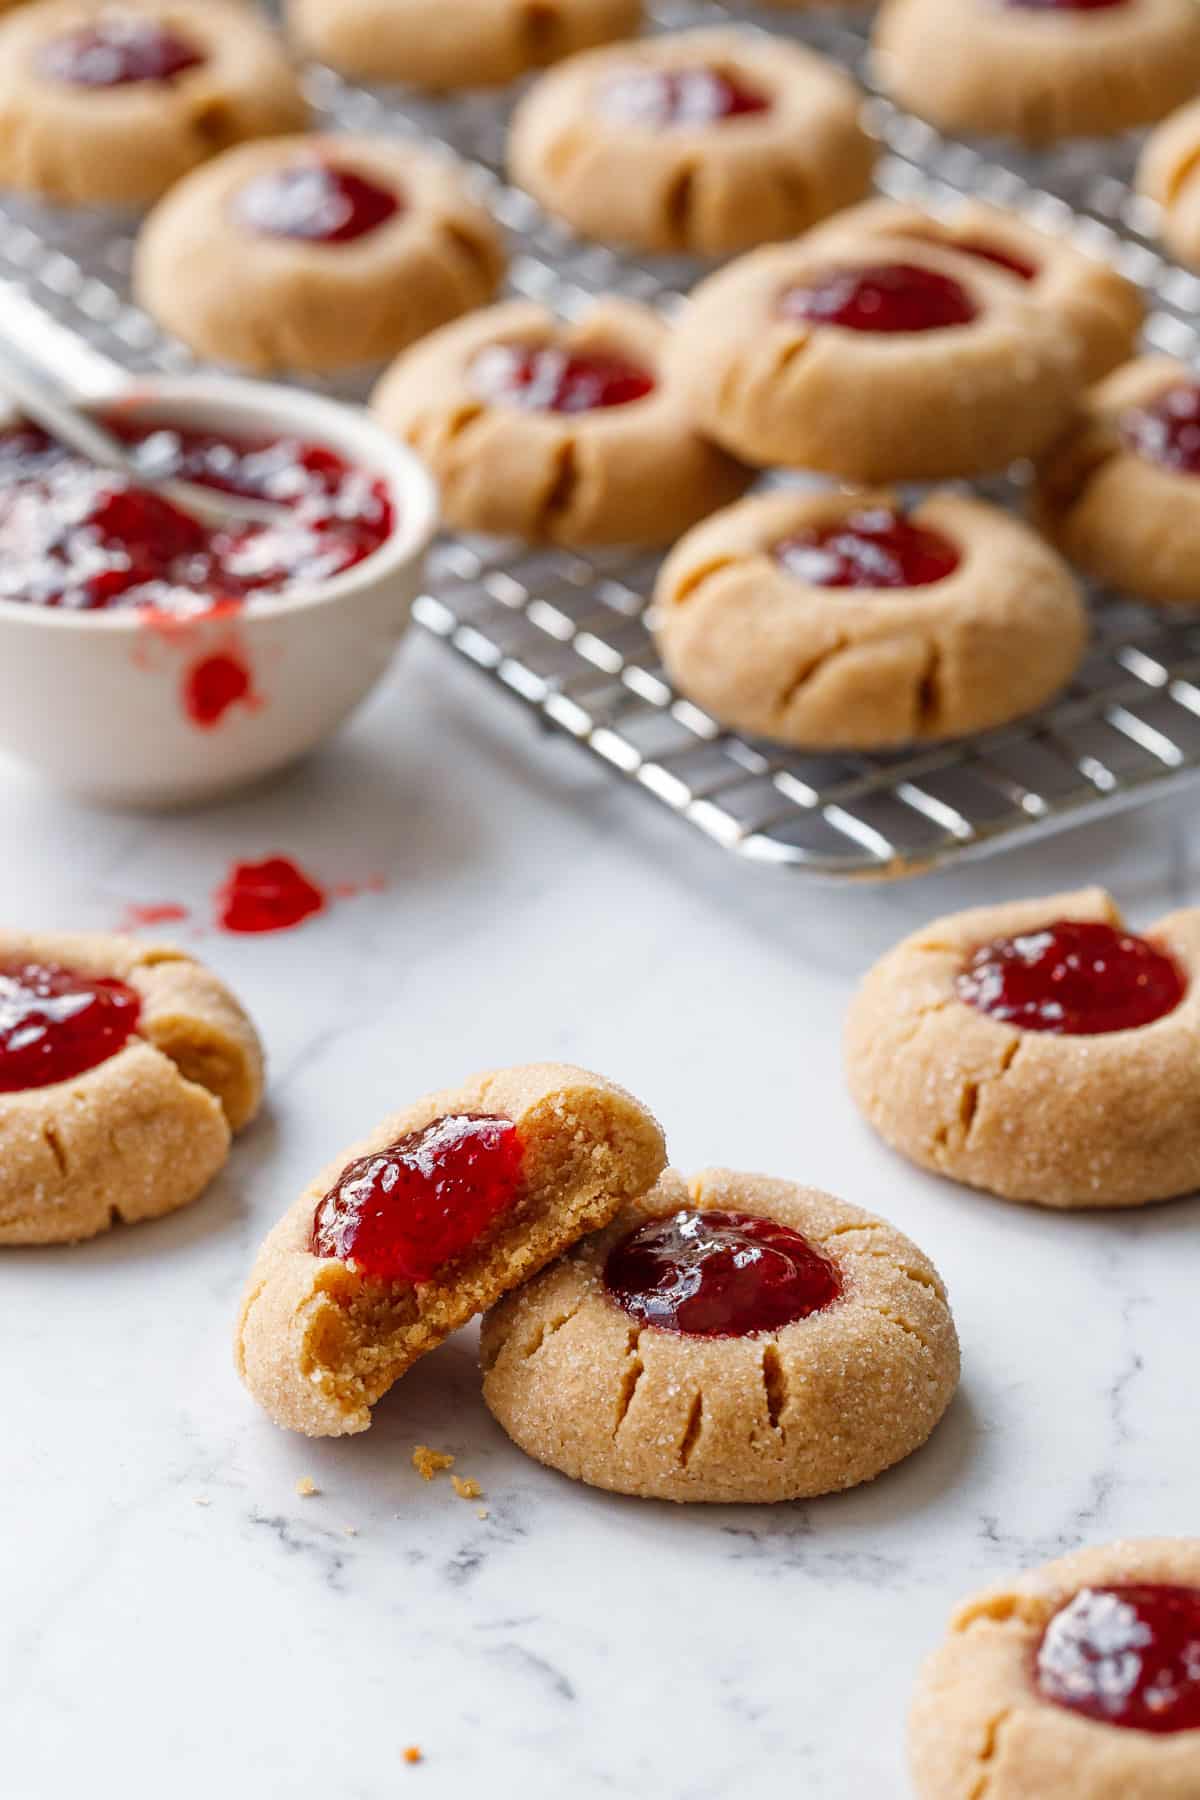
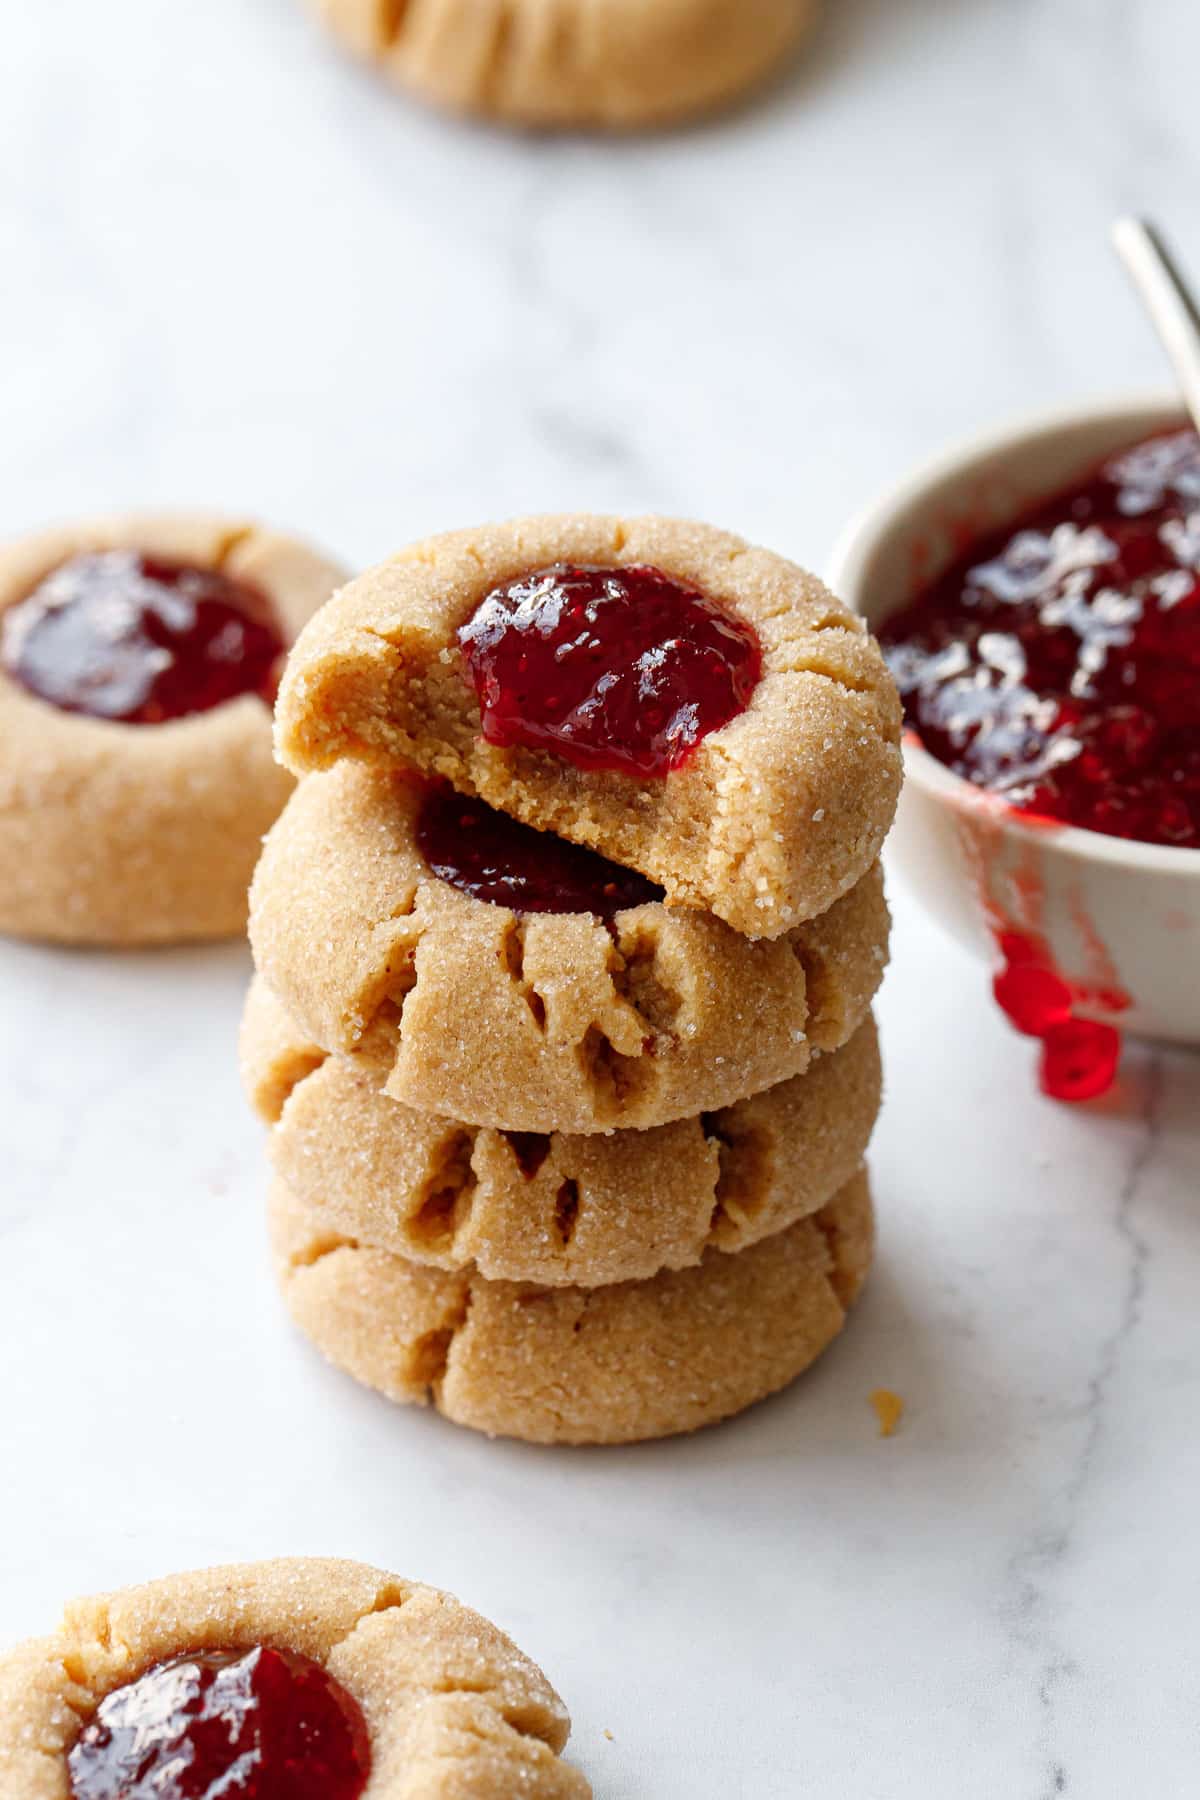
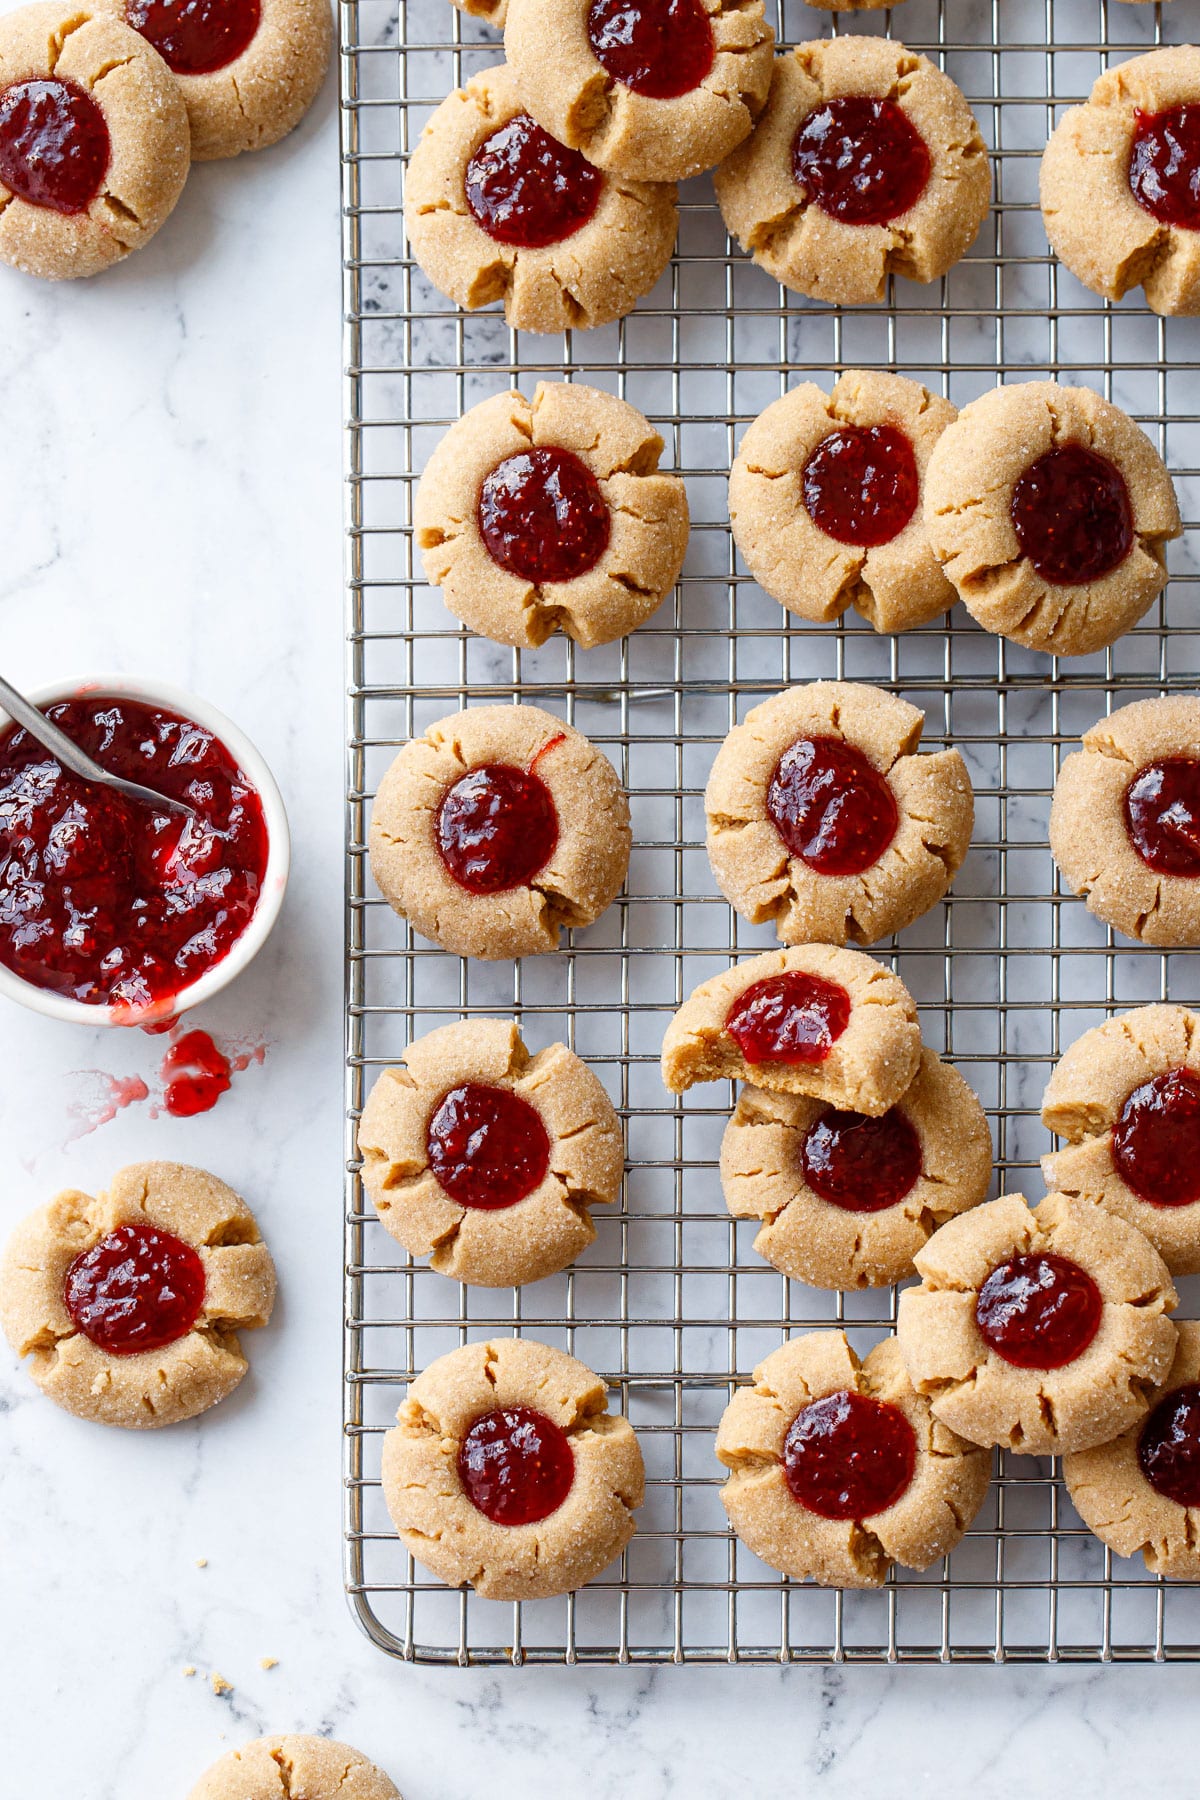
Your favorite peanut butter and jelly sandwich meets thumbprint cookie: a soft and buttery cookie packed with peanut butter flavor and filled with a bright and fruity strawberry jam. These bite-sized peanut butter thumbprint cookies are filled with a...
 Hollif
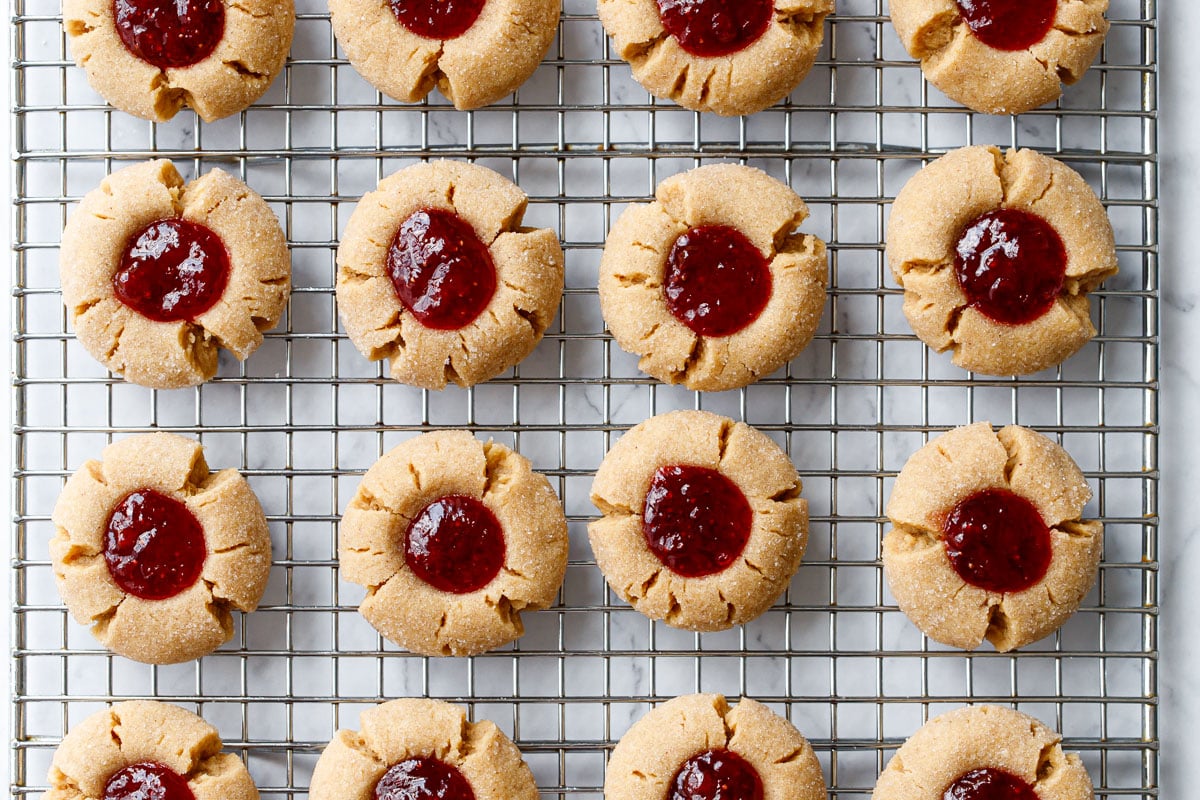
Your favorite peanut butter and jelly sandwich meets thumbprint cookie: a soft and buttery cookie packed with peanut butter flavor and filled with a bright and fruity strawberry jam.
These bite-sized peanut butter thumbprint cookies are filled with a dollop of bright strawberry jam (but you can use whatever kind of jam you have on hand, or even opt for a chocolate or caramel filling, yum!) The peanut butter-packed dough comes together in minutes and can be baked right away—no chilling required!
If you’re anything like me, you have a pantry full of homemade jam, and have also realized that, aside from the occasional charcuterie board or peanut butter and jelly sandwich, you really don’t consume all that much jam (guilty as charged… I like making it—and giving it away—more than I like eating it).
That’s why I’m all about creative recipes using jam, or jams in action if you will. From desserts like these jam-filled thumbprints, to savory dishes like marmalade-roasted chicken and jammy baked brie puffs, if you’ve got a partial jar of jam that needs to be used, I’ve got you covered!
This particular recipe only exists because of my glut of excess jam; I had a handful of partial jars leftover from my epic strawberry jamifesto that needed to be used… and this recipe was the final result.
Peanut butter and jelly (or jam in this case) is a classic combination for a reason, even if it seems like the two wouldn’t go together (peanuts and fruit? what?) it somehow pairs perfectly. It’s no wonder the sandwich has become a classic.
These cookies take that pairing and reimagine it in cookie form, with a sweet and soft peanut butter shortbread cookie base, filled with a dollop of bright, fruity jam (strawberry in this case, but you can use whatever kind of jam or jelly you have on hand).
Jam vs jelly: what’s the difference anyway? Typically jam is made with crushed, chopped, or pureed fruit with a thick, chunky texture, while jelly is made from strained fruit juice so it’s more translucent and less pulpy. Preserves, on the other, hand use whole fruit (I don’t suggest using preserves for this recipe).
Thumbprint cookies are one of my favorite kinds of cookies along with stuffed and sandwich cookies; all three play off of the combination of soft, buttery cookie and the contrasting flavor and texture of the filling. Some kinds of fillings work better in thumbprints, like jam for example, which would be very hard to ‘stuff’ inside a cookie or use as a sandwich cookie filling without a ring of ganache or buttercream containing it.
I’ve previously shared a recipe for jam-filled thumbprint cookies featuring a shortbread cookie base, and they’re one of the most popular recipes on this blog for good reason! I like to think this peanut butter version takes it one step further, with a sweet and salty peanut butter-infused dough that pairs so beautifully with the fruit jam.
Did I mention the fact that these cookies come together in a flash, no chilling required!
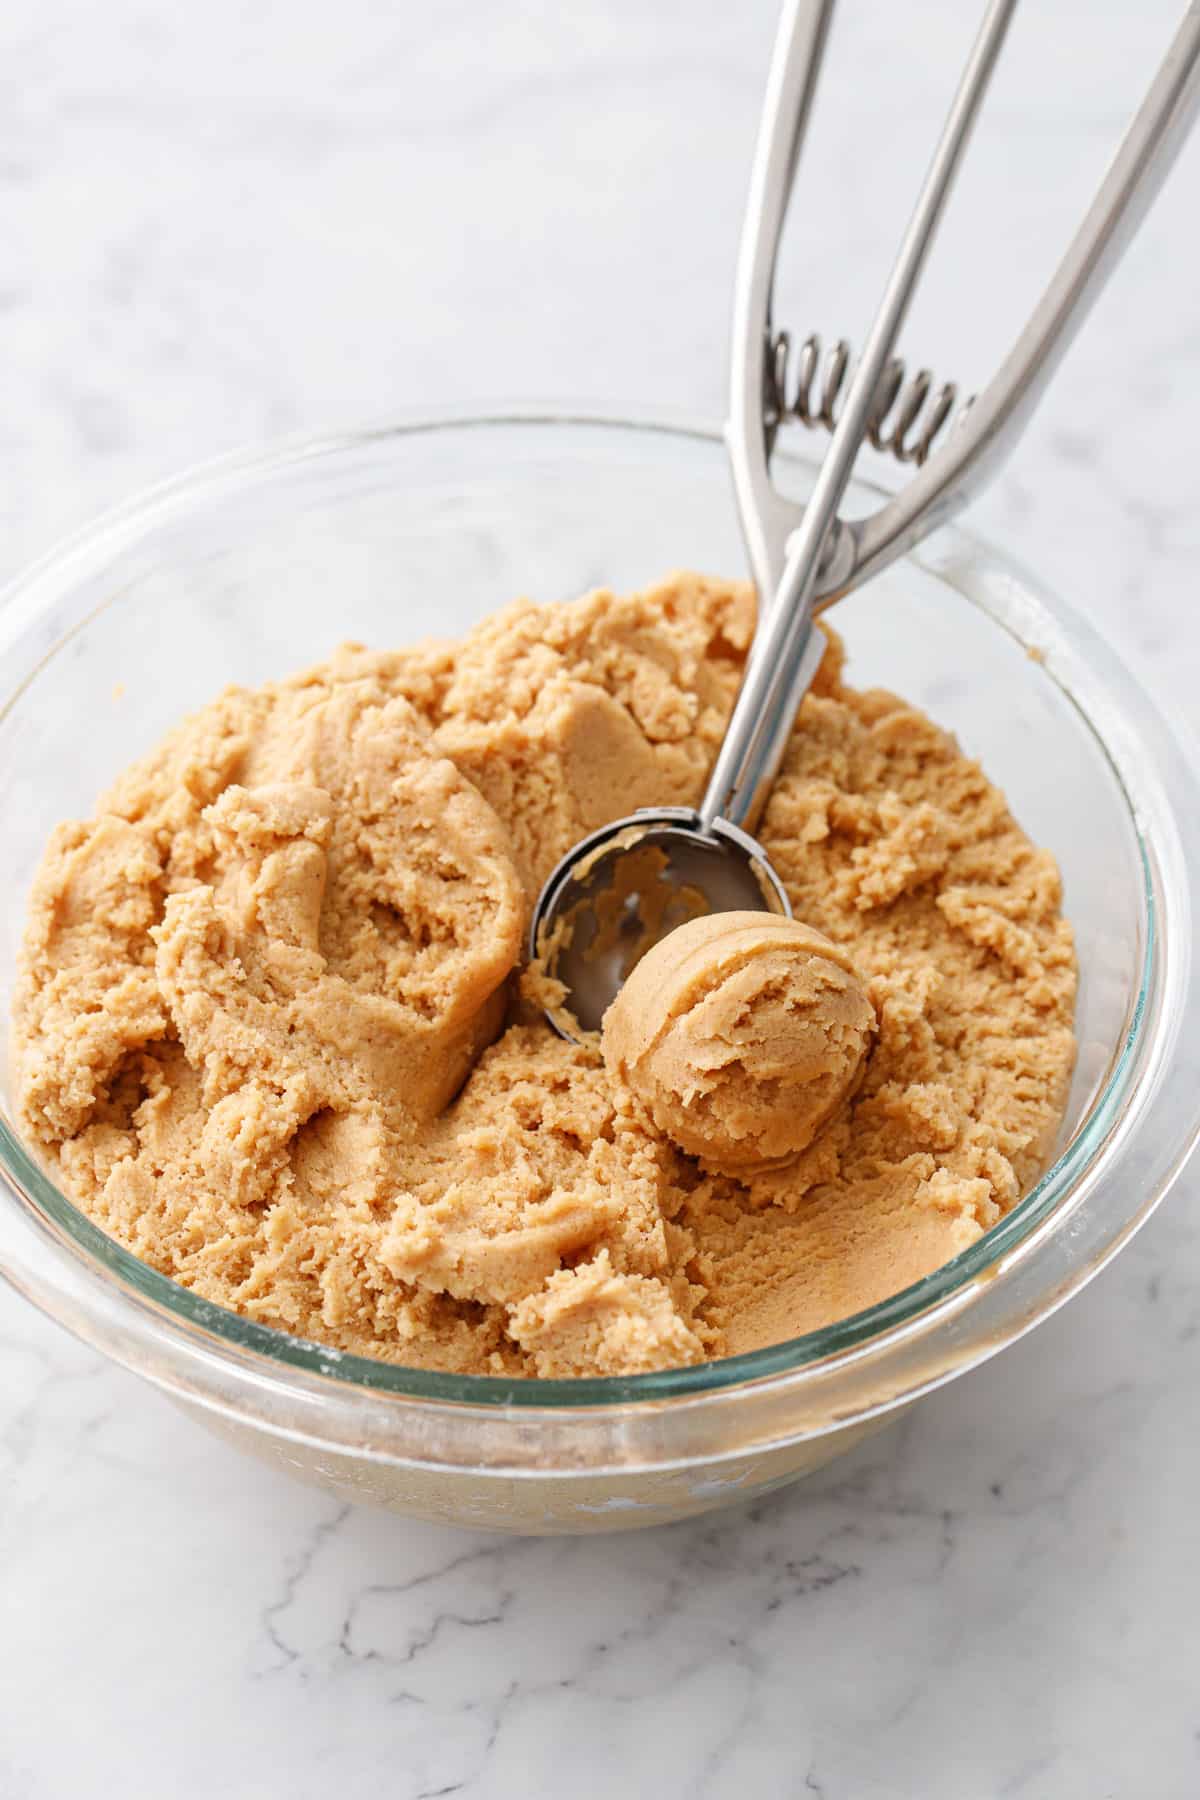
 Use a small cookie scoop to portion dough into 1-inch balls.
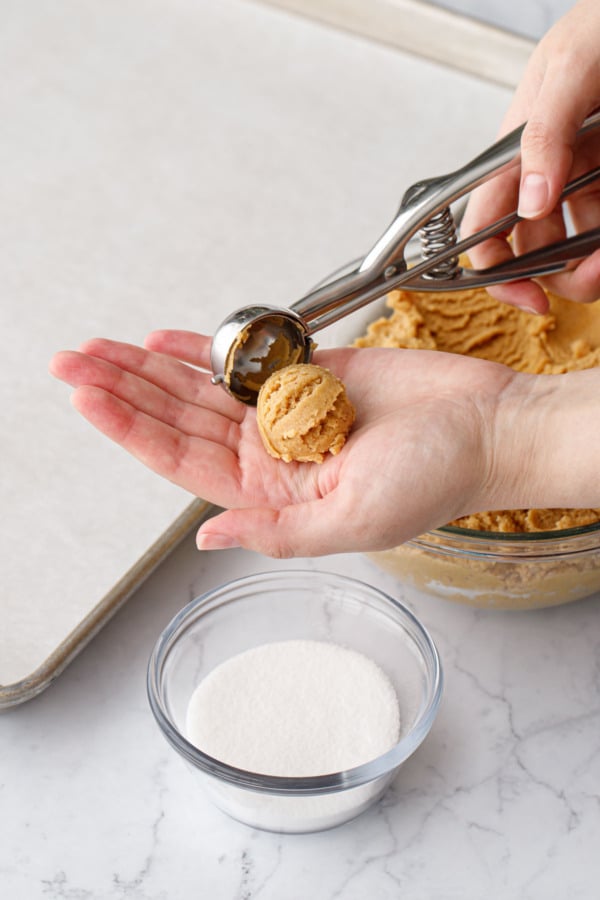 The cookie scoop allows you to make evenly sized cookies; one ball is approximately 16-18g of cookie dough.
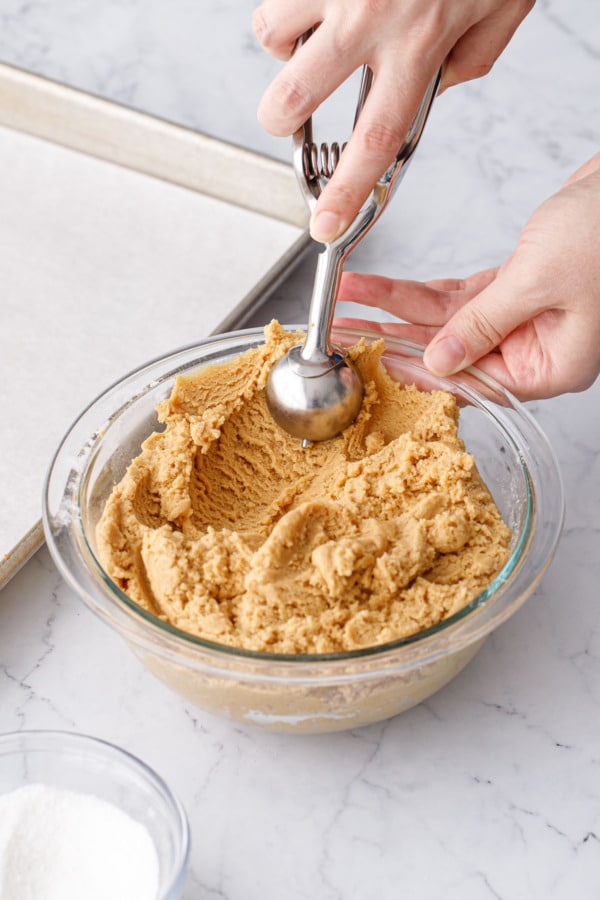
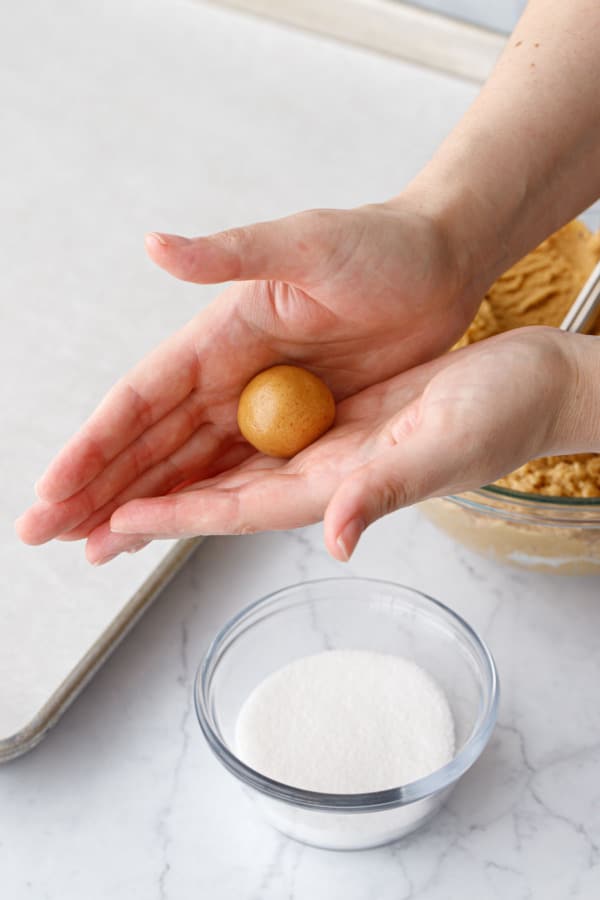 Gently squeeze and roll the dough between your palms to form a smooth round ball.
 Roll dough in granulated sugar until evenly coated.
 Use the back of a half-teaspoon measurer to lightly intent the tops of the unbaked dough balls.
 After partially baking, the cookies will have puffed and the indents will have lost some of their definition. Use the same spoon to redefine the thumbprints in the tops of the cookies while they are still warm.
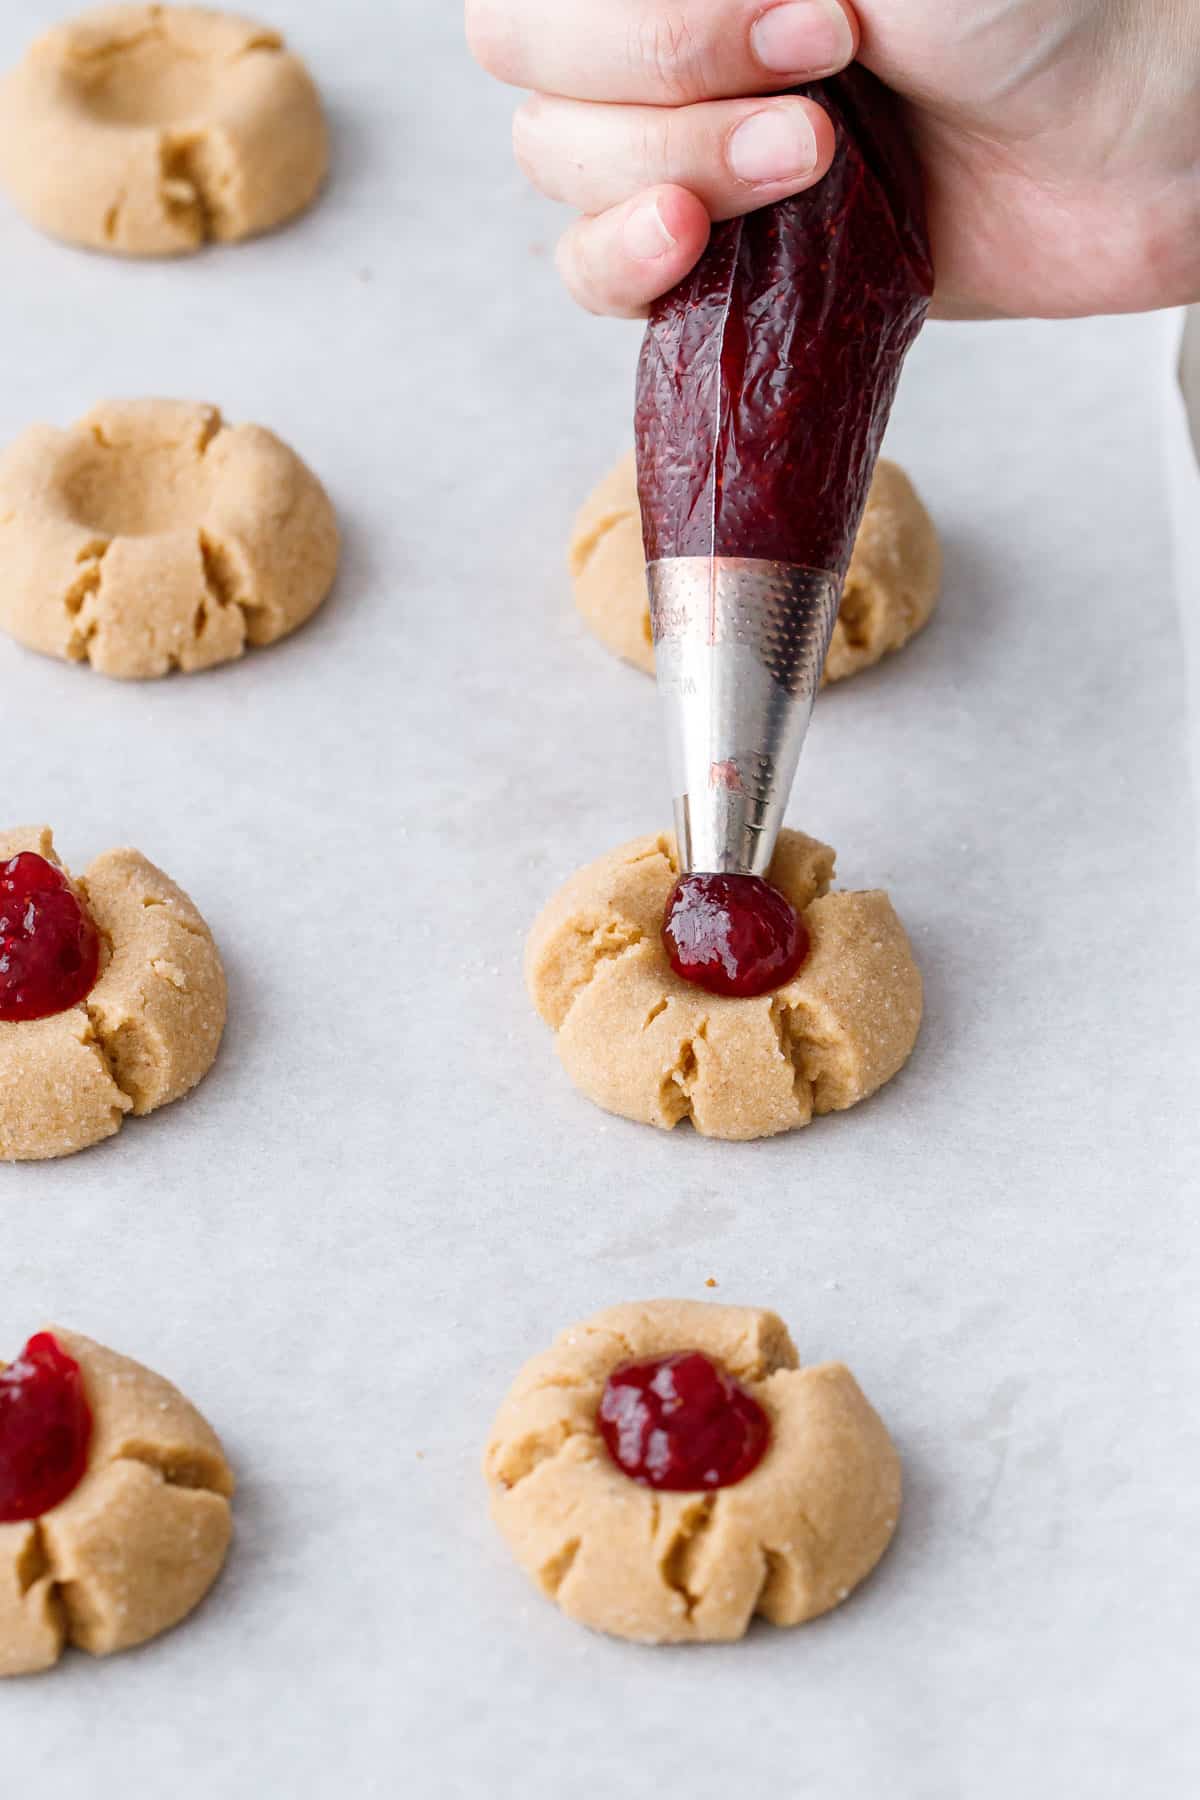 Spoon or pipe 1/2 teaspoon of the jam filling into the thumbprint cavities of partially baked cookies, then return to the oven for an additional 2 minutes to finish baking.
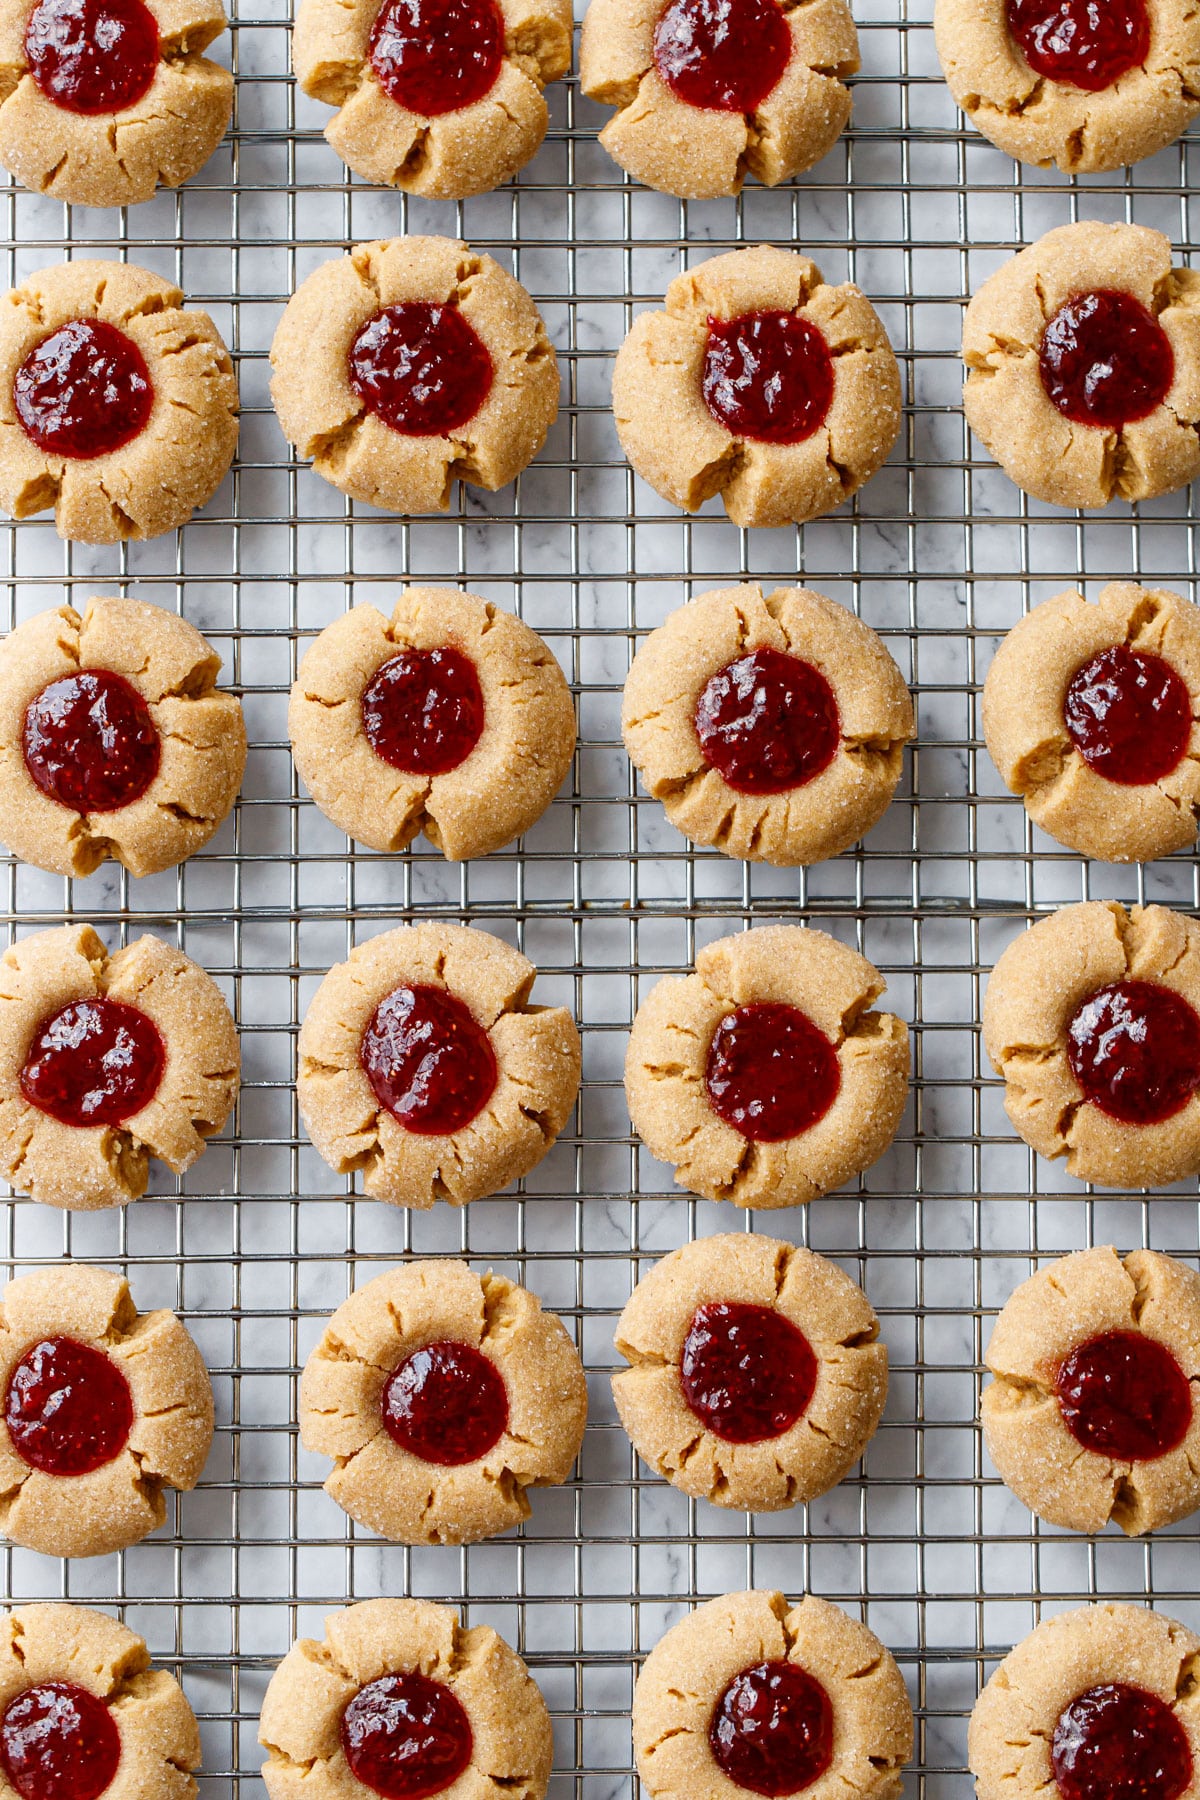
Under your thumb.
Look, I know they are technically called thumbprint cookies, but to be honest your thumb is not the best tool for the job here.
Instead, use the back of a round (not oval) half-teaspoon, or even a marble or something else small, round, and heat-proof.
When indenting the unbaked dough balls, you really don’t need to press down very much at all. You can see in the photos above that I’m barely making an indentation, just pressing down until the sides start to form smallish cracks, but stopping before it develops any large ones.
The cookies will puff and spread further in the oven and you’ll lose the definition of the thumbprint a bit, so when the cookies are partially baked (after about 8 minutes), take them out of the oven and use the same teaspoon to redefine the thumbprint cavity. Add the jam filling to the newly-depressed craters, then pop the cookies back in the oven for another 2 minutes to finish baking as well as soften and set the jam filling.
I prefer to pipe the filling into thumbprint cookies, particularly recipes like this that call for filling the partially baked cookies then returning them to the oven, as piping will allow you to fill them much faster and get them back in the oven before they cool. You can still spoon the filling, of course, just work as quickly as you can so the cookies don’t have a chance to cool down too much.
Worth the Weight
This is one of those recipes where the amount of flour makes a huge difference. Seriously, if you don’t believe me, check out the photo below. Would you believe that the difference between the left and right cookies is only 30g of flour (a mere 1/4 cup)? The middle and right cookies differ by only 10g of flour (that’s a little over a tablespoon). Crazy, huh?
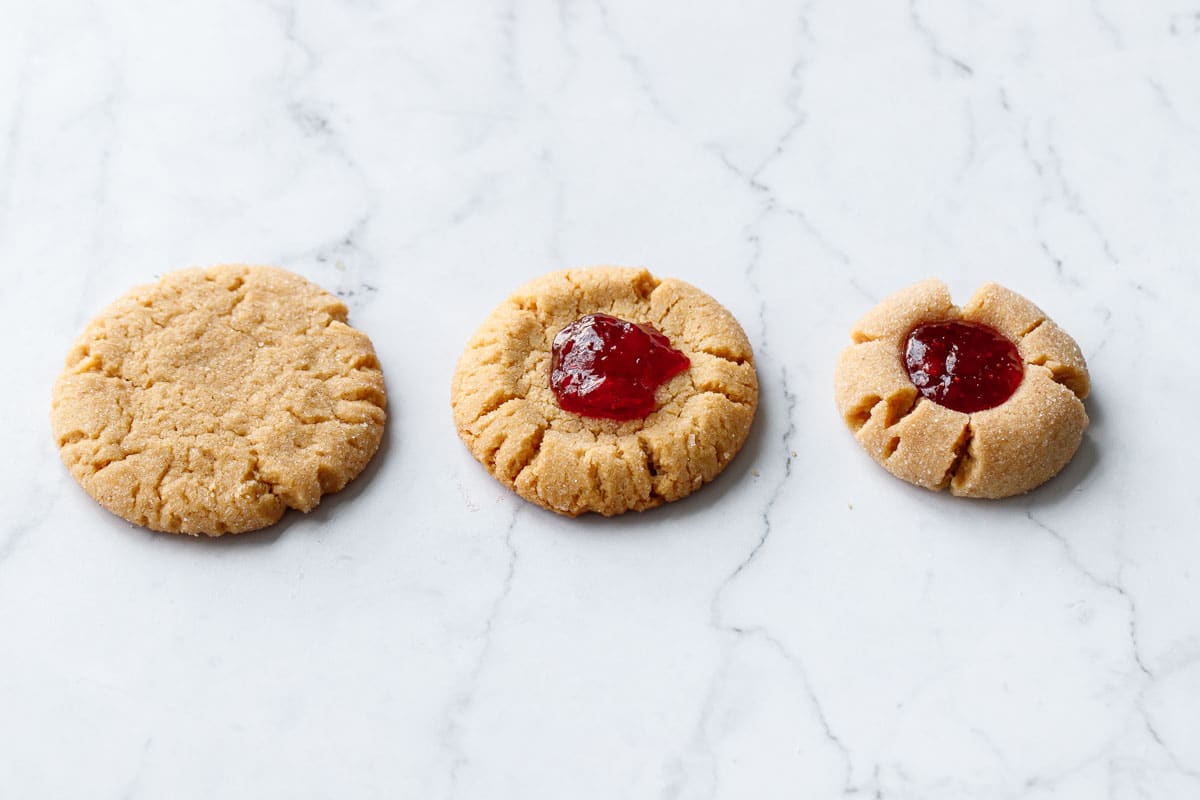
This why accurately measuring flour is so important when baking. I’ve actually written this recipe with only a gram weight for flour, calling for exactly 197g of AP flour. This amount doesn’t have a direct equivalent in cups; it’s approximately 1 ½ cups plus 1 ½ tablespoons or so, or 1 2/3 cups minus 1 tablespoon or so (see now why I wrote it in grams?)
Too little flour and the thumbprints will spread and you’ll lose your thumbprint entirely.
Too much flour and the dough will be dry and crumbly, so when you try to press down the thumbprint, the dough will split into large, unsightly cracks (ideally we want lots of little cracks vs one or two big ones).
But when you get the balance just right, the cookie dough will be soft and pliable enough to impress a proper thumbprint without crumbling or cracking too much, but still with enough structure so that it holds its shape with just a slight softening in the oven.
This recipe is a perfect example of why measuring your flour in grams is the best way to bake. Measuring flour with cups is very inaccurate, depending on how tightly the flour is compressed, for instance, one cup could weight as little as 120g or as much as 150g. Not to mention that all cups are not created equal (US vs Australian cups for example). So you can see why I recommend using a weight measurement for the flour in this recipe!
Don’t have a kitchen scale? Grab my favorite one here!
Ingredients like sugar aren’t quite as prone to variances as flour, fortunately, so measuring by weight isn’t as crucial, although brown sugar can vary a bit more than white sugar, depending on how tightly it is packed for example.
Let’s Talk about our Fillings.
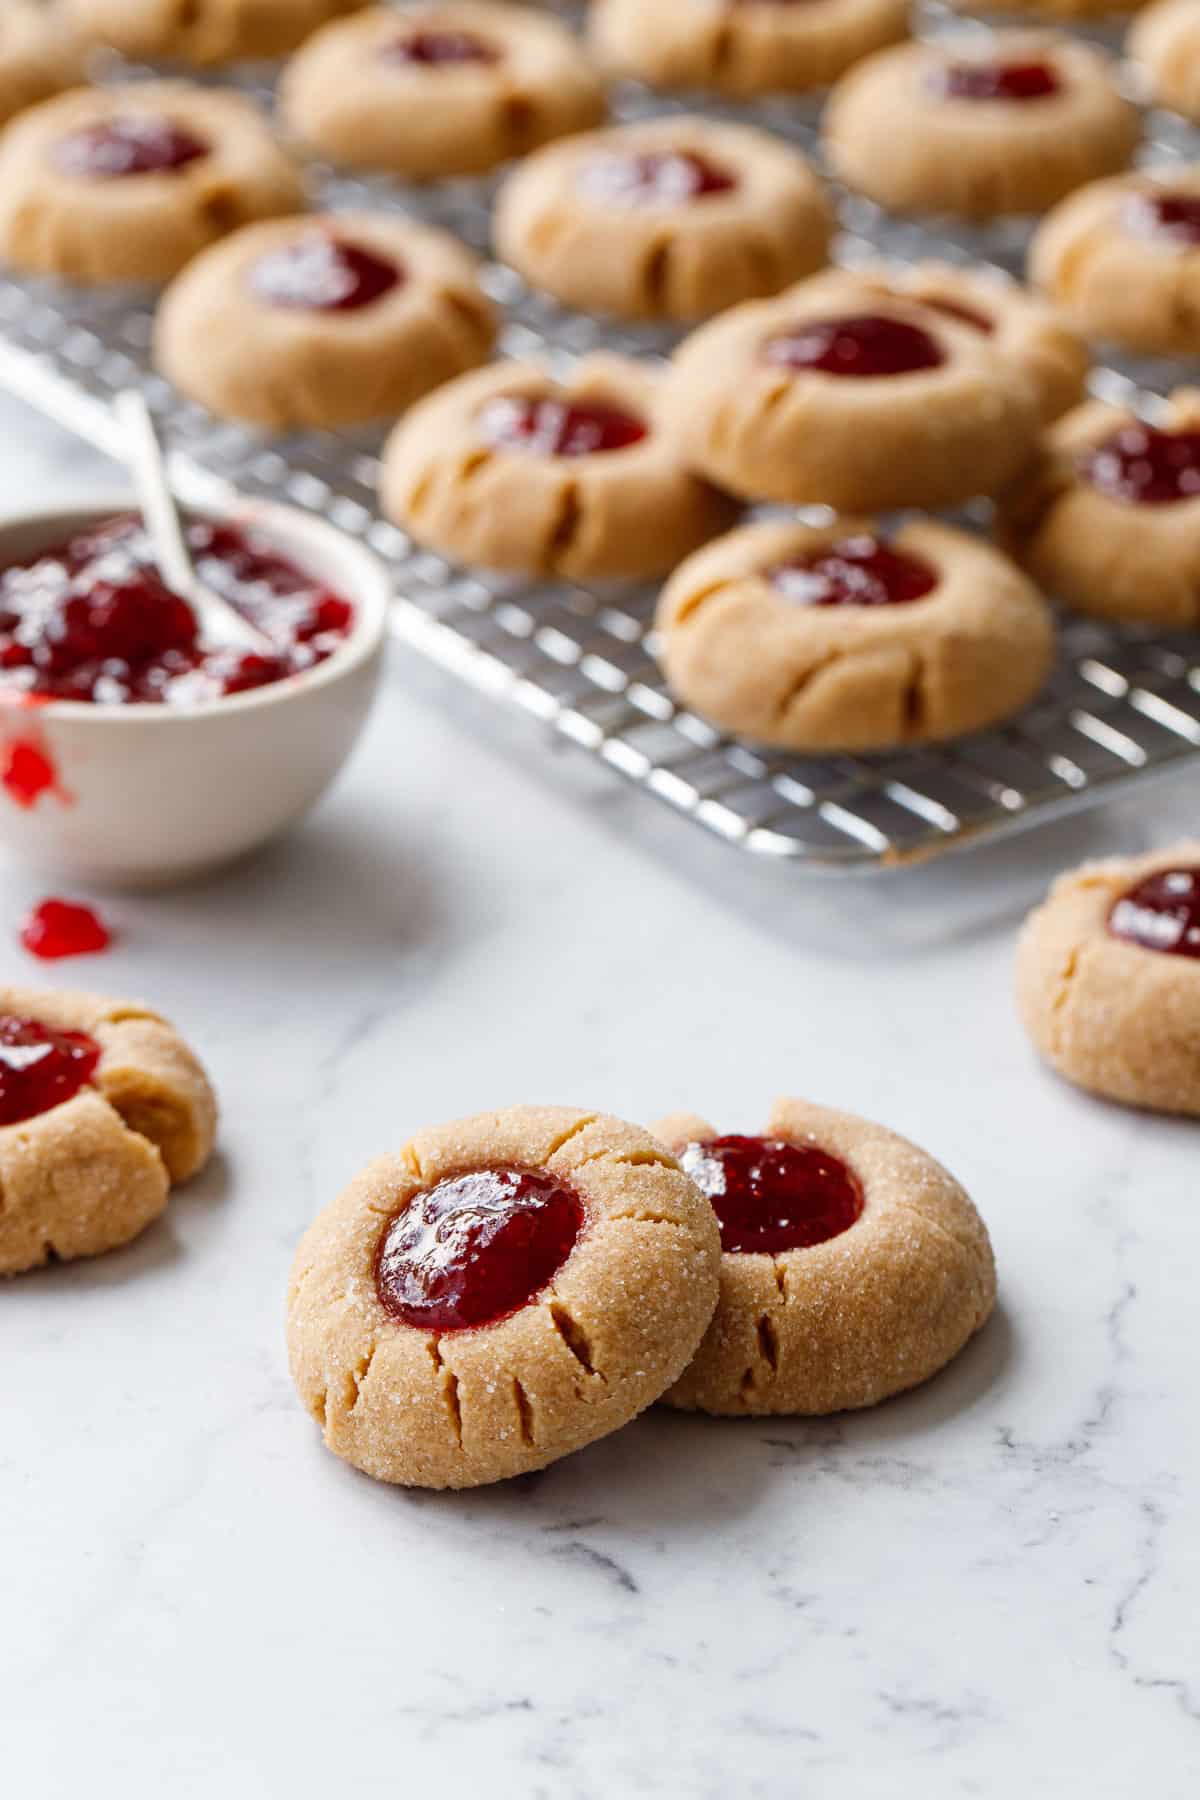
I filled my peanut butter thumbprints with a old-fashioned strawberry jam, as the sweet and sticky consistency is perfect for thumbprints compared to lower sugar jams which can sometimes feel waterier.
Other flavors of jam work here too! Raspberry, for example, would be lovely (or hello chocolate raspberry!) or even a fig jam, grape jelly or honey-sweetened apricot jam (the latter two recipes can be found in my book, That’s My Jam).
You do want to use a jam or jelly here though, not preserves, especially if you’ll be piping in dollops onto the cookies (preserves contain whole fruit and are way too chunky to pipe). If your jam is on the chunky side, just give it a quick chop or a whir in the food processor first.
If your jam or jelly is on the thin side, you can thicken it with a teaspoon of cornstarch, dissolved in a tablespoon of water then brought to a simmer with the jam. Thickened jam won’t run out of the cracks in the sides of the cookies (a hallmark of peanut butter cookies of almost any kind).
In lieu of jam, you could also fill these cookies with a chocolate ganache filling (like a grown-up peanut butter blossom) or even a dulce de leche filling (peanut butter and caramel are almost as perfect a combination as peanut butter and jelly).
Ingredient Notes & Substitutions
Peanut butter: I used a natural creamy peanut butter for this recipe (Costco brand to be exact, which I find to be much smoother than many brands of natural pb and more homogenous too). Classic pb like Jiffy would work well though will result in a sweeter cookie. I do not recommend using coarsely textured natural peanut butter or crunchy peanut butter for this recipe.
If your peanut butter is unsalted, increase the salt called for in the recipe to 1/2 teaspoon.
Jam: I used a homemade strawberry jam, but any other flavor of jam or jelly that goes with peanut butter works here too. You can also opt for a caramel or even a chocolate filling (if using ganache, fill the cookies after they’ve come out of the oven and cooled slightly).
Brown sugar: the high proportion of brown sugar to white here will help keep the cookies softer longer; the hint of molasses flavor also pairs beautifully with the peanut butter. While I used light brown sugar, you can use dark brown sugar instead if you want even more molasses flavor.
Don’t have brown sugar? Mix 3/4 cup granulated sugar with 1 teaspoon molasses for a similar color and flavor to brown sugar.
All Purpose Flour: Use regular, unbleached AP flour here, which gives the cookies a perfect structure and chew. I have not tested this recipe with gluten-free flour replacements and can’t say whether they’d work here or not.
Keep in mind this recipe is very sensitive to flour, even 10-15g can make a huge difference in the final shape of the cookies which is why I strongly suggest weighing your flour for this recipe. I’d also recommend baking off a few test cookies first to make sure they hold their shape; if they spread too much, mix in another tablespoon of flour into the dough and try again (chilling doesn’t make much of a difference here, at least in my experience; you really need more flour to combat too much spread).
Peanut Butter & Jam Thumbprint Cookies
Cook Time: 10 minutes
Total Time: 45 minutes
Your favorite peanut butter and jelly sandwich meets thumbprint cookie: a soft and buttery cookie packed with peanut butter flavor and filled with a bright and fruity strawberry jam.
Preheat oven to 350 degrees F. Line two baking sheets with parchment paper.
In a bowl, whisk together flour, salt, baking soda and baking powder; set aside.
In a mixing bowl or the bowl of a stand mixer, cream butter with brown sugar and sugar for 2 to 3 minutes or until it lightens one shade in color and no longer clumps together like wet sand.
Add peanut butter and beat on medium speed until smooth, scraping down the sides of the bowl as needed. Add egg and vanilla and mix until fully incorporated.
Add dry ingredients and mix until just incorporated, scraping the bowl to ensure dough is evenly mixed throughout.
With a small cookie scoop (about 1 tablespoons worth, or 16-18g of dough per ball by weight), roll dough into a smooth ball, then roll in granulated sugar to coat.
Arrange on prepared cookie sheets, leaving 1-2 inches of space between cookies (they'll spread a little, but not nearly as much as drop cookies so you can bake 12-15 per sheet).
Gently press the back of a round ½ teaspoon (or use something like a marble) to make a shallow indent in the cookie. You don't need to press it down very far (doing so will cause the dough to crack much more), as you'll be refining the indent further once the cookies are partially baked.
Bake for 8 to 9 minutes or until tops have puffed and cookies have softened and spread slightly. Remove from oven and, working quickly while the cookies are still hot and soft, use the same spoon to press down the indents again.
Spoon or pipe 1/2 teaspoon of jam into each indent, then return cookies to the oven to bake for an additional 2 minutes or until jam is set and cookies are baked through.
Remove from oven and let cool on cookie sheet for 10 minutes, then transfer to a wire rack to cool completely. Cookies will keep in a single layer in an airtight container in the refrigerator for up to 5 days.
All images and text ©
for Love & Olive Oil.
Let us know what you think! Leave a Review below or share a photo and tag me on Instagram with the hashtag #loveandoliveoil.
There may be affiliate links in this post. We are a participant in the Amazon Services LLC Associates Program, an affiliate advertising program designed to provide a means for us to earn fees by linking to Amazon.com and affiliated sites.