PowerPoint Tips to Present Like a Pro [Expert Advice & Free Templates]
If you’re here because you’re wondering how to make a good PowerPoint, you’re in the right place. Let’s just hope it’s not the night before the big day.
 FrankLin
![PowerPoint Tips to Present Like a Pro [Expert Advice & Free Templates]](https://www.hubspot.com/hubfs/powerpoint-design-tricks_7.webp)
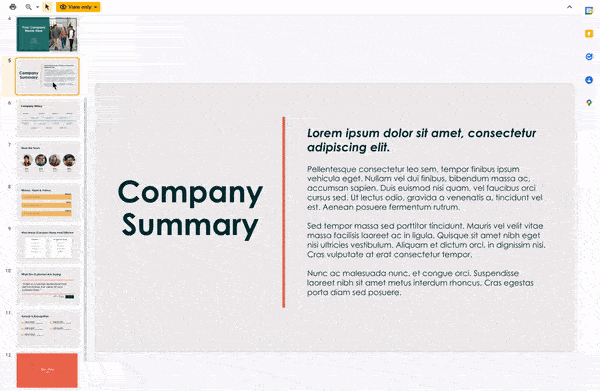
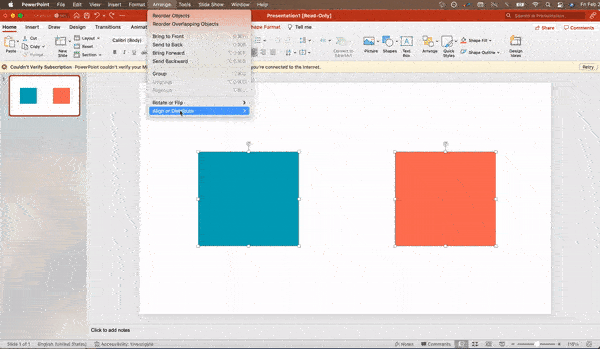
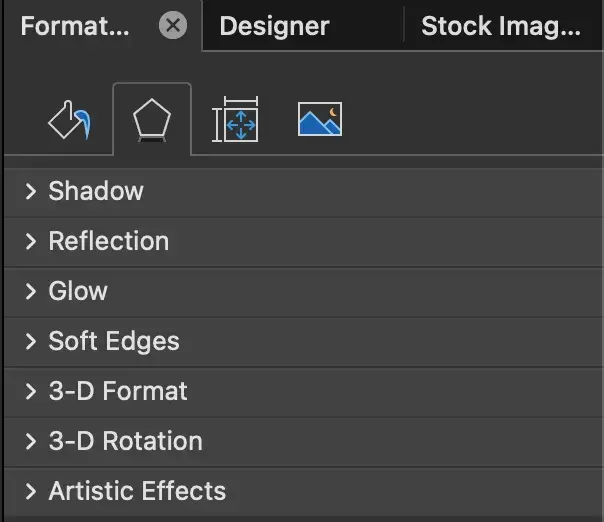
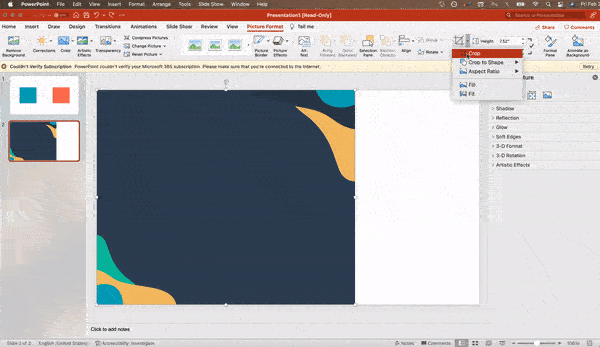
If you’re here because you’re wondering how to make a good PowerPoint, you’re in the right place. Let’s just hope it’s not the night before the big day. But it’s okay… I’ve been there too. As a writer with extremely average design skills, creating great presentations can sometimes feel like an insurmountable task. The storytelling is a key component, which we’ll get into later, but your design approach and delivery tactics are just as important, too. In this article, we’ll go over all of these aspects of a great PowerPoint — from the design and creation process to how to deliver a presentation like a pro. I’ll also share some helpful resources to get you started. Table of Contents Microsoft PowerPoint is like a test of basic professional skills, and each PowerPoint is basically a presentation made of multiple slides. Successful PowerPoints depend on three main factors: your command of PowerPoint’s design tools, your attention to presentation processes, and being consistent with your style. Keep those in mind as we jump into PowerPoint’s capabilities. A page with templates will usually open automatically, but if not, I go to the top left pane of my screen and click New. If I’ve already created a presentation, I select Open and then double-click the icon to open the existing file. Microsoft offers built-in themes and color variations to help you design your slides with a cohesive look. To choose from these pre-built themes, I choose the File tab again, select New, choose one of the options, and click Create. P.S. We have some great PowerPoint templates that you can try out — you can browse them here. There is also an option to select a blank presentation if you prefer to start from scratch. I like this option because I can use PowerPoint elements, my design sense, and my brand’s color palette to make my own theme. I insert a new slide by clicking on the Home tab and then the New Slide button. When choosing the slide layout, consider what content you want to put on the slide, including heading, text, and imagery. You don’t want to present the same exact slide each time, just with different content on it. This would bore your audience, so make sure that you create multiple variations. I suggest you consider what kind of multimedia you’ll be using and choose or create different layouts accordingly. At minimum, I usually use: There’s no need to create these designs over and over. Once I have a few to draw from, I simply duplicate them before inputting my content: This will automatically add a copy of this slide to the presentation. From there, I can customize it for my needs. I add images by clicking Insert and clicking the Pictures icon. I can add other elements by using features in the Home and Insert tabs on the top ribbon. I like exploring my layout by dragging elements around. I click File and Save, making sure to specify where I want my PowerPoint to be stored. If you’re using your slides for education or teaching, it could be beneficial to convert your presentation to an online course. I always do a trial run to ensure that my slides are set up properly and my animations fire the way I expect them to. To present my PowerPoint, I go to the Slide Show tab and click Play from Start. The slide covers my whole screen so that my audience (or, in this case, me) is solely focused on the visual elements of my presentation. Whenever you’re in presentation mode and ready to move on, click your mouse to advance to the next slide. Microsoft wanted to provide PowerPoint users with a lot of tools, but this does not mean you should use them all. Trust me, you don’t want it looking like your tweenage Geocities site and playing unwanted midi-files. To keep it professional, here are some key things I suggest you look out for: I think the easiest way to know you’re getting it right is to download some templates. We offer 30 free templates that you’re welcome to try out. Even if you don’t end up using them, you’ll get a sense of best design practices. Default slide sizes work for most presentations, but you may need to adjust them for larger presentations and/or weirdly-sized displays. Here’s how: Pro tip: You can avoid a headache if you resize your slides before you add any objects to them. Otherwise, the dimensions of your objects will become skewed. I find it’s much easier to edit your underlying PowerPoint template before you start — this way, you don’t have to design each slide by hand. Here’s how I do it: Remember that whatever else your PowerPoint presentation does, it needs to support the fantastic content you’re sharing with stakeholders. A significant part of a PowerPoint’s content is text, and great copy can make or break your presentation. I suggest you evaluate your written work from a few different angles so you know your entire audience can see and understand it. Keep the amount of text under 6-8 lines (or 30 words max). Use a minimum font size 24 pt. How your text is received differentiates good presenters from the best. Choosing the right font is important — the perception of your font type could influence your audience’s impression of you. I believe the right typeface is an opportunity to convey consistent brand personality and professionalism. Some fonts are seen as clean and professional, but this doesn’t mean they’re boring. A common mistake is thinking your font isn’t exciting enough, which could lead you to choose a font that distracts from your message. I recommend sticking to simple serif and sans-serif fonts. Avoid script fonts because of potential readability issues. That said, you can still use fun and eccentric fonts in moderation. Offsetting a fun font or large letters with something more professional can create an engaging presentation. Above all, be sure you’re consistent so your presentation looks cohesive throughout each slide. Check out this example from HubSpot’s company profile templates: Interested in this presentation template? Download it for free here. This is a huge pet peeve of mine. Having properly aligned objects on your slide is the key to making it look polished and professional. You can manually try to line up your images, but we all know how that typically works out. Get rid of the guessing game and let PowerPoint work its magic to align multiple objects: Here’s how I align objects to the slide: I like format menus because they allow me to make fine adjustments that otherwise seem impossible. To do this, right-click on an object and select the Format Object option. (The name of the object in the drop-down menu will change depending on whether you’re formatting a picture or shape.) Here, you can fine-tune shadows, adjust shape measurements, create reflections, and much more. The menu looks like this: Although the main options can be found on PowerPoint’s format toolbars, look for complete control in the format window menu. Other options include: PowerPoint’s shape tools have come a long way. Today’s shapes include a highly functional Smart Shapes function, which enables you to create diagrams and flow charts in no time. I find these tools are especially valuable because paragraphing and bullet lists are boring to look at — I love using shapes to help express my message more clearly. When you create a shape, right-click and press Edit Points to create custom shapes that fit your specific needs. For instance, you can reshape arrows to fit the dimensions you like: Another option is to combine two shapes together. Select the two shapes you’d like to work with, then click Shape Format in the top ribbon. Tap Merge Shapes. There are several options to create custom shapes: You can also use PowerPoint to crop existing images into new shapes: Believe it or not, presenting websites within PowerPoint is something we’re still having to find workarounds for. From my experience, these are some tactics that have worked in the past that may be helpful depending on which version of PowerPoint you have: GIFs are looped animated images used to communicate a mood, idea, information, and much more. I enjoy adding GIFs to PowerPoints to be funny or quickly demo a process. They’re very popular with and easily recognized by Millenials and Gen Z, and it’s easy to add GIFs to your slides: PowerPoint is an excellent tool to support your presentation with visual information, graphics, and supplemental points. Your PowerPoint should not be your entire presentation, and the elements you do introduce need to function properly. If the presentation simply repeats your words, has broken links, or shows unreadable text, the hiccups can become the takeaway of your talk, no matter how well-spoken the presentation. I find slam-dunking the basics by keeping it simple is the way to go. If your slides have dense and cluttered information, it will distract your audience, and you could lose their attention. In short? Keep your presentation persuasive by keeping it clean: One constant problem presenters have with PowerPoint is that fonts seem to change when presenters move from one computer to another. The fonts are not actually changing — the presentation computer just doesn’t have the same font files installed. To embed your fonts on a PC: Now, your presentation will keep the font file, and your fonts will not change when you move computers. To embed your fonts on a Mac: If you’re still afraid of your presentation showing up differently when it’s time to present, you can create a PDF version just in case. I think this is a good option if you’ll be presenting on a different computer because if it doesn’t have PowerPoint installed, you can still use the system viewer to open a PDF. The only caveat is that your GIFs, animations, and transitions won’t transfer over. To save your presentation as a PDF file: You can also go to File, then Export, then select PDF from the file format menu. PowerPoint allows you to either link to video/audio files externally or to embed the media directly in your presentation. For PCs, I think two great reasons for embedding are: If you use PowerPoint for Mac, it gets a bit complicated, but it can be done: Between operating systems, PowerPoint is still a bit jumpy. Even between differing PPT versions, things can change. The easiest fix? Just bring along your own laptop when you’re presenting. The next easiest fix is to upload your PowerPoint presentation into Google Slides as a backup option — just make sure there is a good internet connection and a browser available where you plan to present. Google Slides is a cloud-based presentation software that will show up the same way on all operating systems. To import your PowerPoint presentation into Google Slides: When I tested this out, Google Slides imported everything perfectly, including a shape whose points I had manipulated. This is a good backup option to have if you’ll be presenting across different operating systems. In most presentation situations, there will be both a presenter’s screen and the main projected display for your presentation. PowerPoint has a great tool called Presenter View, which can be found in the Slide Show tab of PowerPoint. Included in the Presenter View is an area for notes, a timer/clock, and a presentation display. For many presenters, I’ve seen this tool help unify their spoken presentation and their visual aids. You never want to make the PowerPoint seem like a stack of notes that you’re reading off of. Use the Presenter View option to help create a more natural presentation. Pro tip: At the start of the presentation, you should also hit CTRL + H to make the cursor disappear. Hitting the “A” key will bring it back if you need it. Now that we’ve covered the basics on how to create a PowerPoint presentation, let’s go over the basics of what makes a presentation memorable — starting with what not to do. As someone who has sat through hundreds of presentations and webinars, few things frustrate me more than watching someone read their slides word-for-word. It makes the presenter seem unprepared and disengaged, and it quickly loses the audience’s attention. Also, it makes the audience feel dumb — they are just as capable of reading the slide as you are, so if you don’t bring additional value, why bother with the presentation? Try this instead: Try to have 2-3 main points per slide that you want to get across. Don’t feel the need to write it all on the slides. Instead, write out what’s most important to know and use bullet points, visuals, or keywords to guide your discussion. Every presentation should have a purpose — a clear point that every audience member will walk away with. If you can’t state the purpose of your presentation in one sentence, your audience will feel lost and confused about what your message is. Try this instead: Before you craft your presentation, ask yourself, “Why am I making this presentation?” and “What do I want my audience to take away from it?” After you answer these two questions, check your slides and talking points against your answers to make sure each one aligns with your ultimate goals. PowerPoint offers a ton of cool features — animations, transitions, sound effects — but just because you can use them doesn’t mean you should. Too many effects can make your presentation feel cluttered and amateurish, and instead of focusing on your message, your audience is left wondering, Why did that text just spin onto the screen? Try this instead: Let your message be what stands out the most. Try to simplify each slide as much as possible and eliminate until you have just what’s absolutely necessary to tell your story. If you’re new to delivering presentations, you might be surprised at how much longer it takes you to give your presentation IRL than when you go over your slides in your head. Try this instead: Do a few rounds of practicing out loud at home (or, better yet, to a friend or partner) to see how long it takes you to get through your slides and where you might need to speed things up or elaborate more. When I was in journalism school, pacing was one of the hardest things to master. It’s easy to speak too fast when you’re nervous or excited. On the flip side, speaking too slowly can make you seem unsure or disengaged. Try this instead: When you’re practicing, aim for a smooth, measured pace. Sometimes, it can be helpful to record yourself while speaking to see how your presentation might come across to your audience. We all use filler words when speaking, but too many can make you sound unprepared or unsure of your material. Try this instead: A weak ending — like “Well, that’s it” or “Any questions?” — can make your presentation feel unfinished. You want to use your final moments to leave a message with your audience, whether it’s potential business investors or a job opportunity. Try this instead: Before presenting, ask yourself what’s one thing you want everyone to walk away knowing after your presentation. Use your conclusion to recap your main points and get this message across. Now that you have these style, design, and presentation tips under your belt, you should feel confident to create your PowerPoint presentation. But if you can, I recommend exploring our other resources to make sure your content hits the mark. After all, you need a strong presentation to land your point and make an impression. And it will take both practice and time; don’t stress! With several templates to choose from — both in PowerPoint and available for free download — you can swiftly be on your way to creating presentations that wow your audiences. Editor's note: This post was originally published in September 2013 and has been updated for comprehensiveness.![30 PowerPoint Presentation Templates [Access Now]](https://no-cache.hubspot.com/cta/default/53/2d0b5298-2daa-4812-b2d4-fa65cd354a8e.png)
How to Make a PowerPoint Presentation
Getting Started
1. Open PowerPoint and click ‘New.’

2. Choose a theme or create your own.
Creating PowerPoint Slides
3. Insert a slide.
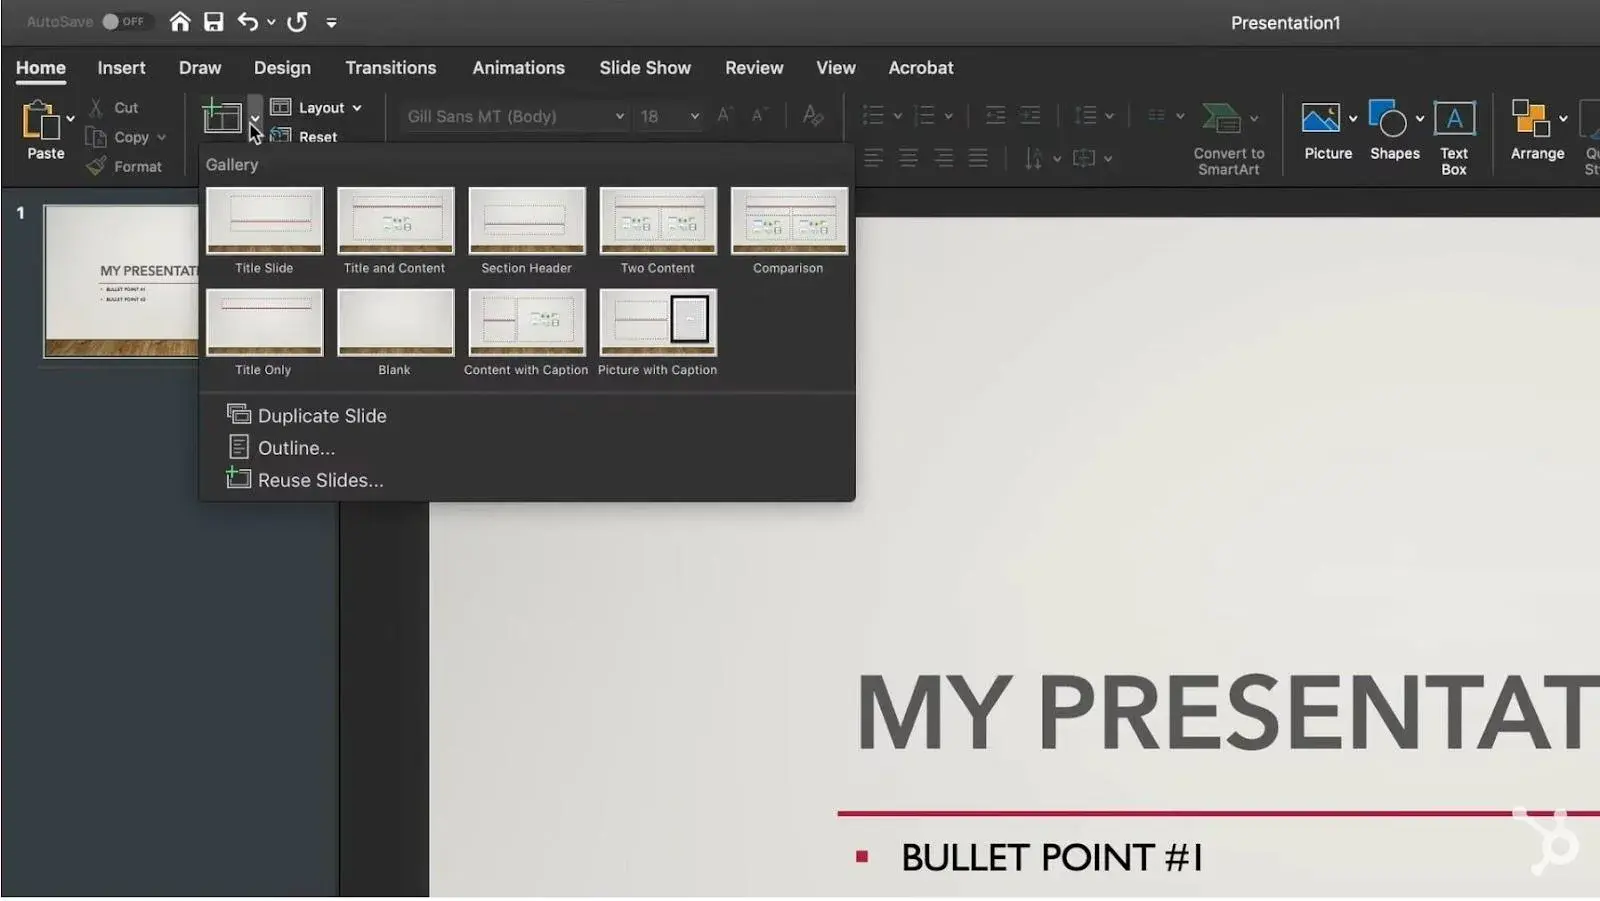
4. Create a variety of slides for different purposes.
5. Use the “Duplicate” feature to save you time.
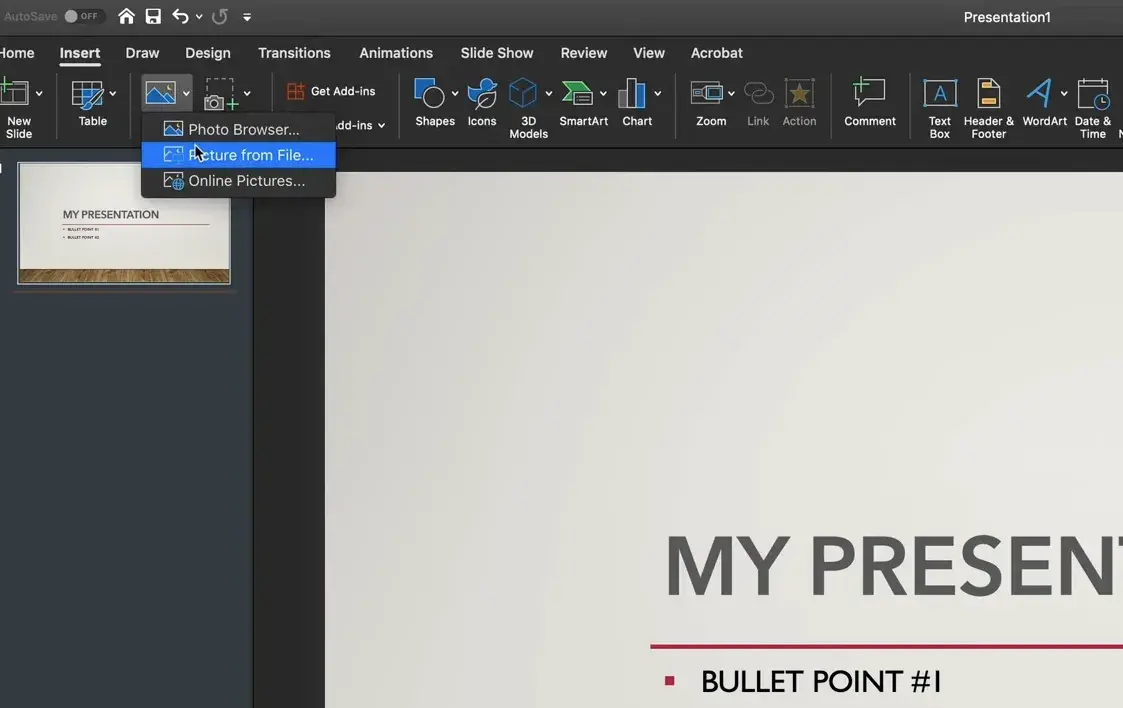
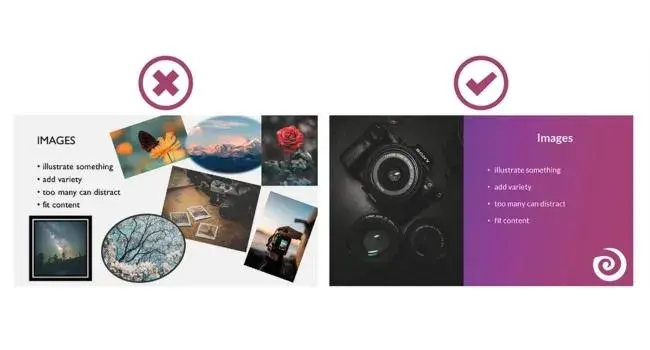
6. Add photos to your slide.
Finishing Up Your Presentation
7. Save your presentation.
8. Run your presentation.
9. Advance the slides.
PowerPoint Presentation Tips
PowerPoint Style Tips
1. Don’t let PowerPoint decide how you use PowerPoint.
2. Create custom slide sizes.
3. Edit your slide template design.
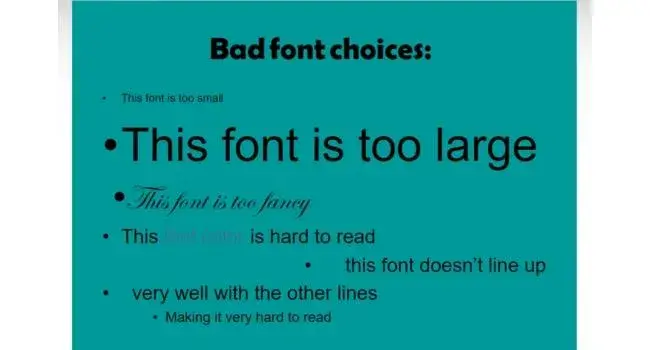
4. Write text with your audience in mind.
Typography
5. Make sure all of your objects are properly aligned.
PowerPoint Design Tools
6. Use “Format Object” to better control your objects’ designs.
7. Take advantage of PowerPoint’s shapes.
8. Create custom shapes.

9. Crop images into custom shapes.
10. Present websites within PowerPoint.
11. Try Using GIFs.

PowerPoint Process
12. Keep it simple.
13. Embed your font files.
14. Save your slides as a PDF file for backup purposes.
15. Embed multimedia.
16. Bring your own hardware.
17. Use “Presenter View.”
Common PowerPoint Presentation Mistakes to Avoid
1. Reading directly from the slides.
2. Creating a presentation without a purpose.
3. Using too many “buzzy features” that distract from the message.
4. Not practicing timing beforehand.
5. Speaking too fast or slowly.
6. Using too many filler words like “like” or “um.”
7. Ending without a strong conclusion.
Your Next Great PowerPoint Presentation Starts Here


_1.png)