Yoga for Hips: 12 Yoga Poses for Stretching & Strengthening Tight Hips
The post Yoga for Hips: 12 Yoga Poses for Stretching & Strengthening Tight Hips appeared first on The Yoga Nomads.
 FrankLin
If you struggle with lower back pain, sciatica, reduced mobility, or hip tension, certain yoga poses can help provide relief.
Health of the hip joints is an often overlooked indicator of wellness. After all, we carry the weight of our entire upper body on the shelf of the pelvis. The ball-and-socket hip joints are the key points of mobility for all of our daily movements.
Hip joint injuries account for over 6% of sports injuries and over 450,000 hip replacement surgeries are performed every year in the United States alone.
Studies show that prolonged sitting is a major cause of limited hip mobility and associated pain. The resulting poor posture is also linked to greater risks for chronic fatigue, stress, depression, and headaches. Needless to say, a sedentary lifestyle can quickly degenerate your physical and mental health. Yoga helps keep the body limber, mobile, and pain-free.
Ancient yogic philosophy asserts that we hold many of our emotions in our hips. After all, the hips reside right at the Sacral Chakra, which is associated with emotions, sexuality, and creative energy. Stretching the hips and releasing tension around your pelvis can lead to a simultaneously emotional and physical release.
Here is everything you need to know about yoga for tight hips and the best poses for nourishing those delicate hip flexors.
How Does Yoga Help Tight Hips?
Tightness in the hips is a common result of spending most of your day sitting in chairs, on couches, or in cars. As tension and inflammation build in the hips, several spinal issues can result.
Thankfully, yoga is one of the best ways to relieve tight hips while preventing hip injuries. The science-backed benefits of yoga for hips include:
Deeply stretch the hip flexors from multiple anglesImprove overall flexibilityStrengthen small muscles that help stabilize the hip jointImprove circulation in the musclesActivate the parasympathetic nervous system for reduced mental stressReduce back painImprove posturePrevent and manage osteoarthritis in the hipsReduce risk of hip or back injuryRelease endorphins that reduce pain and make you feel betterWhile it may seem too good to be true, opening up your hips with yoga can drastically improve your quality of life.
What are Hip Flexors?
Hip flexors are a group of small muscles that support the hip joint. They need to be highly mobile to help move your lower body, especially when walking, bending down, and lifting your legs.
The hip flexor muscles include:
Pectineus: assists in thigh movementSartoris: increases flexible movements in the legsRectus Femoris: connects the pelvis to the kneeIliopsoas: two muscles that support the lower backThese small but vital muscles are essential for healthy hips. Many hip opening yoga poses target most or all of the hip flexor muscle group to reduce pain and increase stability.
However, when these muscles are not regularly stretched or exercised, they can become very tight and tense.
Symptoms of tight hip flexors may include:
Sharp, shooting pains in the hips, pelvis, or groin areaCramping or soreness in your upper legBruising or swelling in hips or upper thighPain in your glutes, core, or low backDecreased strength in the groin areaLower back pain or sciaticaMuscle spasms in your hips or thighsDifficult standing, walking, or runningYoga is a time-tested practice that can help combat hip pain and improve overall mobility so it’s easier to sit, walk, bend, run, and flow through life.
Here are our favorite asanas for the hips:
12 Best Yoga Poses for Hip Opening
Child’s Pose (Balasana)
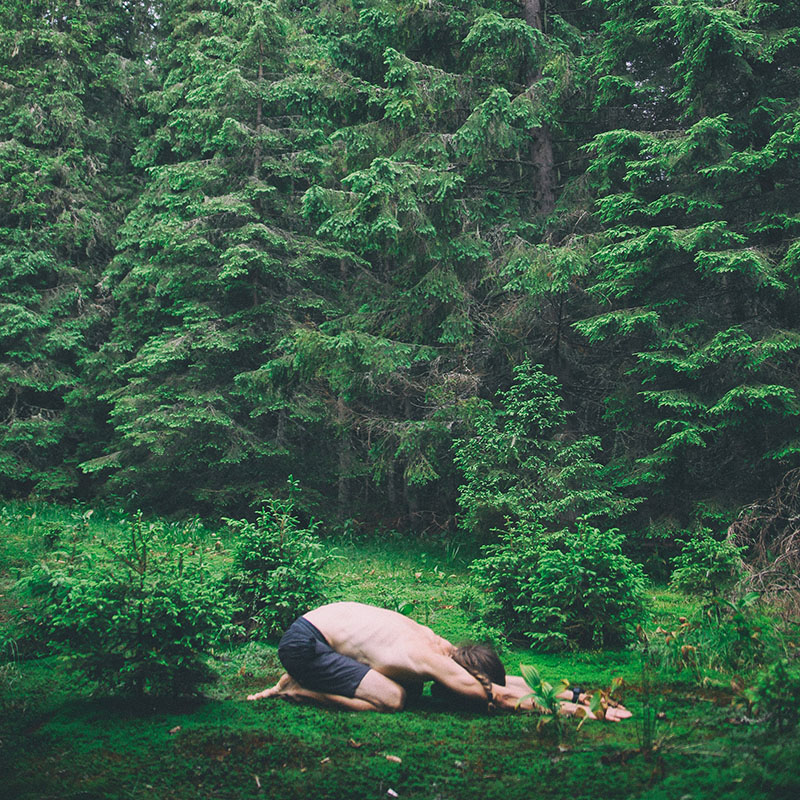
One of the easiest hip openers, Child’s Pose is beginner-friendly and very low risk. Nearly anyone can practice this pose, regardless of their experience level or flexibility. However, props like a yoga bolster or block may be useful for those with extremely tight hips.
Begin in a tabletop position with the wrists stacked under the shoulders and knees stacked under the hips.Tops of the feet are relaxed flat on the ground.Sit your hips back onto your heels as you allow your arms to stretch forward.Lower your forehead to the floor and feel a lengthening in your spine as your tailbone tucks toward the ground.Use a bolster beneath the hips or under the upper body for added support.Hold for as long as necessary, taking deep breaths and melting into the floor.Wide-Legged Forward Fold (Prasarita Padottanasana)

To open up the inner thighs and feel a lower back release, a standing forward fold with the legs in an upside down “V” can be extremely relieving. If you have tight hamstrings or hips, the knees can remain bent or you can balance your hands on yoga blocks.
Begin in a standing position.Separate your legs out to the side about 3 to 4 feet apart.Bring your hands to your hips and engage your core.Lift tall through your torso and slowly fold forward over your legs. Try to bend only at the hip joints and do not round your lower back.If you feel your back rounding, stop bending and place a block beneath your hands to bring the floor closer to your body. You can also keep your knees bent to reduce the intensity.If you can, place your hands flat on the mat and allow your neck to relax downward.Feel the edges of your feet press into the ground by imagining four corners of the foot (the big toe, pinky toe, and each side of your heel) as anchor points.Take several breaths, engage the core, and feel your hips open as your tailbone reaches toward the sky.To release, inhale and bring your arms back to your hips before slowly lifting your torso back to standing.Half Pigeon Pose (Raja Kapotasana)

Pigeon Pose is a deep and rejuvenating hip opener that externally rotates the glute and hip flexors of one hip at a time. This pose can be fairly intense, so if you struggle with a lack of flexibility, it’s best to ease into this pose with a yoga block or bolster beneath the glute.
Begin in a Downward Facing Dog with your hips pushing toward the ceiling.Inhale and bring your left leg up in the air, then pull it forward under your chest. Allow your left knee to rotate outwards as you bring your left foot beneath the right hip.Your leg will look like an “L” shape beneath your lower body. Adjust the foot and shin forward or backward as necessary to reduce or increase the stretch.Keep the right leg straight behind you with the top of the thigh, shin, and foot flat on the mat.You can keep the torso forward and lifted or begin to fold forward onto your elbows for a deeper stretch.Feel a deep stretch in the outer hip flexors as the knee presses toward the ground.Be careful to keep the hips forward and “squared” to the front of the mat. Don’t roll over to one side and create an imbalance.Use gravity and the weight of your torso on your thigh to allow the hip to fall toward the ground.To exit this pose, push back up into Downward Facing Dog or bring the back leg straight forward. Repeat on the other side.Yogi Squat/Garland Pose (Malasana)
Yogi Squat is a perfect stretch for the inner groin and upper thighs. It uses gravity and your own body weight to release the hip muscles and awaken energy in the lower body.
It is also excellent for digestion, reproductive health, and mobility in the pelvis. You can often find regular people on the streets of India sitting and resting in this position to experience the grounding and relieving benefits.
Don’t worry: you don’t have to squat all the way down you see in photos. You can reap all the benefits of this pose even with minimal flexibility.
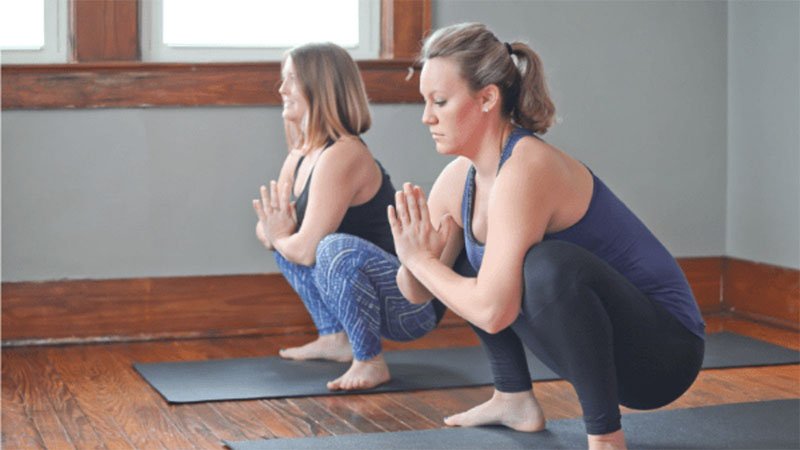
Begin in a wide-legged standing position with your feet about mats-width apart.Bend your knees and start lowering your tailbone toward the mat. This will feel like a standard squat.Your toes may naturally turn slightly out or remain facing forward.Keep your spine as straight as possible and core lightly engaged.Bring your hands to your heart center in prayer hands, or the Anjali Mudra, keeping your chest forward and lifted.If you have the flexibility, bring your elbows to the inside of your knees and use them to press the legs farther apart.Breathe into the super deep stretch in your groin. Hold for 30 seconds to 1 minute. Use your quad strength to press up and out of the pose if it is too intense.To release, simply straighten the legs as you press through the feet back to standing.High Crescent Lunge
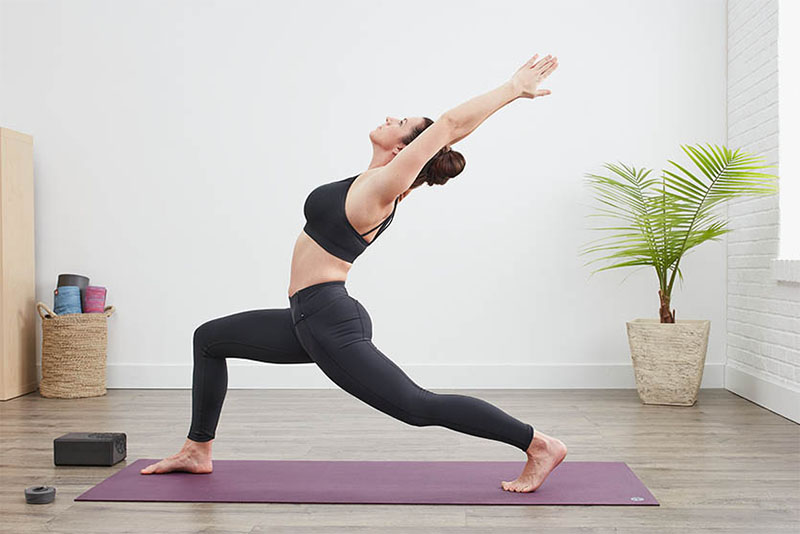
High Crescent Lunge pose is often used as a preparation for intermediate poses like Warrior I and Warrior II. This upright posture stretches the front thigh as well as the groin, outer hip flexors, and hamstrings.
Begin in a Downward Facing Dog with your hips lifted to the sky.Inhale and bring the right leg up as you press the left heel into the floor.On the next inhale, bring your right leg forward and under your body. The knee and thigh should make a right angle beneath your torso.Keep your back heel lifted as you press off your hands to lift your upper body into an upright position and reach your arms overhead.This posture will feel like a standard lunge. Be sure to keep your hips forward and aligned by imagining a string pulling the left hip toward the front of the mat.Hold for 3-5 breaths and then step the back leg forward into a standing Mountain Pose.Step back with the right leg to repeat on the other side.Low Lunge (Anjaneyasana)

If you want to stretch your front thighs and groins while opening up the shoulders, Low Lunge is a great post-workout recovery that helps improve posture and boost your energy while stretching tight hip flexors.
From Downward Facing Dog, inhale and step your right foot forward, bending the right knee directly over the right heel.Bring your left knee to the floor and adjust it backwards until you feel a comfortable stretch in the front of the left thigh. Place the top of the left foot relaxed on the mat.Lift your torso up and bring your arms overhead with palms facing inwards.Look up slightly without crunching into your neck.Sit deeper into the lunge as you feel the right hip flexors stretch and the left thigh lengthen.Draw your tailbone downward and feel your pelvic bone rotate forward.Hold for 30 seconds to 1 minute and then exhale back into Downward Dog.Repeat on the other side.Happy Baby Pose (Ananda Balasana)
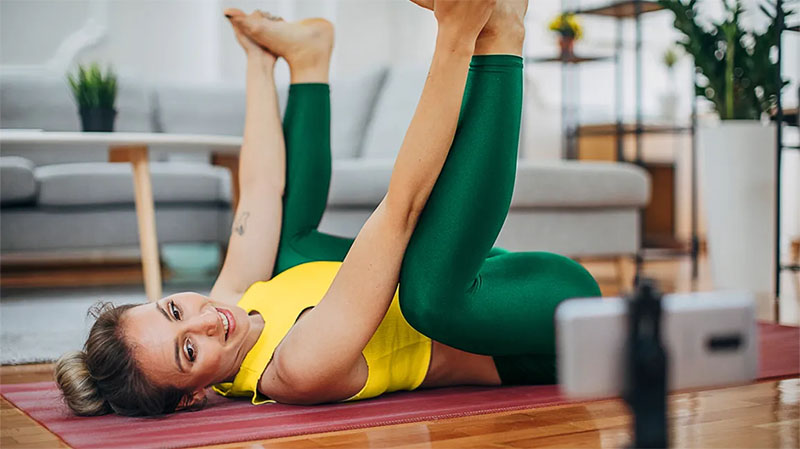
Any pose with “child” or “baby” in it tends to be pretty relieving. Happy Baby Pose is a laid-back pose (literally) that feels remarkably massaging on your lumbar spine. As you use your hands to gently press the feet and knees outward, you can open up your groin and hips for a deep emotional release.
Begin laying flat on your back.On an exhale, bend your knees and pull your legs toward your stomach.On an inhale, grip the outsides of your feet or loop your ring and index fingers around the big toes.Gently begin to pull your knees out and down toward your armpits.Try to keep your spine flat to the ground.Adjust the intensity of the hip opening stretch by pulling softer or harder against the bottom of your feet.Hold for 1-2 minutes as you breath. To release, slowly bring the legs back to the floor.Lizard Pose (Utthan Pristhasana)
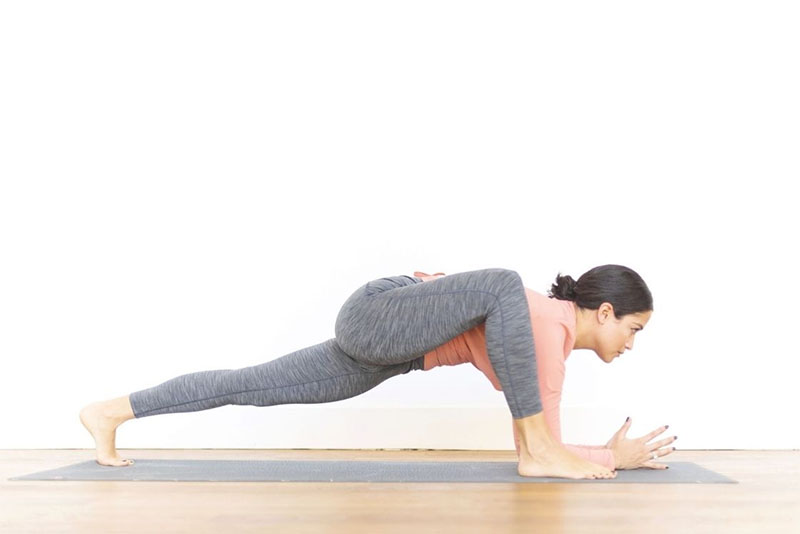
Lizard Pose is another deep hip opener that can be modified for more or less intensity. It significantly strengthens and lengths the quadriceps, hip flexors, and hamstrings while challenging balance and improve creativity.
Begin in a Downward Facing Dog and inhale your left leg forward. Place the left foot on the outside edge of your left hand as if in a low lunge position.Lower your right knee to the floor and press your hips forward, maintaining a straight spine and upright torso.If this feels okay for you, then slowly lower onto your forearms, keeping a flat back and neck elongated.Lastly, straighten your right leg and press into the ball of your right foot.Hold for 5-10 breaths and then repeat on the opposite side.Half Lord of the Fishes Pose (Ardha Matsyendrasana)
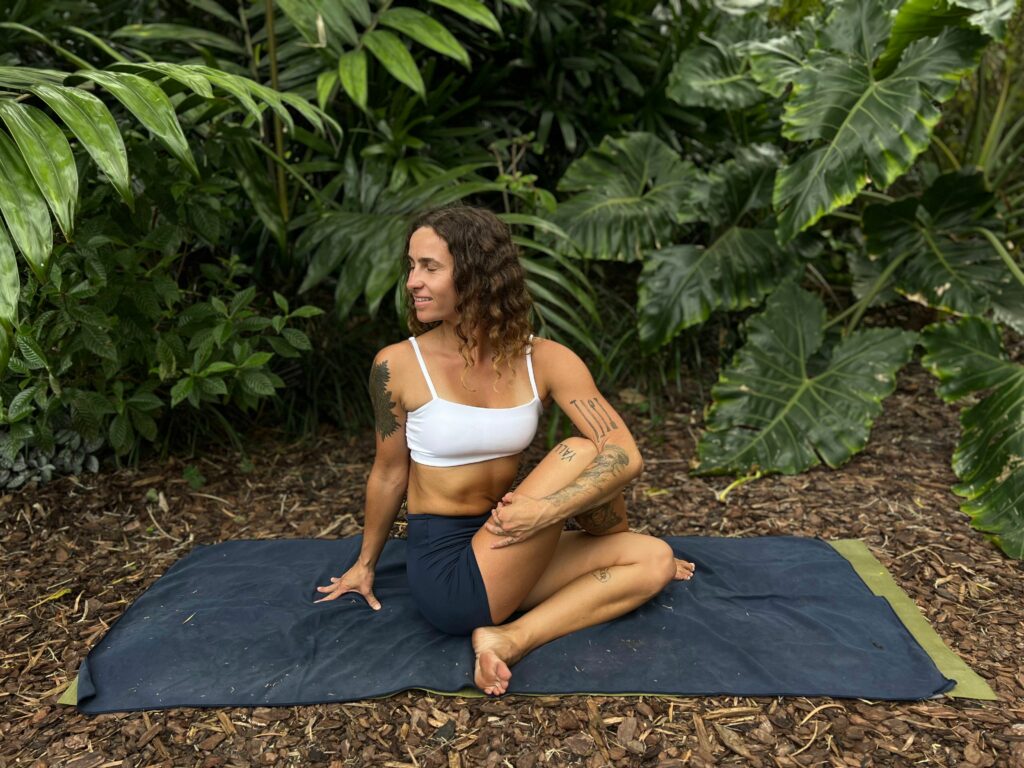
This restorative twist is a great yoga pose to counter previous poses focused on the inner thighs and groin. Half Lord of the Fishes focuses on the external hip flexors and rotators while also providing a relieving spinal twist that stimulates digestion.
Begin in a seated position with your legs extended straight in front of you and spine straight.Bend your right knee and cross it over the left. Tuck the right foot against your right buttock.Inhale as you extend your right arm alongside your right ear.As you exhale, twist your torso to the left and place your right elbow on the outside of your left knee. Use your left palm to press lightly into the mat behind your tailbone.Feel a deep stretch in the outside of your right hip and glute.Bring your gaze over your left shoulder, but do not crunch into the neck or over-twist.As you inhale, lengthen your spine up tall. As you exhale, twist more. It is very important that you don’t collapse into the low back.To release, uncross the legs and then switch to the other side.Avoid over-twisting or pushing your spine beyond its limits.Frog Pose (Bhekasana)
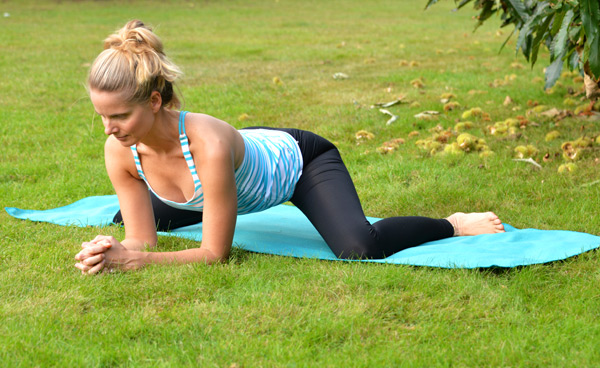
Frog is an intermediate hip opening yoga pose that requires significant flexibility and focus. It stimulates digestion, circulation, and stronger back muscles to improve posture. However, if you have knee problems or extremely tight hips, this position is best avoided.
Start in a tabletop position with your wrists stacked beneath your shoulders and knees bent in alignment beneath your hips.Slowly widen your knees with each foot flexed, toes pointing outwards. Use yoga knee pads or a yoga blanket to support the knees if they feel uncomfortable.Come down onto your forearms and press the palms into the floor.As you widen your knees, feel your groin begin to open toward the mat. Maintain a straight spine and neutral neck.Sink as low as is comfortable and hold for 5-10 breaths. Release into Child’s Pose.Reclined Bound Angle Pose (Supta Baddha Konasana)
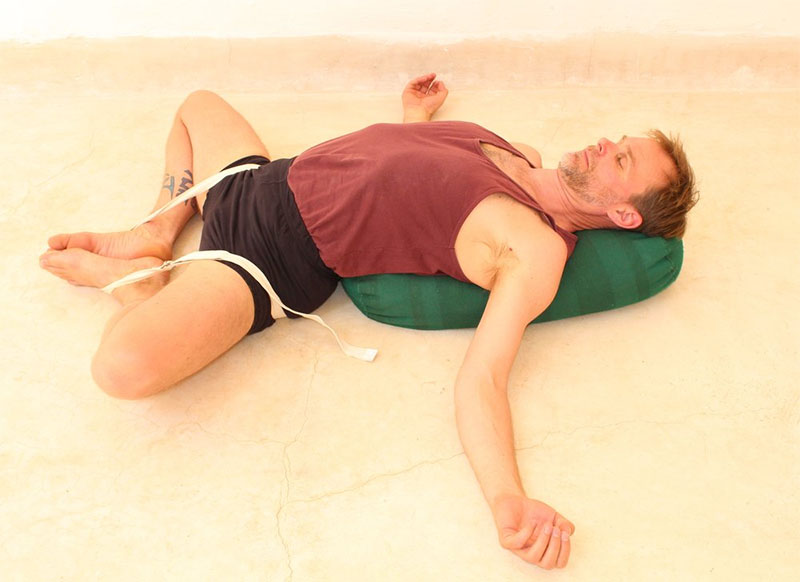
If you recall the classic “butterfly legs” from childhood, this posture will feel very familiar. As you lay back with the bottoms of your feet touching and knees splayed out, you can experience all the benefits of hip opening as well as a shoulder and back release.
Begin laying flat on your back.Bend your knees and touch the bottoms of your feet together. Bring them closer or farther from you depending on flexibility.Allow the outer hip to roll open as the knees fall toward the floor and you feel a deep stretch in your inner thighs.Sink your spine flat to the mat and optionally bring your arms overhead.Hold for 4-10 breaths or as long as you’d like. Release by bringing the feet to the mat and sitting up.Dancer’s Pose (Natarajasana)
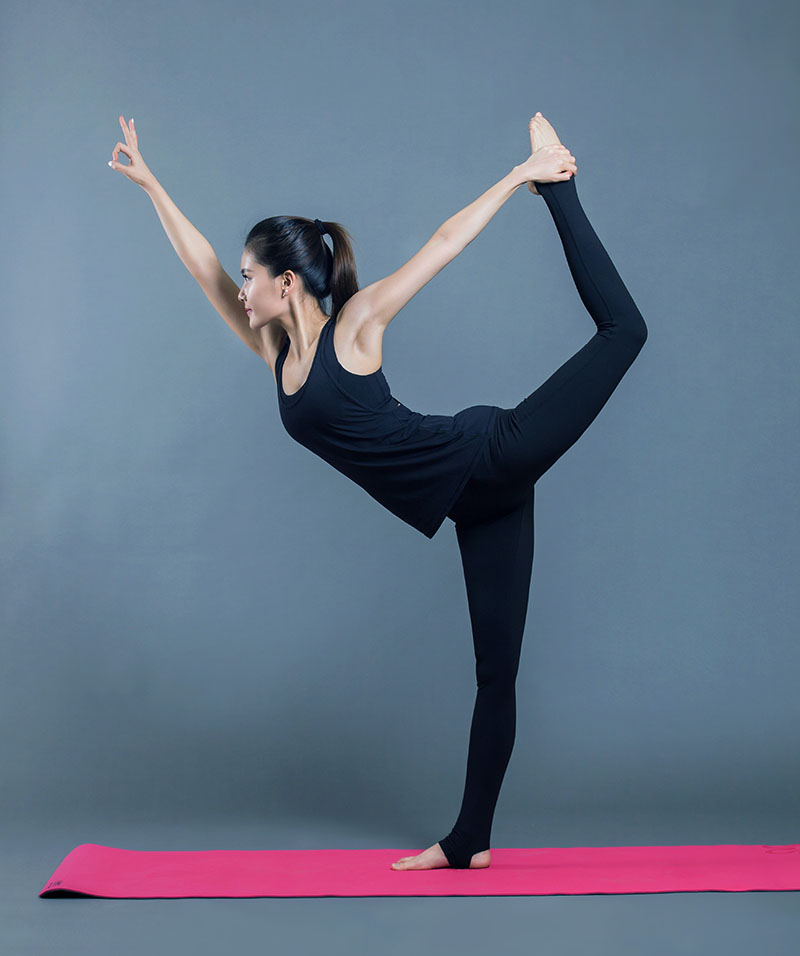
As one of the best hip opening standing postures, Dancer’s Pose is often the pinnacle of a hip opening sequence. It challenges balance, focus, leg strength, and hip mobility while integrating a big back bend.
Begin in Mountain Pose with feet hip distance apart.Root down through the balls of your feet and flex your legs.Shift your weight into the right foot and bend your left knee. The left foot should reach toward your tailbone.With your left arm, reach back and grab the inside of the left foot arch. This will externally rotate your shoulder so your elbow ditch faces outward.Bring the left knee back in alignment with the right before continuing.On an inhale, bring the right arm to the sky, palm facing forward.On an exhale, begin kicking your left foot into your hand as your back leg lifts up and back. Allow your spine to naturally curve without over-arching into the lower back.Keep the left hip in alignment with the right and maintain a strong, straight right knee.Keep your drishti (gaze) forward as you reach up and forward in each breath.Bring your front hand into a mudra if you’d like.Hold for 3-7 breaths, then release by slowly releasing the left foot back to the floor.Safety in Hip Opening Yoga Poses
When practicing hip openers, it is extra important to honor your body’s limitations and avoid pushing too hard. The hip flexors, low back, and knee joints can be especially sensitive in these postures.
To safely practice hip opening yoga asanas, remember to:
Maintain proper alignment at all timesAvoid overextending (hyperextension) of your joints or tendonsAvoid pressure on your kneesModify when necessary with yoga blocks, bolsters, or knee padsNever twist your knees or hold them in an uncomfortable positionEase in and out of poses; never force your hips into a deep split positionHonor your range of motionWhen unsure, practice under the guidance of a certified yoga teacher or physical therapistMaintain steady pranayama breathing (deep inhales and deep exhales) throughoutIf you feel an upwelling of emotions during hip opening yoga, be assured that this is completely normal. Ancient yogic philosophy says we store many unresolved emotions in our hips. Anyone who has felt an upwelling of tears in yoga class may be able to relate. This emotion isn’t from physical pain (yoga should never be painful!), but rather from often indescribable underlying spiritual and emotional forces.
With proper precautions, hip opening yoga is safe and offers a range of benefits for your joints, spine, and mobility. You may even feel more mental clarity and emotional balance after a restorative hip opening sequence!
Key Takeaways: How to Stretch and Strengthen Your Hips with Yoga
The hips are the crux of lower body mobility. They affect every aspect of your daily movements, from walking and running to bending and sitting.
Tight hip flexors are most commonly the result of too much time spent sitting. Yoga can be a rejuvenating practice for stretching these small muscles while building more strength around the hip joints.
Just don’t forget to ease into hip opening yoga poses. Progress and pain relief takes time and consistent practice, so remember that just 10 minutes of hip opening stretches every day is better than 1 hour of super intense stretching once per week.
Namaste!