10 Yoga Arm Balances to Uplevel Your Practice: Safety, Tips + Useful Props
The post 10 Yoga Arm Balances to Uplevel Your Practice: Safety, Tips + Useful Props appeared first on The Yoga Nomads.
 KickT
KickT
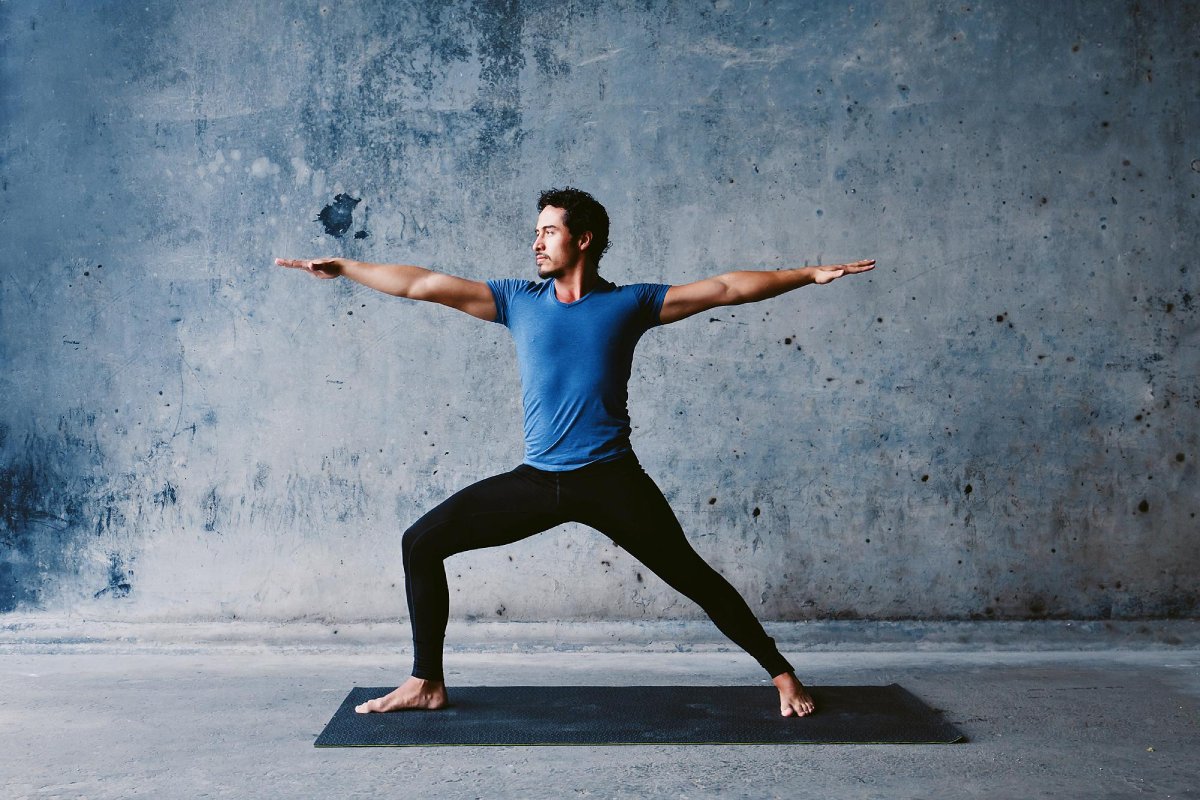
Is there a secret to lifting up into an arm balance without falling on your face? With proper preparation, relaxation, props, and alignment, yoga arm balances are a lot more accessible than they look.
Finding balance is a challenge in any aspect of life. In your yoga practice, arm balances are almost a physical representation of this mental trial. As you seek the focus and clarity required to balance your body upside-down, you simultaneously tap into your grounded inner self.
With a few secrets, you can safely work toward mastering the art of being upside down (without falling on your face).
Benefits of Arm Balances
Yoga arm balances require significant mental focus, shoulder strength, core strength, and plain old courage. They bring us back to our center, building emotional and muscular stability in the process. Inverting the body also has some surprising health benefits you don’t want to miss out on.
Shift in perspective: Going upside down quite literally changes your point of view. When you’re feeling stuck or “in a rut”, an inversion can quickly shift your mood into a more positive state.Improve energy: Inversions are inherently energizing and motivating. They get your heart beating and calories burning.Tone upper body: Arm balances improve your arm strength for more toned appearance and stronger joints.Build core strength: The abdominal muscles are the center of any balancing asanas. As you practice, you will notice a stronger core for supporting your arms and back.Improved mental focus: The attention required to shift your center of gravity is great practice for more focus in daily activities.Top 10 Yoga Arm Balances
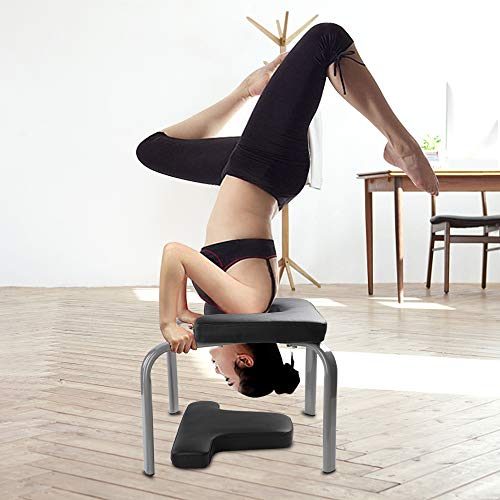
Headstand (Sirsasana)
If you’re nervous about going fully upside down in a handstand, headstand is surprisingly
How to Do Headstand:
Begin in a downward facing dog, then adjust your arms into “dolphin arms” with the hands interlaced together and arms in a “v” shape.Look behind you and tuck your chin into your chest. Place the very top of your head on the mat with your clasped hands holding the back of your skull.Engage your core, tuck your toes, and slowly begin walking your toes toward your face.Begin to lift one leg into your chest and then the other. Slowly squeeze your glutes and core as you straighten your feet up toward the sky. Alternatively, try to float both knees up at the same time, leaning forward as you press the crown of your head into the ground.Here is a more detailed guide to How to do a Yoga Headstand and Safely Teach Headstand to Yoga Students.
Pro Tip: Try a headstand bench or “yoga stool” to enjoy the benefits of training for a headstand without risking straining your neck or falling on your face. Here are our Top 6 Favorite Yoga Stools and how to use them.
Crow Pose (Bakasana)
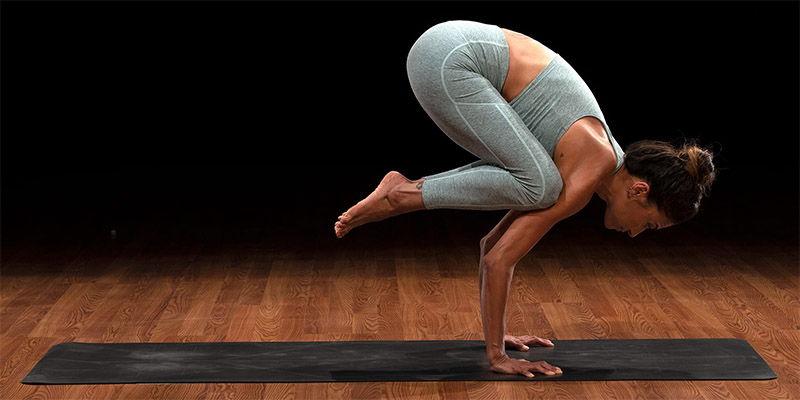
One of the most accessible beginner arm balance poses, Crow Pose is close to the ground and fairly easy to get into. While it requires shoulder strength and some core training, most of Crow Pose is actually just balance. Once you find your center of gravity, you can simply shift your knees onto the back of your arms and feel your body float upwards.
How to Do Crow Pose:
Begin in a forward fold with a halfway lift and knees slightly bent. Spread your fingers wide and press your hands into the mat.Slowly bend your elbows and begin pressing your thighs into your elbows. You can also try tucking your knees to press into the back of your arms, a few inches below your armpits.Shift your graze about two feet in front of you and then slowly move your body forward until you feel weight coming out of your toes.As your toes lift from the ground and knees press into the arms, bring your heels up toward your glutes and continue looking forward.Pro Tip: Try Crow Pose Bakasana using two yoga blocks beneath your hands. The added elevation makes it easier to lift off the ground and stabilize your wrists as you shift your balance.
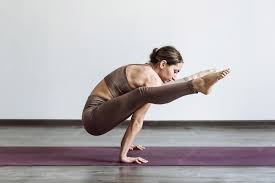
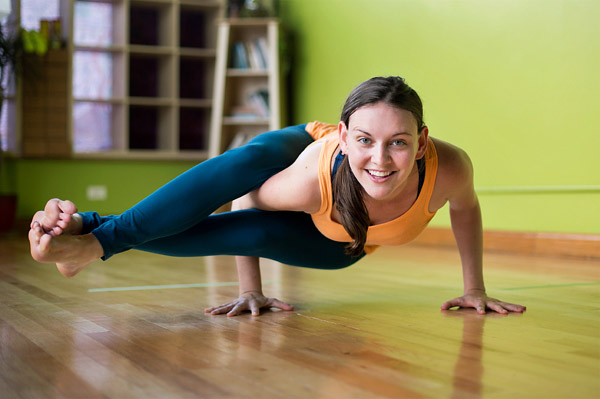
Side Crow (Parsva Bakasana)
Side Crow Pose challenges the obliques and thighs as you balance atop your triceps. This twist is great for digestion, stretching the wrist, and building shoulder strength. While it looks pretty intimidating, it can feel more stable than other inversions because your legs are tightly pressed together. Once you master Side Crow, you’ll be able to try out a lot more arm balances.
How to Do Side Crow Pose:
Begin squatting and facing the front of your mat. Place your palms flat on the floor about 12″ in front of you and shoulder width apart.Move to the balls of your feet and press your knees together. Pivot to turn your knees to face the right side of your mat.Start to lean forward, but keep your head lifted and looking forward.Bend your arms toward a 90° angle as if they are a shelf. Lift your hips onto your left arm shelf and let your knees rest on the right arm.Continue leaning forward until your upper arms become parallel with the floor and your feet begin to float off the mat. Engage your core and focus forward as you barely lift your feet to balance on your hands.Breathe and hold. Repeat on the other side.Scissor Leg Side Crow (Eka Pada Koundinyasana I)
Once you get comfortable in Crow Pose and Side Crow, this scissor leg version is a super fun variation to inspire a deeper meditative state. It is a challenging arm balance that requires some serious focus and core twisting.
How to Do Scissor Leg Side Crow:
Just like Side Crow, start out with your legs tucked in a squat close to the ground. Twist to one side and place your palms on the mat.Bend your elbows to 90° and press your outer thigh into the tricep of the opposite arm. Gaze at least 2 feet in front of you and begin to lean forward.Once you feel a center of balance, float your toes off the mat and begin to extend your top leg up and back toward the sky. Straighten the bottom leg out to the side with the toes flexed. Your knee will be balancing on the opposite elbow.Squeeze all muscles and press the Earth away from you to keep your chest lifted up.Firefly Pose (Tittibhasana)
Beginning in Bhujapidasana (or arm pressure pose), this arm balance pose stretches your hips while strengthening your wrists and triceps.
How to Do Firefly Pose:
To get into “arm pressure pose”, start in a forward fold, move the legs wider than the shoulders. Then, squat down and tuck your shoulders as far beneath your knees as possible, as if wearing your legs as a backpack.Place your palms flat on the mat just behind your feet and begin to bend your elbows like you would in a Chaturanga.Shift your weight backwards to begin resting on the backs of your upper arms. Use that momentum to slightly lift your toes from the floor, keeping your core fully engaged.Begin to straighten your legs and point your toes as your tailbone points downward and your knees straighten. Maintain a forward gaze.Pro Tip: Maintain a slight bend in your elbows and rest your knees on your upper arms near the triceps.
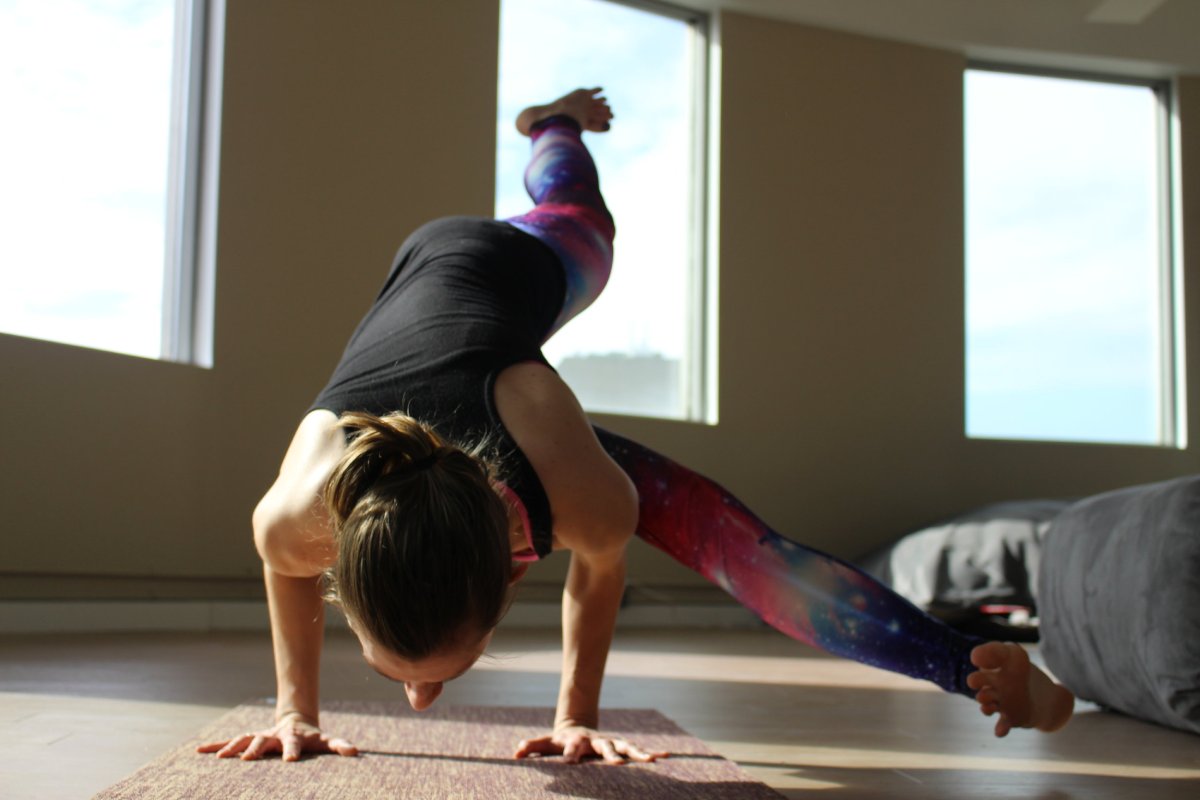
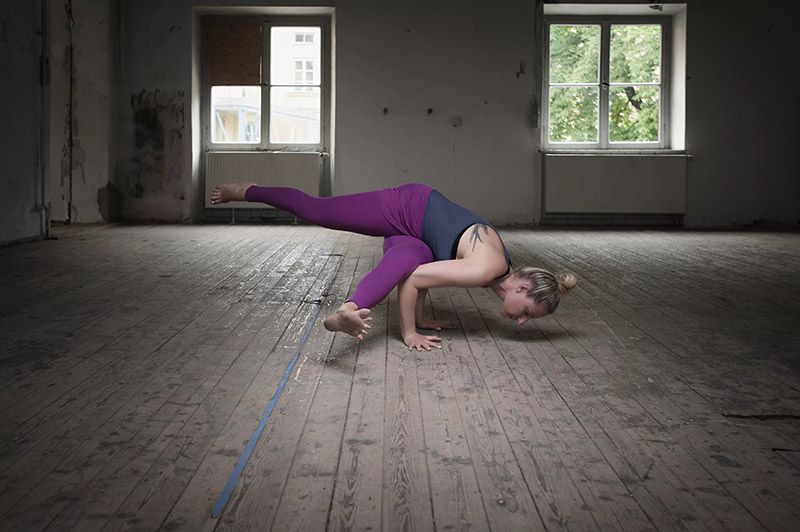
Hurdler’s Pose (Eka Pada Koundinyasana II)
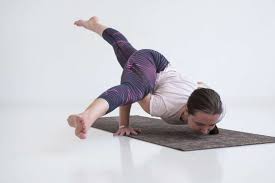
This advanced arm balancing pose is almost like doing a side split while balancing one leg on the back of your bent arm. It burns fat, opens your hips, and builds back strength.
How to Do Hurdler’s Pose:
Begin in a downward facing dog. Inhale and lift one leg up to the sky. On an exhale, shift forward as if moving into a plank pose, but link the lifted knee to the outside of your tricep.Bend your arms down to a 90° angle to create a shelf. Adjust the lifted leg to bend more and transition more weight onto the arm.Slowly shift your upper body weight forward into the tips of your fingers.Tighten all your muscles and continue looking forward as you shift so you can lift the back leg up off the floor.The final expression of this pose is to extend the front bent leg out to the side. Shift your gaze downward and slightly in front of you. Breathe deeply and don’t get discouraged by wobbling.Dragonfly Pose (Maksikanagasana)
Sometimes called Grasshopper Pose, Dragonfly Pose is an intermediate level arm balance pose that challenges hip flexibility, strengthens the hip flexors, and twists the lower body. Be sure your body is fully warmed up before you practice this asana.
How to Do Dragonfly Pose:
Begin by standing with your feet together. Bend your knees and sit back as if you’re going into Chair Pose. On an inhale, lift your left leg and place the left ankle on your right thigh to create a “4” shape. Keep sinking the hips down and back.Bring your palms together at heart center, engage your core, and twist to the side to place your left elbow on the bottom of your left foot. Continue sitting into the Chair Pose and shift your right shoulder backward to further engage the twist.Once you feel stable, bend your right knee even more so you can place your palms onto the mat. Shift the weight out of your standing leg and over the top of your upper body, using your arms as a shelf (this is similar to the Chaturanga arm position).For the final expression, your left foot will stand on the back of your right upper arm as you use your inner thigh strength to lift the right leg off the ground.Keep the entire body engaged and breathe deeply. Repeat on the other side.Forearm Stand (Pincha Mayurasana)
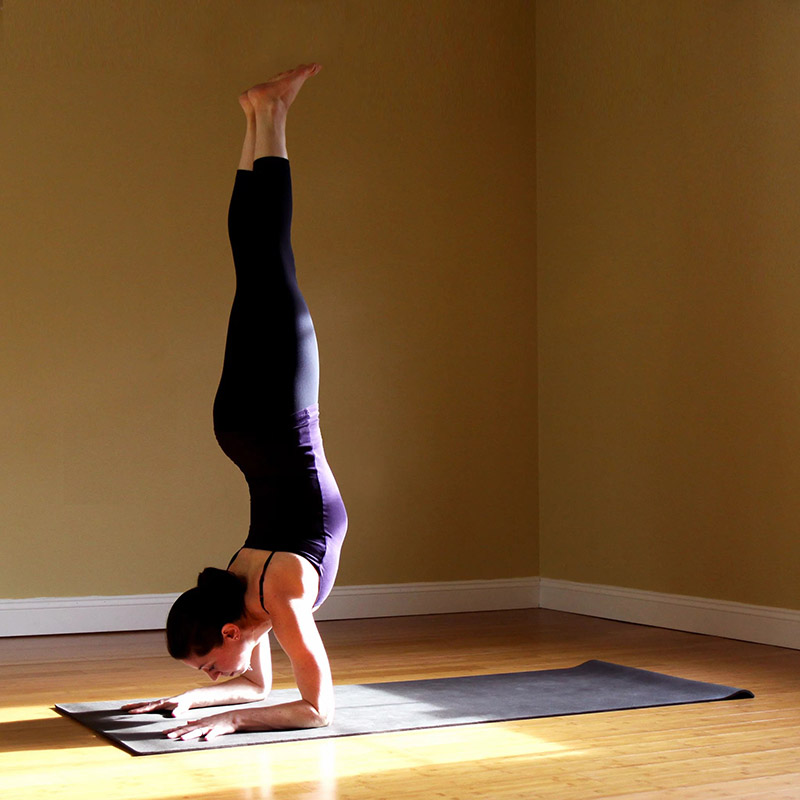
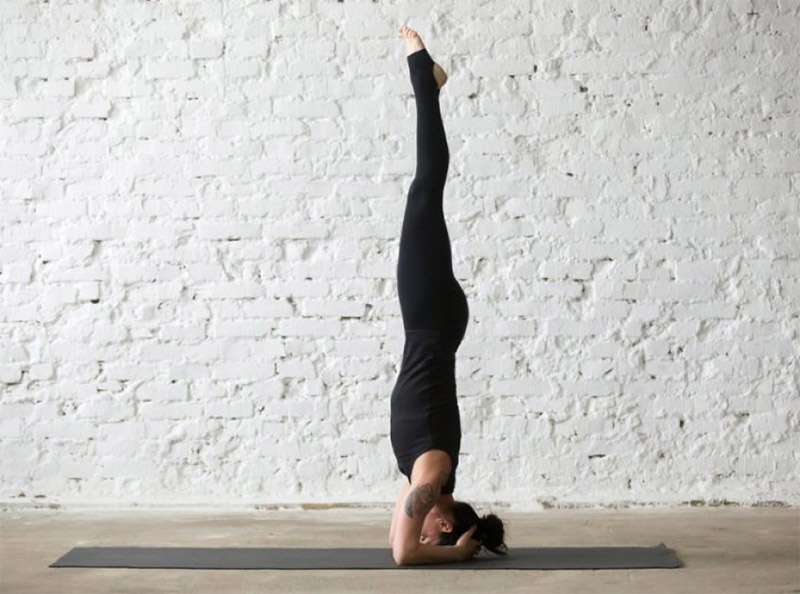
Once you’ve gotten the hang of Headstand, a Forearm Stand isn’t too far in your future. If you want to practice against a wall, its best to begin facing the wall and climb your legs up (rather than kicking up and trying to catch yourself on the wall behind you).
How to Do Forearm Stand:
Begin in a downward facing dog, then transition down to your forearms, maintaining shoulder-width distance between your arms and fingers facing forward.Look straight down between your hands.Begin to walk your feet towards your face and engage your abdominal muscles as you shift your weight forward into your arms.Keep looking at the ground and lift one toe off the floor, then the other.Alternatively, walk up the wall and find your center of gravity.Eight Angle Pose (Astavakrasana)
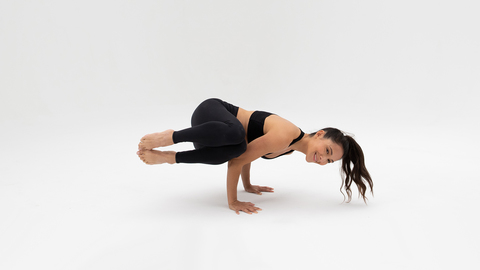
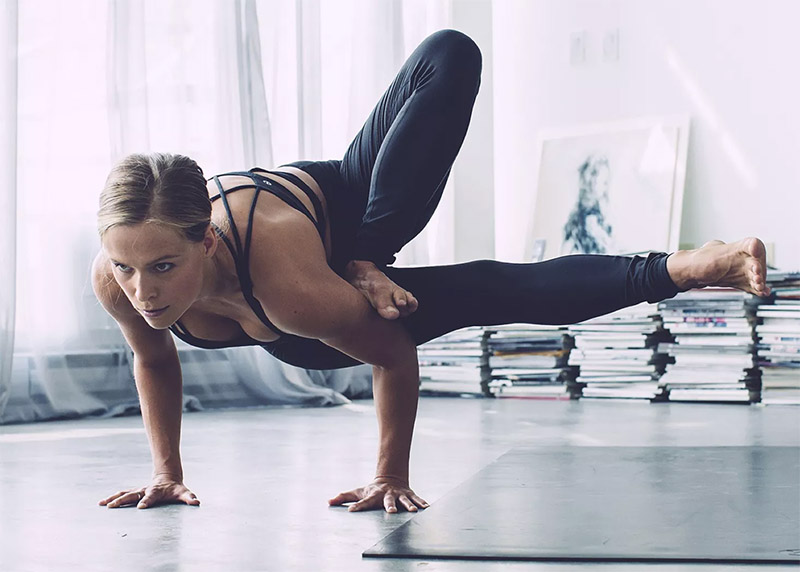
Working towards Astavakrasana requires a strong Chaturanga (four limbed staff pose) and significant upper arm strength. You will be wrapping your inner thighs around one arm while interlocking the ankles. This is a challenging advanced yoga posture that will definitely test your focus and help up-level your practice. It is also a huge energy booster.
How to Do Eight Angle Pose:
Begin sitting down in Staff Pose with your legs extended straight out in front of you.Bend your right knee up and adjust your right hand and shoulder to tuck under your leg. Firmly press your right leg into your arm.Begin to shift your weight forward and place your hands on the floor in front of your hips, about shoulder-width apart. Your right knee and shin should continue hugging your right shoulder.Engage your core as you press into the mat and lift your left leg and hips from the floor.Hook your ankles together and press your inner thighs up toward your arms. Bring your chest forward like a Chuturanga and straighten your legs out to the side, simultaneously pressing out through your feet and hands.To exit, lift your chest on an inhale and bring your legs back to the mat center. Repeat on the other side.Peacock Pose (Mayurasana)
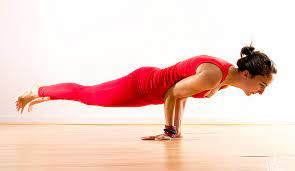
This beautiful advanced pose is known to improve digestion, stimulate appetite, and improve lung function. It strengthens your arms and torches some major calories in a short time frame.
How to Do Peacock Pose:
Begin in a seated position on your heels and knees wide. Place your palms on the mat with fingers pointing toward the back wall.Hold your hands directly under your stomach and place your forehead on the ground, extending your legs out straight behind you.Your arms will create a shelf underneath your torso as you begin to raise your head and shift the center of gravity forward. This will raise your toes off the ground until you are eventually floating in a position parallel to the mat.Tips for Safe Arm Balances
Arm balances are undeniably a little bit risky. Any time you’re shifting your balance and gravity around, you risk getting destabilized. If you want to safely learn to do yoga balances, remember to:
Strengthen your upper body and core muscles with Plank Pose, Boat Pose, and Chaturanga push-ups.Carefully study the shape of arm balances you want to attempt to ensure you can achieve the proper alignment.When in doubt, use a spotter or a wall.Place a yoga pillow or blanket beneath you to cushion your head if you fall.Attend an inversion workshop and practice with certified yoga practitioners who can guide you.Never push your body beyond your flexibility or strength limits.Thoroughly warm up your muscles with Sun Salutations or other preparatory poses before moving into balancing asanas.Use yoga blocks beneath your hands/shoulders or a yoga stool to train your body to be more comfortable upside down.Strengthen your wrists and joints with a regular practice.Arm balances take a lot of focus and persistence. Practicing for just 5 to 10 minutes per day can dramatically improve your balance and strength. Don’t be afraid to practice with props, a wall, or a spotter until you find your center of gravity.
Namaste!