7 Best Chair Yoga Exercises for Seniors: Free Printable Routine (2024)
The post 7 Best Chair Yoga Exercises for Seniors: Free Printable Routine (2024) appeared first on The Yoga Nomads.
 ShanonG
Key Takeaway
Download our free PDF for easy and safe chair yoga routines tailored for senior citizens.
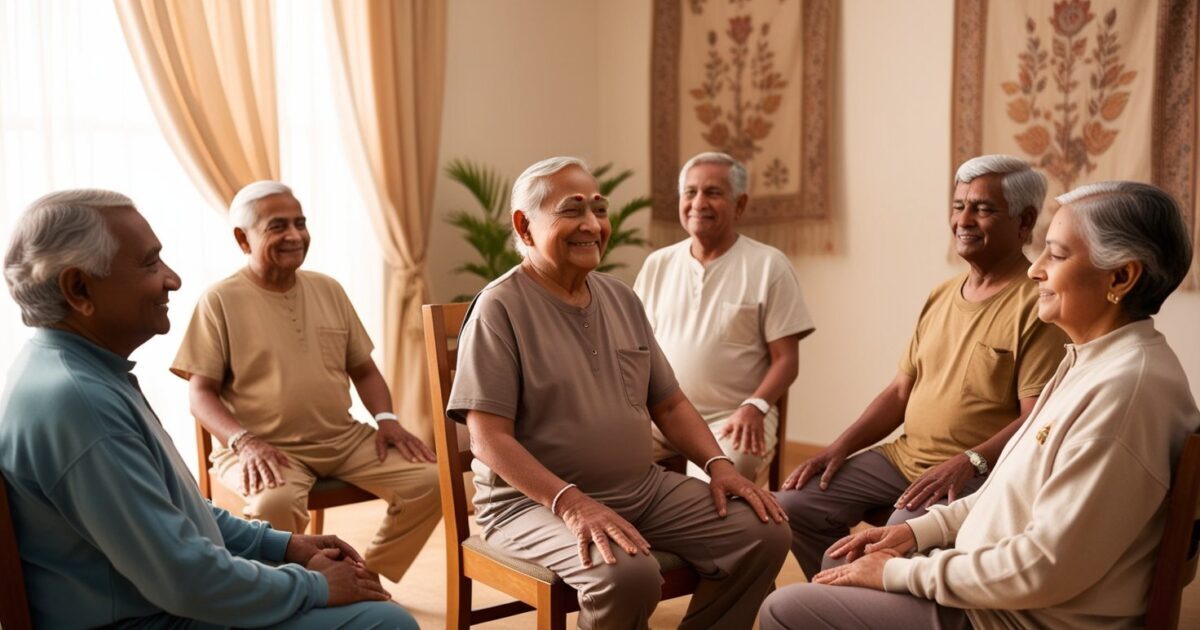
Did you know that over 40% of folks over 65 do some kind of yoga? It’s true! Chair yoga is getting super popular with seniors. It’s a gentle way to stay active and bendy. Let’s check out 5 awesome chair yoga exercises perfect for seniors and beginners. Plus, I’ll give you a free printable routine to start your chair yoga adventure. Ready to energize your body and mind from your comfy seat? Let’s go!
See Also: The 9 Best Types of Yoga for Seniors: A Guide for Older Adults
What is Chair Yoga and Why is it Perfect for Seniors?
One of the best forms of yoga for beginners and elders alike is chair yoga. It all comes down to performing standard yoga poses while seated or with the assistance of a chair.
The truth is that as we age, our bodies don’t always function as well as they once did. This is where the usefulness of chair yoga lies. It’s easy on your joints and helps keep you moving and flexible. The amazing thing about chair yoga is – anyone can do it, no matter how fit or old you are.
Thus, if you’re considering giving chair yoga a try, don’t hesitate! If regular yoga seems too difficult, this is a terrific way to stay active. Moreover, you can complete it at home. You don’t need an upscale yoga studio!
Getting Started: Preparing for Your Chair Yoga Session
Okay, let’s talk about how to get started with chair yoga. First things first – you need a chair. Sounds obvious, right? But trust me, not all chairs work for yoga.
You want a strong chair without arms if you can. I found that a dining room chair works great. Make sure it’s on a flat floor that’s not slippery.
Let’s arrange your area now. Although an elaborate yoga space is not necessary, it should be serene. I like to make space in my living room and occasionally light a few candles. It aids in setting me in the proper mood. Oh, and remember to always have water on hand—staying hydrated is crucial!
Warm up a little before you begin. Usually, I shrug my shoulders and gently roll my neck. The amount of tension we unknowingly carry in these regions is astounding.
Breathing is one thing that I cannot emphasize enough. Concentrate on inhaling slowly and deeply. Inhale through your nostrils and exhale through your mouth. You’ll unwind and benefit more from each pose as a result.
Recall that the key to chair yoga is being aware of your body. Don’t do something if it doesn’t seem right. There’s no competition or award for being the most flexible person in the room—or your living room—either.
Now grab a chair, make some room, and let’s prepare to strengthen and stretch. Your body will appreciate it, I promise!
5 Best Chair Yoga Exercises for Seniors
1. Seated Cat-Cow Stretch
 1")
The Seated Cat-Cow Stretch is a good place to start. Your back will thank you for this!
With your feet flat on the ground, sit up straight in your chair. Lift your chest and arch your back as you inhale; this is your “cow.” After that, when you release your breath, round your back, and snuggle your chin into your chest; this is your “cat.”
Repeat a few times while coordinating your breathing. It can relieve back discomfort and is excellent for increasing the flexibility of your spine. It feels great first thing in the morning as well. Just be careful not to push yourself too much; go slowly.
2. Seated Twist
 2")
The Seated Twist is the next move. This is great for your spine and feels similar to wringing out a wet towel. It’s wonderful for digestion and can help with back stiffness.
Turn your upper body a bit sideways. Inhale to sit up straight, then exhale as you turn to the right while clinging to the back of the chair. After a few breaths of holding, switch sides.
This is an excellent stretch move for your body.
3. Seated Forward Bend
 3")
Let’s now attempt the Seated Forward Bend to stretch your lower back and hamstrings. After an exhausting day of sitting, your back will appreciate it!
Take a seat in a chair with your feet flat on the ground. Inhale to raise your head and exhale as you lean forward from your hips. Place your hands on the floor or your legs. If you are unable to touch your toes, don’t worry. You will be able to accomplish that with practice and time in this stance.
Recall that it isn’t about your degree of flexibility. It’s about sensing how your legs and back are stretched. After holding for a short while, gradually return to a sitting position. Well, it feels amazing, doesn’t it?
4. Seated Warrior Pose
 4")
The Seated Warrior Pose comes next. This one is excellent for strengthening your legs and enhancing your balance. You also get the feeling that you are a true fighter!
Place your right side against the chair back and sit sideways in your chair. With your right foot flat on the ground, extend your left leg out to the side. Lift your arms above your head. After a few breaths of holding, switch sides.
You’ll quickly feel stronger and more balanced with practice!
5. Seated Pigeon Pose
 5")
To perform Chair Pigeon Pose, begin seated on a chair with your feet flat on the floor. Raise your right leg and place your right ankle over your left thigh to form a figure-four shape. To keep your knee safe, keep your right foot flexed.
Maintain a straight spine while sitting tall, then gradually bend forward from your hips, bringing your chest closer to your knees until your glutes and hips start to stretch.
Repeat on the other side after holding this stretch for 20 to 30 seconds while taking deep breaths. This position is excellent for releasing tension in the lower back and hips.
Creating Your Chair Yoga Routine
Now that we’ve completed all these fantastic workouts, let’s combine them into a sequence. Relax, you don’t have to be an expert yoga practitioner to do this!
First, give yourself a half-hour or so. If you’re just starting, that could seem like a long time, but once you get into it, I promise it will go by quickly.
This is a basic regimen that you can adhere to:
1. Start with some breathing exercises to center yourself. Just 2-3 minutes of deep breathing can make a big difference.
2. Next, alternate between Seated Cat-Cow Stretch and Seated Twist. Practice each pose for about a minute.
3. Move on to the Seated Forward Bend. Hold this for 1-2 minutes, or whatever feels good for you.
4. Follow that with a Seated Warrior Pose on each side, holding for about a minute per side.
5. Next, move on with a Seated Pigeon Pose for 1-2 minutes on each side.
6. Finally, end the practice again with a Cat-Cow stretch.
Recall that this sequence is only a recommendation. You can experiment and see what works best for your body. You may like to dedicate extra time to specific poses on some days or incorporate some more stretches on others. Your body usually knows best, so pay attention to it!
You might start pushing yourself as you become more accustomed to the habit. Try varying the stances or holding them for a little while longer. Perhaps begin incorporating some arm circles.
The secret is to stay consistent. Aim to perform your routine many times every week. The greatest time to practice is in the morning because it sets the tone for the rest of the day. But do what seems right for you. Perhaps you’re a night owl who does yoga right before bed. That is also acceptable!
Remember, development might be slow, but it’s steady. If you don’t notice results immediately away, don’t give up. But if you persevere, you’ll start to see gains in your general well-being, strength, and flexibility.
So take a seat and give it a go. Your body and mind will appreciate it!
Safety Considerations and Precautions
Now, let’s talk about staying safe while doing chair yoga. I know it might seem like chair yoga is pretty safe. But trust me, it’s always better to be careful.
Pay attention to your body first and foremost. There’s no rivalry here, so there’s no reward for exerting too much effort. Don’t do something if it doesn’t seem right. That’s how easy it is. It is a good idea to consult your doctor before beginning any new fitness regimen if you have any health issues. They can offer you specific guidance and advise you on which positions to avoid. Take your time and move cautiously as you perform the poses. Injuries may result from jerky movements. Pay attention to your breathing. The quality of your poses matters more than how quickly you can execute them. Make sure your chair is stable and on a non-slippery floor. Remain hydrated! Throughout your practice, have a water bottle close at hand and take little sips. Even though yoga doesn’t require much sweating, your body nevertheless requires water. At any stage, if you get lightheadedness, dizziness, or dyspnea (shortness of breath), stop and take a break. These can indicate that you’re exerting too much pressure. Recall that it’s acceptable to take breaks. Remember to maintain proper posture. It’s simple to let our posture go, particularly while we’re seated. To avoid injuries and maximize the benefits of each position, however, proper posture is essential. Finally, don’t be hesitant to use props. Adding a cushion to your chair might improve sitting comfort. In forward bends a belt or strap might assist you in reaching your feet. And if your knees are uncomfortable, you can support them with a folded blanket. Make the practice work for you by using your imagination!Remember, the goal of chair yoga is to feel better, not worse. So take it easy, listen to your body, and enjoy the journey. After all, yoga is supposed to be fun, not stressful!
Printable Chair Yoga Routine: Your Free PDF Guide
Alright, folks, we’ve made it to the end! Now, I know we’ve covered a lot today, and you might be thinking, “How am I supposed to remember all this?” Well, don’t worry – I’ve got you covered with a free printable PDF guide of our chair yoga routine!
This guide is like having a personal yoga teacher in your pocket (well, on your computer or phone, but you get the idea). It’s got all the poses we’ve talked about, with step-by-step instructions and helpful tips. And the best part? You can download it for free!
Having a guide will make it so much easier. You can just prop it up next to your chair and follow along.
The PDF includes:
1. A quick intro to chair yoga
2. Safety tips to keep in mind
3. All 5 of our chair yoga exercises, with clear instructions and images
4. Yoga routine layout
5. A blank schedule for you to plan your yoga sessions
Just click the download button below to get your hands on this guide. Easy peasy!
Download Your Free Chair Yoga Guide
I know some of you might be thinking, “But I’m not good with computers.” Don’t worry! If you can click a button, you can download this guide. And if you run into any trouble, just leave a comment below and I’ll do my best to help you out.
Remember, this guide is meant to help your practice, not replace it. It’s still important to listen to your body and move carefully. Use the guide as a reference, but don’t be afraid to change the poses or routine to suit your needs.
I’d love to hear how you’re using the guide and how your chair yoga journey is going. Feel free to share your experiences in the comments section. Who knows, your story might inspire someone else to give chair yoga a try!
Pop quiz! 🧘🤔
Chair yoga is a safe and effective form of exercise for senior citizens.
Chair yoga requires participants to stand and balance most of the time.
Practicing chair yoga can help improve flexibility and reduce joint pain in seniors.
Thanks for your feedback!