How to Do Cobra Pose in Yoga—Proper Form, Variations, and Common Mistakes
The post How to Do Cobra Pose in Yoga—Proper Form, Variations, and Common Mistakes appeared first on The Yoga Nomads.
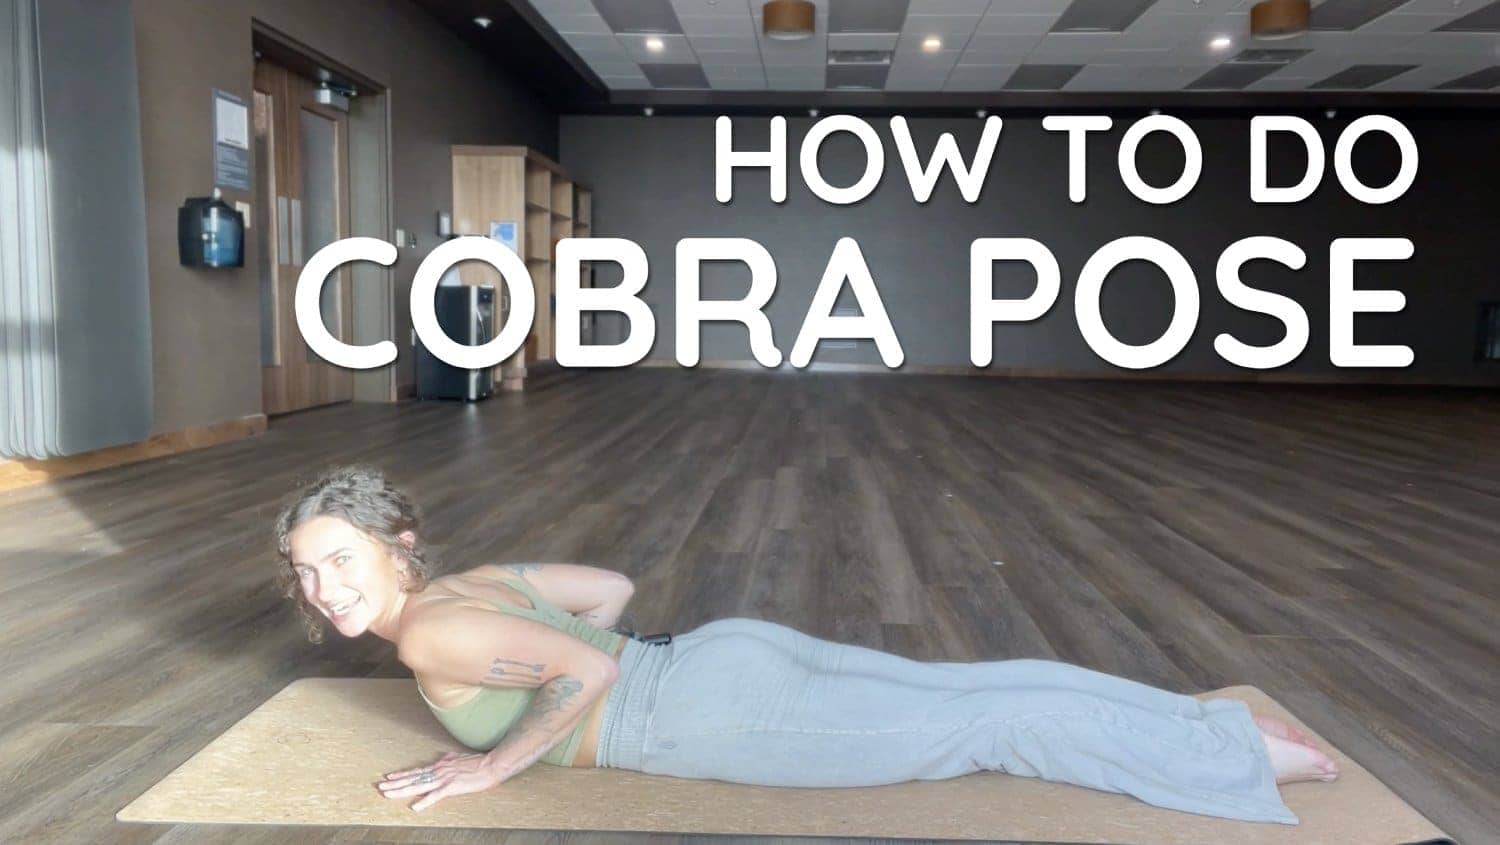
Backbends are often the climax of a yoga practice. They challenge our flexibility, open our hearts, and energize our bodies. But when you’re not quite ready for an intense spinal stretch, Cobra Pose offers a more accessible and beginner-friendly entry point to all the benefits of backbends. It is also one of the best stretches for low back pain and herniated discs.
From Hatha yoga sequences to Sun Salutations to Ashtanga classes, Cobra Pose is found in nearly every yogic tradition. This powerful spine-extending pose helps to counteract hours spent hunched over devices. However, without the proper support Cobra Pose can also cause discomfort in your low back.
Here we’ll dive into everything you need to know about safely performing Cobra Pose so you can reap all the benefits and none of the back pain.
Prefer video? Here’s ours on everything you know to know to perform cobra pose:
Pose Benefits
Cobra Pose or Bhujangasana is inspired by the king cobra: a majestic snake that can glide forward with the front of its body upright. This energizing posture is powered by the back muscles and core. As you stretch open your chest and expand your rib cage, Cobra Pose can invigorate your mind and body with a rejuvenating backbend.
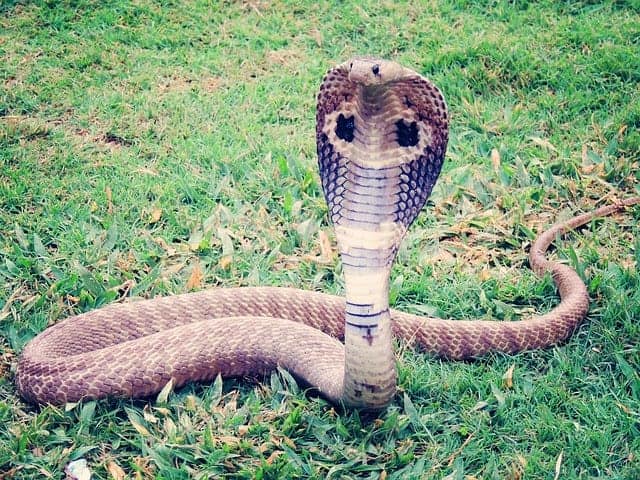
Cobra Pose offers two sets of benefits: The front of your body is stretched and opened, while the back of your body is engaged and strengthened.
The muscles stretched in Cobra Pose include:
Neck and cervical deep neck flexors (which are often a key source of neck pain from looking down at a computer or phone) Tops of your feet Front hip flexors Abdominals (great for after an ab workout) Pectoralis (chest) muscles Biceps and brachialis (forearm) musclesMuscles engaged in Cobra Pose:
Hamstrings Glutes (as you’ll read below, you should not over-tense the glutes or it may compress your lower back) Erector spinae and spinal extensors (muscles on each side of the spine) Upper back muscles TricepsIncorporating Cobra Pose into a regular yoga practice can tremendously improve mental and physical health. When Bhujangasana is performed in a sequence of asanas, research shows that it can help:
Relieve lower back pain Reduce symptoms of depression Reduce inflammation Relieve neck pain Reduce anxiety Improve self esteem and emotional regulation Improve postureStep-by-Step Instructions
Getting into Cobra Pose is very straightforward, but you want to take care to consciously create alignment and strengthening as you enter the pose. If you aren’t ready for a bigger back bend, Low Cobra Pose is the perfect entry-level variation.
Low Cobra (Hasta Bhujangasana)
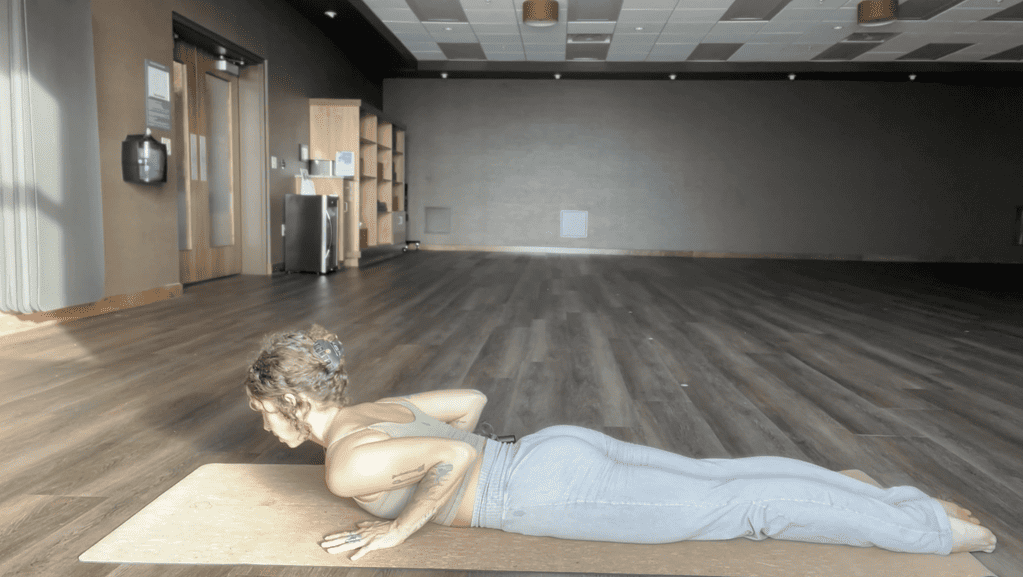 Start by lying facedown on the floor with your legs extended behind you and feet hip-width apart.
Point your toes to the back of the room with the tops of your feet on the mat. Do not tuck your toes.
Place your hands under your shoulders with fingers facing forward. Keep your elbows close to your ribs.
Press down through your pubic bone and the tops of your feet.
On an inhale, press your palms into the mat as you gently lift your chest and head off of the floor. Your lower ribs should stay down.
Bend your elbows and keep them hugged to your sides.
Draw your shoulder blades back and down as you open your heart. Keep your shoulders pulled down away from your ears to avoid crunching your neck.
Keep your gaze to the floor and your neck neutral.
As you breathe, press your thighs firmly into the mat and use your back muscles to stabilize. Avoid pushing yourself up with your hands and forcing a backbend.
Stay here if you have neck pain or a tense lower back.
High/Full Cobra Pose (Urdhva Bhujangasana)
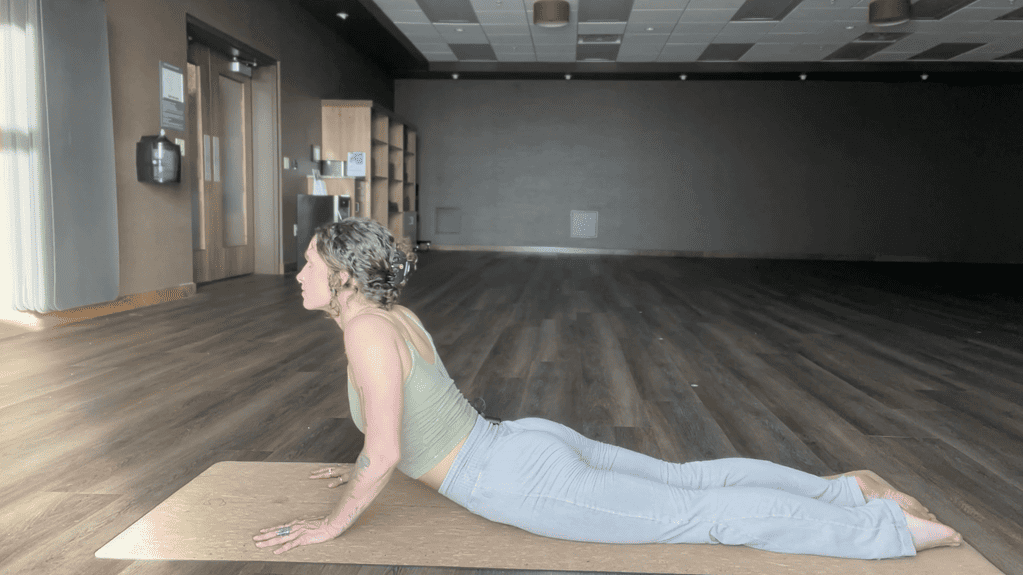 If you are ready for a deeper backbend, begin to straighten your arms as you lift your chest forward and up.
Don’t press up with your hands. Instead, allow the lift to come from the extension of your spine. There should be very little weight in your hands.
Only straighten your arms as much as your body allows. Keep your neck long and optionally shift your gaze upward to extend the backbend. Keep your thighs and feet pressing downwards. Do not strain your back by forcing a backbend.
Actively press your shoulder blades together and keep your elbows hugged to your ribs.
Feel your collar bones broaden and your heart lift.
Hold for 20 to 30 seconds, then exhale and slowly lower your chest to the mat.
Tips for Mastering the Pose
Cobra Pose is meant to be entered slow and easy. You want to be sure that you’re building a solid foundation before lifting into the full expression. Use these quick tips for practicing Cobra:
Tip #1: Know the Difference Between Cobra Pose and Upward Facing Dog
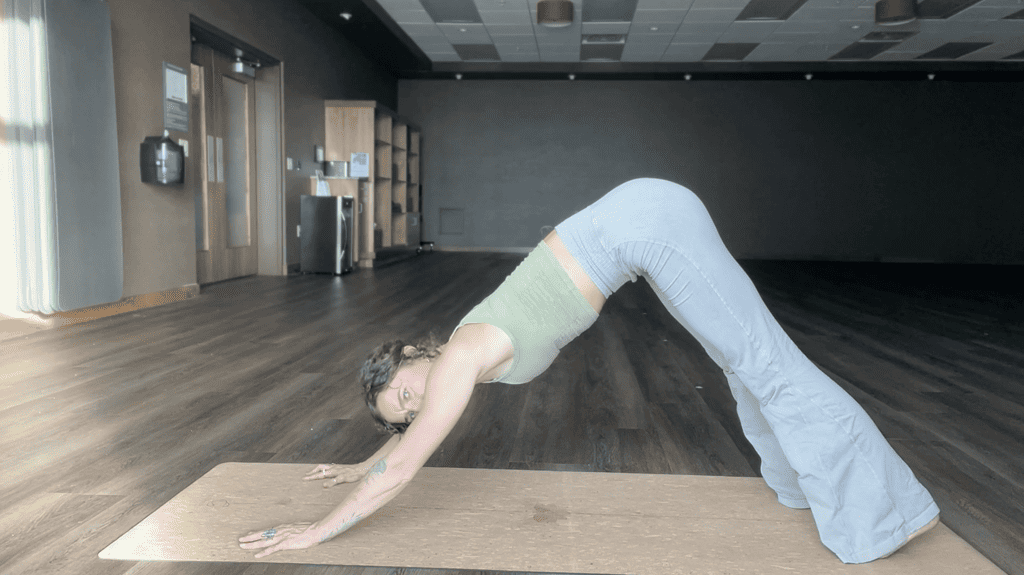
Cobra Pose is commonly confused with Upward Facing Dog (“Up Dog” or Urdhva Mukha Svanasana). While these two poses look similar at first glance, they actually work very different parts of the body. The key differences are:
In Cobra Pose, your hips, thighs, and the tops of your feet stay flat to the floor. In Upward Facing Dog, you lift your hips, legs, and ankles off the floor. In Cobra Pose, your elbows stay in a slight bend. You can do a low or high Cobra. In Upward Dog, your elbows are straightened out to allow you to fully arch your back. Cobra Pose is more flexibility focused, but still requires muscle activation. Upward Dog is more strength focused and challenges the leg muscles as you lift up.Tip #2: There Should Be Almost No Weight in Your Hands
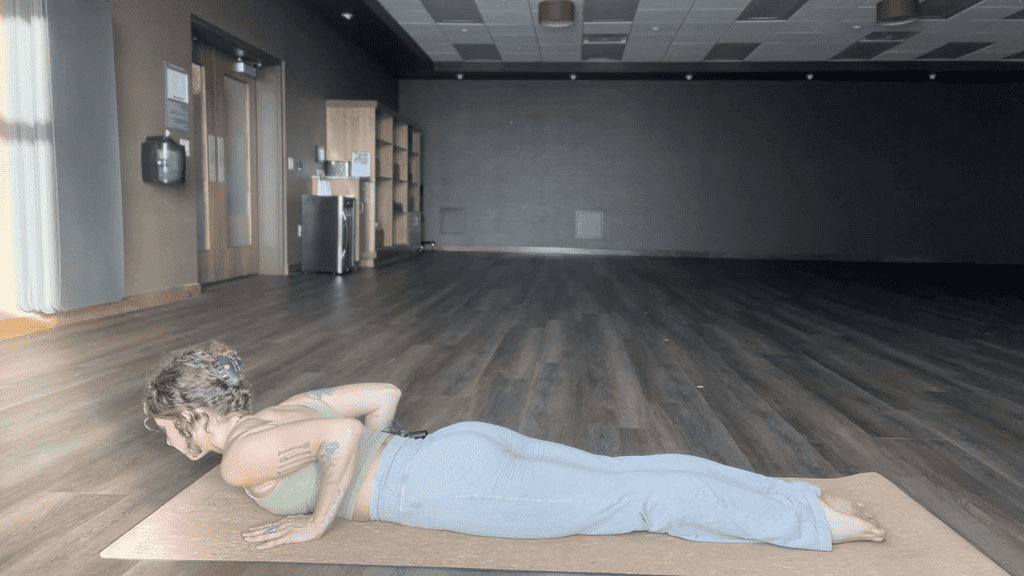
It is natural to want to push into the floor to arch upward in Cobra Pose, but proper form means there isn’t supposed be much weight in your hands. The bulk of your weight in Bhujangasana should be held by your core and back muscles. Your muscles are doing the work while your hands simply act as stabilizers. Pushing your weight into your hands can also cause you to prematurely overarch your backbend. Ouch!
In Low Cobra, some teachers may even challenge you to lift your hands off the floor to check that you aren’t putting too much weight on your palms. This will challenge you to engage your upper back and press your thighs more firmly into the mat.
Tip #3: Squeeze Your Shoulder Blades Together
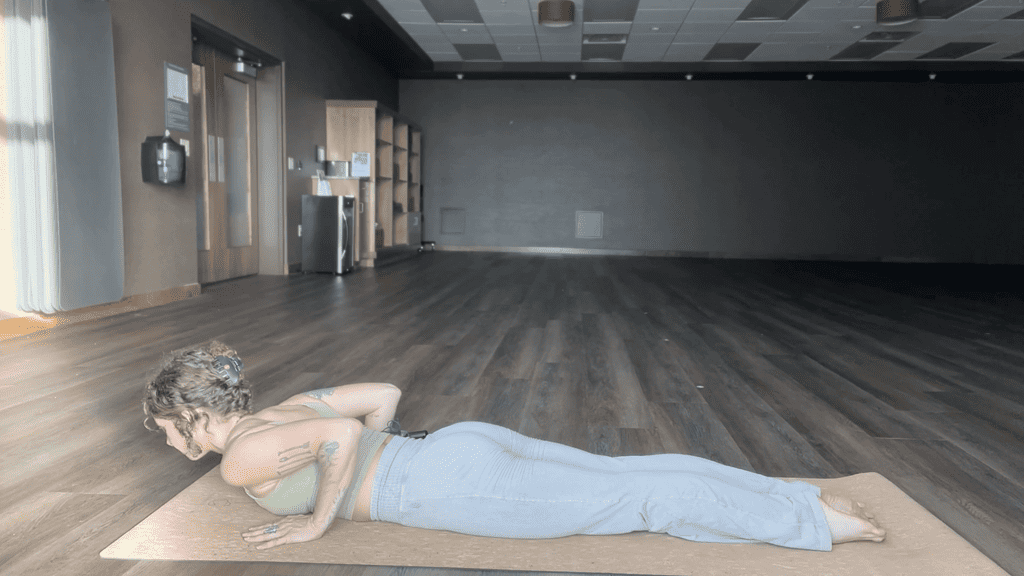
Cobra Pose can only improve your posture if you pay attention to your shoulder blades. Check that your shoulders aren’t shrugged up toward your ears. You should not be crunching your shoulders or pinching your neck.
Instead, roll those shoulder up and then down. Squeeze your shoulder blades toward each other, then tuck them downwards. This will open up your chest and elongate the spine into a more comfortable curve.
Tip #4: Hug Your Elbows In and Keep Them Bent
Cobra Pose can have you feeling a little bit like a funky bird because your elbows stay right alongside your body. You do not want them to splay out. Throughout the pose, notice the elbows brushing your rib cage and imagine that they are glued there. Regardless of how high you lift your torso, the elbows stay in toward your body.
If you are approaching a Full Cobra pose, you need to keep the elbows close against the ribs as you lift. Angling the elbows outward or locking them can lead to back pain or injuries. A micro-bend in the elbow ensures that you aren’t overextending or overarching in this posture.
Tip #5: Press Your Pubic Bone Into the Ground
Before lifting up into Cobra, it helps to bring consciousness to your pubic bone and pelvis. Feel them root into the floor as an anchor point for your spine as the upper back elevates.
Common Mistakes in Cobra Pose
Back-bending yoga poses like Cobra Pose requires a special attention to alignment, posture, and muscle engagement. When people complain of hurting their back in yoga, it is often because they skip these vital steps to “set up” the pose. Instead of enjoying a nice stretch and spinal release, these mistakes can actually make back pain worse. Here is how to avoid them:
Common Mistake #1: Overarching the Spine and Forcing a Backbend
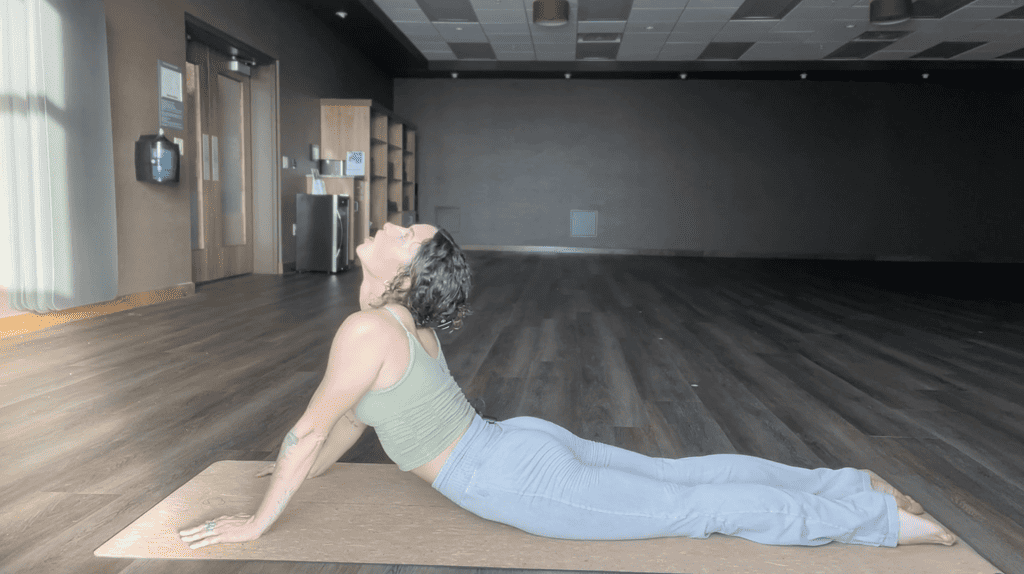
Many overeager yogis see Cobra Pose as an opportunity to create as much back-bending action as possible. Trust us, we’ve made this mistake before!
When you relax your stomach, drop your hips, and let your low back fall into a huge backbend without the muscular support it needs… Well, it doesn’t feel as great as you’d imagine.
This forceful backbend can quickly become dangerous when you overarch and compress your spine rather than lengthen it. It is easy to overdo the arch in your lower back because the lower spine is naturally more flexible than the upper spine.
How to Fix It: Enter the asana as slowly as possible. Avoid pressing into your hands to push yourself up high. Cobra is not a back-arching competition!
Activate your abdominal muscles to build extra support in Cobra Pose. Imagine your belly button pushing back toward your spine. Your abs are the stabilizing force that protects your lower back from compression. Never go into Cobra Pose without a solid core.
Common Mistake #2: Clenching Glutes
A light squeeze in your glute muscles is helpful to keep your legs engaged in this pose. However, over-tightening the buttocks with can actually cause unnecessary tension on your lower back.
How to Fix It: Loosen the glutes and focus on the quads. Keep the front and back of your thigh muscles engaged. Keep your thighs flat to the floor and the tops of your feet pressing into the mat. Press your pelvis into the mat and allow your entire spine to remain lengthened as it curves up.
Common Mistake #3: Locking Elbows
Cobra Pose should always be performed with a bend in the elbows. Unlike Upward Dog, this posture requires that your arms stay bent so you don’t “crunch” into your neck or lower back. If you lock out your elbows, it could overextend your joints while forcing too harsh of a back curve.
How to Fix It: Slightly bend your elbows and keep your palms flat on the floor. Activate your forearms and shoulders to build support around the elbow joint. No matter how flexible you are, Cobra Pose is always performed with bent elbows.
Common Mistake #4: Wide-Splaying Ankles
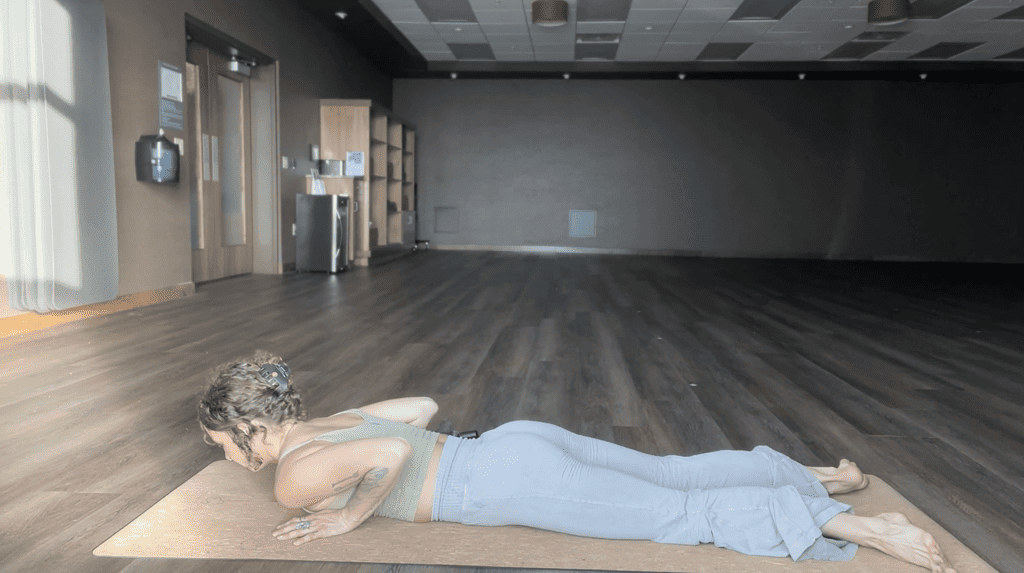
Some yogis experience back pain in Cobra because they keep the legs too wide. If you allow your ankles to splay out to the sides, there isn’t enough foundational support to keep your back protected.
How to Fix It: Bring your feet hip width apart and actively press them into the mat. Keep your toes curled under and your ankles straight in line with your heels.
Common Mistake #5: Kinked Neck
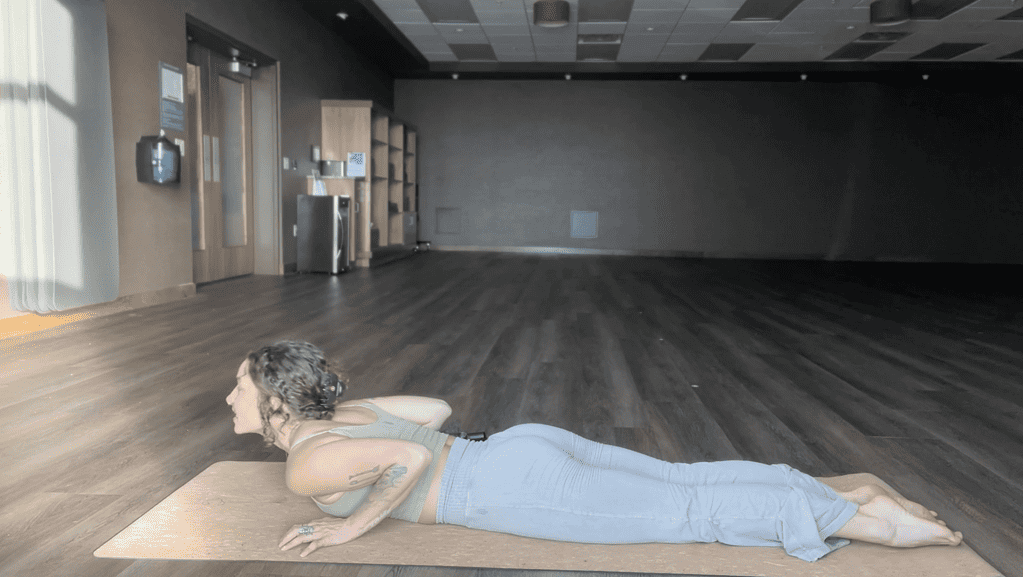
It is normal to look up during a backbend. However, if you look too far upwards, it can feel like your neck vertebrate are grinding together. Ouch!
How to Fix It: Allow your neck to be a natural extension of your spine. Do not kink it backwards. Instead, gradually lift your chin and imagine lengthening the space between your neck vertebrate.
Variations
When you’re practicing yoga, always pay special attention to how your body wants to do the pose. You don’t have to look like everybody else! These variations may be more comfortable or relieving than the traditional Cobra posture.
Half Cobra (Sphinx Pose)
Sphinx Pose or Half Cobra is the most accessible variation for beginners. It protects the low back and stretches more of the upper spine. The focus is mostly on the upper back while the lower body can relax.
Instead of tucking your elbows into your ribcage, this posture keeps your arms flat out in front of you like a resting sphinx. To do it:
Lie flat on your stomach and press your stomach, legs, and tops of the feet into the mat. Rest your forehead on the mat with a neutral spine. On an inhale, engage your core and back muscles to lift the upper body. Walk your hands out in front of you, fingertips forward, and elbows shoulder-width apart. Check that there is a 90 degree angle between your shoulders, elbows, and forearms. As you breathe, widen your fingers and toes. Lightly press into your hands, forearms, and feet. Keep your gaze forward. Feel your shoulders roll down your back and your collar bones open. Hold for 3-5 breaths, then exhale to lay your chest back on the mat with your head to one side.Bolster-Supported Cobra
If you want to make the Cobra asana more gentle and restorative, try placing a bolster lengthwise beneath your body or horizontally under your chest. For yogis with a back injury, the bolster ensures that your spine stays neutral. This is also nice for anyone with tender hip bones.
Flying Cobra
This posture-correcting, muscle-building variation of Cobra challenges you to lift your arms off the ground and “fly”. It stretches out your pecs and takes the focus off of backbending. To do it:
From a regular Cobra, lower your chest closer to the floor than usual. Engage your glutes and back muscles. Squeeze your shoulder blades. Press your torso into the ground and lift your arms out to the side like wings. Keep your chin gently tucked so that your neck stays long. Engage your upper back to hold your body up. Breathe and hold for 20-30 seconds. On an exhale, release back to a standard Cobra or lay flat on the floor.Safety and Precautions
Backbends are not recommended for anyone with an injury to their back or spine. Pregnant women or anyone who recently had abdominal surgery should also avoid this asana. If you have Carpal Tunnel Syndrome, you should not do Cobra Pose.
If you have chronic back pain, go very slow and easy into this pose. Always engage your core, press into the floor, and avoid over-arching your back.
Teaching the Pose
If you are a yoga teacher cueing Bhujangasana, be sure you take plenty of time to guide your students through the foundational strengthening of this pose. Helpful cues include:
Imagine your navel drawing in toward your spine. Place your palms flat on the mat underneath your shoulders. Bend your elbows straight backwards and hug them toward your ribcage. Check that your feet are hip-width apart and actively pressing into the floor. Don’t curl under your toes. Imagine your shoulders rolling back and down. Don’t let them shrug up toward your ears. Keep your gaze forward and neck elongated. A gradual curve in the spine is much better than a harsh crunch. Don’t force this backbend. Focus instead on releasing tension in the mid and lower back.Preparatory Poses
Before going into Bhujangasana, it’s helpful to warm up your spine with these poses:
Cat/Cow Pose (Chakravakasana) Standing Forward Fold (Uttanasana) Seated Forward Bend (Paschiomottanasana) Upward Facing Dog (Urdvha Mukha Svanasana) Sphinx PoseCounter Poses
Cobra Pose is naturally invigorating and energizing. After a few breaths in Cobra, it is helpful to move into a calming, back-relieving pose where you can breathe deeply and release your spine. Follow up with:
Child’s Pose (Balasana) Downward Facing Dog (Adho Mukha Svanasana)After several rounds of Cobra Pose, you may want to take advantage of your spinal extension by moving into some deeper backbends, such as:
Bridge Pose (Setu Bandhasana) Shoulder Stand (Sarvangasana)Supine twists are a the perfect ending to any back-bending sequence. These grounding twists are a final trick for releasing the lower back after Cobra Pose:
Supine Spinal Twist (Supta Matsyendrasana) Half Lord of the Fishes Pose (Ardha Matsyendrasana)Conclusion
The King Cobra is a fascinating animal that inspires us to have the flexibility and flowing movement of a snake. However, we have to take care not to go beyond our flexibility and hurt the spine. The most important thing to remember in Cobra Pose is to strengthen before you arch. Muscle engagement will protect your back from unnecessary strain.
Namaste!

 Hollif


