How To Do The Yoga Lunge Pose – Proper Form, Benefits, & Variations
The post How To Do The Yoga Lunge Pose – Proper Form, Benefits, & Variations appeared first on The Yoga Nomads.
 Tfoso
Tfoso
As one of the most commonly practiced yoga poses and fitness exercises, you may assume there is little to know about the humble lunge pose.
However, as a foundational standing pose, the high Lunge pose (Anjaneyasana) is vital in building leg strength, improving hip flexibility, and improving self-awareness, all of which will help you in the more challenging asanas.
Read on to learn how to safely practice the yoga lunge, the different variations to try, and how to modify it for your unique body.
Lunge Pose Benefits
Before we dive into how to do the lunge pose, here are a few key benefits you can expect from practicing this asana.
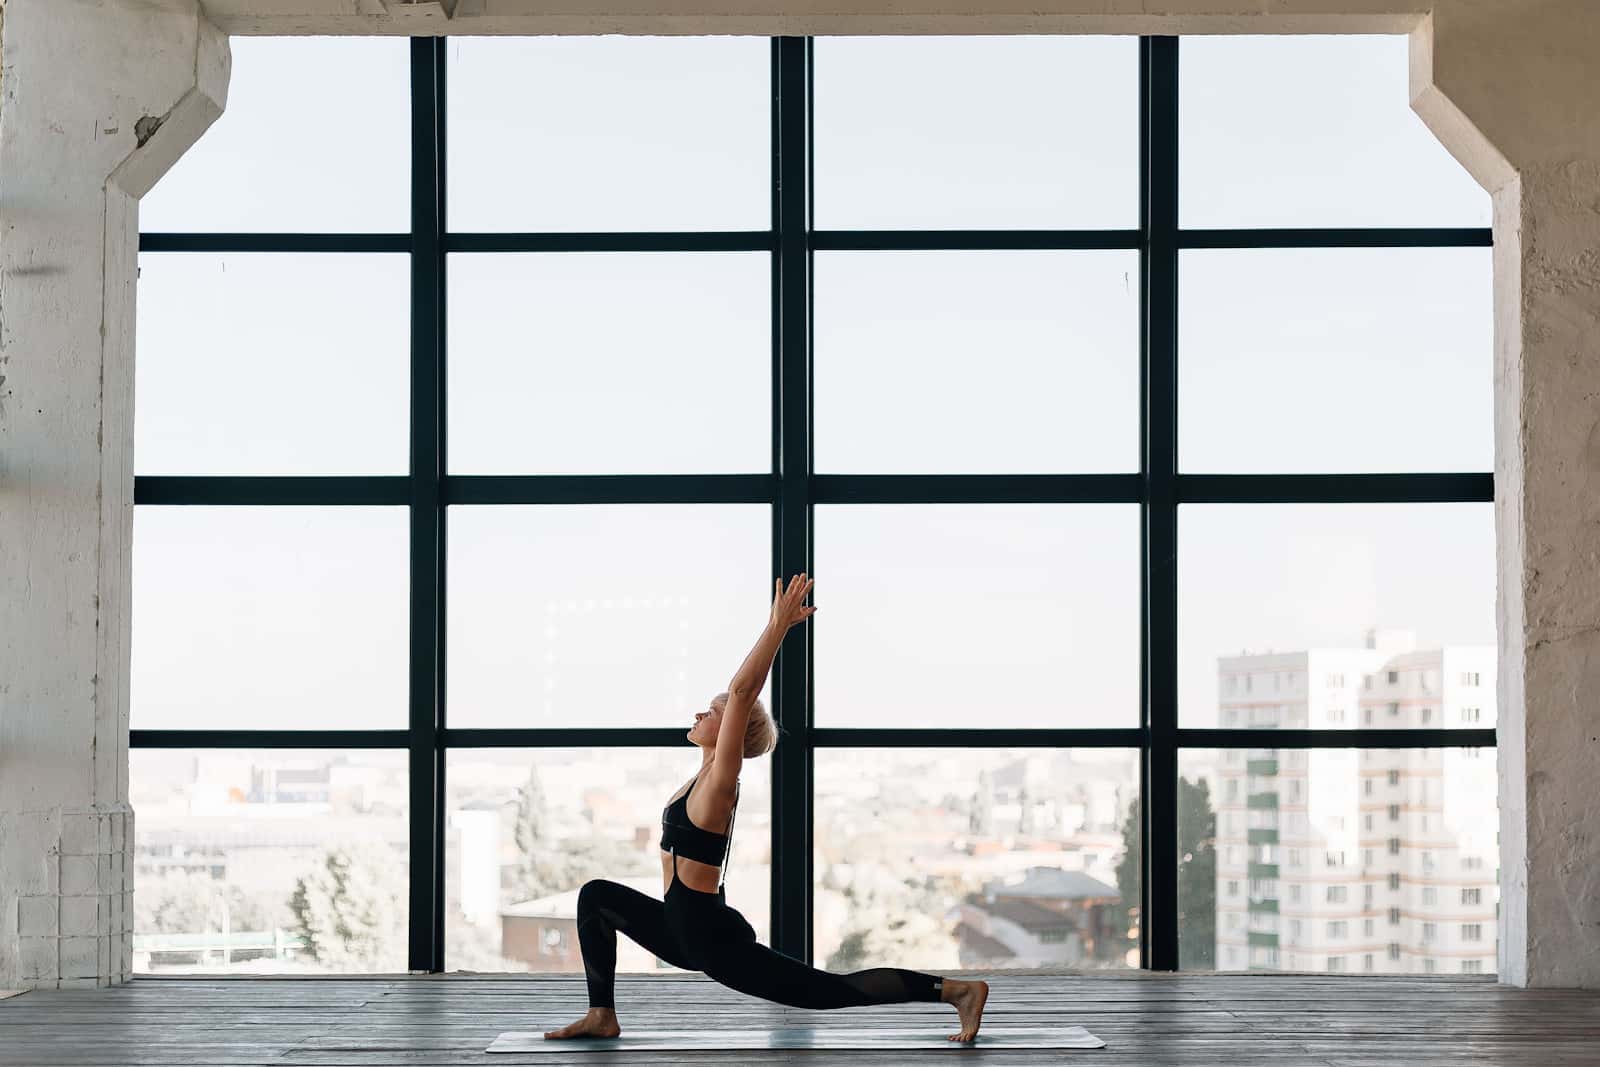
Builds strength in hamstrings and glutes Relieves low-back pain and tension Improves balance Reduces stress and anxiety Elevates mood Increases awareness of the breath Counteracts long periods of sittingHigh Lunge Pose (Crescent Lunge)

Practicing the high lunge calls for engagement from many major muscle groups and intense mental focus. The pose increases body awareness from the feet to the fingertips and helps stress melt away.
How To Do High Lunge: Step-by-Step Instructions
Start in a downward-facing dog pose. Exhale as you step the right foot forward. Check your front knee is at a 90° angle, directly above your ankle. Keep the left leg straight, your toes planted. The left heel should be above the ball of the foot, pressing toward the back of your mat. Place the feet hip-distance apart. Bring your hands to your waist. Inhale as you lengthen the spine, exhale as you pull in the navel, and squeeze your lower rib cage together. Squeeze the inner thighs towards each other, press into the front foot, and inhale as you lift the chest upright. Rotate the left hip forward to align the hips. Tuck the pelvis by engaging your core. You should feel a stretch in the hip flexors and hamstring. As you inhale, sweep both arms up and slightly back. Look up and gently arch the back into a crescent lunge. Exhale and drop the shoulders away from the ears. Hold the pose for 5 breaths. To leave the pose, bring your hands back to the floor. Step the right foot back into a downward-facing dog.If you prefer visual instruction of high lunge, check out this video:
Low Lunge Pose
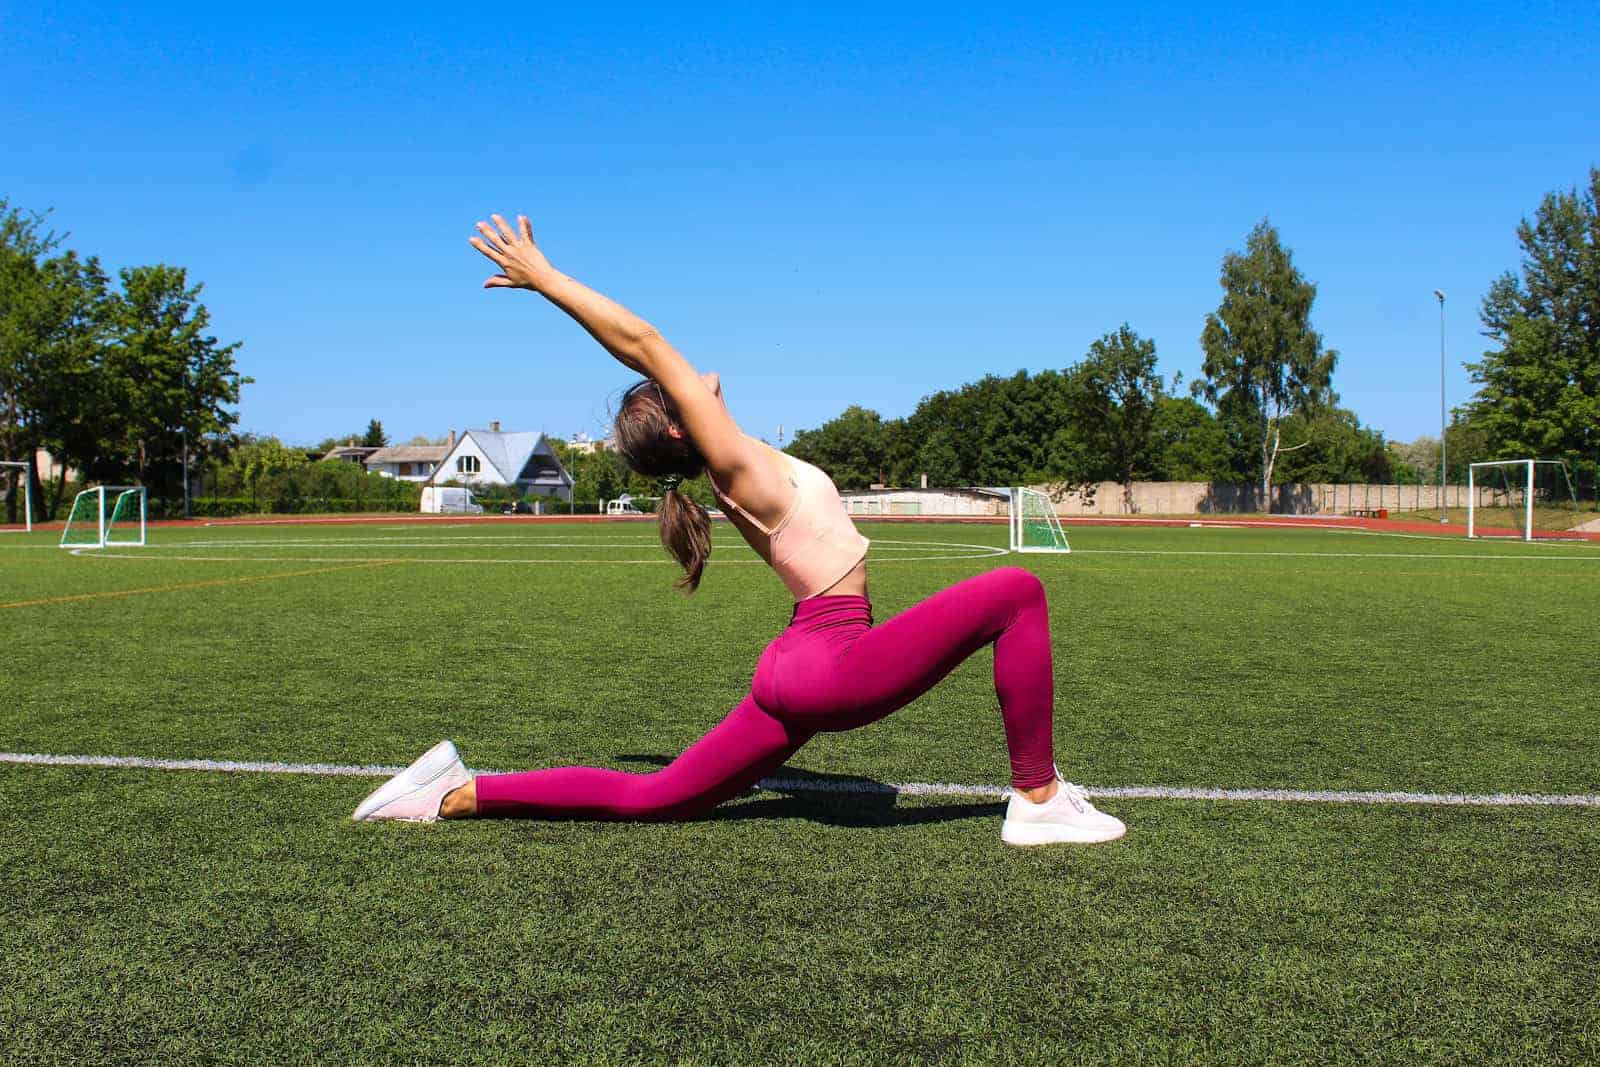
The low lunge (Anjaneyasana lunge variation) is a great way to prep for a high lunge. With the back knee on the mat, you’ll feel grounded and supported, helping you sink into a deeper hip flexor stretch.
How To Do Low Lunge: Step-by-Step Instructions
Start in a standing forward bend. Exhale and step the right foot to the back of your mat. Ensure the left knee is bent to 90° and directly above the ankle. Bring your back knee down to the mat and rest the top of your right foot on the floor. Move the left foot and right knee hip distance apart. Slowly let the hips drop until you feel a gentle stretch in the hip flexor. Tuck the tailbone in and align the hips parallel to the front of your mat. Exhale as you pull the navel into the spine and squeeze the ribcage together. Inhale as you press your front foot into the floor and lift the torso upright. Sweep your arms to the sky, then drop your shoulders away from your ears. Hold the pose for 5 breaths. To leave the pose, bring your hands to the floor and step the back foot up to the front of your mat.Other Lunge Pose Variations
Both high and low lunges can be modified to build strength at any skill level.
Arm Variations
 Hands or fingertips stay on the floor or yoga blocks.
Lift the chest a few inches above the thigh, and extend your arms to reach the back of your mat.
Hands stay at the waist.
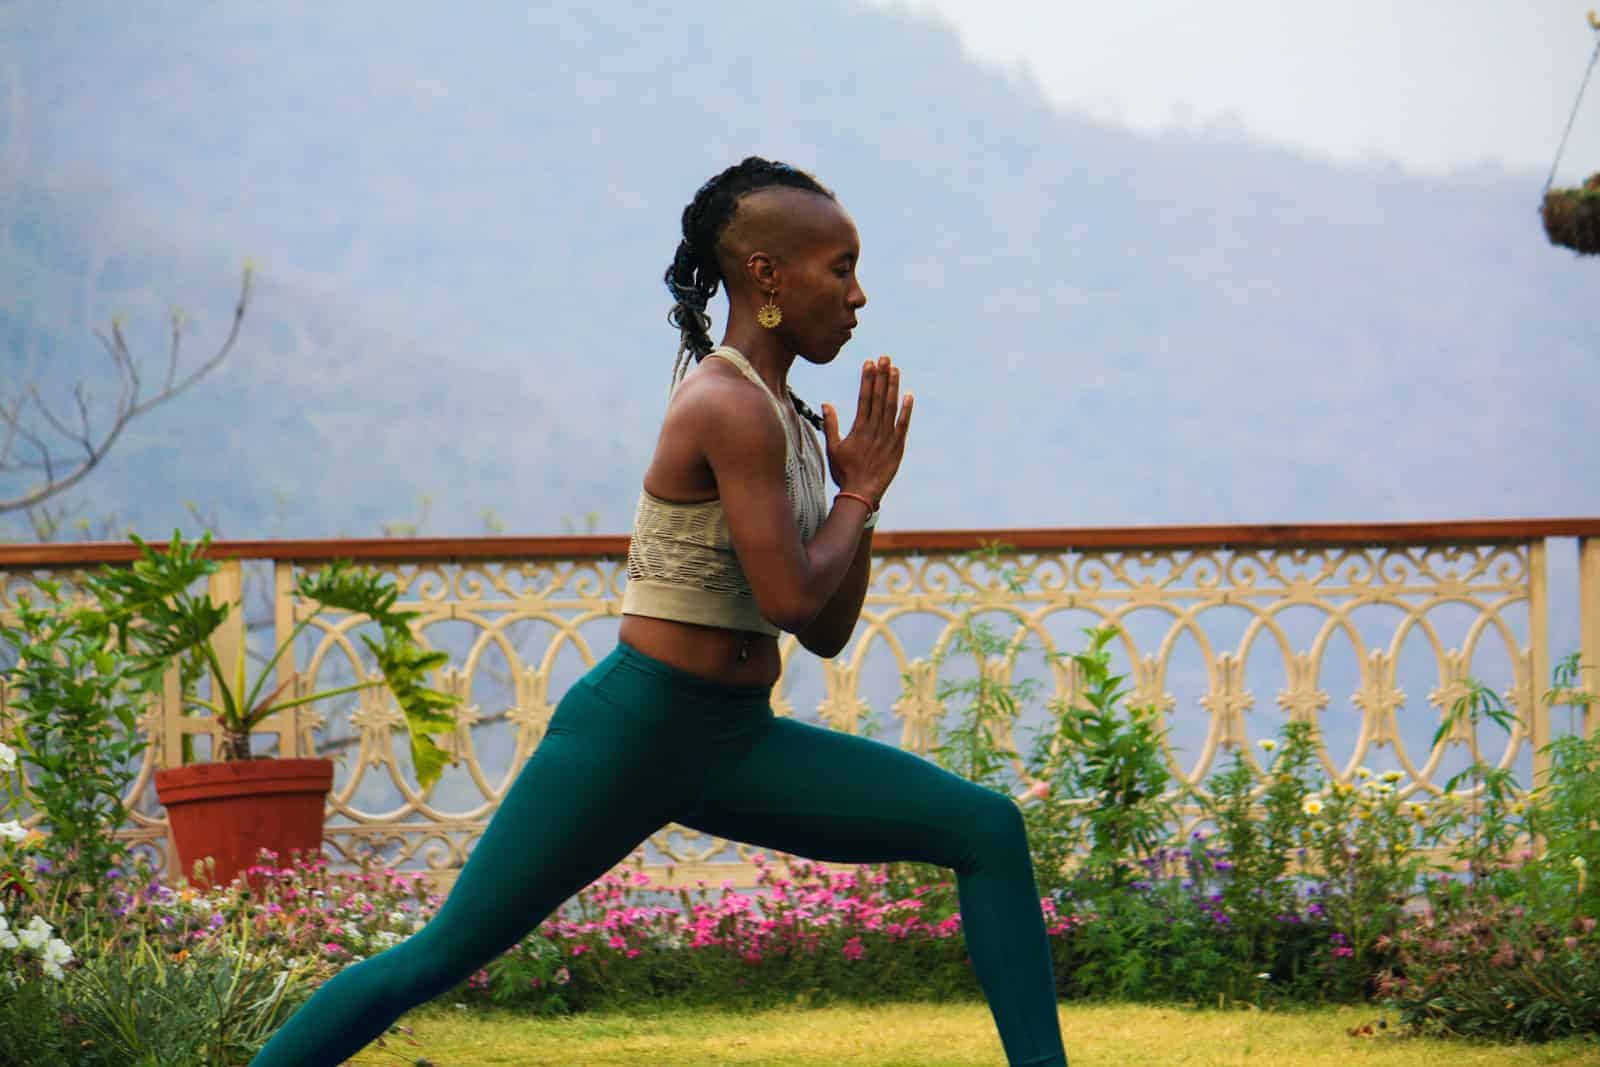
Hands in prayer pose
Hands or fingertips stay on the floor or yoga blocks.
Lift the chest a few inches above the thigh, and extend your arms to reach the back of your mat.
Hands stay at the waist.
Hands in prayer pose
Crescent Pose
In a high or low lunge with your arms extended, increase the challenge by looking up slightly. Then, gently arch the back and drop the hips a few inches into a crescent pose.
Revolved Crescent Lunge Pose

To add a twist to lunge:
Lift the torso just high enough over the thigh to bring your hands into a prayer position. Inhale to lengthen the spine, and exhale as you slowly twist and hook the left elbow over the top of the right thigh. Gently press the elbow into the thigh to deepen the twist while the hands stay connected to the heart.If you’re not quite ready to go hands-free…
Bring your left hand to the floor or yoga block directly under your shoulder. Slowly extend the right arm up to the ceiling. Looking down at the ground or a still focal point over the right knee can also increase stability in this standing twist.Lunge with Side Stretch
Adding a side stretch will lengthen the Psoas to counteract back pain from sitting at work all day.
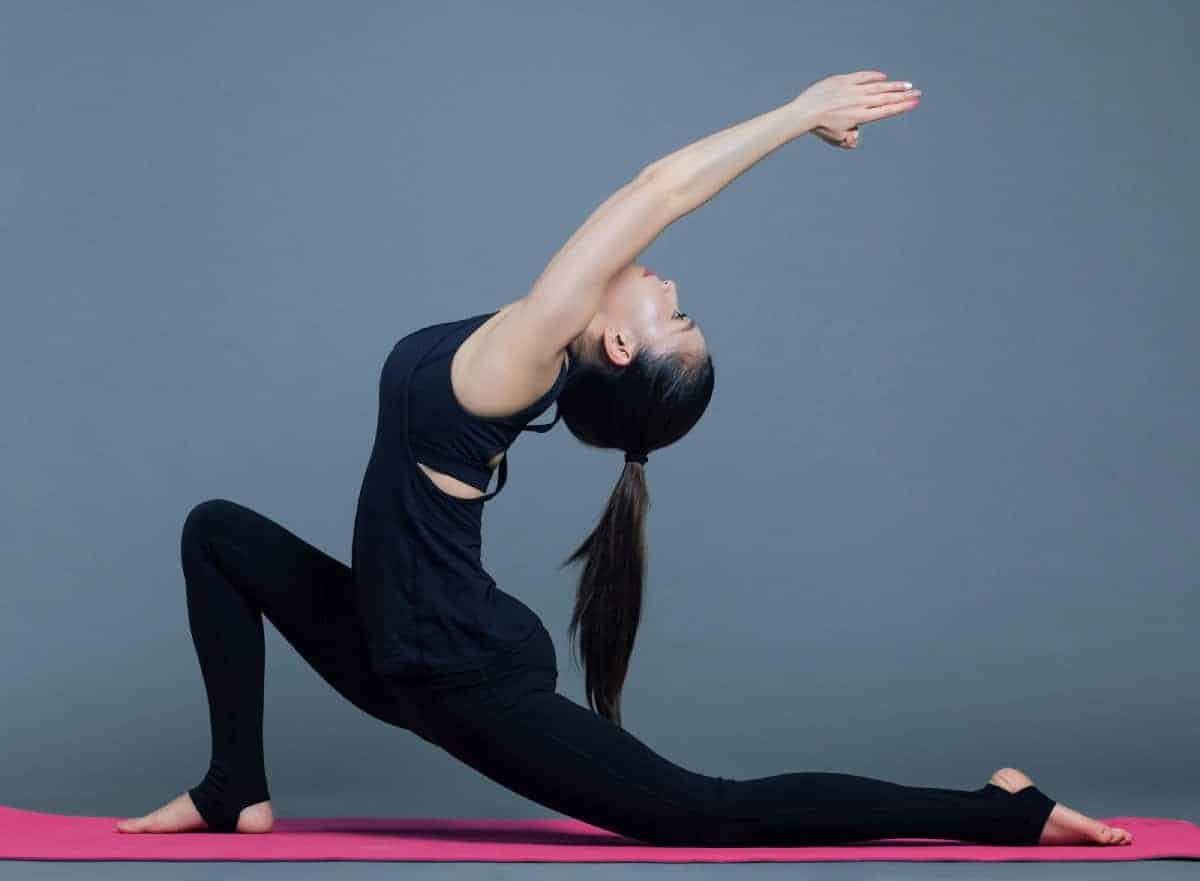
In a low lunge (arms high and left knee forward), drop the left fingertips to the floor as you bend the waist to the left. Reach the right fingertips up and over the head, towards the left. Release the head towards the left shoulder and breathe into this deep oblique stretch.Lunge Pose Common Mistakes
Avoid these common mistakes to ensure the lunge pose leaves you feeling reinvigorated.
Mistake 1: Bending the knee in front of the ankle
You may see your knee come over your foot or toes when you step into a lunge. This puts too much stress on the knee joint.
How to fix it: Inch the front foot forward or drive the back heel toward the back of your mat. Moving your body backward will transfer the load to the leg muscles.
Tip: It’s easier to align the knee and ankle while your hands are still on the floor. Recheck the knee alignment after you lift your torso.
Mistake 2: Compressing the low back
Reaching the arms up before your pelvis is tilted in a neutral position could cause compression and pain in the low back.
How to fix it: Engage the core muscles to bring the pelvis forward into neutral alignment. Also, shift the hip flexor of the back leg forward to align your hips.
Tip: Lower your hands to the hip sockets to feel when they tilt forward and are parallel to the front of your mat.
Mistake 3: Shoulders up to the ears
As you raise your arms, the shoulders may follow, reaching towards your ears. Dropping the shoulders can help to release (and prevent) stress and tension in the upper body.
How to fix it: With fingertips reaching to the sky, press the shoulders down away from your ears.
Tip: Envision your shoulder blades sliding down your back and towards your body’s midline.
Lunge Pose Modifications

Modifications and props can help you feel stable as you build strength and flexibility.
Padded Low Lunge Pose
If you have sensitive knees, a past knee injury or your mat is not thick enough, you may experience back knee discomfort in a low lunge. A supportive yoga knee pad can diminish aches and pains while you enjoy this wonderful stretch.
Block-Supported Lunge Pose
Placing yoga blocks beneath your hands creates space under the torso to lengthen your spine. They should also make it easier to position your foot and control the load on your hip flexors.
Lunge Pose Contraindications
If you have any of the following, seek advice from your GP before you practice a yoga lunge.
Ankle, hip, or knee injuries Herniated or spinal disc injuries Pregnancy (third trimester) VertigoPreparatory Poses & Counter Poses
These poses will help you prepare for the high lunge pose:
Low lunge Downward-facing dog (Adho Mukha Svanasana) Chair Pose Warrior I (Virabhadrasana I) Warrior II (Virabhadrasana II) Pyramid Pose (Parsvottanasana) Half splits (Ardha Hanumanasana)To exit a high lunge, step into a forward bend, then choose 1 or 2 of these poses to diminish any tension in the back, hips, or quads:
Standing or seated forward-bend Garland pose (Malasana) Child’s pose (Balasana) Pigeon Pose (Eka Pada Rajakapotasana)Final Thoughts
With many modifications, this posture will meet you where you are at in your practice. Listen to your body as you practice high lunge, and enjoy the lesson it teaches, to maintain a sense of grounding and stability both on or off the mat.