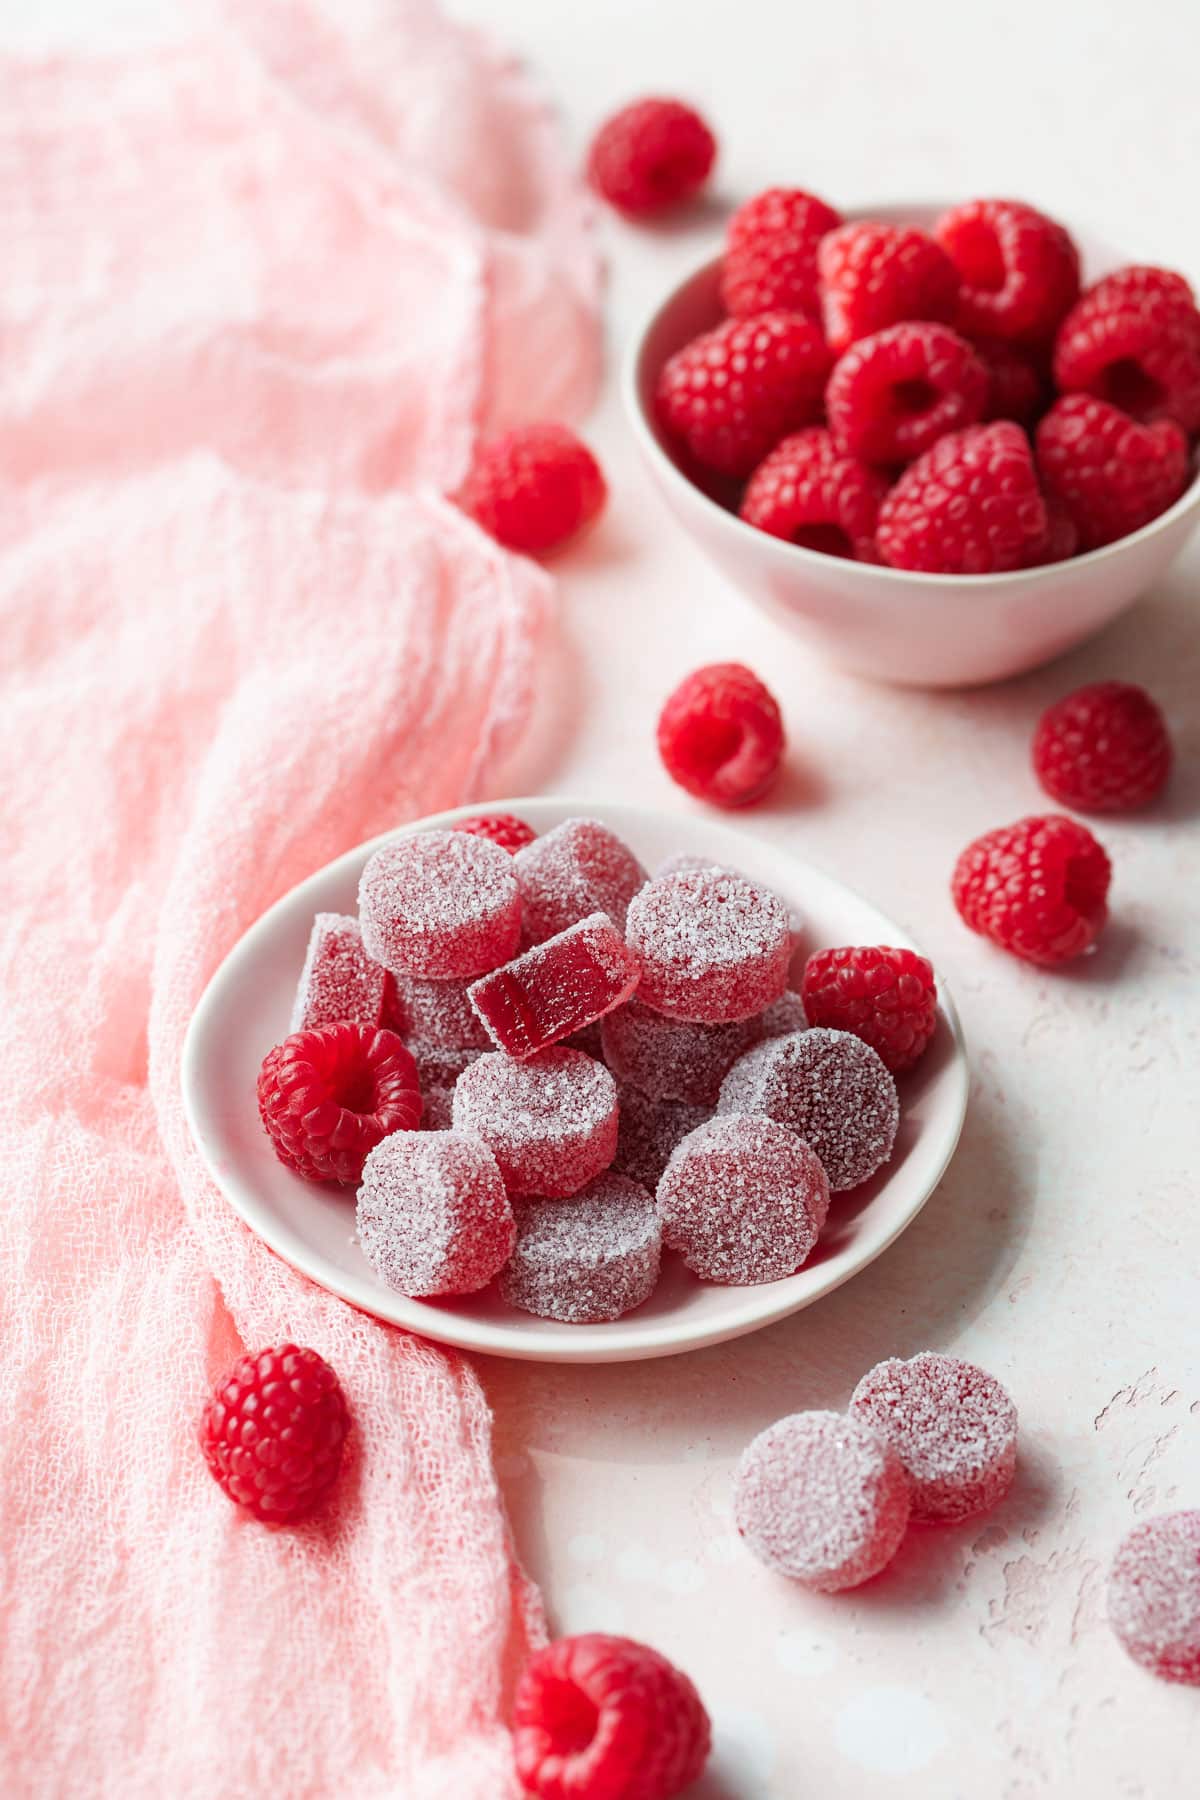
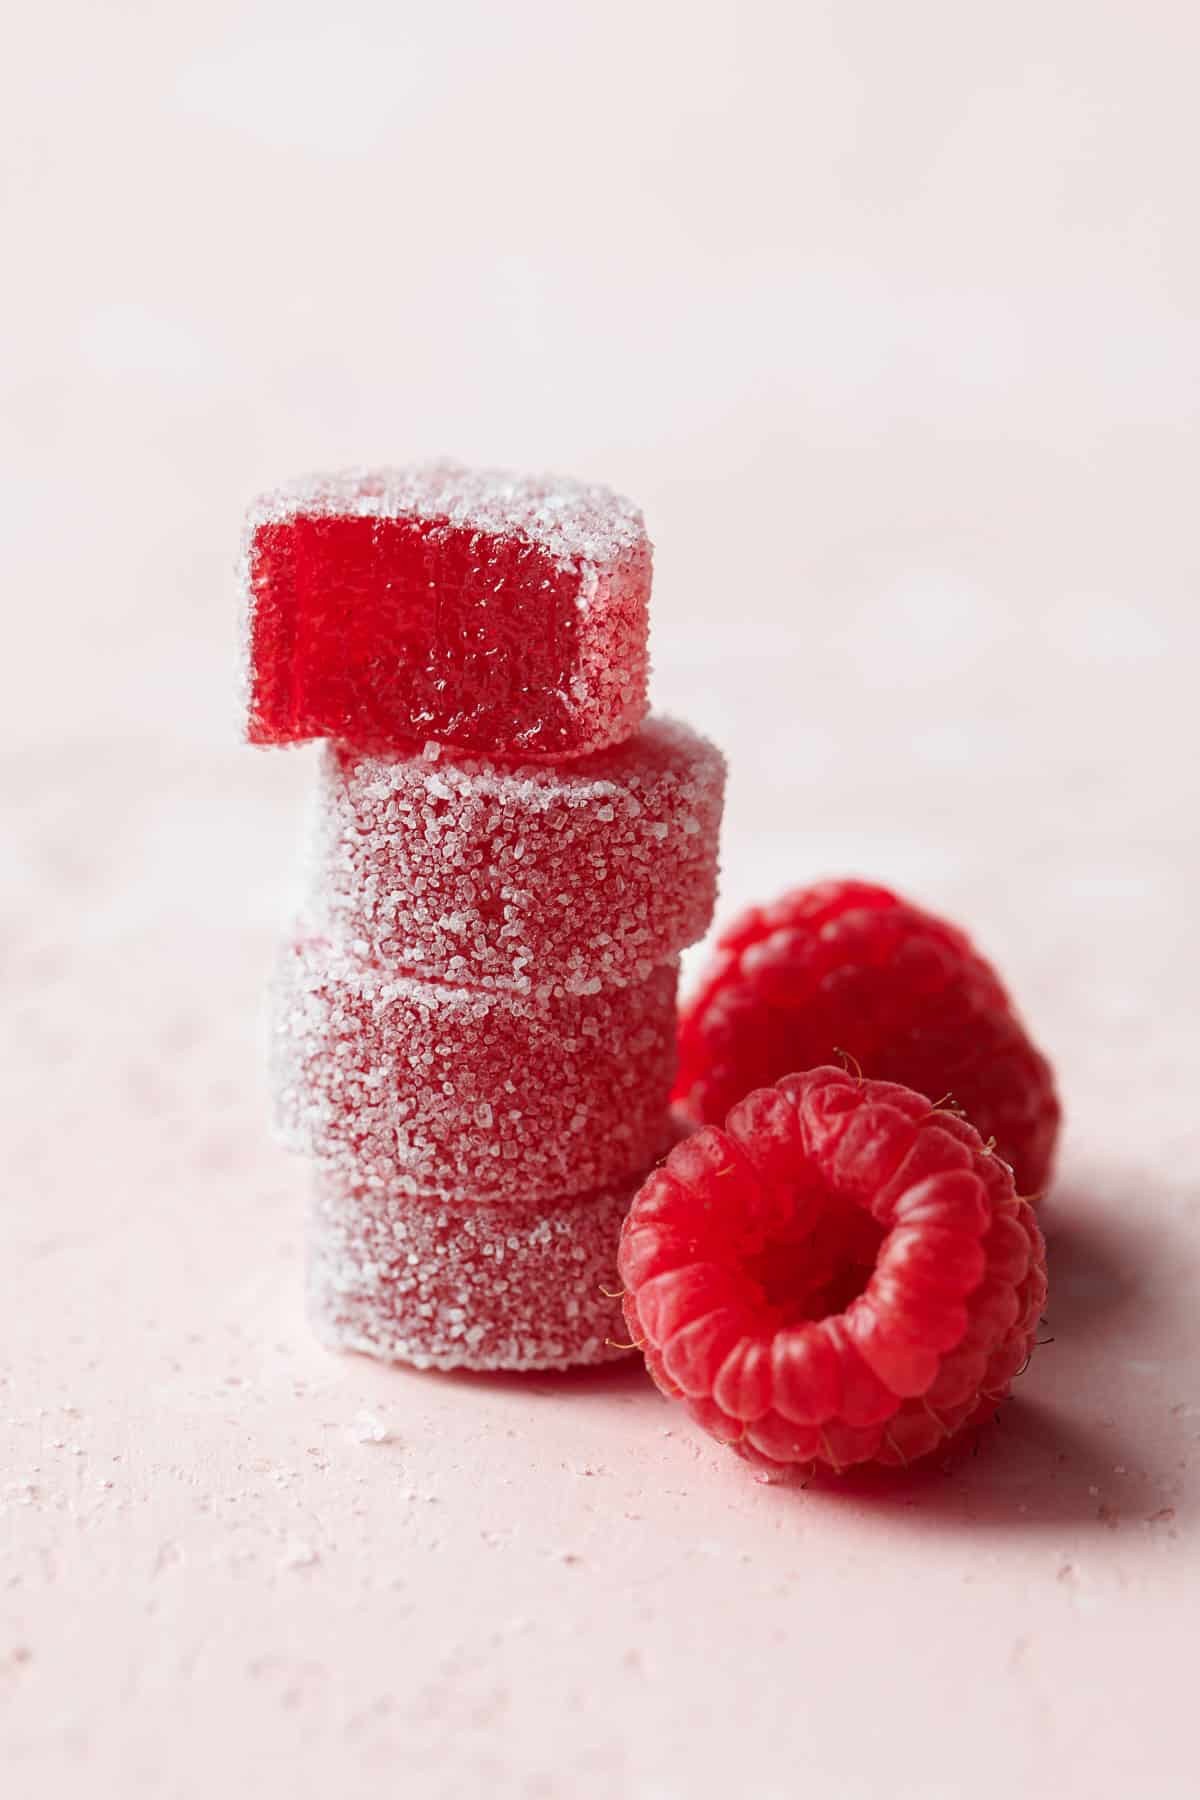
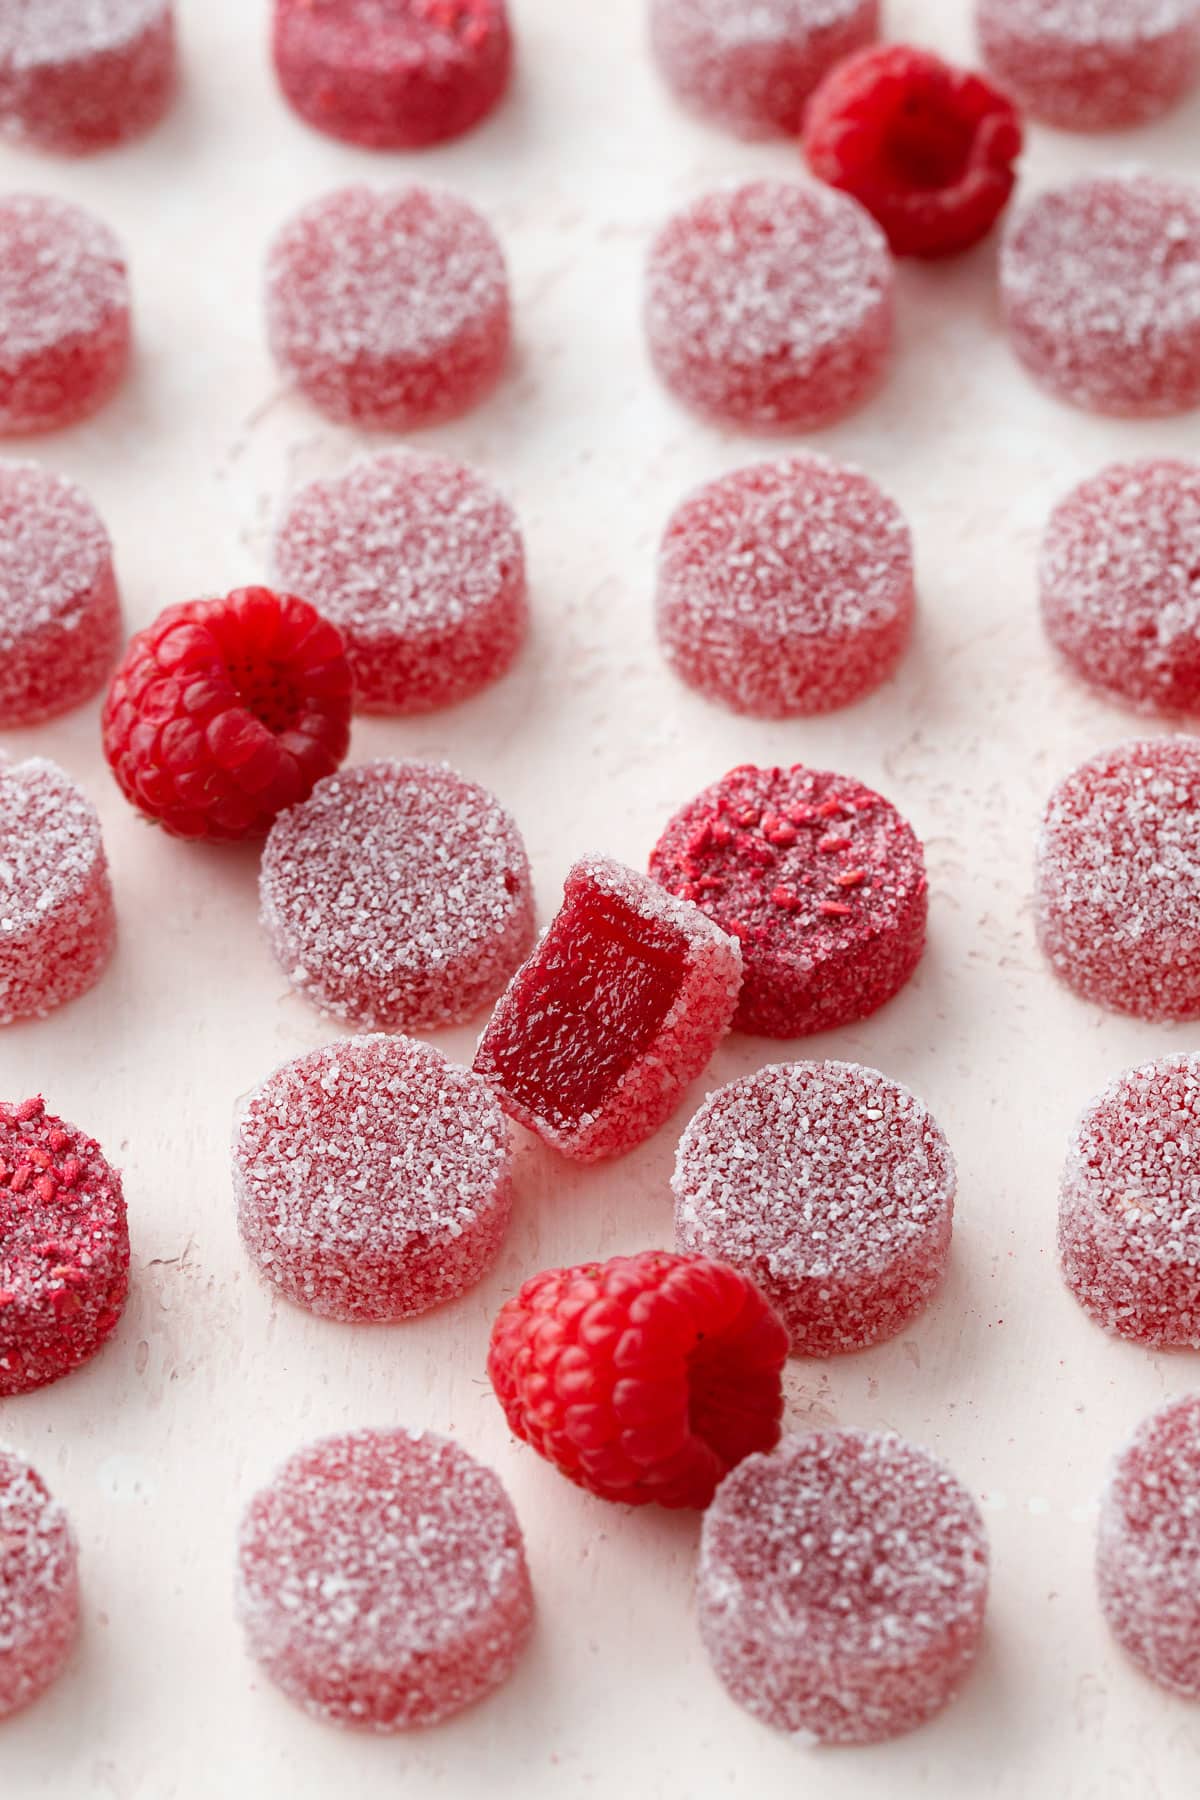
Homemade Raspberry Pectin Gummies (no Gelatin!)
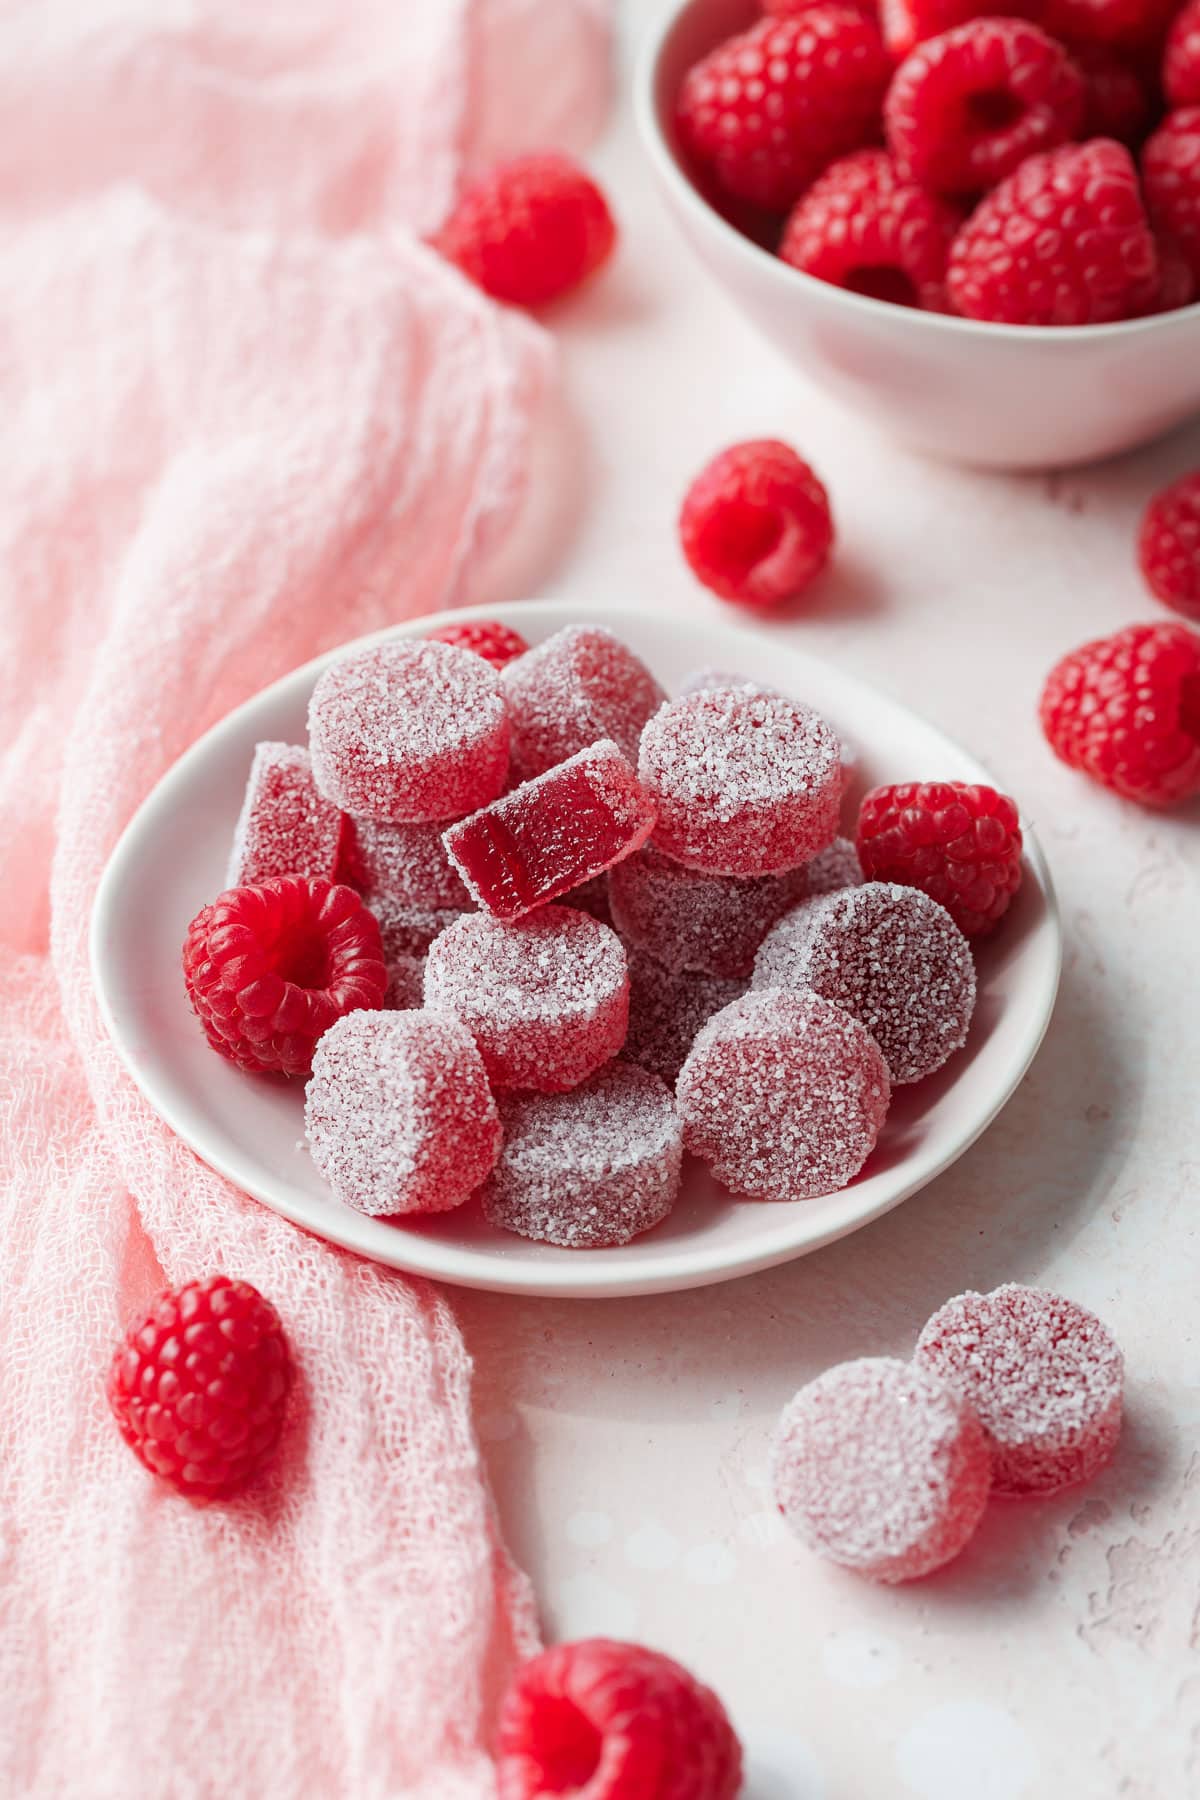
These delightfully chewy raspberry gummies are made with real fruit and set with pectin (indeed, there’s no gelatin required for this recipe, meaning they are vegetarian and even vegan-friendly)! While it does require time and precision, making your own...
 Troov
Troov
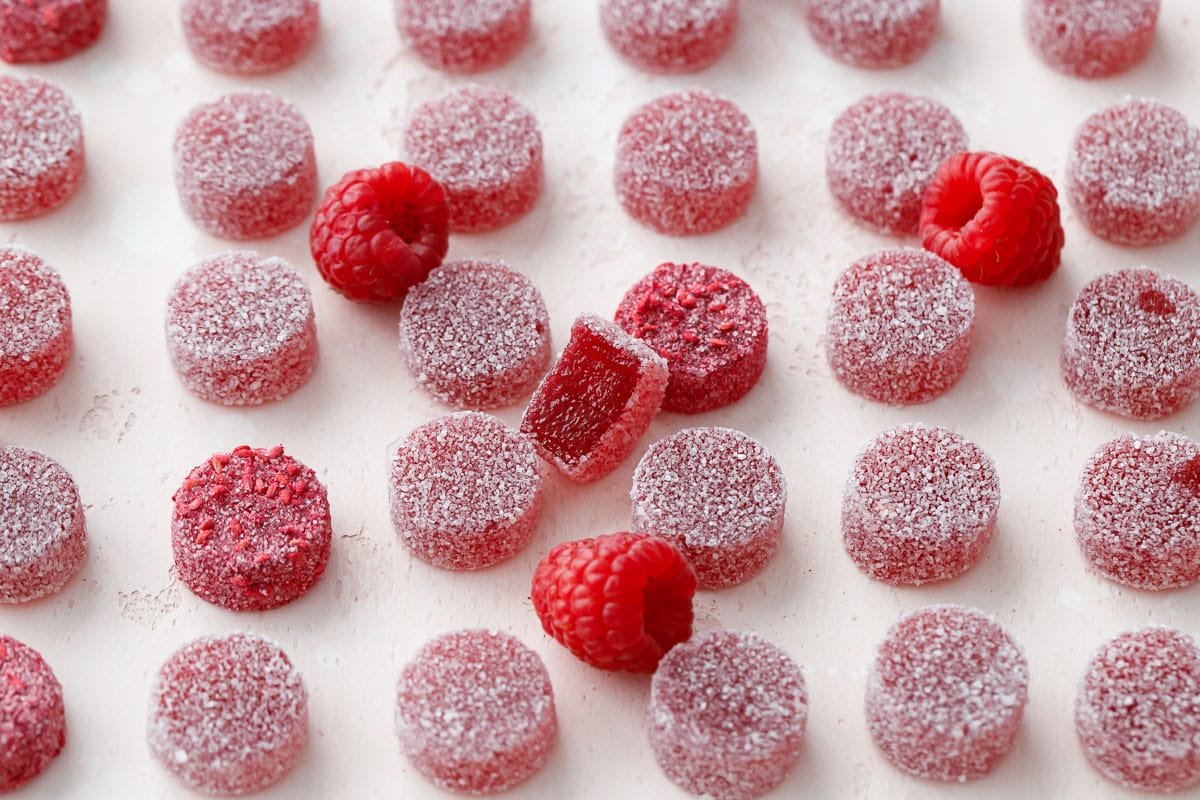
These delightfully chewy raspberry gummies are made with real fruit and set with pectin (indeed, there’s no gelatin required for this recipe, meaning they are vegetarian and even vegan-friendly)!
While it does require time and precision, making your own gummy candies is incredibly satisfying and well worth the effort, resulting in perfectly sweet, chewy fruit gummies bursting with bright raspberry flavor.
Before we get started let me clarify that these are perfectly innocent gummies, not those kinds of gummies, and I cannot and will not advise as to how to adapt this recipe to be those kinds of gummies. Just so we’re clear up front. All good?
Moving on.
The raspberry flavor is on point. Many gummy recipes are basically water, sugar and pectin with concentrated flavorings mixed in at the end.
Not this recipe, which is made using real fruit in the form of pureed fresh raspberries (strained, because, let’s face it, seeds would mar the perfection that is the chewy gummy texture). Frozen berries will work here too, with a few caveats (see the notes at the bottom of this post for more on that).
Pectin-based gummies, while they do take more time and precision to make than gelatin-based recipes, present flavors more cleanly and produce a vegetarian-friendly candy with a lovely jammy chew. Think of the texture like a really thick jam, as that is essentially what it is (compared to gelatin gummies which are more stretchy/rubbery). It’s like the difference between a gumdrop and a gummy bear.
My strawberry sour gummy candy recipe has always been a fan favorite, so I figured, why not make a raspberry version? It should be as easy as swapping out the fruit, right? (In fact, I debated whether or not it was even worth posting such a variation as I assumed the recipes would be basically identical.)
Spoiler alert: I was wrong.
Turns out, that despite all the charts saying otherwise, raspberries are ever so slightly more acidic than strawberries, which throws off the pH of the gummy goo causing it to thicken and earlier and makes it virtually impossible to cook to the proper temperature, not to mention pour into molds (it’s like pouring Flubber or something equally gloppy). This may be ok if you were doing a single pan pour (then later cut into individual pieces), but it definitely does not work for individual molded candies.
Time to regroup, figure out what went wrong, and try try again.

So what happened?
After extensive research, the issue was not one of time, temperature, or even too much pectin. Rather it came down to one, tiny little detail: acid. The fact that raspberries are slightly more acidic than strawberries (it could also be that my strawberries were super ripe and sweet and less acidic than usual). This meant that the pectin was setting too soon in the cooking process, leading to the gummy mess that was my first batch.
For the science minded, traditional fruit pectin gels, or sets, at around a pH of 3.2-3.3 (I use a range of 3.1-3.5 just to be safe). With gummy candies, because you want to be able to ‘pour’ it into molds, you want to hold off that set until as late as possible.
This is the reason for the baking soda—it buffers the pH of the fruit puree mixture to above 3.5, allowing the sugar-fruit mixture to cook to the appropriate temperature without the pectin setting. Something like sodium citrate would work similarly to buffer the pH, though this ingredient isn’t quite as common.
Then, at the very end once the mixture has hit the target temperature, add some citric acid (pre-dissolved in water) to bring the pH back down and jump start the pectin. At this point the clock is ticking so get your molten gummy mixture poured into your molds as quickly as possible!
Keep the gummy mixture warm for as long as possible by pre-warming your pouring vessel: simply fill it with boiling water and set aside while your gummies are cooking. Dump out the water right before you transfer the hot gummy mixture to the cup, then quickly pour into molds.
The gummies can also be poured into a single pan, which isn’t quite as time sensitive or stressful. Once the giant slab of gummy is set, you can cut it into individual pieces before coating in sugar.

Unlike jam, where we’re trying to hit a specific pH for safety reasons, when it comes to candy making, the pH, along with the final cook temperature, is critical to the proper set and texture of the final candy.
If your pH is too low the pectin will kick in too soon (resulting in a thick, gloppy mess). On the other hand, if your pH is too high at the end (if you forget to add the citric acid, for example) then the pectin may never kick in at all and your gummies won’t fully set.
Testing pH during the candy-making process isn’t exactly practical (pH measurements need to be taken at room temperature for accurate results), though you can certainly get a pH meter if you want to experiment with different fruits and the like. But that extra technical step is unnecessary, if you just follow the recipe as written and don’t make any substitutions, your gummies should come out perfect every time.
A note about pectin: this recipe calls for regular fruit pectin, specifically HM pectin which is the most commonly available type of pectin. I tested this recipe with SureJell Original pectin (in the Yellow box), but Ball Classic pectin also works. Just be sure you’re not using a low or no-sugar pectin.
If I haven’t scared you away yet with my excessive science talk… here’s how to make them!
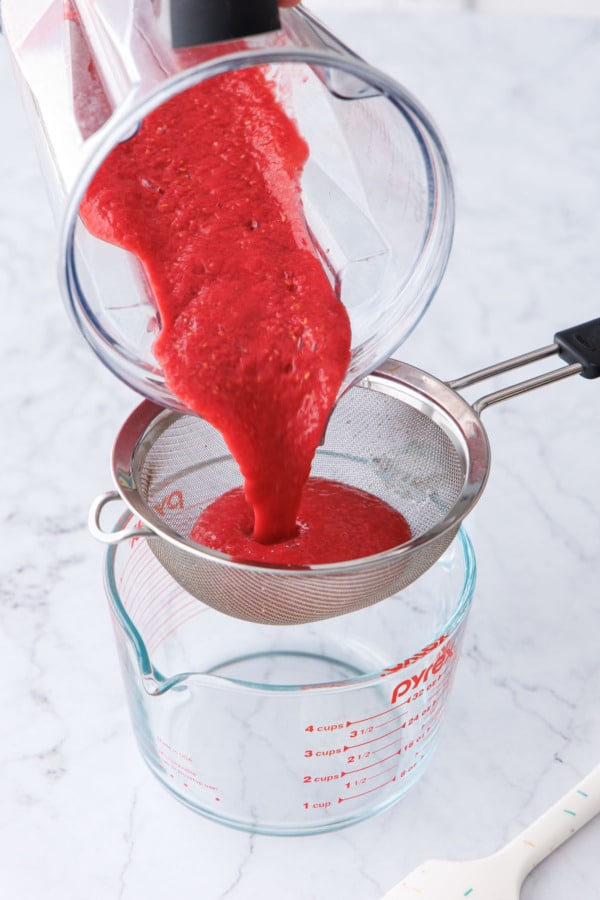 Puree fresh or frozen raspberries (thawed) in a blender or food processor until smooth.
 Strain raspberry puree through a fine mesh sieve to remove seeds; you should have 1.5 cups of puree.
 Combine raspberry puree, sugar, and corn syrup in a medium saucepan set over medium high heat and bring to a simmer.
 In a separate small saucepan, combine pectin, baking soda, and water.
 The mixture will foam up quite a bit. Bring to a simmer and the foam should subside a bit.
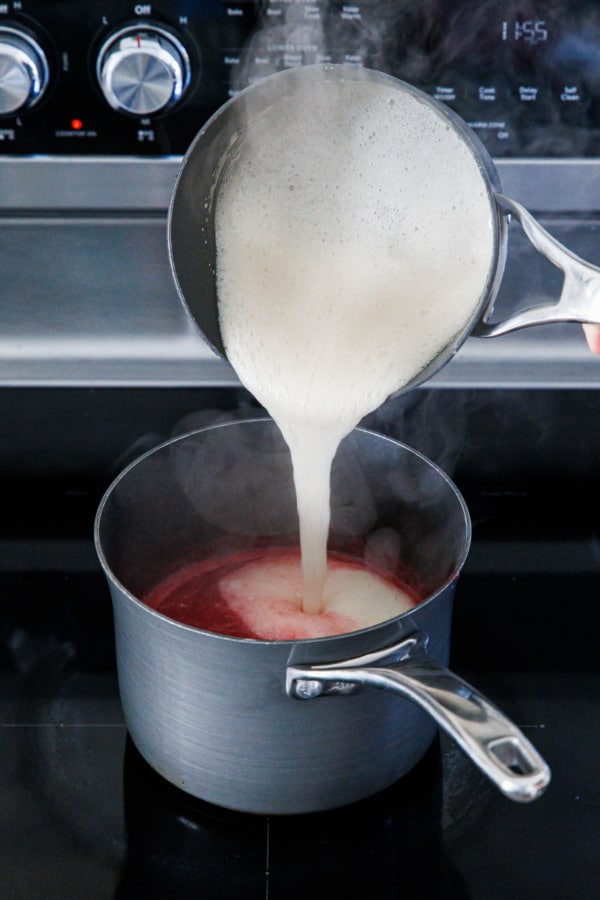 Pour the foamy pectin mixture into the saucepan with the simmering raspberry mixture.
 Affix a candy thermometer to the side of the saucepan if you have one, making sure the tip is fully submerged but not touching the bottom.
 Simmer the raspberry mixture, stirring regularly to prevent the fruit from burning or sticking to the bottom of the pan.
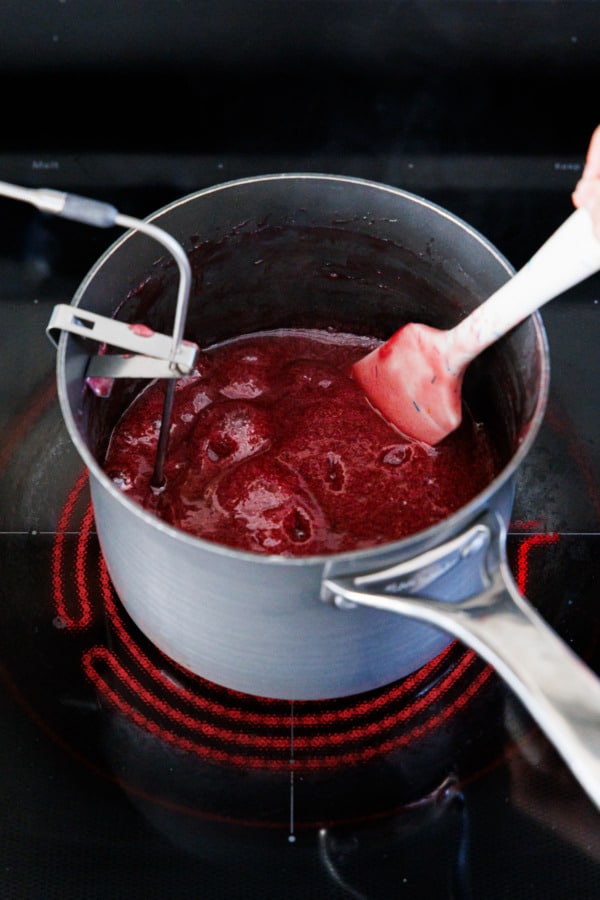 Continue to cook until the mixture reaches 230 to 240 degrees F; it will be thick and significantly reduced in volume. Quickly stir in citric acid, remove from heat, and transfer to a pre-heated pouring vessel.
 Working quickly, pour liquid gummy mixture into individual silicone molds. You can also pour it into a single silicone or parchment-lined baking dish (then cut it into pieces once it’s set).
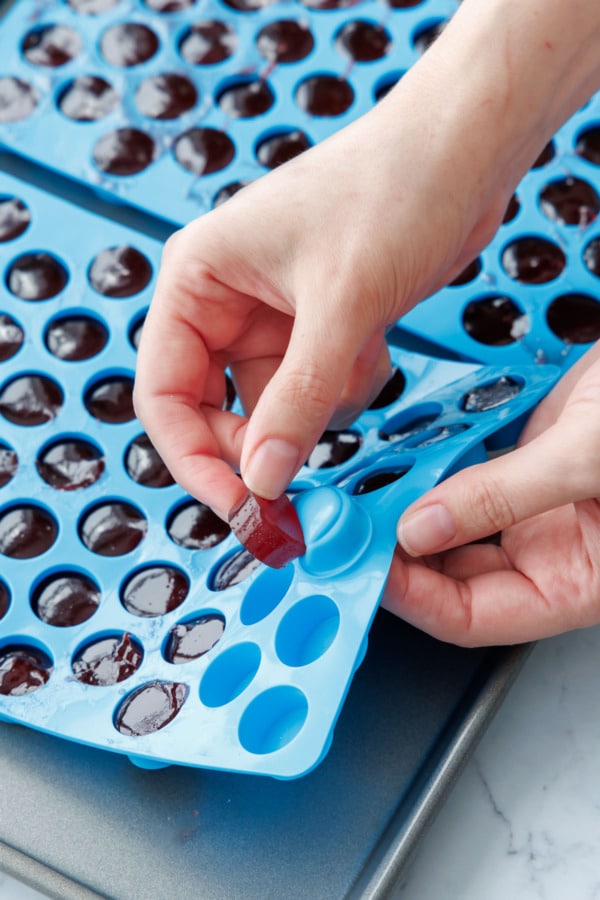 Once fully set set, pop the gummies out of the silicone molds.
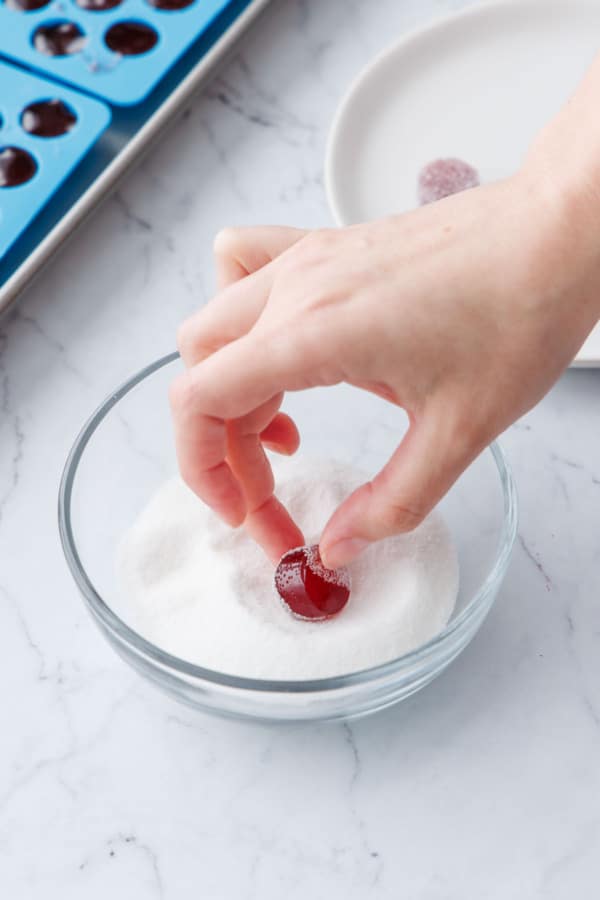 Roll candies in granulated sugar (this will prevent them from sticking together).
Time & Temperature
There are multiple factors that contribute to the final texture of the gummy, acidity (as we’ve already discussed), but also the temperature to which the sugar-fruit mixture is cooked.
Now here’s the thing about cooking sugar, it gets hotter than boiling water. It’s able to reach certain temperatures when the sugar concentration reaches a certain point, when so much of the water from the mixture has evaporated.
What that means is that you cannot reduce the sugar in this recipe. Doing so is not going to actually give you a lower-sugar candy, rather you’ll just have to cook it longer (and risk burning your fruit) to reach the same sugar concentration.
You also cannot replace the sugar with alternate sweeteners in this recipe. It’s candy, afterall. Just enjoy the sugar for what is.
The corn syrup inhibits crystallization and contributes to the final texture of the candy and cannot be ommitted, but any invert sugar will serve the same purpose. You can use glucose syrup, golden syrup, or tapioca syrup in its place; honey will technically work too however it will significantly change the flavor profile of the candy.
I’m assuming you already have an accurate candy thermometer, if you don’t, then definitely go get one before you attempt this recipe. I recommend an accurate instant-read thermometer with a temperature alarm and a clip for attaching the probe to your saucepan (this will make it much easier to keep an eye on the temperature of the candy as it cooks). This is the thermometer I use (though I did have to replace the probe, I have a feeling I fried it making one too many batches of candied orange peels).
Anyway, for chewy gummy candies, you’re looking for a final target temperature for 230-240ºF.
This is quite a big range when it comes to sugar, and it’s up to you how soft or firm you want your candy. Gummies cooked to 230ºF will give you a firm, jelly-like texture, much like a paté de fruit, while candy cooked to 240ºF would be much firmer. Going even higher (which you technically can do) would give you more of a hard candy rather than a chewy one.
I personally found my sweet spot right in the middle, around 235-236ºF.
For folks at high elevation, you’ll want to adjust the target temperature by 1 degree for every 500 feet above sea level (so folks at 5000 feet would want to reduce the target temperature by 10 degrees, or 220-230ºF). This is due to the lower boiling point of water at high elevations. Adjust accordingly!
Molding & Coating
I used these round silicone candy molds for my candies; they’re smaller (about 3mL each) than the square ones I used for my strawberry gummies, so you’ll end up with about 100-120 candies in the end.
For reference, this recipe makes about 450mL of liquid candy, if you’re looking for a reference as to how many individual molds you may need.
I don’t recommend molds any smaller than 3mL, as you just won’t be able to pour them all before the gummy mixture starts to set (even with these molds my last handful started to get really gloppy and messy).
You can also pour the cooked gummy mixture into a 9×9-inch square silicone baking pan; once the gummies are set, you’ll want to cut them into individual pieces and coat in sugar. Silicone is really the best material for the ultra-sticky gummy mixture, but you can try to use a parchment-lined baking pan as well (whatever you do, do NOT use waxed paper or cling wrap as it will melt!)
Let your gummies set in the molds for at least 24 hours, then pop them out and coat in sugar (a coating is necessary as they’ll be too sticky otherwise).
The final coating is an essential step in this recipe, otherwise the gummies stick together.
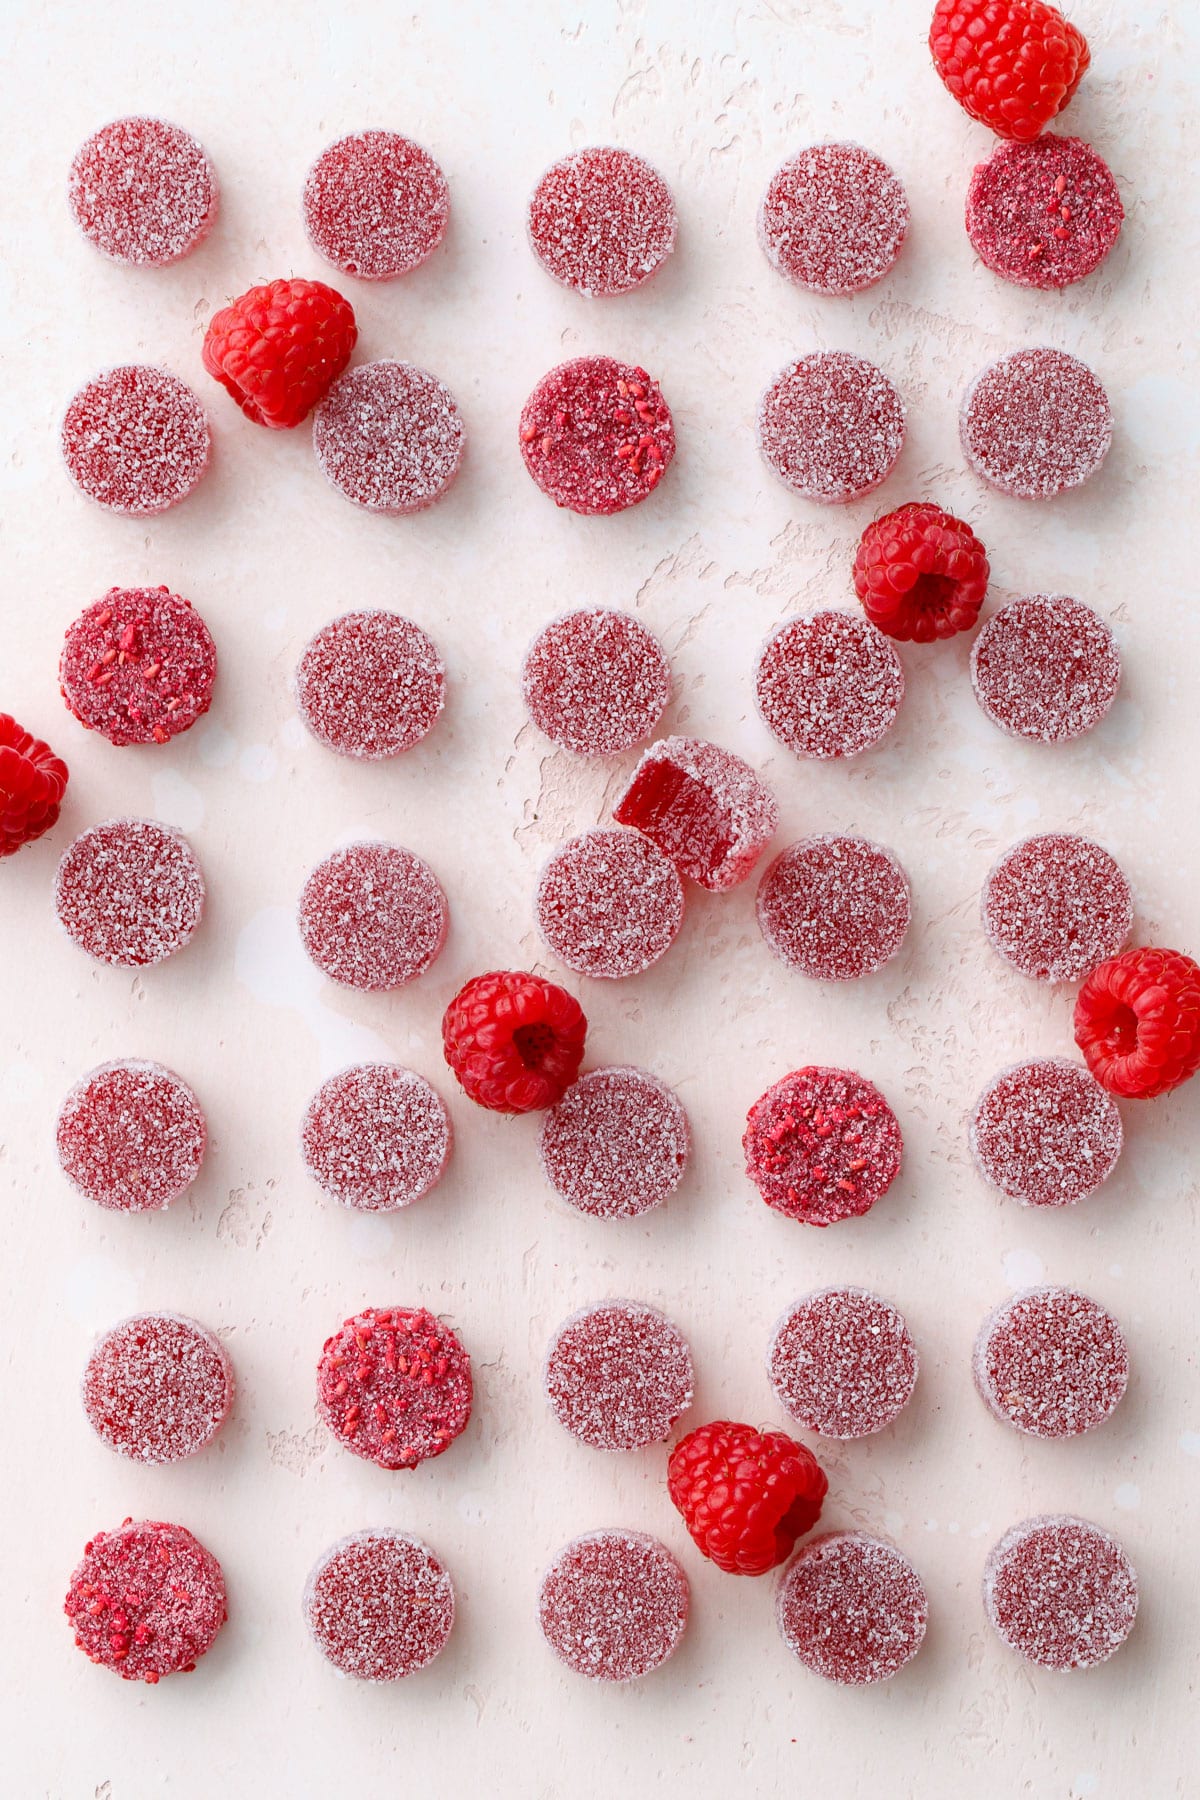
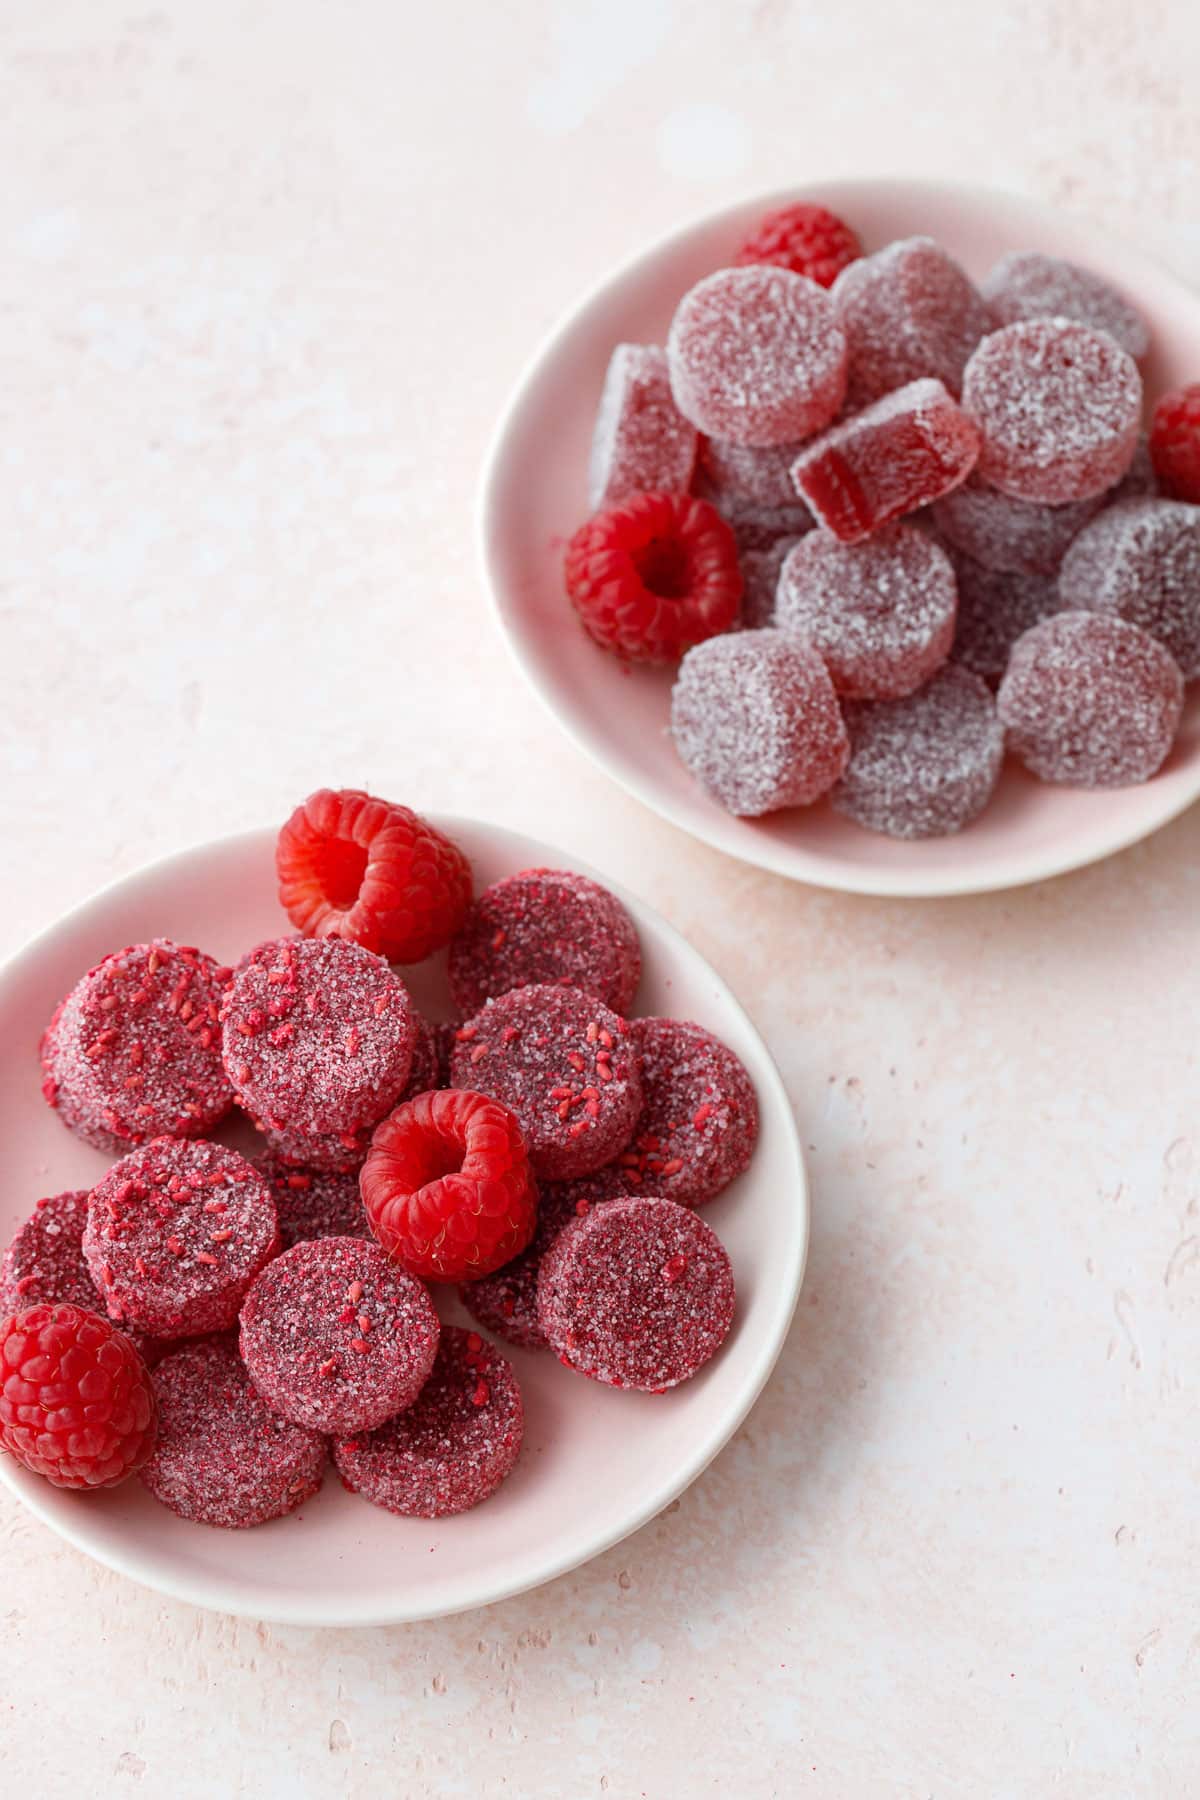
For these raspberry gummies, I opted to coat them in plain granulated sugar, compared to my strawberry gummy recipe which uses a lip-smacking mixture of sugar and citric acid.
If sour stuff is your jam, mix 1/2 teaspoon citric acid into 1/4 cup sugar to use as your coating.
I also played with a mixture of sugar and freeze-dried raspberry for an extra pop of raspberry flavor, and while both were great, the raspberry-infused sugar tends to soften and absorb more quickly than plain granulated sugar. Still, if you want to amp up the raspberry flavor, mix in a few teaspoons of finely ground freeze-dried raspberry powder into your granulated sugar (see photo above for the pretty-in-pink results!)
If you wanted a spicy kick, you could also mix in a little bit of ground cayenne into the granulated sugar. You know I love a little heat in my fruit so I’m totally on board with this idea too!
One more alternate coating idea is starch, a mix of powdered sugar and either cornstarch or tapioca starch for a smoother finish without the crunch of the granulated sugar. Not my taste personally, but totally up to you!
The gummies will continue to set and dry the longer they sit out, so store them uncovered at room temperature and they’ll get even chewier! I find airtight containers, while they definitely keep the gummies soft, will increase the absorption of the coating; if that’s something you care about be sure to leave your candies uncovered or lightly covered, they’ll easily keep for a few weeks.
Homemade pectin gummies can also be refrigerated or even frozen for longer term storage.

Fresh vs Frozen Fruit
This recipe can be made with fresh or frozen raspberries, however, keep in mind that frozen raspberries will produce a candy with a darker color and a more syrupy flavor. The candy in the photos was made with fresh raspberries; frozen fruit will give you a deep red candy instead.
You’ll also need slightly more fruit (more like 20-22oz) to achieve the 1 1/2 cups of puree as called for.
As for substituting other fruits in this recipe: I’ve only tested raspberries and strawberries, but technically if the fruit has a similar pH and pectin content you should be able to swap them equally. However, even small variances in pH can greatly affect the final result (for example, a less acidic fruit like peaches would need less baking soda but more citric acid at the end; similarly, fruits with higher or lower natural pectin content may need slightly more or less pectin to achieve the ideal texture, and it might take a few tries to figure out the right amounts).
Homemade Raspberry Pectin Gummies
Cook Time: 45 minutes
Total Time: 2 hours
These homemade raspberry pectin gummies are bursting with raspberry flavor from real fruit puree, coated with granulated sugar for a perfect finish.
Prepare your silicone molds or a silicone cake pan (9×9 square ideally) set on a cookie sheet on a heat-proof surface (the candy will be very hot when it goes into the molds, you don't want to melt your countertops). You can also use a regular baking pan lined with parchment paper (NOT waxed paper or plastic wrap).
Puree raspberries in a food processor or blender until smooth (if using a high-powered blender, use a medium-low speed so you don't pulverize the seeds). Strain puree through a fine mesh sieve. Measure out exactly 1 1/2 cups (350 grams) of seedless raspberry puree.
In a medium (3-4 quart) heavy-bottomed saucepan, combine 1 1/2 cups raspberry puree, sugar, and corn syrup. Set over medium to medium-high heat and bring to a boil.
Meanwhile, combine pectin, baking soda, and water in a small saucepan; it will foam up quite a bit. Bring to a simmer over medium-high heat, stirring occasionally, then add to saucepan with raspberry mixture.
Attach a candy thermometer to the side of the saucepan. Continue to cook over medium to medium-high heat, stirring occasionally, until the mixture reads 230-240°F. This will take about 45 minutes. As it gets above 220, start stirring more frequently, scraping the sides and bottom with a heat-proof spoon or spatula to ensure the mixture cooks evenly and doesn't burn.
Once the mixture hits your target temperature (I aimed for 236°F), remove from heat and quickly mix in citric acid dissolved in water (careful as it will sputter and steam). Immediately transfer to a large spouted measuring cup (ideally pre-warmed) and pour into molds. The mixture will thicken as it cools, so you want to get it into your molds quickly; this is especially important for small molds (since it'll take longer to fill more of them). For reference, this recipe will make about 450 mL of liquid candy, if you need to calculate how many molds you'll need to fill.
Set aside the filled molds and let cool completely to room temperature, at least 2 hours or ideally overnight, until candies are fully set.
Remove candies from molds (or, if you used a single pan, remove the entire piece from the mold and cut it into bite sized pieces or use a cookie cutter to stamp out shapes). Roll individual pieces in granulated sugar until fully coated.
Store candies uncovered at cool room temperature for up to 1 week, covered in the refrigerator (separate with layers of parchment) for up to 2 weeks, or in in the freezer (in a container between layers of parchment) for up to 3 months.
All images and text ©
for Love & Olive Oil.
Let us know what you think! Leave a Review below or share a photo and tag me on Instagram with the hashtag #loveandoliveoil.
There may be affiliate links in this post. We are a participant in the Amazon Services LLC Associates Program, an affiliate advertising program designed to provide a means for us to earn fees by linking to Amazon.com and affiliated sites.