How to make Windows look like Windows 7
We provide step-by-step instructions on how you can use tools and tweaks to bring the Windows 7 experience to Windows 10 and get back features you may want.
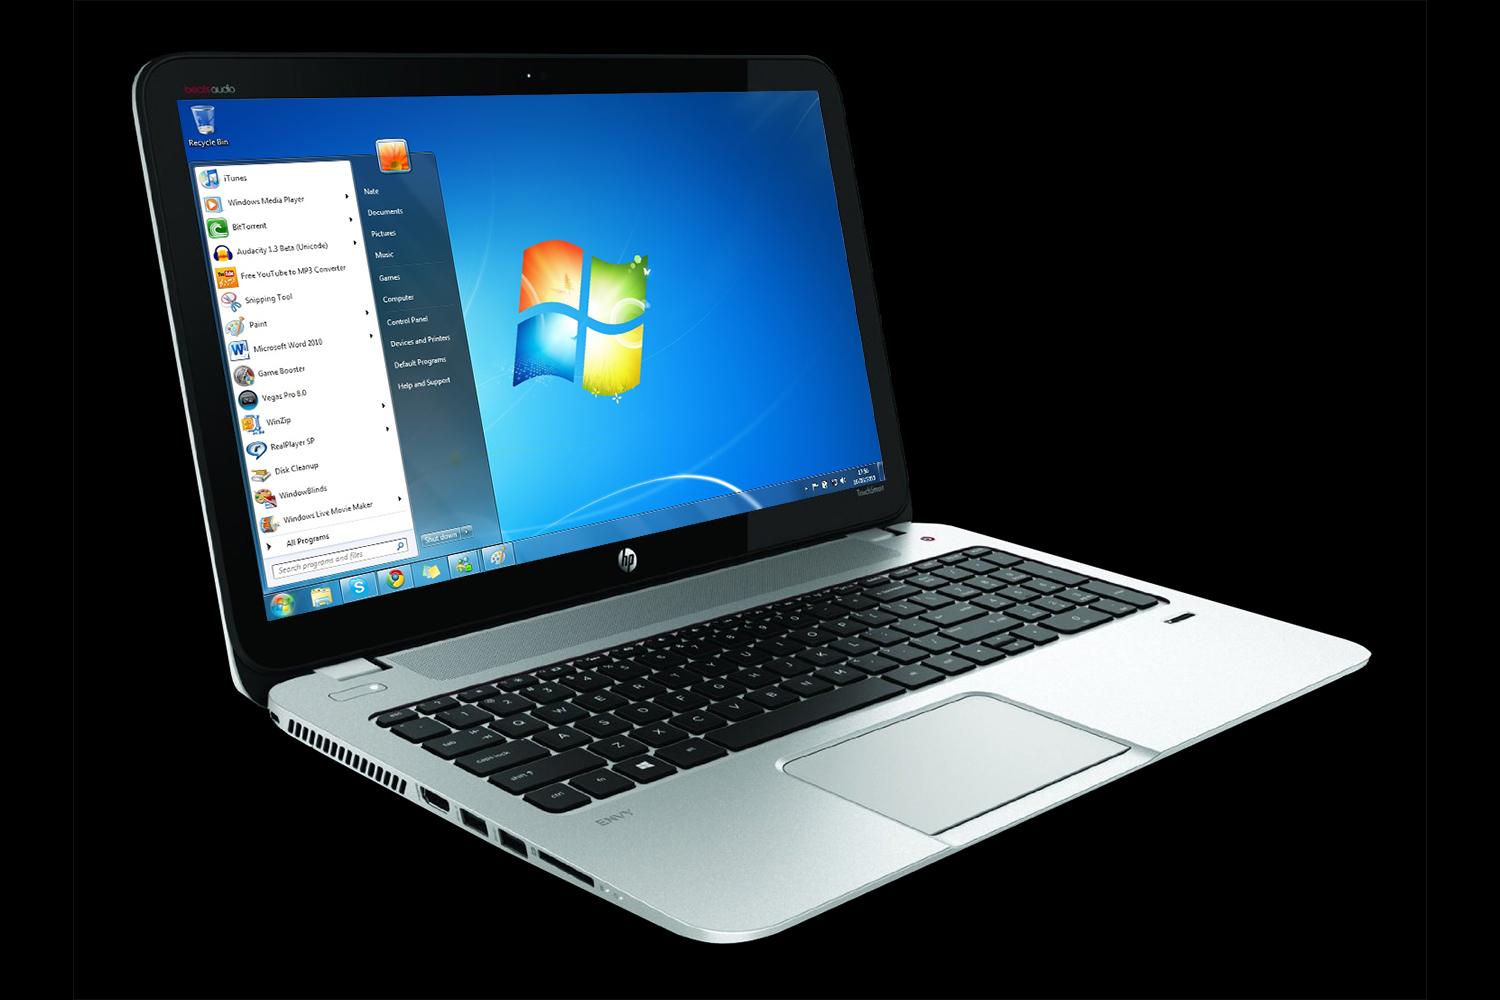
While some people feel that Windows 10 and 11 have an appealing look, others appreciate the old days and the more classic Windows 7 look. If dealing with the appearance of Windows 10 has had you down these last seven years or Windows 11 has you wishing for a callback to the traditional Window look, you have options!
The good news is that Windows 10 and Windows 11 are highly customizable, so you can engineer their design to look nearly the same as Windows 7. With a few tweaks to elements like wallpaper, color scheme, and default browser, you’ll be back to a Windows 7 look and feel in no time.
Change the Start menu on Windows 10
Step 1: A download called Classic Shell once allowed you to change key menu aspects to look more like Windows 7. Unfortunately, support for Classic Shell ended in 2017, but the code was picked up and continued with Open Shell, which you can download here. With this free tool, you can modify the Windows 10 Start menu to resemble the version that came with Windows 7. Once installed, you’ll see six entries on your Start menu listed under Classic Shell. Here, you will want to choose the Classic Start menu settings.
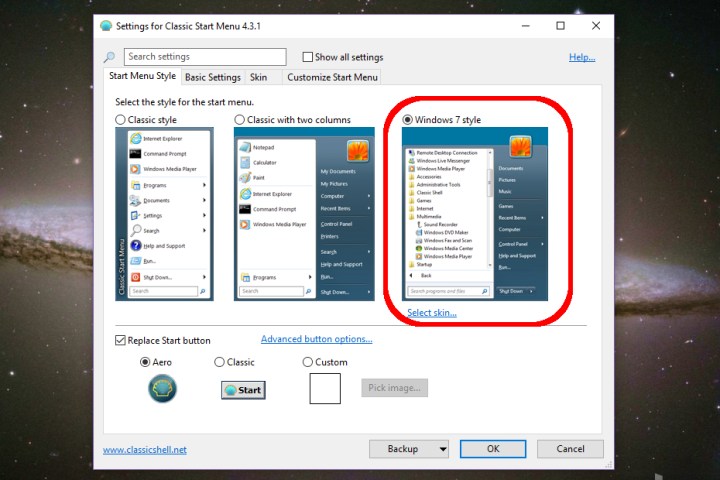
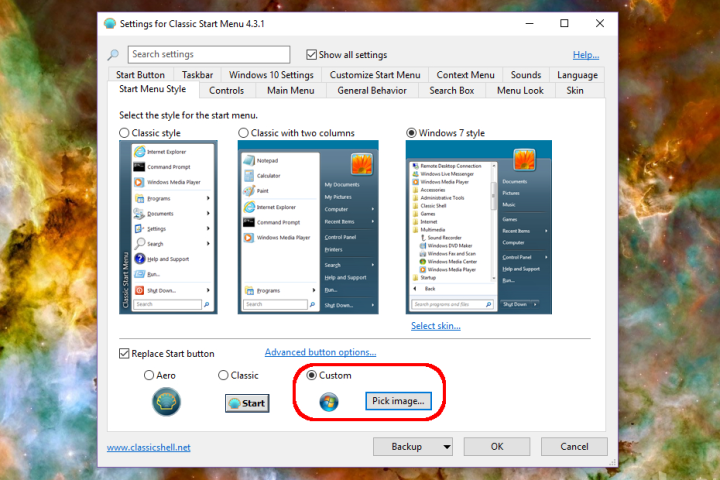
Step 2: On the Start menu style tab, choose the Windows 7 style.
Step 3: Next, head here to download the Windows 7 Start Menu orb (these are image files, so you can pick them up from many different places if you prefer). Once downloaded, choose Custom near the bottom of the Start menu style tab and select the downloaded image. You may need to tweak the button size — we used 60 given the default setting was too large for our desktop resolution.
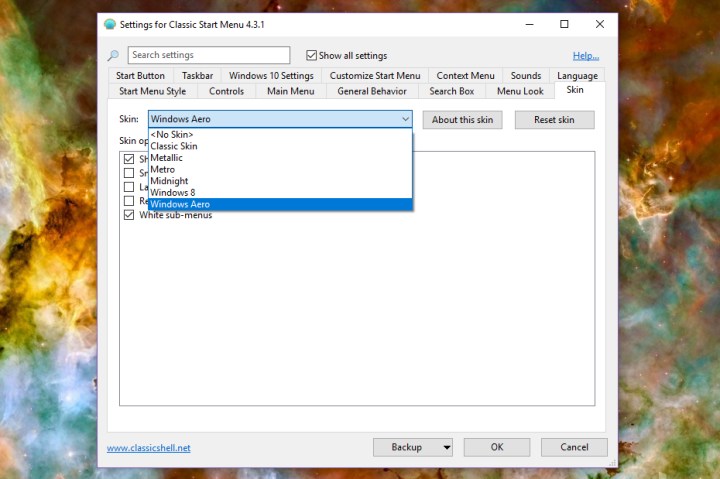
Step 4: On the Skin tab, choose Windows aero. Select OK to finish up.
Step 5: If you don’t care much about the other style options, but you do really miss the option to make the taskbar transparent while you work, then we suggest downloading TranslucentTB instead. It will give you that sweet transparency without changing anything else.
Change the wallpaper on Windows 10
Step 1: To install a Windows 7 wallpaper, download the images from here. We have an example here you can use, too.
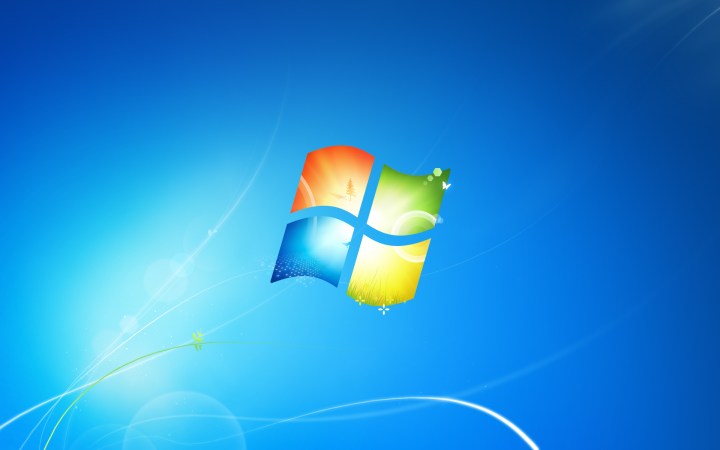
Step 2: Right-click on the Windows 10 desktop and select Personalize.

Step 3: The Settings app should then appear, defaulting to the Background panel. Make sure the Background drop-down menu reads Picture and then select the Browse button to find your downloaded wallpaper.
Change the colors in Windows 10
Step 1: Right-click on the desktop and select Personalize.
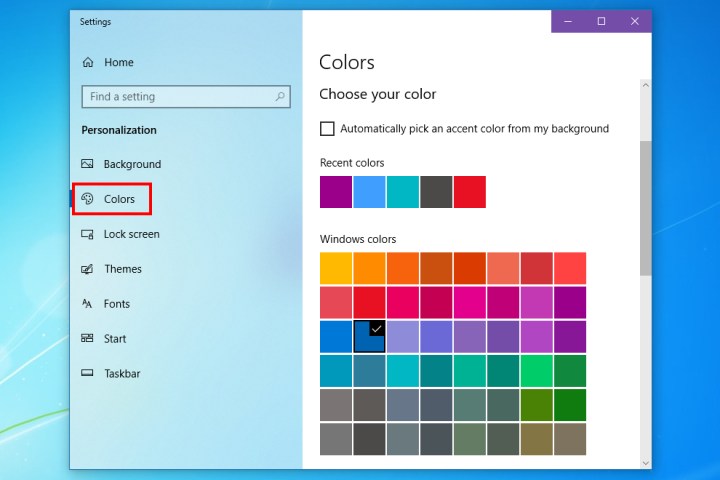
Step 2: Choose Colors on the left of the Settings app. We chose navy blue for the best results, but you can experiment if you want.
Step 3: Next, we’ll switch the colors of the title bar. Check the Title bars option toward the bottom of the panel. You can add the Start and taskbar if you prefer as well.

Add Gadgets
Microsoft Gadgets was a popular option in Windows 7. You could instantly see various categories of vital news and daily updates on your desktop thanks to these handy apps. They could display the weather, a clock, stock updates, and more, all while using minimal system resources.
Much to some users’ dismay, Microsoft eliminated Gadgets in Windows 10 to help prevent security issues. Windows 11 is a little better, as it got widgets. (Here are our favorites) that are taking an increasingly Gadget-like role.
Many Windows users miss the way Gadgets functioned in Windows 7. The upside is that you can access many of these features by downloading the 8GadgetPack. The Microsoft store has certified the 8GadgetPack for safety, so you can get the same Windows 7 experience without the risks. Options include Clipboarders, Clock, Agenda, App Launcher, and more.
What about Windows 11?
Many of the steps we've discussed for Windows 10 will work for Windows 11 too, but you may run into some compatibility issues. There are a few separate steps you should take if you are trying to convert Windows 11 to a 7 appearance.
Step 1: Download StartAllBack. This is a full package to change Windows 11 into a more traditional UI that brings back many classic favorites, including features from both Windows 10 and Windows 7. You can get a permanent license key for only a couple of bucks if you like how it looks.
StartAllBack is very intuitive, with different sections for the Start menu, taskbar, file management, and more. It's one of the easiest retro-UI solutions we've ever seen and saves a lot of work compared to Windows 10.
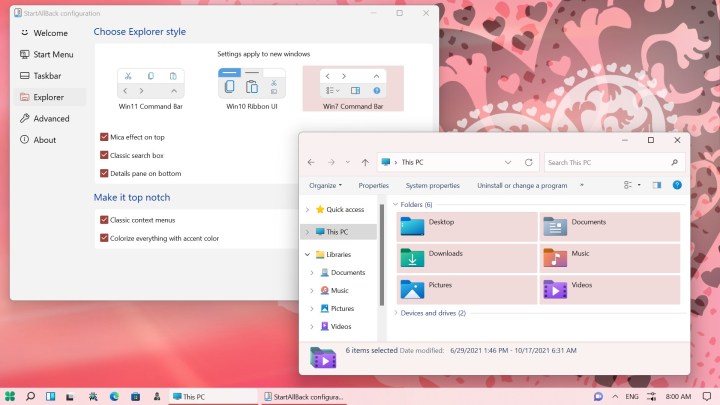
Step 2: Download the Win11DisableRoundedCorners utility. If you're a fan of the old style of Windows, you may be especially dismayed by the rounded corners in Windows 11. Running this utility should eliminate them for you.
Step 3: Note that solutions like 8GadgetPack will also work with Windows 11, although Microsoft is also testing Gadget-like widgets in its 2022 Insider Previews.
Finally, if you're hesitating between Windows 10 and 11, you may want to check out our guide here to see if you should upgrade.

 Tfoso
Tfoso 


