How to Sit for Pranayama: 5 Best Sitting Postures
Pranayama is an integral part of yoga. It involves the use of various yoga breathing exercises to rectify your breathing pattern as well as cleanse your mind and body. Certain pranayamas can help calm down your nervous system and...

 Image Source: Shutterstock
Pranayama is an integral part of yoga. It involves the use of various yoga breathing exercises to rectify your breathing pattern as well as cleanse your mind and body.
Certain pranayamas can help calm down your nervous system and help with sleep while others can generate internal heat. Kapalbhati, Anulom-Vilom, Nadi Shodhana, Bhastrika, and Ujjayi are some common pranayamas that you will see people practising often.
Whenever you are learning to perform pranayama correctly, be it from your teacher or other sources, you will frequently notice the emphasis on the posture you assume. Even though it is said that whatever posture you sit in, you should be comfortable, phrases like “sit tall and straight”, and “straighten your spine”, are time and again used to encourage sitting in the desired manner.
This is because, when you sit straight, you are encouraging optimal oxygen circulation. Your lungs get the space to breathe and the diaphragm gets the space to expand during deep breaths. Moreover, the abdominal muscles can easily expand and contract as per the pranayama you are practising.
More essentially, an uninterrupted flow of prana, which is the main aim of pranayama, is established in a better sitting posture.
All of the above factors are important steps for your spiritual practice.
The question now arises – what is a good yet effective sitting posture while practising pranayama?
You will find the answer to this usual and important question in this article.
Sitting correctly for pranayama
Be it any practice, yoga or any other exercise, half of the work is already done when one learns to sit.
One of the most important things to bear in mind when deciding on the best sitting posture for pranayama is to maintain a tall, straight back. Your spine should be in a stable position in this posture, which will help with breathing properly and permit the Kundalini and energy flow to move.
A perfect combination between your body and mind will determine how powerful your experience is.
Follow these tips when sitting for pranayama practice:
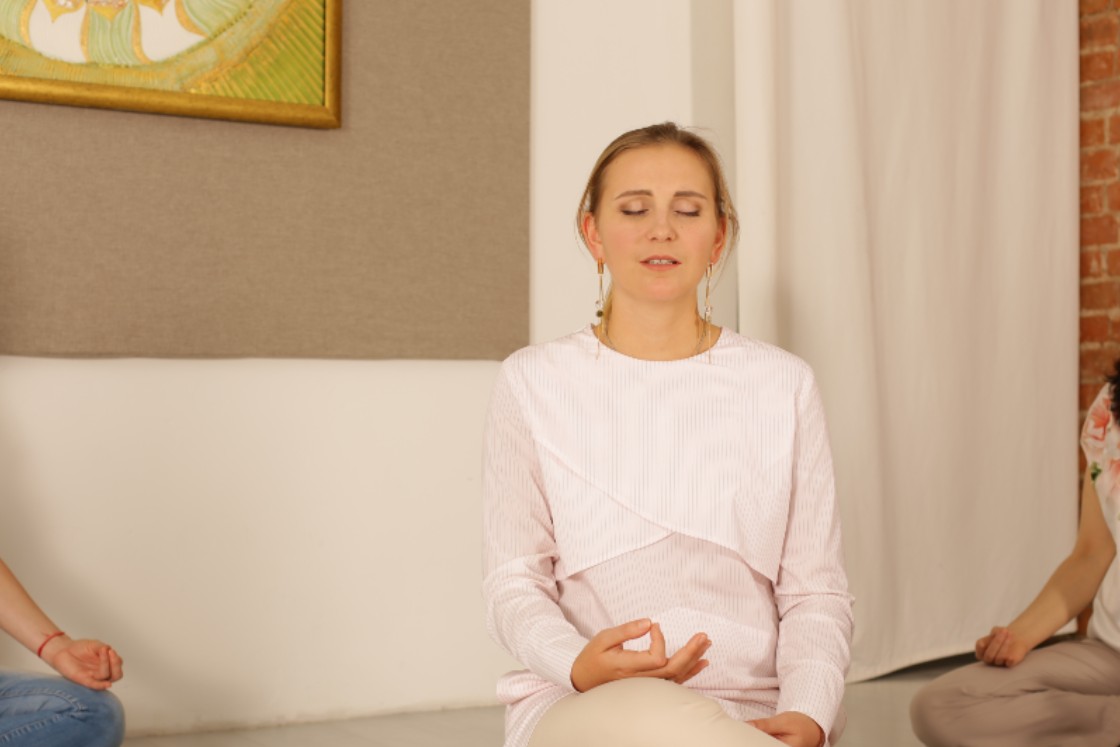
Have a straight back – When we sit for pranayama breathing, the spine should maintain its natural bend rather than be forced to be straight like a stick. In such a position, there won’t be any obstructions to the energy flow and the back won’t give out during pranayama. If it is not possible to keep your back straight naturally, you can sit on a yoga block, cushion, or bolster to elevate your hips above your knees or sit facing backwards a wall to take support. This helps in straightening the back while aligning the spine naturally. Open your chest and shoulders – In pranayama practice, make sure your shoulders are rolled back and down. shoulders shouldn’t be slumped forward. Role your shoulders outwards while pushing the shoulder blades down. The back and shoulder muscles should be relaxed. This opens the front body, especially the thoracic region while establishing a strong back.Take time to arrange the legs – Your leg arrangement can have a significant impact on how comfortable it is to maintain a straight back. You won’t be able to enjoy the pranayama if you experience pain when sitting because thoughts will constantly go to the area of your body that is in pain. For this reason, using props such as yoga blocks and blankets is advised.Relax your head, face, neck, and arms – Besides the above necessities, you should make sure that the rest of your body is as relaxed and comfortable as possible. Keeping your gaze or drishti at a focal point in front of you will help keep the head and neck aligned with the spine. Place your hands on your thighs or knees with a mudra of your choice which will relax your arms as well.Take some time to assimilate to the position. See if you are experiencing any discomfort or pain. Once you have attained the desired position, keep your body still.
5 Sitting postures for pranayama
Generally, pranayama is advised to be performed while sitting on the ground. This is because sitting gives stability and balance and is less distracting and exhaustive than standing.
A variety of sitting postures like padmasana, sukhasana, etc. supports the lungs’ natural expansion while others promote hip stabilization or spinal lengthening. All sitting postures appear the same at first glance. They do, however, have their peculiarities as you understand further about them.
Some of the most recommended and best asana for pranayama practice are as follows:
1. Lotus Pose (Padmasana)
 Image Source: Shutterstock
Padmasana is known as the “King of Sitting Asanas” because it lengthens the spine and allows prana to flow upward. While doing pranayama in lotus pose more concentration is attained as a result, and breath retention is significantly improved.
The Lotus pose calms the mind while balancing and energizing the Chakras. Padmasana is the best sitting position for pranayama, according to early yoga scriptures and Vedic literature.
This pose promotes mental and physical steadiness by having calming effects on the nervous system and brain.
The hip, spine, pelvis, and abdominal muscles and nerves are all stimulated.
How to perform
Sit on the ground with your legs stretched in front of you. Bend the right leg and place the outer edge of the feet near the left hip crease, sole facing up. Similarly, bend the left leg and place the outer edge of the feet on the right hip crease, sole facing up.
In the perfect position, your knees should touch the ground. If not, you can place yoga blocked under your knees or you can sit on a cushion or bolster to elevate your hips.
Your hands should preferably form the Gyan Mudra and be placed on the knees or simply palms facing up or down.
Precautions
Proceed with caution if you do not have enough hip flexibility.Do not force your feet towards the hip crease. Take your feet as far as they can go. Avoid practising in this pose if you have sciatica.Avoid this pose if you have a chronic injury or have undergone surgery recently.2. Accomplished Pose (Siddhasana)
 Image Source: Canva
Just after Padmasana, Siddhasana is the asana most frequently used for pranayama and meditation practice.
Siddhasana is known as an accomplished posture because it symbolizes attaining the level of excellence necessary to transform into a Siddha, or Adept Yogi. One who has attained spiritual enlightenment and superhuman abilities via meditation on the yoga path is referred to as an adept yogi.
During breathing exercises, Siddhasana enables the spine to stay flexible. It’s a good seated posture for increasing hip and inner thigh flexibility. Without exerting any muscular effort, your heels press against your perineum, creating a little root lock that aids in lifting energy from your body’s lower region.
Also read: How to Do Shambhavi Mahamudra and Its Benefits
How to perform
Sit on the ground with your legs stretched in front of you. Bend your right leg and place the heel under the perineum (space between anus and genital). Bend your left leg and place the foot above the right foot, ankles on top of one another.
Tuck your right foot’s toes between your left thigh and calf to maintain a straight posture.
Make sure your knees are on the ground; if not, adopt a modified stance by using a cushion to elevate your hips and blocks under your knees.
The formation of this pose is slightly different for men and women. For women, it is encouraged that they should keep the heel of the inside foot close to the vagina and the heel of the top foot close to the clitoris.
Precautions
If you suffer from sciatica, do not perform this pose.In the event of injury or surgery to any part of your lower body and back or stomach infections, avoid this pose till you have significantly recovered.The placement of legs can lead to inflammation, hence do not perform this pose in case of arthritis.3. Auspicious Pose (Swastikasana)
 Source: canva
Swastikasana is a pose that falls into the category of moderately challenging poses for pranayama. The word “Swastikasana” includes three root words: “Su,” which means “good,” “Asti,” which means “exist,” and “ka,” which means “to make.” Therefore, Swatikasana is a pose that promotes mental well-being.
It enhances focus, strengthens the back, stimulates the neural system, and increases hip and knee flexibility.
Both men and women can use it to support the body and maintain a straight back.
How to perform
Sit on the ground with your legs stretched in front of you. Bend both legs and place both feet under the calf of the opposite leg. With your hands, bring the toes of the right foot to be placed between the fold of the left knee and the toes of the left foot to be placed between the fold of the right knee.
Beginners can sit on a folded blanket, cushion, or yoga block to elevate the hips and correct the positioning of the feet.
Precautions
Do not force your feet to be extended beyond their capacity. Take cognizance of your level of flexibility of the thighs, hips, knees, and ankles.Pregnant women should avoid this pose to avoid the risk of a restricted blood supply to the pelvic region.Sciatica patients should perform this pose under strict supervision or not perform at all. Practice some hip-opening asana to prepare for extensive hip rotation.4. Thunderbolt Pose (Vajrasana)
 Image: Canva
Although vajrasana is a meditative position, it is frequently utilized as a sitting position in pranayamas to improve posture firmness. This posture elicits a profound sense of comfort and calmness in the body by smoothing the entire body, primarily the lower body. Vajrasana is a fantastic exercise to enhance posture.
The Vajra Nadi, the first subtle layer of the Sushumna Nadi that aids in bringing forth the Kundalini energy, is thought to be stimulated and controlled by Vajrasana.
You become more focused, imaginative, and at peace as a result of the increased blood circulation in your body, as well as the relaxation of your mind and nerves. Regularly practicing it while using Pranayama and chanting aids in bringing about Kundalini awakening and Nadi circulation.
How to perform
Kneel on a yoga mat or a folded blanket. Place the top of your feet flat on the mat such that the soles face up. Keep your feet together such that the big toes are touching each other and spread apart the heels to form a ‘V’. Lower your buttocks and sit on your heels.
Precautions
Your knees will be under a lot of strain in this position. Therefore, do not execute Vajrasana if you have any knee problems.For people who have hernias or ulcers, the thunderbolt position puts pressure on the intestines and the stomach and therefore, should be avoided.This pose should not be performed by anyone who has recently or severely injured their ankles, hamstrings, calves, shins, or knee ligaments.5. Easy Pose (Sukhasana)
 Image Source: Shutterstock
If you find trouble sitting for extended periods in Siddhasana, Vajrasana, or Padmasana, try sukhasana for pranayama. As the name implies, the Easy Pose is an easy cross-legged meditation asana used for pranayama.
Even though it is simpler than the other positions mentioned above, it can still help you become more aware of your breath and body. Sukhasana is a fantastic position for beginners since it is simple to keep good posture and sit for longer periods without slouching forward.
Your knees won’t get sore from the simple pose, which is a significant benefit. Your legs are less likely to become numb since your thighs have better blood circulation. Beginners who struggle with steadiness may find it helpful to use a yoga bolster or folded yoga blankets beneath their buttocks.
How to perform
Straighten your legs when you sit. Bending both legs, position the right foot under the left thigh and the left foot in front of the right calf or if possible, under the right calf. The position of the legs can be in a reverse way, left foot under the right thigh and the right foot in front of the left calf if that is more convenient.
Precautions
Do not sit in this pose if you have a knee injuryBe aware of slouching, especially when beginners sit in this pose for a longer duration.Conclusion
To benefit the most from pranayama, you must sit comfortably. Practice these positions responsibly and within your physical limitations.
Frequently asked questions
1. Can we do pranayama while sitting on a chair?
Yes. If sitting on the ground is not feasible due to any reason, you can also sit on a chair. In such a situation, the soled of your feet should be firmly placed on the ground. You will be sitting in the middle of the chair seat without leaning on the back of the chair for support.
2. Can pranayama be done standing?
Typically, pranayama is not performed while standing. However, a variation of deep breathing, known as Standing Deep Breathing Pose, is often practiced in hot yoga sequences. This type of breathing is performed while standing in Tadasana (mountain pose).
The slow, deep, prolonged, and four-step Sama Vritti Pranayama technique used in Hatha Yoga is identical to the deep breathing being done in this context. In order to prepare the body for the asanas in the sequence, this type of breathing aids in bringing deeper awareness to the breath.
3. Can we do pranayama while lying down?
Performing pranayama while lying down is often discouraged as lying down restricts breathing. Your lungs drop towards the spine and do not get the required expansion.
On the contrary, BKS Iyengar, after whom the Iyengar yoga style is named, often recommended his students to practice pranayama while lying down if they were ill or fatigued. According to him, practicing any form of yoga needs an alert yet still mind and a stable spine, which is possible while lying down.
If you want to practice pranayama while lying down, make sure to use proper support for your spine, neck, and head.

 Koichiko


