How to create a folder on your desktop
Here’s how to create a folder on the desktop for both Windows and Mac. It’s takes only seconds and then you have a handy spot for the things you use most.

Your desktop, whether Windows or MacOS, is the handiest spot for the applications, files, and folders you use most. Maybe you’d like to organize your desktop icons by placing some in a folder. Or perhaps, you want to set up a folder for new files you plan to create for quick desktop access.
Whatever your reason or purpose, here’s how to create a folder on your desktop on Windows and Mac.
Create a folder on a Windows desktop
Creating a folder on your Windows desktop is super simple and you have more than one way to do it. Once you create it, you can move desktop items into it or simply make it a home for future files.
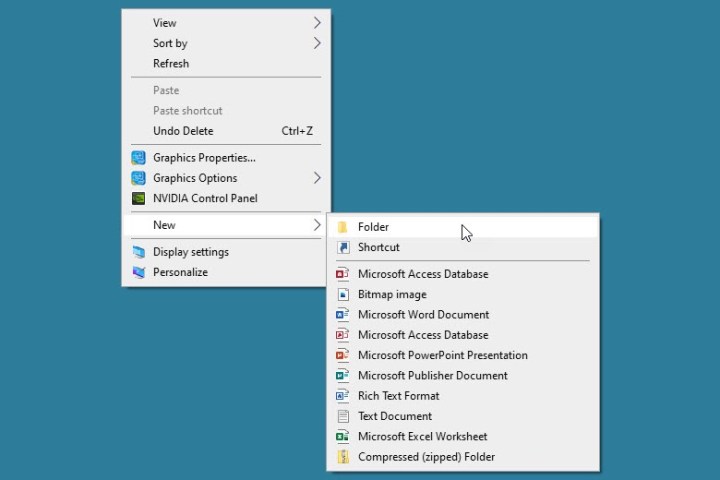
Step 1: Right-click a blank spot on your desktop.
Step 2: Move your cursor to New in the menu and pick Folder in the pop-out menu.
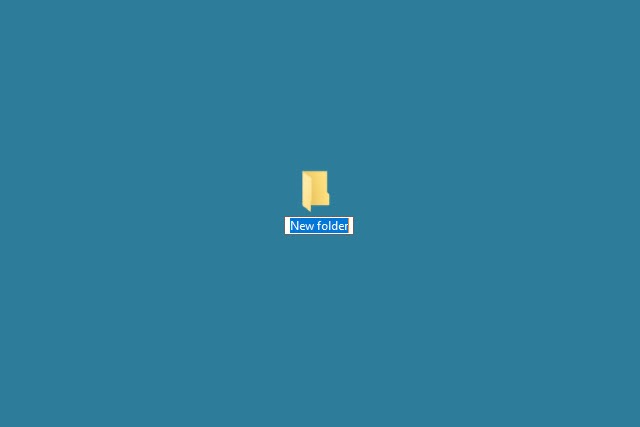
Step 3: When you see the folder appear, the default name “New folder” is automatically selected so that you can just enter a name of your own.
Type the name, press Enter, and your folder is ready to go.
Step 4: Alternatively, you can create a desktop folder from File Explorer or with a keyboard shortcut.
Open File Explorer, select Desktop on the left, and pick New folder in the ribbon on the Home tab. Use the keyboard shortcut Ctrl + Shift + N to create a new desktop folder.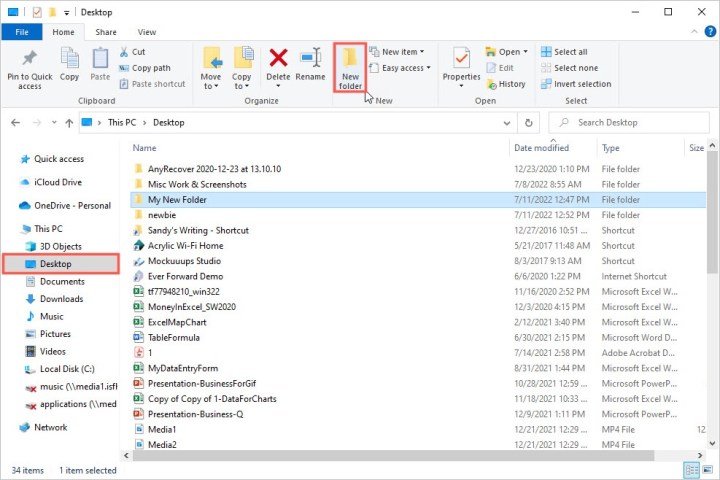
Step 5: Name the folder, press Enter, and you’ll see the new folder on your desktop in the next open spot.
You can then drag existing desktop icons for applications, files, or other folders into your new folder. Or, save future files to that folder by selecting it as the location in the Save As dialog box for the application you’re using.
Create a folder on a Mac desktop
Creating a folder on your Mac desktop is just as easy as creating one on Windows. Whether you want to organize your desktop or set up a spot for files you plan to create, it’s a breeze.
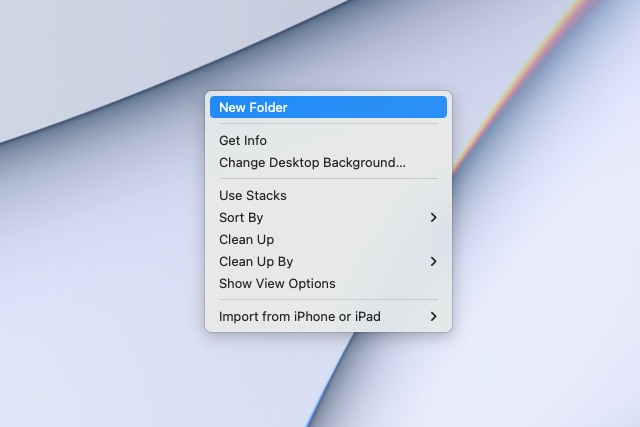
Step 1: Right-click a blank spot on your desktop.
Step 2: Select New folder at the top of the menu.
Step 3: When the folder appears, the default name “Untitled folder” is automatically selected. So, type the name you want for the folder and press Return.
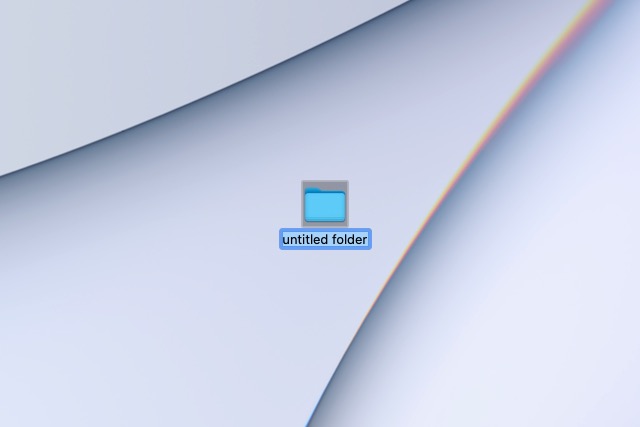
Step 4: Alternatively, you can create a desktop folder from Finder or with a keyboard shortcut.
Open Finder and select Desktop on the left. Then, either right-click anywhere on the right and pick New folder or go to File > New folder from the menu bar. Use the keyboard shortcut Shift + Command + N to create a new desktop folder.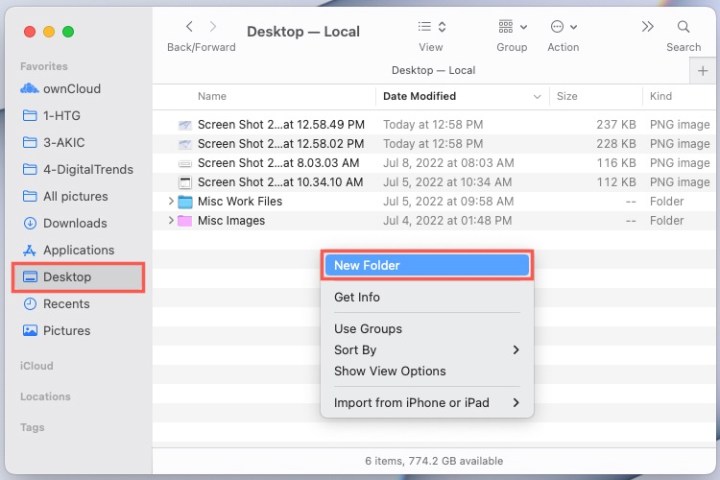
Step 5: Name the folder and press Return. You’ll see the new folder on your desktop in the next open spot.
Then, drag existing desktop items into your new folder or select it when you save future files you want in that folder.
Now that you know how to create a folder on your computer’s desktop, check out how to make a folder on iPhone or how create a Google Drive folder.

 FrankLin


