How to Use the Facebook Debugger to Fix Your Post
If you’re about to share a blog post or link on Facebook, you might notice that the platform sometimes generates the wrong image or description for your site. Although this can be a frustrating problem, it’s relatively easy to...
 ShanonG

If you’re about to share a blog post or link on Facebook, you might notice that the platform sometimes generates the wrong image or description for your site. Although this can be a frustrating problem, it’s relatively easy to fix using the Facebook Debugger.
What is the Facebook Debugger?
The Facebook Debugger is a free tool that allows you to review, edit, and control how your content is displayed on your Facebook post. For some users, Facebook may incorrectly display the wrong image or text. If this happens to you, you can run the Facebook Debugger to make changes to identify problems so you can fix any issues for your post. This is very helpful for those posting a lot of lead ads on Facebook and many other benefits.
How to Use Facebook Debugger to Fix Posting Issues
If you encounter a problem with your Facebook post preview, the follower steps should be able to help you resolve any issues you have with incorrect content.
1. Run the Facebook Debugger
To access the Facebook Debugger tool, visit the Developer Tools page on the Meta for Developers website. Then select Sharing Debugger. You can also navigate directly to the page here.
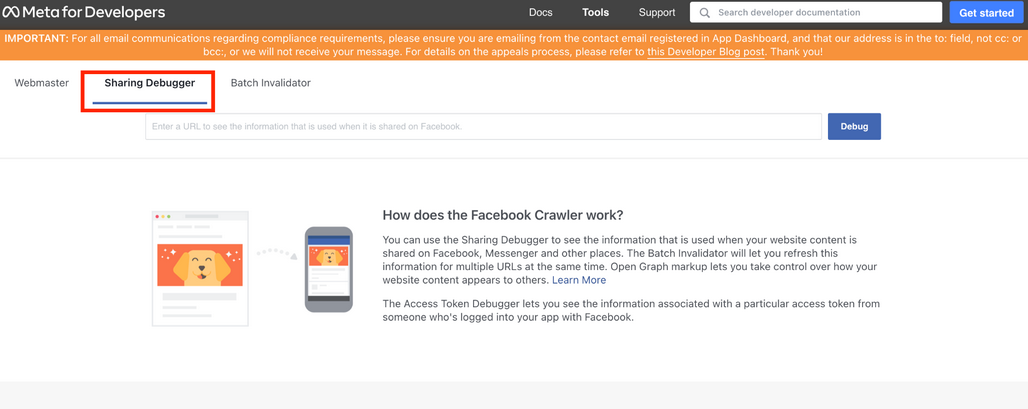 Screenshot from developers.facebook.com
If you are already logged into Facebook, you should be immediately taken to the Sharing Debugger tab on the website. If not, you’ll be instructed to enter your login credentials to continue.
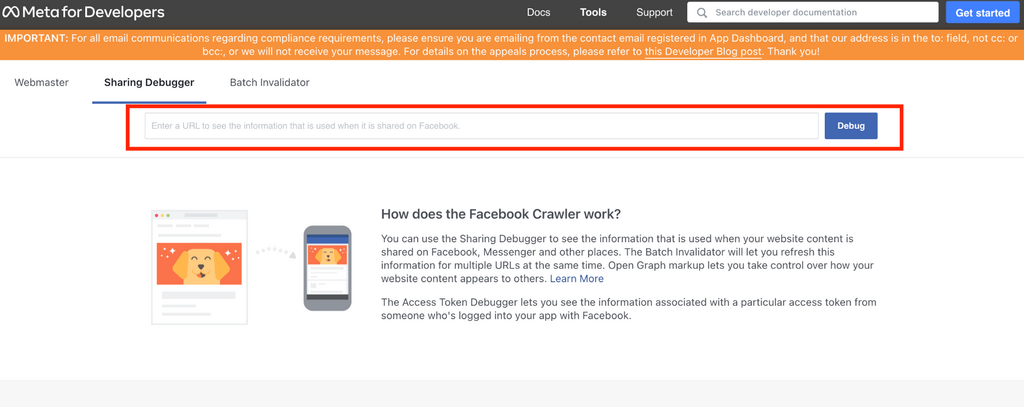 Screenshot from developers.facebook.com
On the Sharing Debugger tab, enter the URL of the website you want to check. Press “Debug” once it’s entered.
2. Review the Open Graph Markup
Once the page loads, you’ll see a full report about your site. You’ll also see other pieces of information, including the date of collection, the response code, the canonical URL of the page, and a preview of your blog post or page.
If there are any errors with your post, you’ll see them as well in your report.
Extraneous Property: This error means that Facebook doesn’t recognize your site’s Open Graph property. It can also mean that the property on your site has expired.Inferred Property: You will see this error if Facebook can’t locate your image or if you have too many image properties for your post. This can also occur if your image is too small.Parser Mismatched Metadata: This means you have minor mistakes in your text (ex. extra spaces or incorrect date formats).Share App ID Missing: You will get this error if you have not correctly entered the app_id on your site.Open Graph Errors: If there is a problem pulling information from your site, you will see a list of open graph errors. These errors can be about your site name, description, or page title.3. Fix the Issues
Once Facebook scrapes your site, you might notice incorrect information on the report. In some cases, the problem could be with your Open Graph tags. Scroll down the report and find the og tag descriptions.
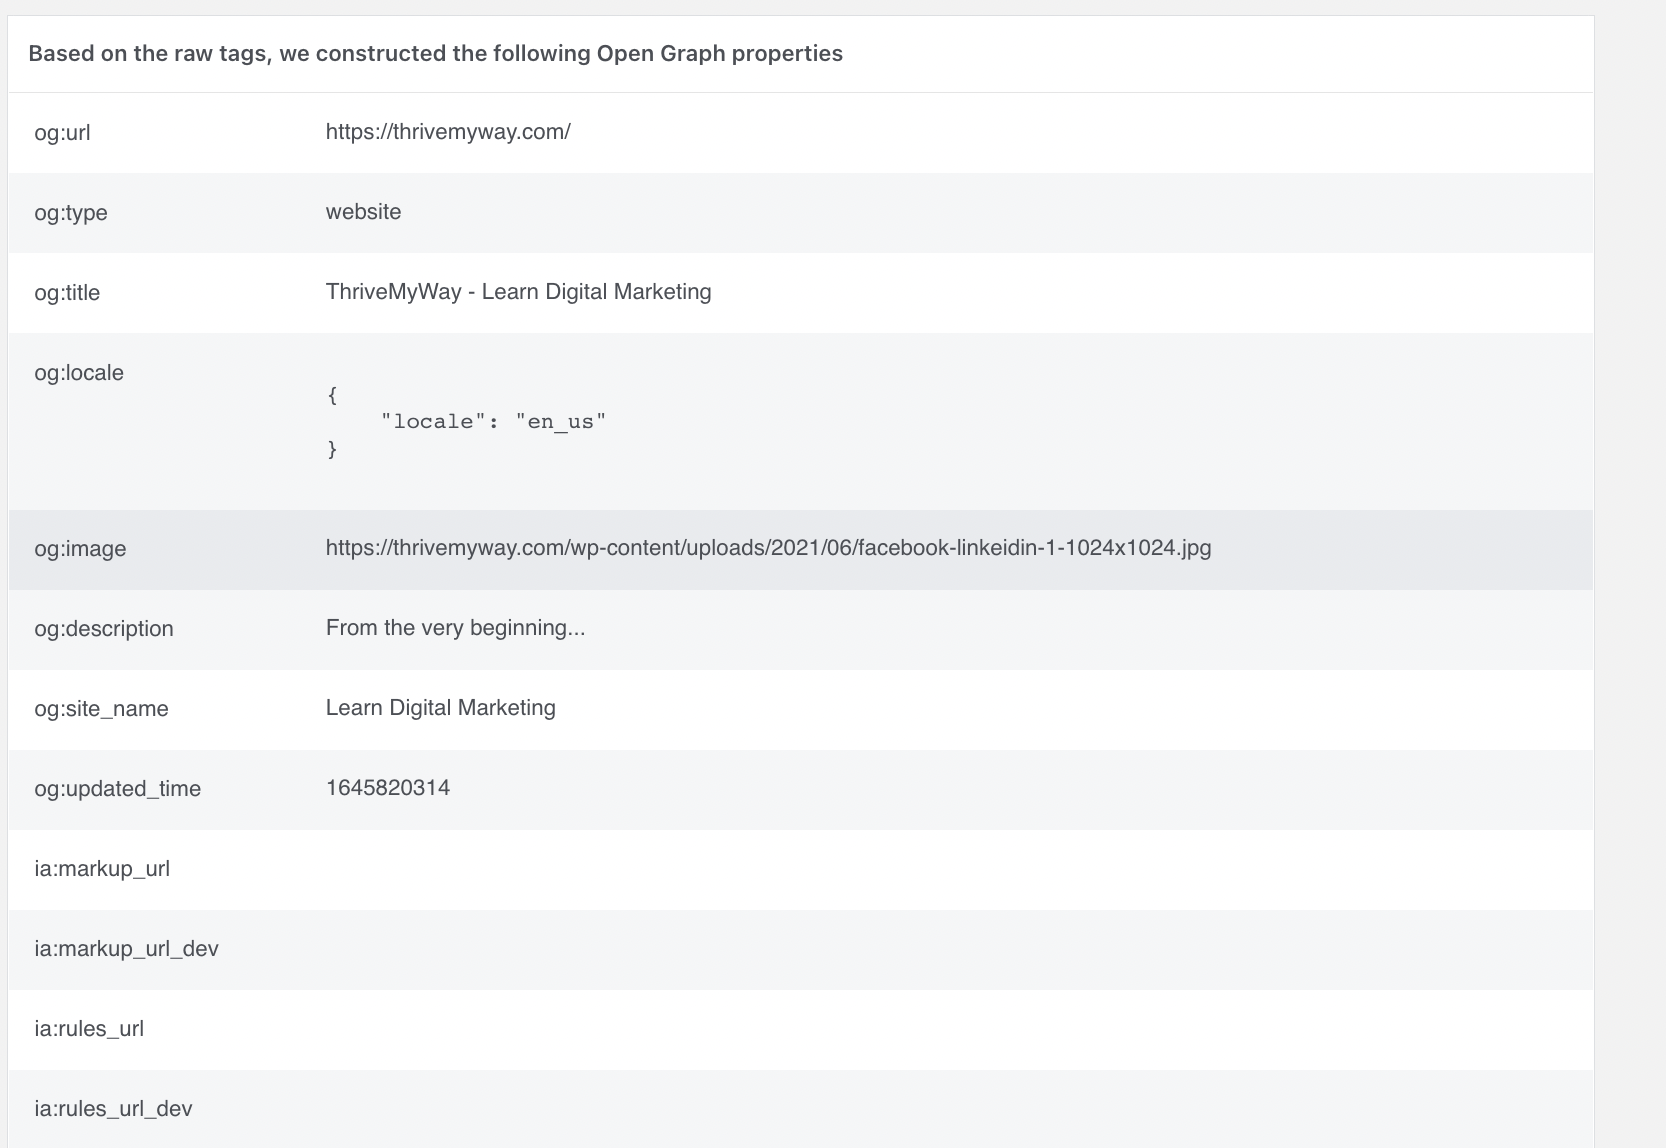 Screenshot from developers.facebook.com
The information shown in the og tags should correspond with the content shown on your Facebook post. If they do not match, you will need to open up your website HTML editor to fix the issue.
Missing images
Your post needs an image before it is set live. If there is no featured image, then Facebook will automatically pull one, which may or may not match what you want to post. To fix this problem, make sure that your blog post or site has a featured image.
Old or Incorrect content
If Facebook shows outdated images or titles, it could be a caching issue. In this situation, you’ll need to clear your WordPress and Facebook Cache.
Image resolution
Facebook requires a featured image at least 200 x 200 pixels in size (although bigger is perfectly acceptable). If the image is too small, it might be blurry or not get pulled in at all. So make sure that you are using an image that is larger than 200 x 200 pixels.
Missing App ID
You may get the Missing fb:app_id when running the Facebook Debugger. This means there’s no app ID associated with your site. Although it’s not required, it can help you analyze your campaign vis Facebook Insights. To add your Facebook app ID, log into WordPress and open YoastSEO. Then navigate to the Facebook tab, and you’ll see a box to enter the app ID.
4. Clear Your WordPress Cache
It’s also important to clear your cache. For example, it’s possible that Facebook is showing the wrong preview based on previously stored data. Therefore, the cache should be cleared on your WordPress site.
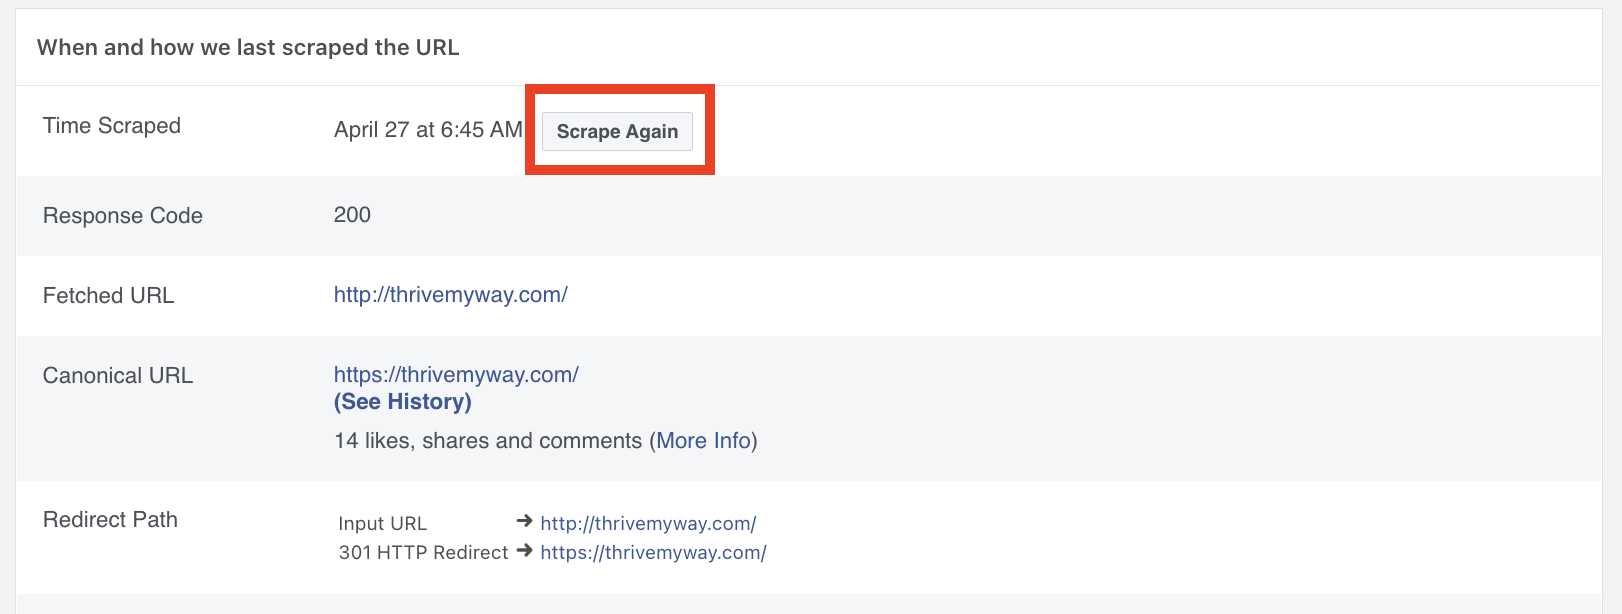
5. Scrape Again
Once the issues have been fixed and your WordPress cache has been cleared, you should run the Facebook Debugger once more. In the report, click the button that says “Scrape Again.” You might have to press this button a few times before Facebook is able to load the correct information.
 Screenshot from developers.facebook.com
If you correctly fixed the necessary problems, you should now see your preview the exact way you wanted it to look.
6. Publish Your Post
Now you’re ready to publish your post on Facebook. Head back to your account and share your content with the rest of the world!
Conclusion
The Facebook Debugger is a simple and easy-to-use tool that all marketers or business owners should use before sharing content on the site. So, don’t stress if your encounter an issue with your post. As you now know, debugging the problem can be done in just a few steps!