Lotus Pose (Padmasana): How to Do, Benefits and Precautions
Sanskrit Padmasana Pronunciation Pa-dah-maa-sun-aa Common Vajra position, Kamalasana, Lotus Pose Type Seated Level Intermediate Stretches Hamstrings, Adductors, Hip Muscles, Glutes, Groin, Knee, Ankle Strengthens Back, Shoulders, Chest, Spine, Lower Back Even the people who are not in yoga knows...
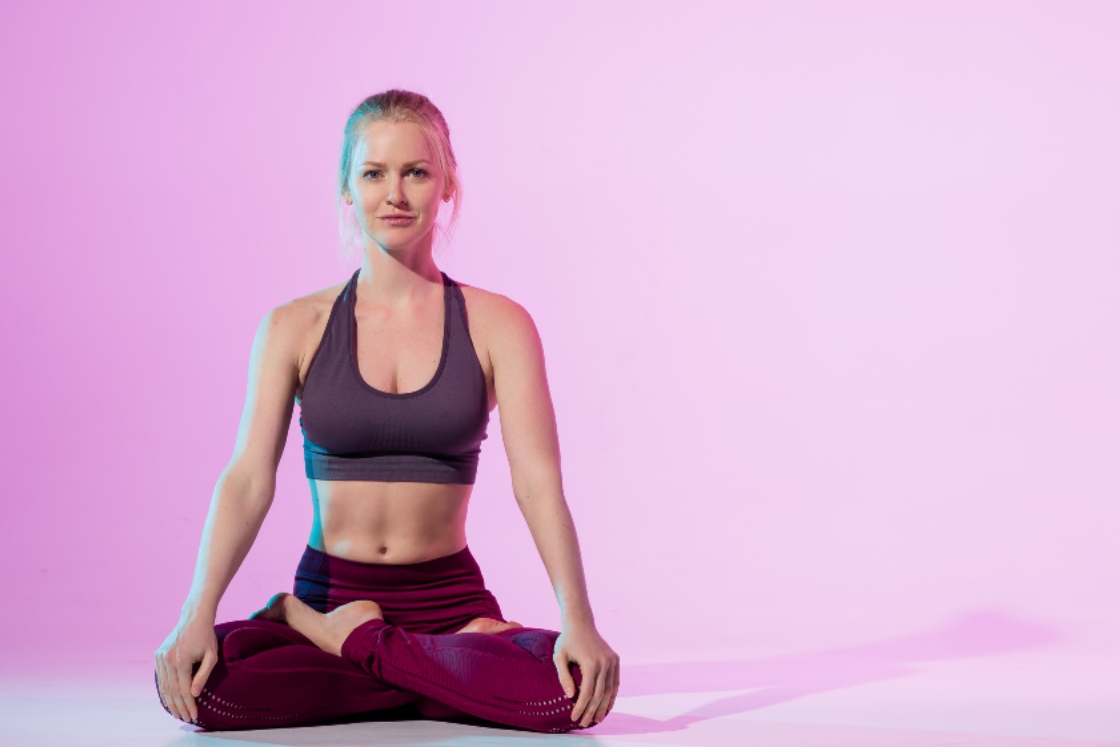
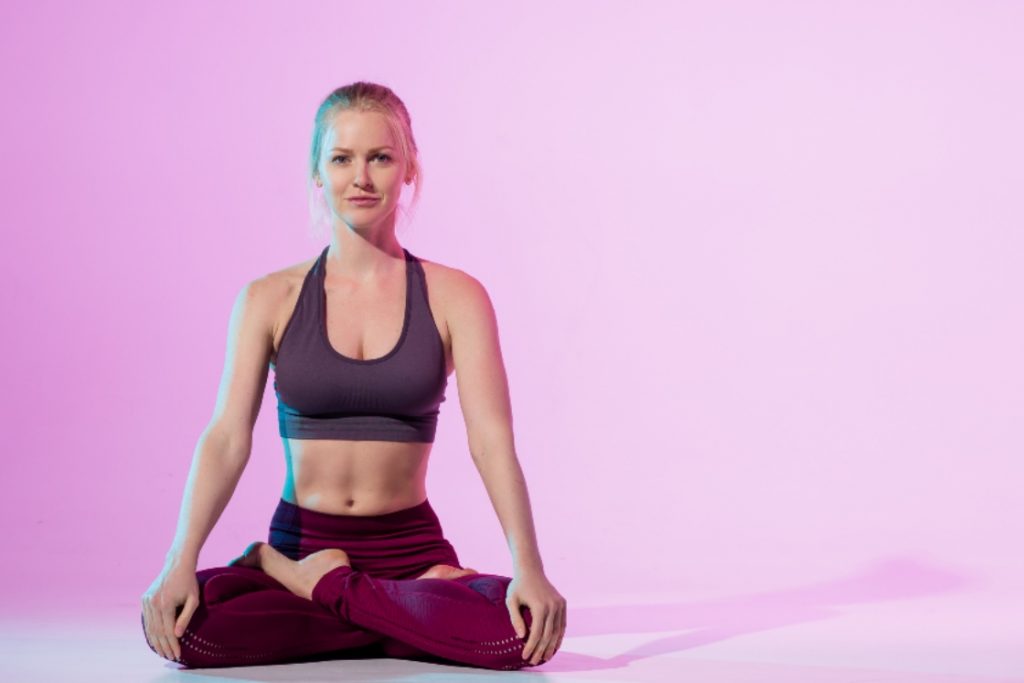 Image Source: Shutterstock
| Sanskrit | Padmasana |
| Pronunciation | Pa-dah-maa-sun-aa |
| Common | Vajra position, Kamalasana, Lotus Pose |
| Type | Seated |
| Level | Intermediate |
| Stretches | Hamstrings, Adductors, Hip Muscles, Glutes, Groin, Knee, Ankle |
| Strengthens | Back, Shoulders, Chest, Spine, Lower Back |
Even the people who are not in yoga knows it by a single name, the lotus pose. One of the most recognized yoga pose, lotus pose, is also an ancient sitting posture. Yogis used to perform it to get steadiness in their meditation & pranayama practice.
Different practices in yoga are named after the beautiful blooming lotus flower, one such is Padma mudra, and here the other Padma asana! Yes, the Sanskrit name Padmasana depicts that state of lotus flower when its petals are ready to fully bloom. When one is mastered in the lotus pose, their feet soles pointing upwards looks like the petals of a lotus flower. This opening of feet towards the sky symbolizes enlightenment and fearlessness.
Before you go into performing part of the Lotus pose, its ancient roots can make you encouraged to go through any physical obstacle that comes in its way.
Lotus Pose: History and Philosophy
Mostly the illustration of Lord Shiva, Buddha, and many ancient yogis can be seen in sitting a cross-legged posture while putting hands over the knee in Gyan mudra. Indeed, the Pasupati (lord of animals) seal we got from Indus Valley civilization was also in some seated posture. These cross-legged postures are none other than but the Lotus pose. These figures suggest lotus pose has come practiced from a long history.
Padmasana is one among the 12 seated postures mentioned by Vyasa commentary on Yoga Sutras of Patanjali. This way Padmasana is considered a classical pose.
Another Hatha Yoga text, Hatha Yoga Pradipika has stated in verses 46 and 49 that Lotus pose is the destroyer of all diseases and only wise can master it. In some other yogic texts, Padmasana is mentioned by a synonym name Kamalasana.
Philosophy of Working
Why Lotus pose is considered the best seated meditative pose because of its locking down mechanism. Usually, our lower body is shaky (even it’s not visible) when we sit for meditation practice. In lotus pose, our body especially the lower back and sitting bone came in such a position that it firmly binds all physical movements.
Another thing is when sitting bone is correctly grounded, our spine naturally got its true alignment. When the spine is correctly aligned, Prana starts flowing through Sushmana Nadi (the central energy channel), that further fires up the Ajna Chakra.
This way Padmasana is best for sitting without any physical disturbance in long hours of meditation. Ancient yoga practitioners have stated that the practice of Padmasana for 15 minutes without any pause makes one ready to practice pranayama.
While for most of the beginners, Lotus pose looks very simple to attain but mastering it is not that easy. Although it can be a piece of cake for you if there’s natural flexibility in your hips but if not have, anyone can develop this mobility in hips with time & consistent practice.
Preparation
If you’re a beginner want to sit in lotus pose, simply examine your hips mobility by sitting into bound angle pose and see if both sides knee touching the ground without any stretching. Is it easy for you? Then you will find it easy to come into the lotus pose.
If your hips not allowing you to fully move through your knees, it’s better to first practice Easy pose (Sukhasana) or Half-lotus pose. Other poses you can consider in warm-up preparation of lotus pose are:
Janu Sirsasana (Head-To-Knee Pose) – In this pose flexion of the knee joint happens and hips muscle stretches which are good for lotus pose. Gomukhasana (Cow Face Pose) – This pose will give your thighs and knees extra opening to smoothly flow in Lotus pose. Paryankasana (Couch Pose) – Any stiffness in ankles and lower back will be released by this pose.How to Do Lotus Pose(Padmasana)
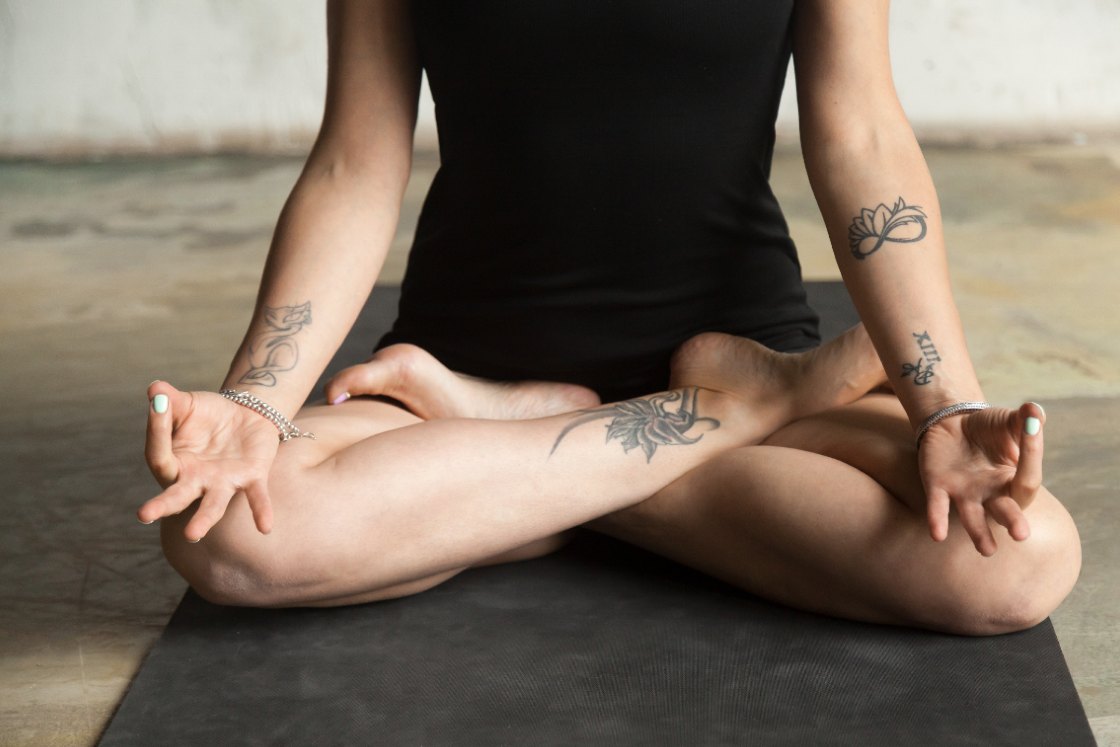 Legs crossed and hands in Gyan mudra in Lotus pose. Image Source: Shutterstock
For meditation, Gyan mudra and Dhyana mudra are the most suitable hand gesture you can make in lotus pose. If you’re comfortable, hold the pose and take a few deep breaths. In traditional Padmasana, the head is brought forward just like in the Chin lock and gaze is fixed at the nose tip. It’s called nasikagra drishti. In order to balance both sides of hips, the same procedure is done left leg first (instead of right leg). For that, to come out the pose, slowly grab your upper leg first & then lower and extend it forward as at the beginning of the pose (staff pose).
Hand Mudras for Padmasana
Yoga hand mudras are a great tool to deepen the effect of any yoga asana. In Padmasana, while hands resting over knees can take such different gestures that will help you to concentrate easily.
Jnana or Gyan mudra – With palm up and the tips of index finger and thumb touching each other. Chin mudra – With the palm facing down the and the tip of the index finger touching the tip of the thumb. Dhyana mudra – With both hands on the lap, the right palm placed on the top of the left palm, and both the thumbs touching each other.Follow-Up Poses of Lotus Pose
Paschimottanasana ( Seated Forward Bend Pose) and Savasana (Corpse Pose) are recommended after lotus pose to bring the blood circulation of the legs back to the normal. Some other poses you can try after lotus pose are:
Adho Mukha Svanasana (Downard Facing Dog) Badha Padmasana (Bound Lotus Pose) Supta Padangusthana (Reclining Head-To-Big-Toe Pose) Matsyasana Variation Lotus (Fish Pose Variation Lotus) Utthita Padmasana (Elevated Lotus Pose)Variations and Modifications
Half-Lotus Pose – Instead of placing both feet on the hip crease, one foot is placed under the opposite thigh or the buttocks. The foot of the other leg is brought inward and placed near the hip crease. This pose is the best way to begin your practice of the complete lotus pose and also as a warm-up. You can use blankets, towels, and yoga blocks to support your knees.
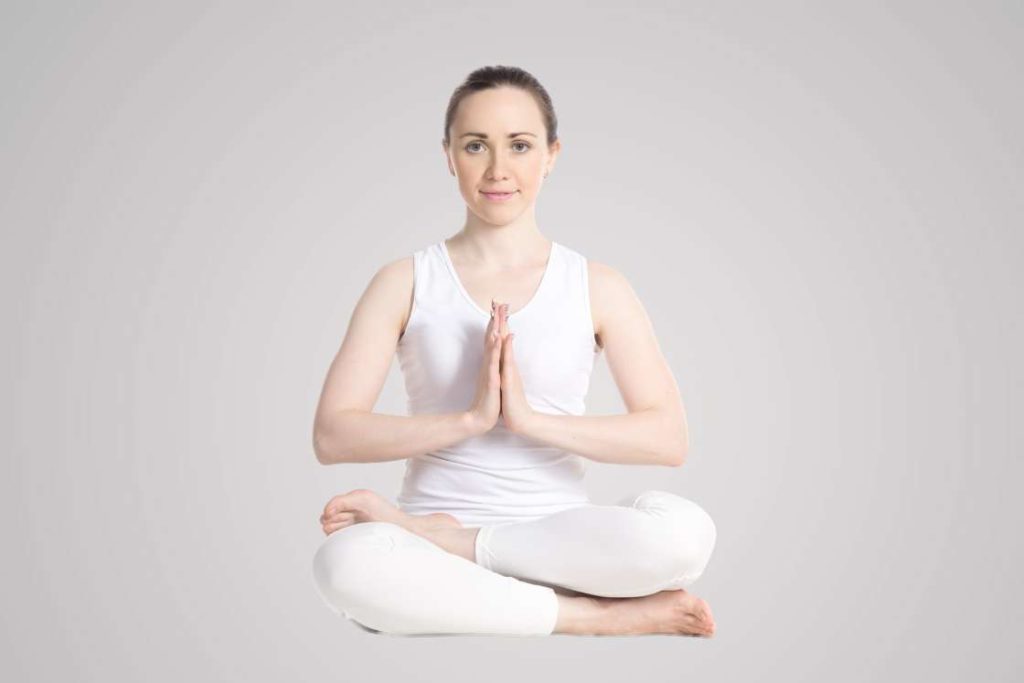 Image: Canva
Utthita Padmasana – This is an advanced pose and should only be practiced after you have achieved some strength in your arms and back through the various core, arms, and back strengthening poses. In this pose, after staying in the lotus pose for a while, place your palms firmly on the mat and push the ground to elevate your body while sitting in Padmasana. Your hands act as an anchor or like the stand of a weighing scale, which is why it is also called the scale pose.
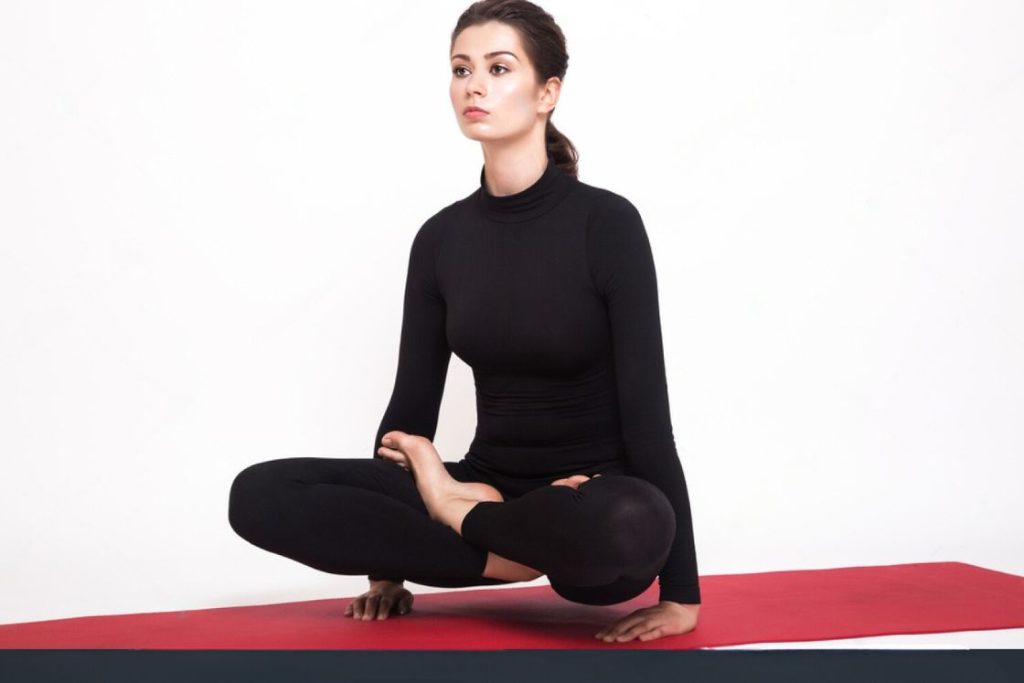 Image source: Shutterstock
Baddha Padmasana(Bound Lotus Pose) – Another advanced level pose, it is a great chest and shoulder opener. Here the flexibility of your upper body is tested to the extremes. While sitting in Padmasana, twist towards the right from the hip. Bring your left arm back and catch the big toe of the right foot with the left hand. Straighten your body for a few minutes and repeat the same process with the right arm and left toe. Your arms should be crossed behind your back.
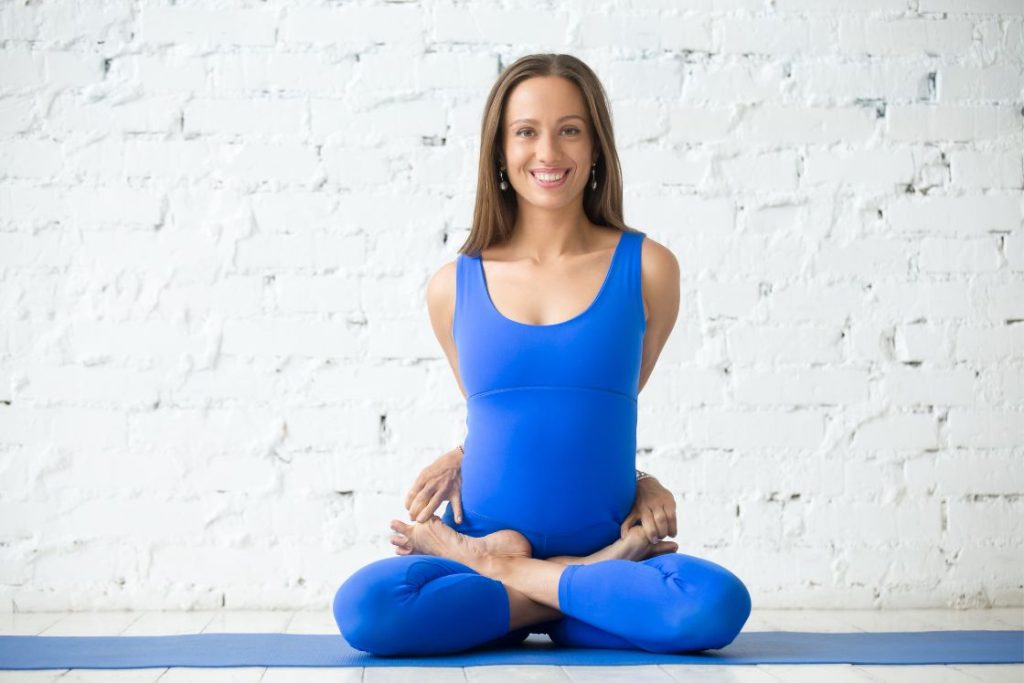 Image source: Shutterstock
Fish Pose with Lotus – The fish pose is a great backbend and chest opener along with a core strengthening pose. Combining it with the lotus pose gives an additional benefit of stretching the quads and knee and tonings the glutes. While staying in the lotus pose, slowly and gently tilt backward with the support of your arms. Once you have come to a reclined position, lift your upper back as you would in a traditional fish pose. You can use a bolster or a cushion if you are unable to fully tilt back.
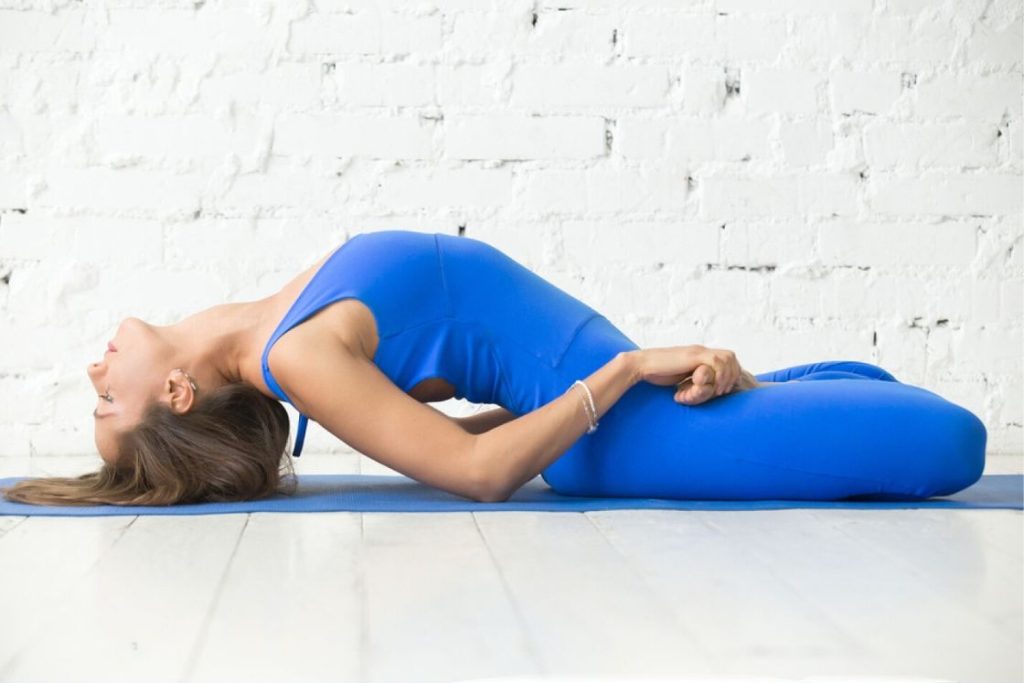 Image source: Shutterstock
Precautions and Contraindications
As the lotus pose is an advanced pose, it is best to first learn it from a qualified teacher who will train you with cues and guide you with the adjustment, rather than practicing it alone.
Avoid practicing the pose if –
You’ve recently undergone knee surgery or you suffered an injury. You are suffering from sciatica. You have suffered an injury in your ankles or calf. You have a back or spinal ailment. You’ve undergone a hip surgeryBenefits of Lotus Pose(Padmasana)
From improving the flexibility of the hips to calming the mind during meditation, the lotus pose offers a number of benefits that cannot be overlooked. Although it may be difficult to perform at first, the benefits it offers to the body and mind surpass the degree of difficulty.
Some common benefits of Lotus Pose are:
It is a great pose to open up the hips and improve flexibility and range of motion of the hip joints. It also stretches the muscles around the knees well and prepares them for more challenging poses. It also strengthens the knee joint. A straight spine helps correct a slouched or rounded back. This is one of the poses that also focuses on the ankles. It strengthens the ankle, which is very helpful in many balancing postures. It improves blood circulation to the sacral nerves, which originate from the lower spine and spread to the pelvis and lower limbs. Regular practice of the lotus pose can prevent the occurrence of sciatica and also relieve mild sciatic pain. It is also said to relieve menstrual pain and cramps. If you practice this pose for a long period of time, it will help tone the abdominal muscles and strengthen your core. It also has a positive effect on your digestive organs and improves the function of the digestive system. The lotus pose helps to balance the root chakra or muladhara. Since you are sitting on the ground, you are connected to the earth and maintain stability, which are the essential characteristics of this chakra. Releasing tension in the hips also helps relieve emotional stress that often accumulates in the hip region. Meditation with this pose promotes the free flow of prana, which helps to stimulate and awaken the kundalini energyConclusion
Even the people who are not in yoga know it by a single name, the lotus pose. It is best for sitting without any physical disturbance in long hours of meditation. Although coming onto this pose can be a piece of cake for some with a natural flexibility in the hips, those who do not possess the flexibility can easily develop this mobility in the hips with time & consistent practice.

 UsenB
UsenB 






![Run An Ecommerce SEO Audit in 4 Stages [+ Free Workbook]](https://api.backlinko.com/app/uploads/2025/06/ecommerce-seo-audit-featured-image.png)


