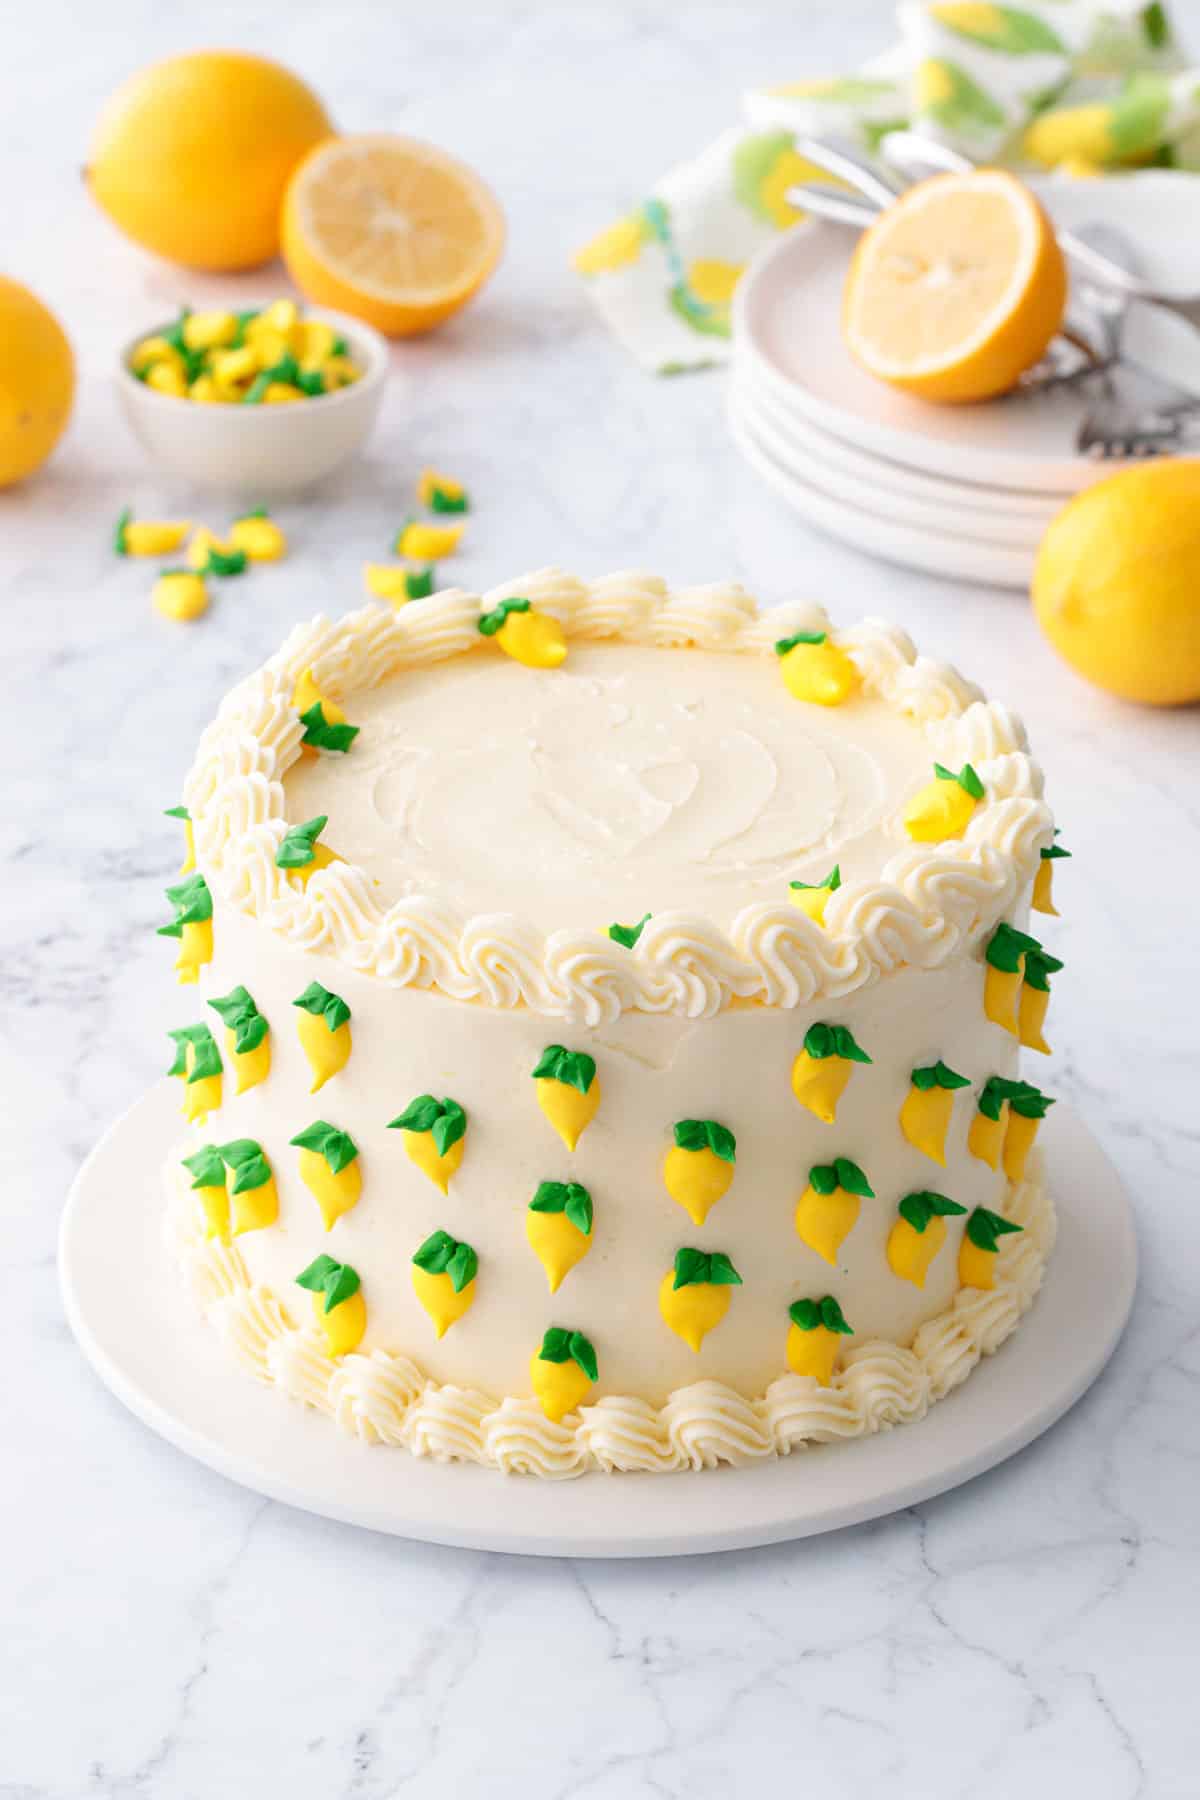
Triple Lemon Layer Cake
Lemon lovers: this one’s for you! Layers of light and buttery lemon cake (the reverse-cream method produces a particularly cotton-soft texture that’s perfect for layering), a bright lemon curd filling (extra thick so it says put), and a silky...
 Tfoso
Tfoso

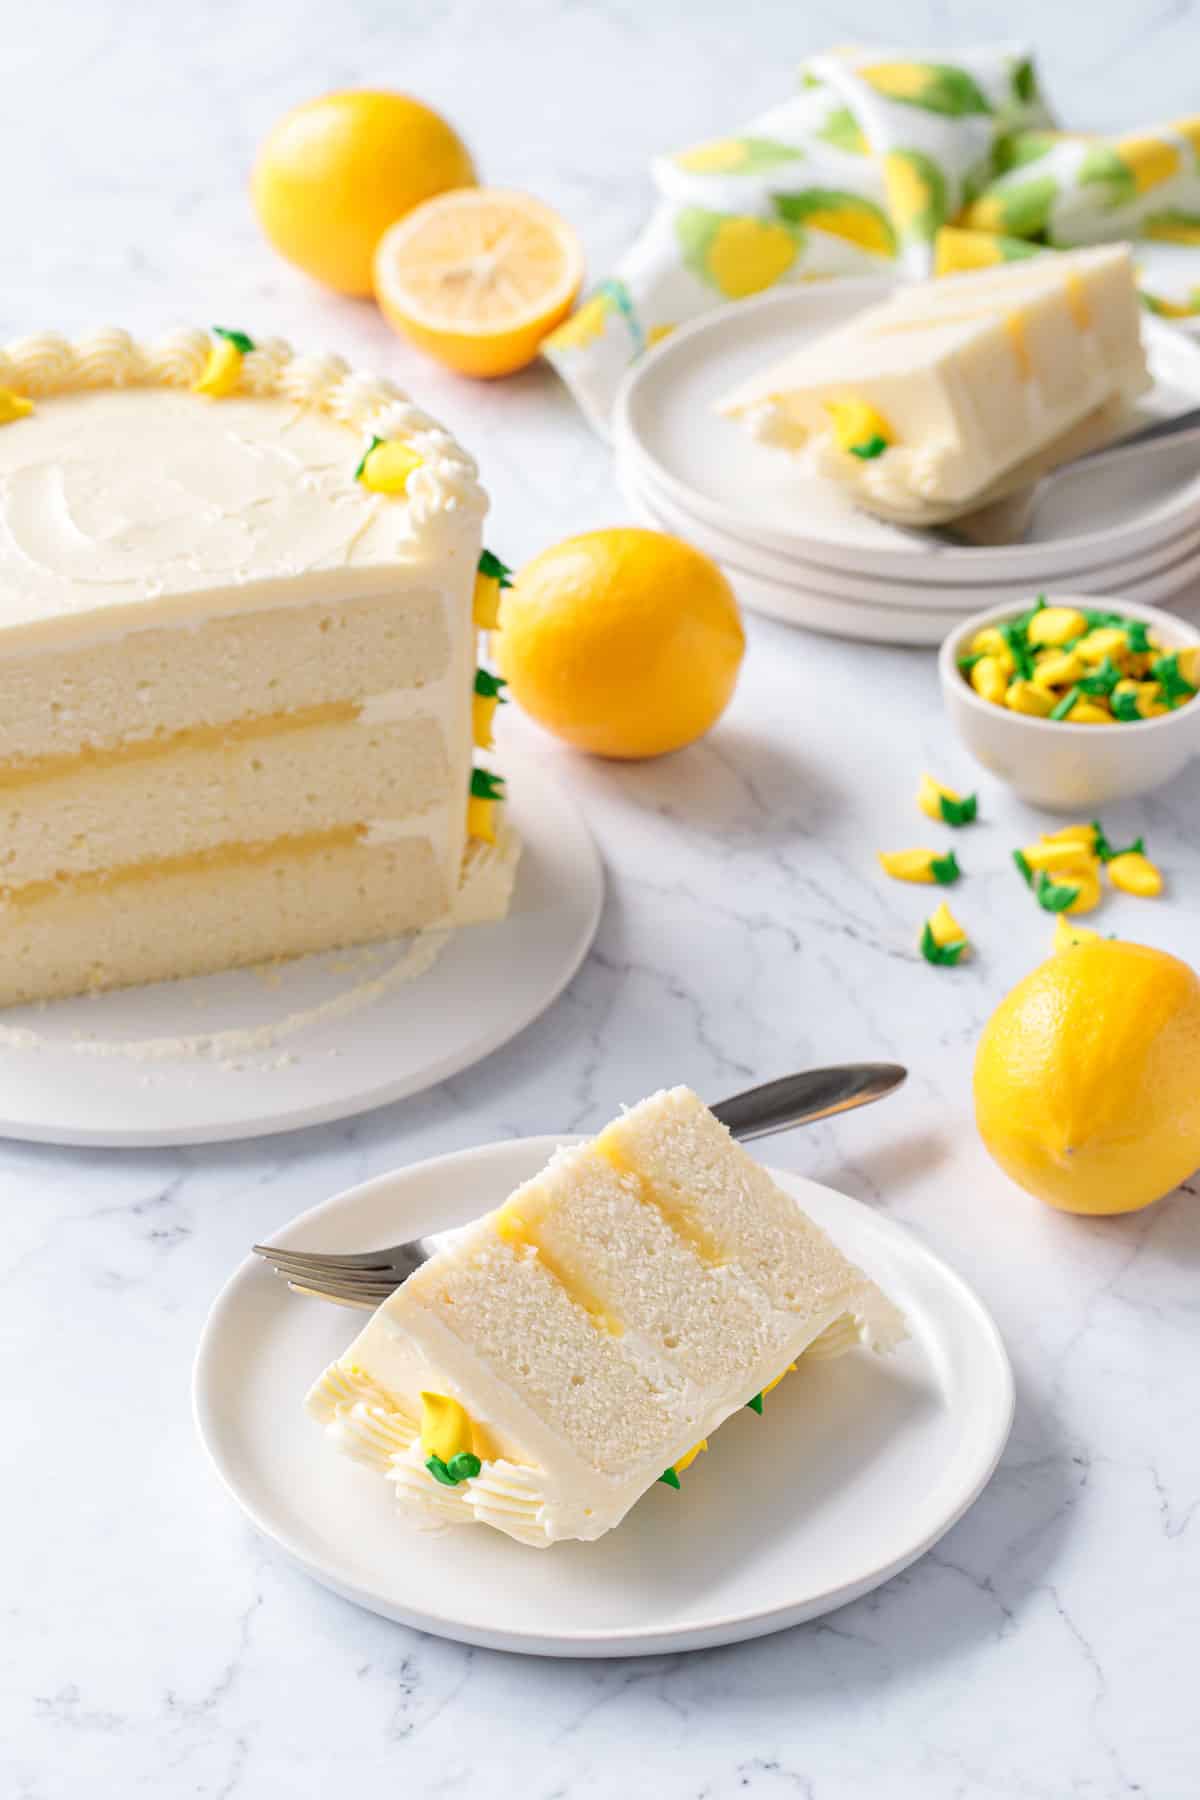
Lemon lovers: this one’s for you! Layers of light and buttery lemon cake (the reverse-cream method produces a particularly cotton-soft texture that’s perfect for layering), a bright lemon curd filling (extra thick so it says put), and a silky smooth lemon buttercream for a flavor-packed lemon cake even non-lemon-lovers will adore.
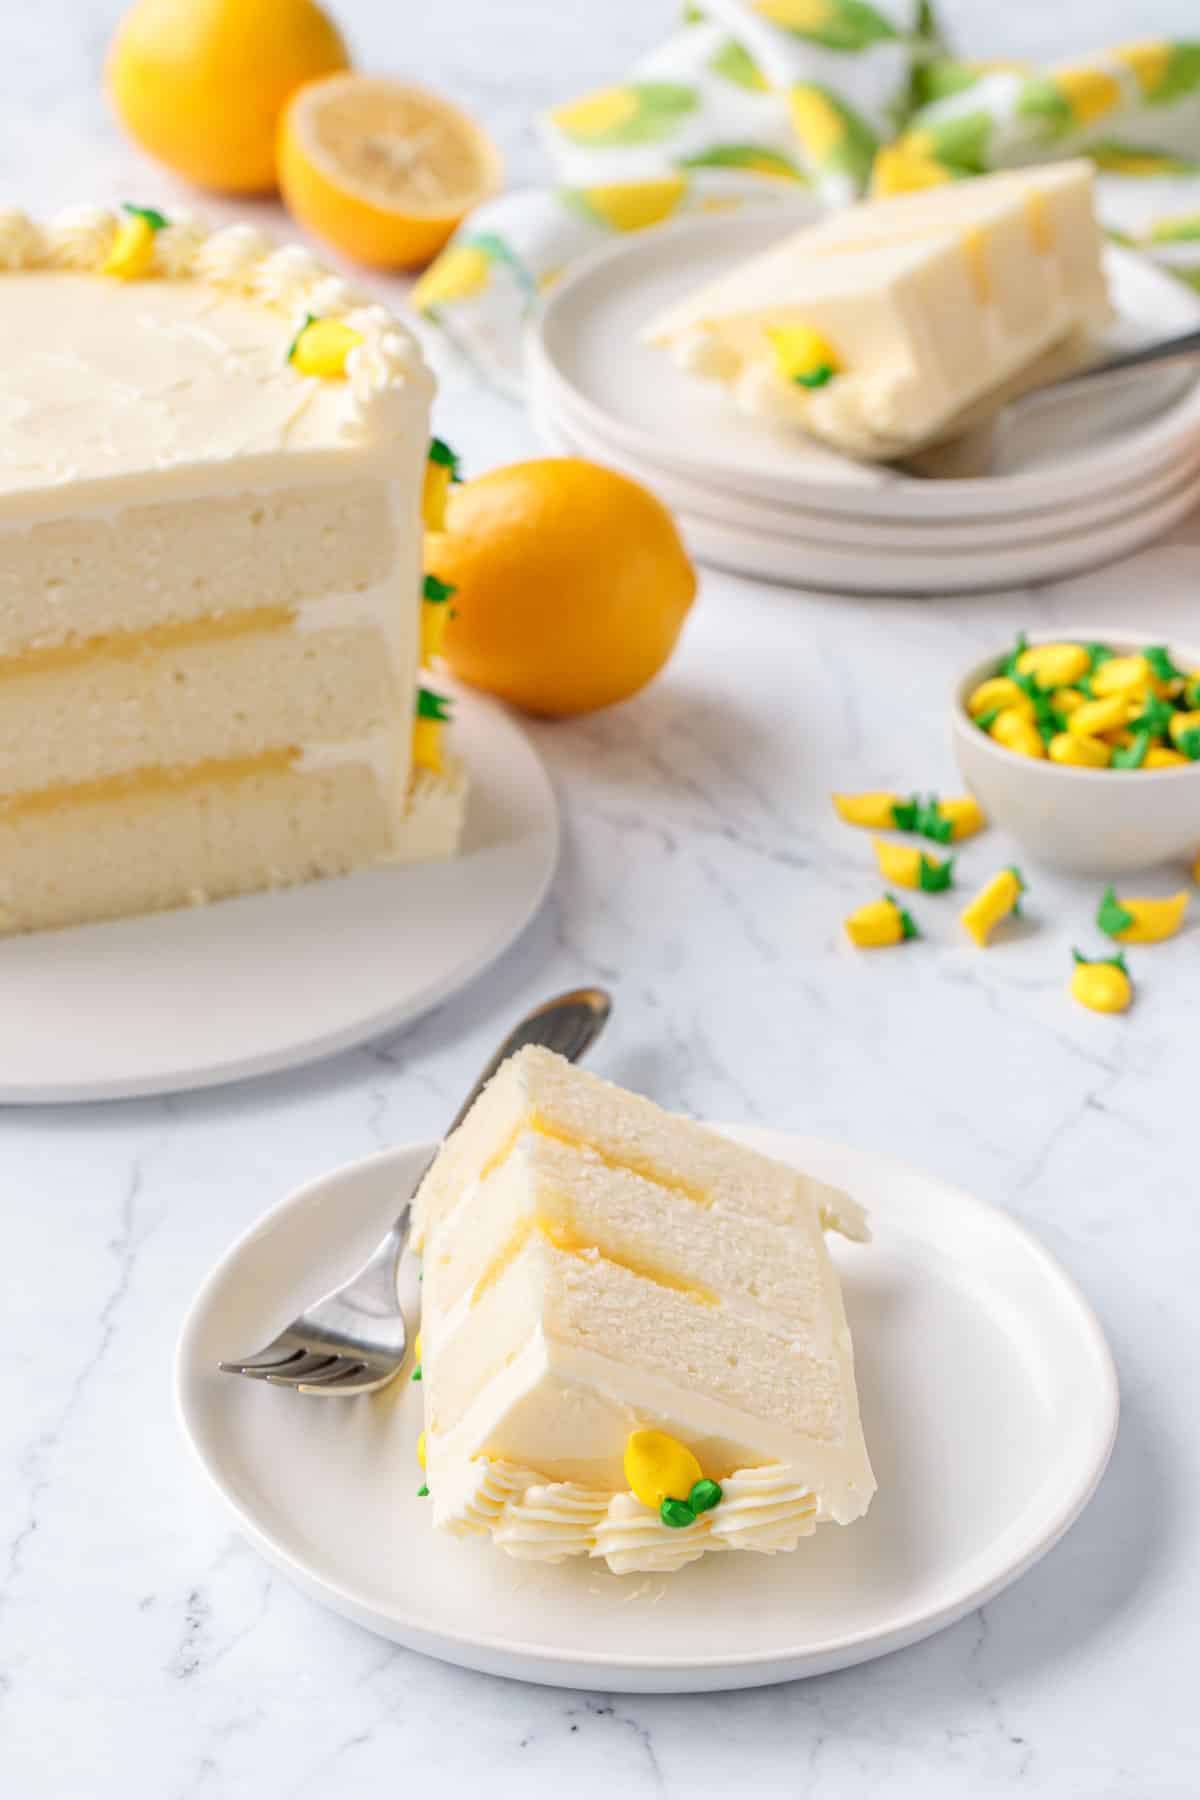
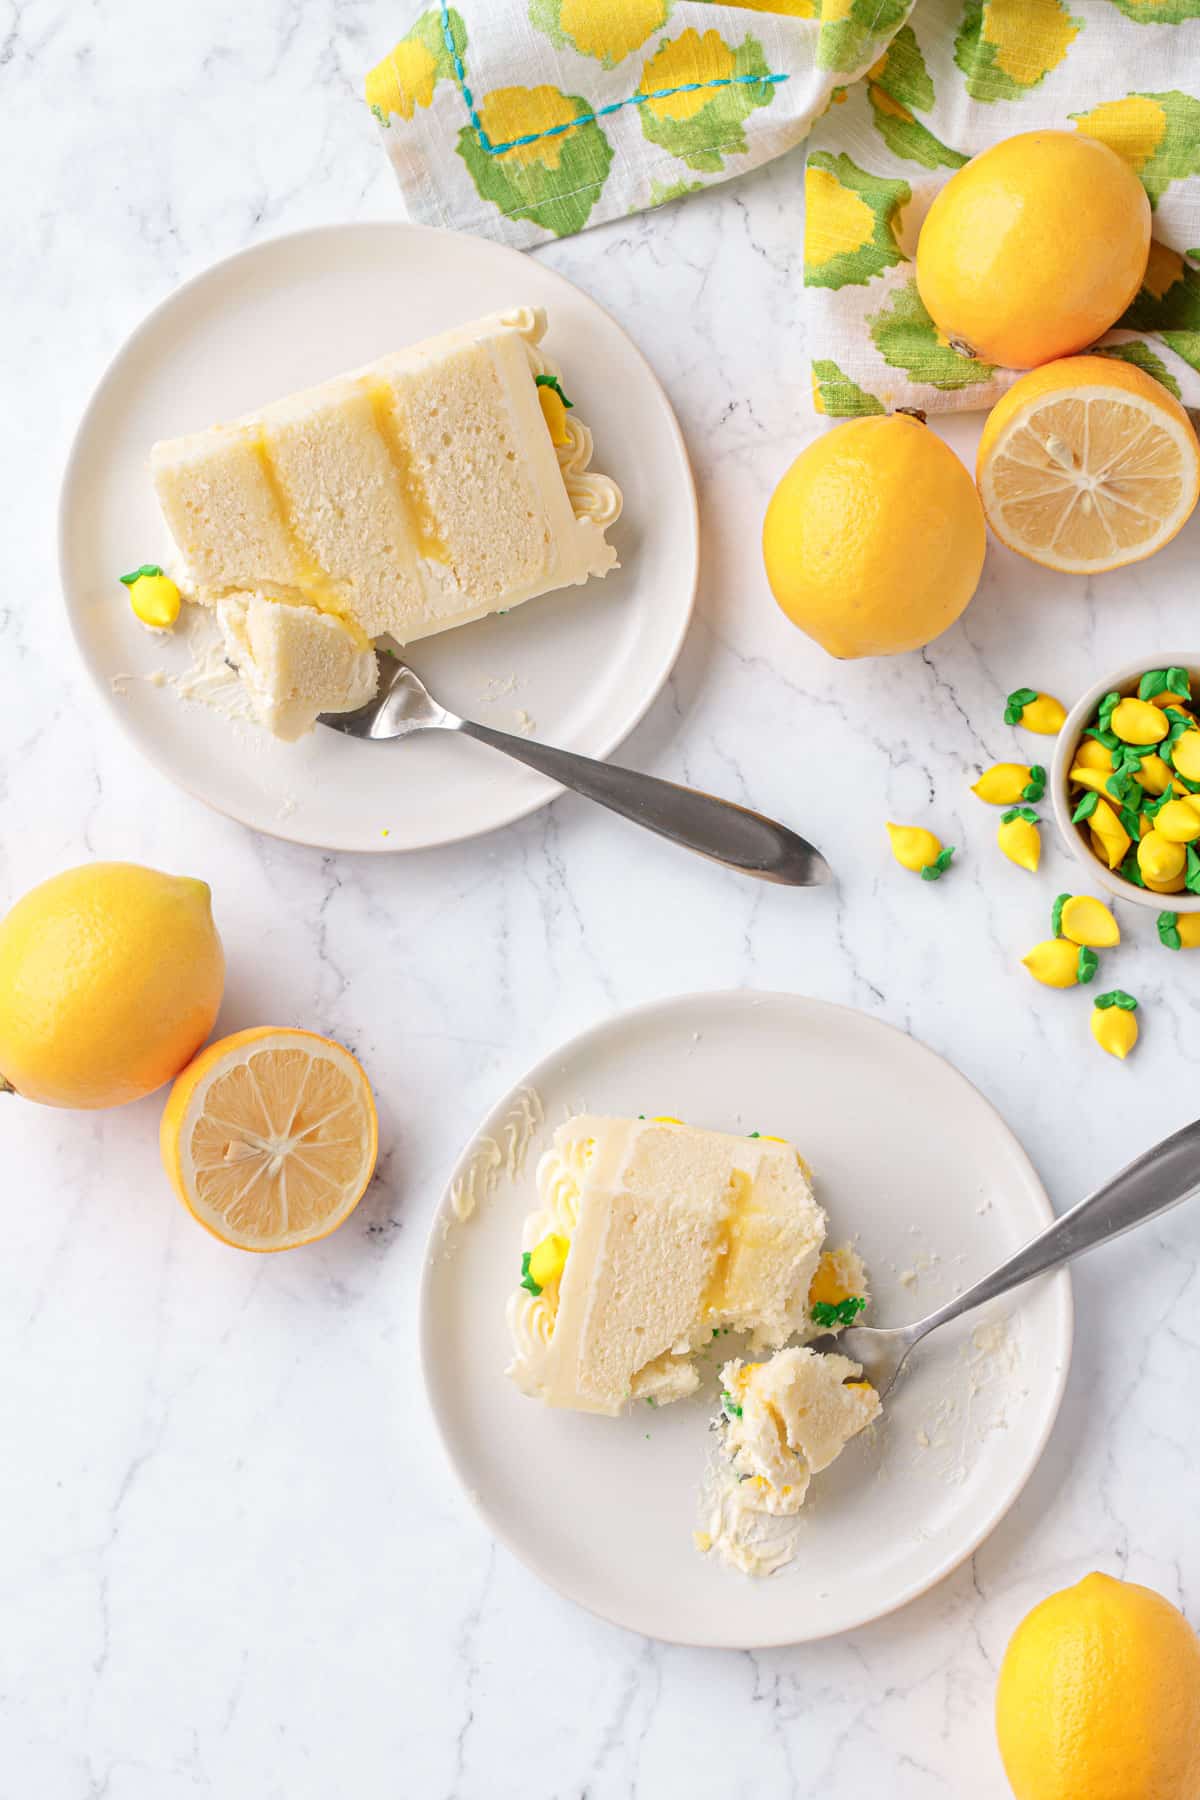
Layer upon layer of lovely lemon flavor, this lemon cake has three times the lemon flavor for three times the deliciousness! With a filling of tart and tangy Meyer lemon curd sandwiched between layers of tender lemon cake, all covered with a cloud-like lemon Swiss meringue buttercream that’s straight out of a dream, this cake is proof that there is no such thing as too much lemon.
When life gives you lemons (and by life I mean mom, who sent me an enormous box filled with Meyer lemons from her tree without any heads up or warning) make an epic lemon layer cake that’s loaded with luscious lemon flavor.
I’ll admit, I’m not usually a lemon dessert person (I’ll choose the chocolate dessert over the lemon one almost every time), but this cake really is something special, three layers of soft lemon-scented cake with a bright lemon curd and finished with the silkiest lemon buttercream you’ve ever tasted. It’s the perfect balance of tart lemon and sweetness.
Looks like I might just be a lemon lover after all!
I particularly love Meyer lemons, which have a sweeter flavor and less harsh acidity that makes them perfect for baking (and I’ve got plenty of other Meyer lemon dessert recipes to prove it!) but you can use regular lemons in this recipe as well.
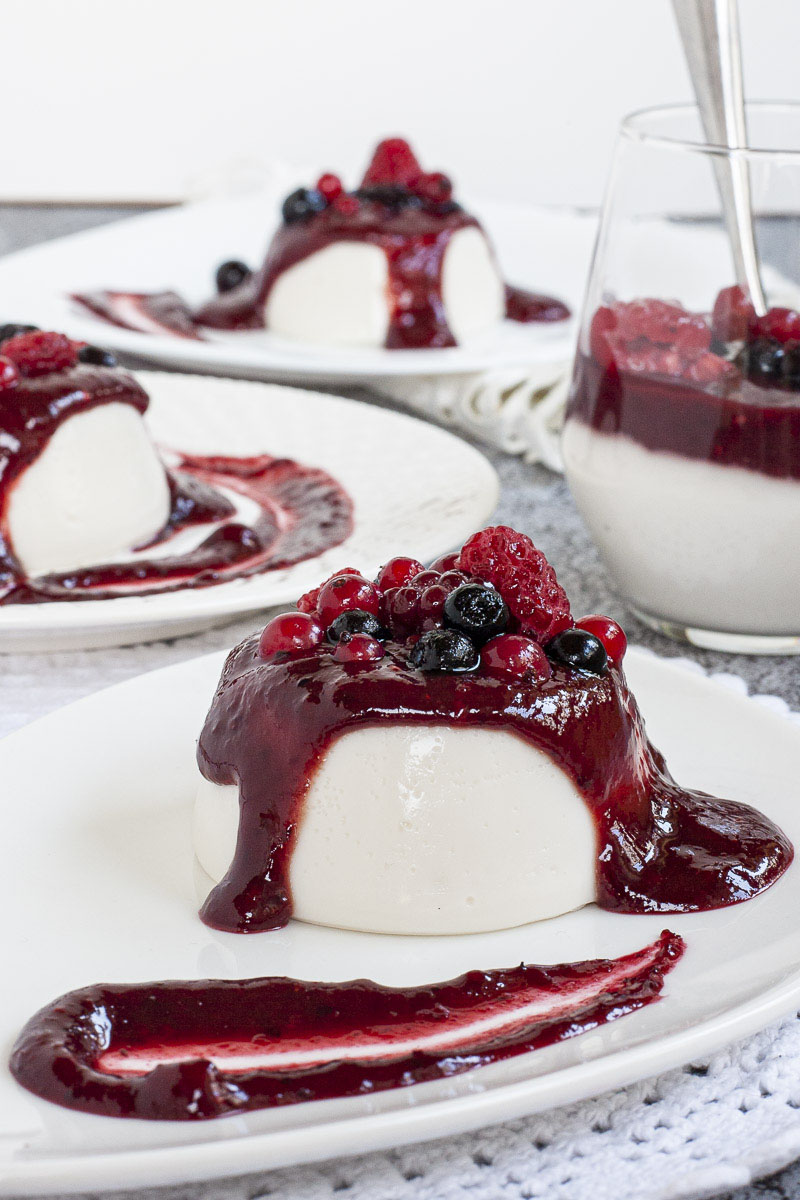
After distributing slices of the first test cake to some lucky neighbors, I heard from more than one of them that this was one of my best creations yet. Considering they’ve been lucky enough to get to sample such delectable creations in the past as this elegant raspberry mousse cake and these citrus-forward cupcakes, that’s no minor claim.
Somehow I hit the bullseye on the very first try, and even though I made it a second time for photos, I didn’t change a thing about the recipe (love it when that happens).
Feel the Heat.
Baking in the summertime is an entirely different ballgame, let me tell you. 🥵
Did you know, that when recipes call for room temperature ingredients, that really means cool room temperature, around 65 to 70 degrees F? And that room temperature butter is not the same as softened butter? Indeed, that’s the truth, and it’s probably why you’ve found yourself in an overly warm kitchen staring at a bowl of soupy buttercream (yikes!) But don’t fret, it can still be saved!
The most important factor when making cakes and frostings, at any time of year, is the temperature of your butter.
Cool room temperature butter should make a shallow impression of your thumb when lightly pressed. If your finger presses in deeply with very little pressure, or if the butter appears greasy or slumped, the butter is too warm. If you’re unsure, stick a probe thermometer right in the middle of the stick to clear up any lingering doubts about the actual temperature of your butter—in an ideal world you’re looking for 68 degrees (don’t forget about the other liquid ingredients in the cake batter—eggs and milk—which should be the same temperature).
In the wintertime, bringing ingredients up to cool room temperature means getting your ingredients out well ahead of time, at least an hour if not more, to let them fully come up to temperature (and sometimes when it’s really cold out, that’s not even enough, I have to soak my eggs in some warm water or set the butter on top of the preheating oven to bring it up to the appropriate temperature). I try not to microwave butter if at all possible, as I find it usually softens the butter unevenly. Better to let it come up to temperature naturally whenever possible.
In the summer, however, it’s the exact opposite: leave your butter out for more than an hour and it will most likely get too soft, leading to curdled cake batters and broken buttercreams (oh, the horror!)
That means, if your kitchen is on the warm side, get your butter out 30-60 minutes ahead of time (but no more). For reverse-creamed cakes in particular, *cool* room temperature butter is particularly important, as too-soft butter will cause the batter to curdle even more. Swiss meringue buttercreams are a bit more forgiving and work well with slightly softer butter, but it’s easy enough to fix if things are slightly too warm or too cold.

You butter not cry (here’s how to fix that buttercream!)
For any kind of buttercream, but particularly meringue buttercreams, having your butter at the correct temperature is key—too cool and the frosting will be thick and greasy, too warm and it’ll be soft and soupy.
Luckily, even if your butter isn’t at precisely the right temperature, it’s easy to adjust and adapt to give you the perfect consistency, no matter the weather.
For my first batch of buttercream, for example, the butter was too cool, making the buttercream thick, stiff, and somewhat greasy (it looks just like whipped butter, not buttercream, if that makes sense).
To warm up buttercream that is too cool, transfer about 1/4 cup of the buttercream into a microwave save bowl, and nuke on 50% power for 10 to 15 seconds until the frosting is just barely melted. With the mixer running on low, drizzle in the melted buttercream into the rest of the batch, then increase the speed and beat it for another minute or two. (This is also my preferred method of rewhipping buttercream that has been refrigerated overnight).
 If the butter is too warm or the meringue was not cooled fully, your buttercream may be loose and almost soupy, flowing off the beater (don’t even try to pipe it like this!)
 After chilling the bowl for 15 minutes and then rewhipping the buttercream, you can see the obvious difference in consistency (this one is thick and fluffy and perfectly pipeable).
On the other hand, if things are too warm (or your meringue wasn’t cooled fully), your buttercream may seem too loose and soupy (see photo above left, this buttercream is much too warm and basically ‘flows’ off of the beater) and can even separate and curdle if it’s really warm. If this happens, don’t fret, just pop the whole mixing bowl in the fridge for 15 to 30 minutes, then put it back on the mixer and beat it for a few more minutes. It should whip right up in to a stiff yet fluffy and silky smooth buttercream (see photo, above right: this is the same batch of buttercream after chilling for 15 minutes).
Swiss meringue buttercream is not particularly heat-tolerant and must be refrigerated, especially in the warmer months. If you want a slightly more stable frosting (if it needs to sit out for longer than 30 minutes), I’d recommend 25-50% of the butter in the recipe with shortening for added stability.

Curd is the Word
One batch of extra-thick Meyer lemon curd becomes both filling for the cake and the primary flavoring method for the Swiss meringue buttercream.
This particular curd recipe is thickened with cornstarch so the filling will stay in place between the cake layers without oozing out. I have a hard time getting egg-only curds to thicken up consistently, so the cornstarch serves as a safety net of sorts, and really helps eliminate the guesswork.
You can use store bought curd here if you prefer (though I’m generally not a fan, it just doesn’t taste as good as homemade). You’ll need about 1 cup for a 6-inch cake (half to flavor the buttercream and the other half to fill between the layers).
But to be honest, any recipe that perfectly uses up both the egg yolks (curd) and egg whites (Swiss meringue frosting) is a perfect one in my opinion, and I’m not sure why you’d mess with that! This is one such recipe, with all the components it uses an even number of whole eggs without a single stray white or yolk left over.
Reverse-Cream Method
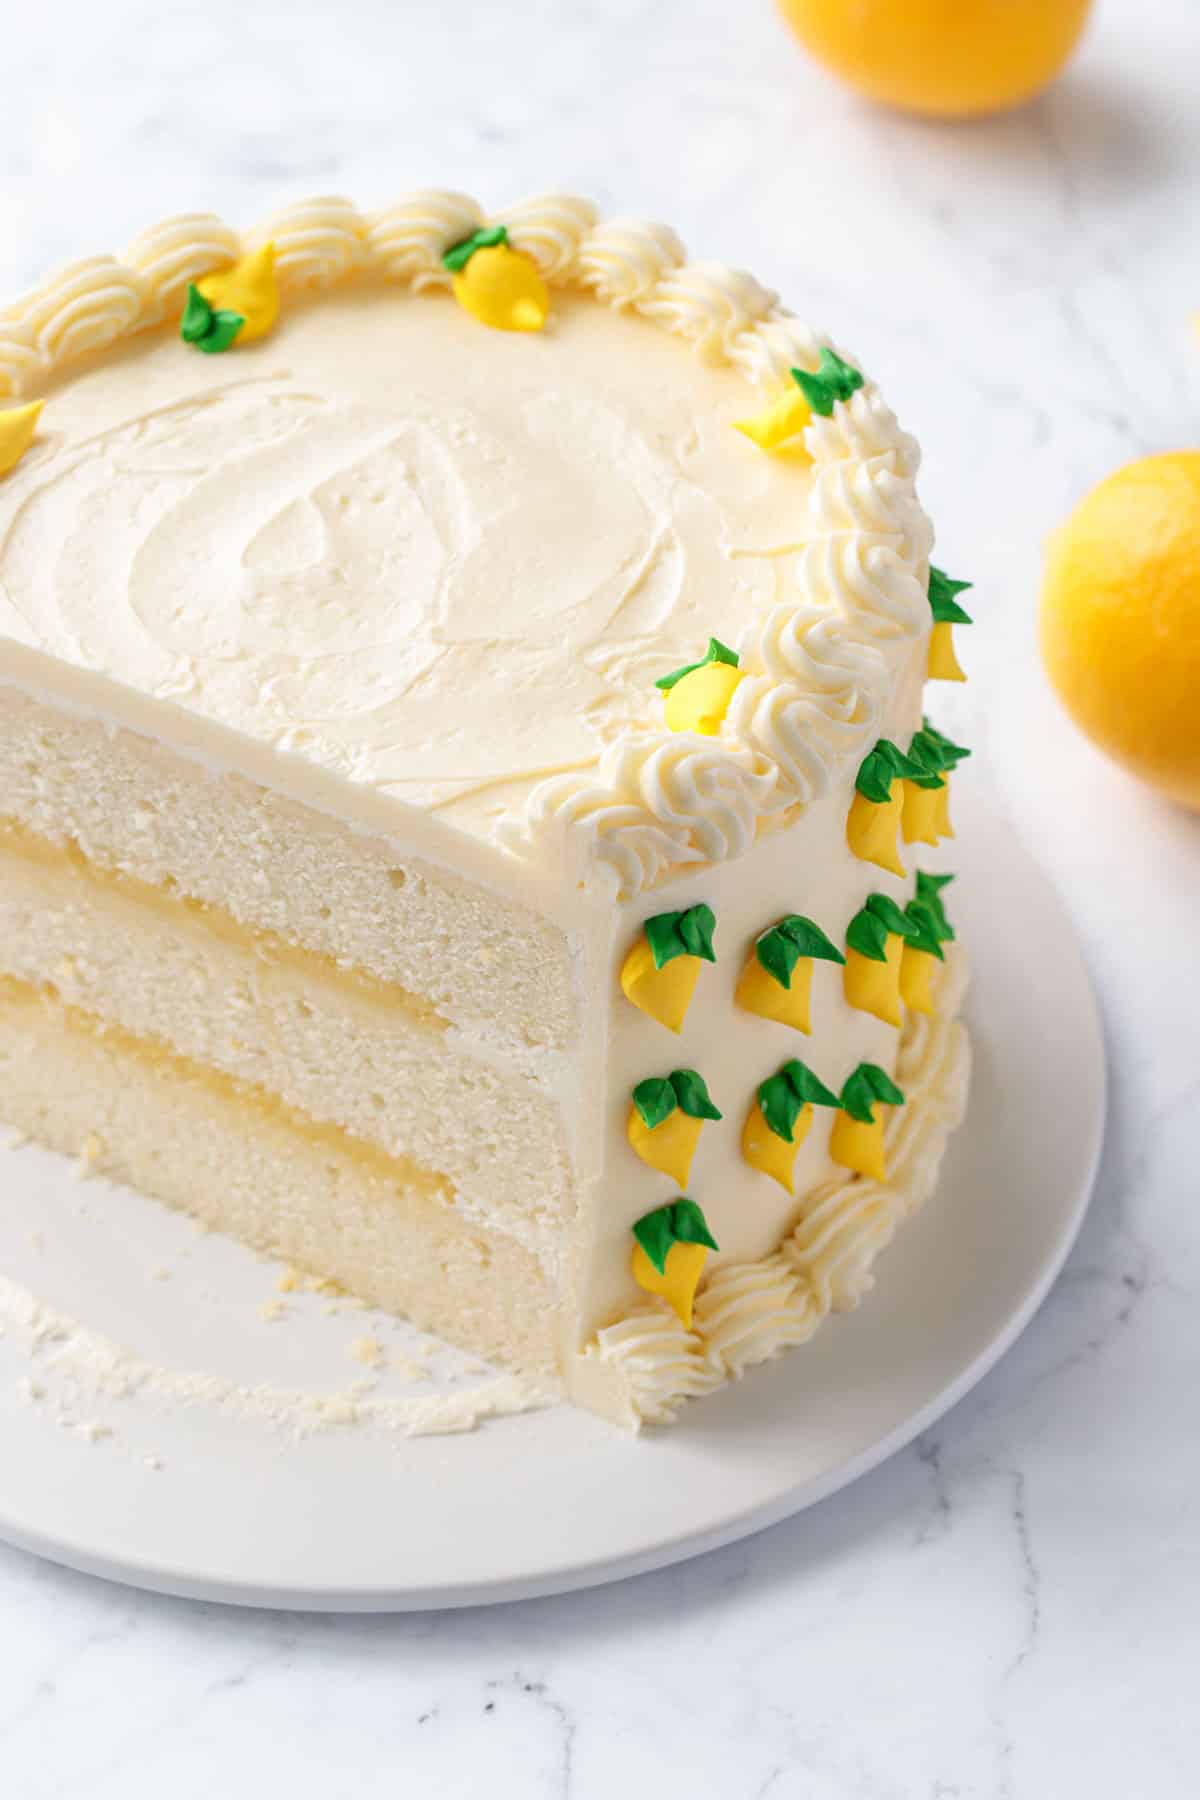
The reverse cream method is my favorite way to make layer cakes, I find it produces a more even texture and rise (no leveling necessary!) with an extra fine, almost cottony-soft texture. The batter is also less prone to curdling than regular creamed cake batters.
With reverse creaming, the idea is that by mixing the butter with the flour first, the fat ‘coats’ the flour molecules, preventing gluten formation when the liquid ingredients are added.
Using cake flour is key with reverse-creamed cakes, as, once again, inhibiting gluten formation is our main objective (and the lower protein levels in cake flour do just that). While you can technically use AP flour here (use an equivalent amount by weight, NOT volume, AP weighs more than cake flour) I think it’s worth it to track down cake flour for this recipe.
 In the bowl of a stand mixer, combine flour, baking powder, salt, and lemon zest-infused sugar and mix to combine.
 Add cubes of cool room temperature butter (not too soft!) to mixing bowl with dry ingredients.
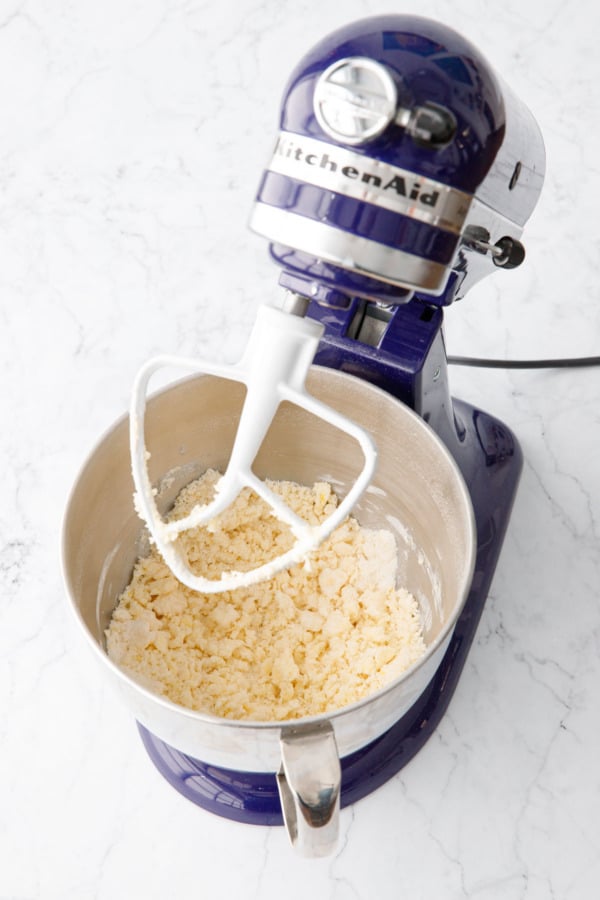 Mix in butter until the mixture looks sandy with pea-size and smaller pieces of butter.
 With the mixer running on low, add lemon juice and and half of milk.
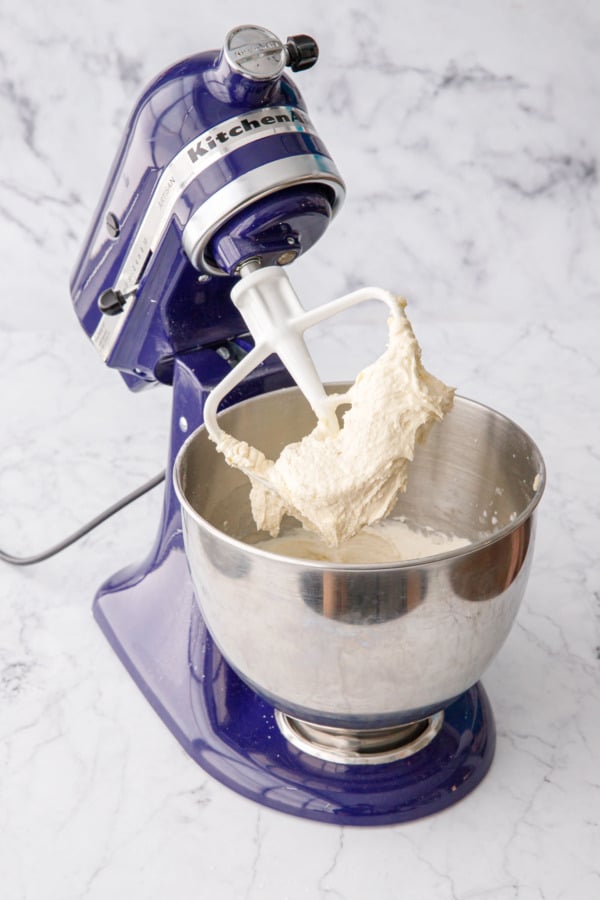 Increase mixer speed to medium high and beat for 3 to 5 minutes or until batter is very light and fluffy. Scrape down the sides of the bowl.
 Whisk eggs and vanilla into remaining 1/4 cup milk; slowly pour into mixer in a few additions, mixing until well combined.
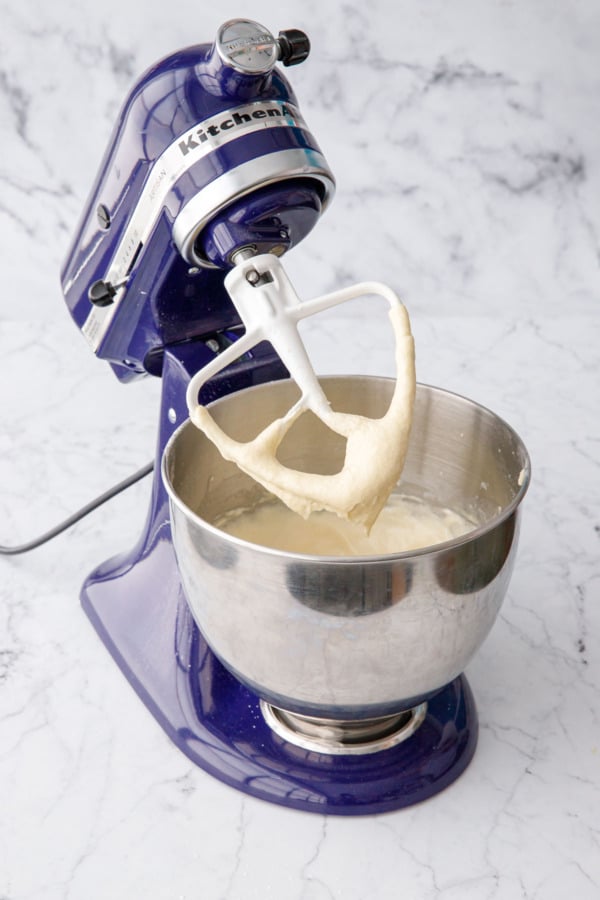 Once wet ingredients are fully incorporated, the batter should be smooth, though it may appear somewhat curdled (that’s ok).
 Divide batter equally among three 6-inch round cake pans (ideally with a light colored finish). I use a kitchen scale to divide the batter into perfect thirds.
Sizing and Scaling
This recipe is written for one 6-inch triple layer cake (as seen in the photos), a perfect size for a small gathering, about 10-12 servings. I used these 6″ heavy aluminum cake pans, which bake evenly and the light-colored surface keeps the cake from browning too much on the edges.
If you’re wanting to make a larger, 8-inch triple layer cake, simply double all components and increase the bake time slightly.
Baking Tip: get the tare weight of your mixing bowl BEFORE you start mixing ingredients. Then with some simple math, you can figure out the precise weight of your batter so you can divide it into perfect thirds.
You can use the same proportions for two layer cakes too, just divide the batter in half instead of thirds. You’ll need to increase the baking time accordingly to account for the thicker layers.
 Pipe a border of buttercream around the edge of the first cake layer, this will keep the curd from leaking out.
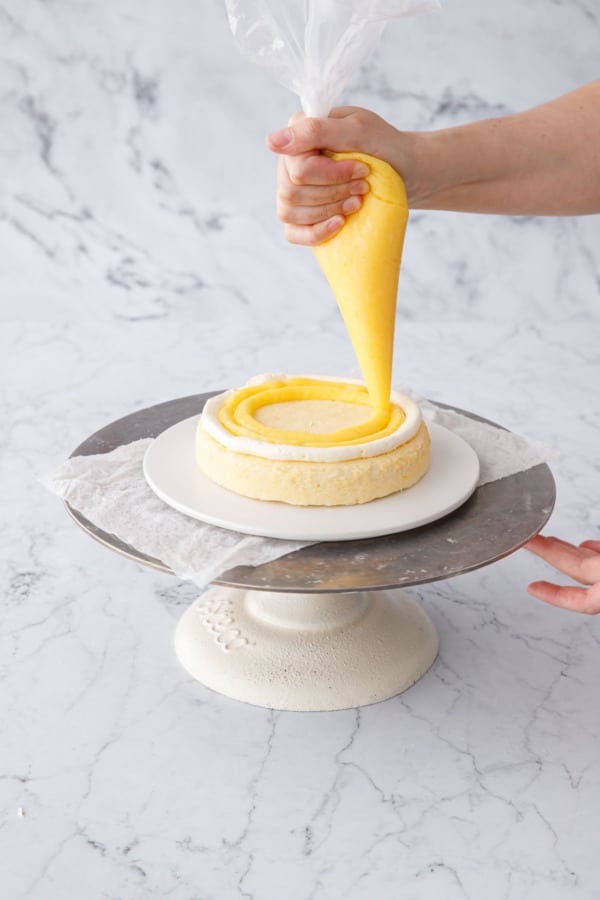 Spoon or pipe 1/4 cup of lemon curd into the center of the cake.
 Use an offset spatula to spread curd into an even layer.
 Place the second layer on top of the filling and gently press to adhere.
 Repeat with second layer: piping a buttercream border and filling with lemon curd.
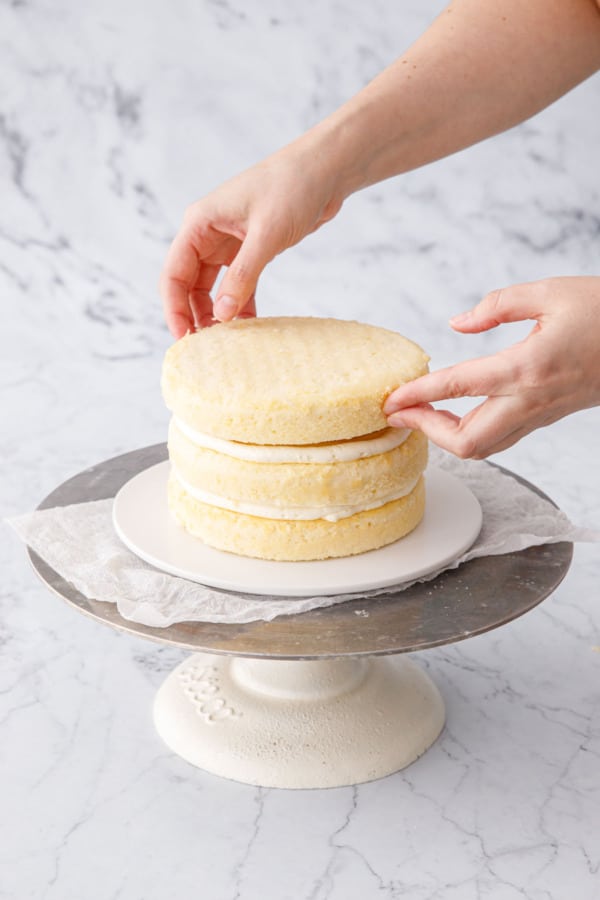 Top with the final layer of cake, flat side up, pressing lightly to adhere.
 Give the cake a thin ‘crumb’ coat of frosting. I like to pipe the frosting on to make it easier to get an even coat over the entire cake.
 After chilling for 15 minutes, the crumb coat will have set and you can then give the cake a final thicker layer of frosting, using an offset spatula to smooth out the sides.
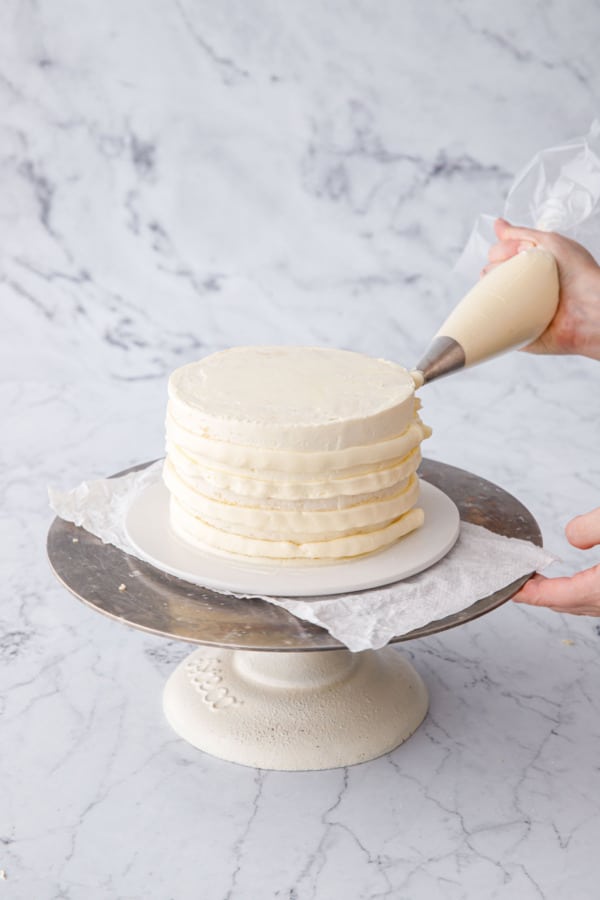 After chilling the crumb coat for 15 minutes, spread or pipe the final layer of frosting onto the sides and top of cake.
 Use an offset spatula to spread the frosting evenly over the top and sides of cake.
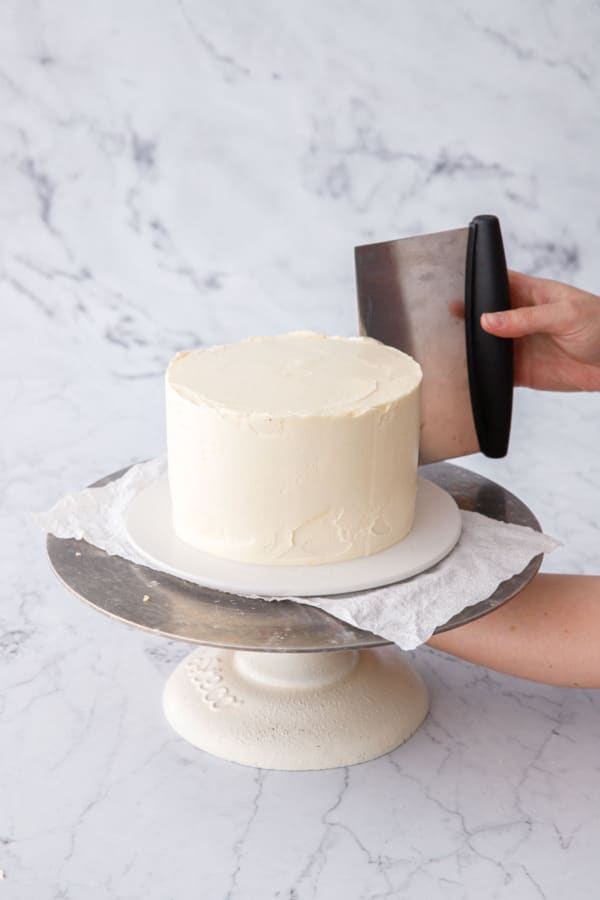 Get smooth buttercream sides by using a flat-edged pastry scraper while spinning the cake on a turntable.
 If desired (and if you have enough buttercream), pipe a decorative border on the top and bottom edges of the cake for a professional finished look.
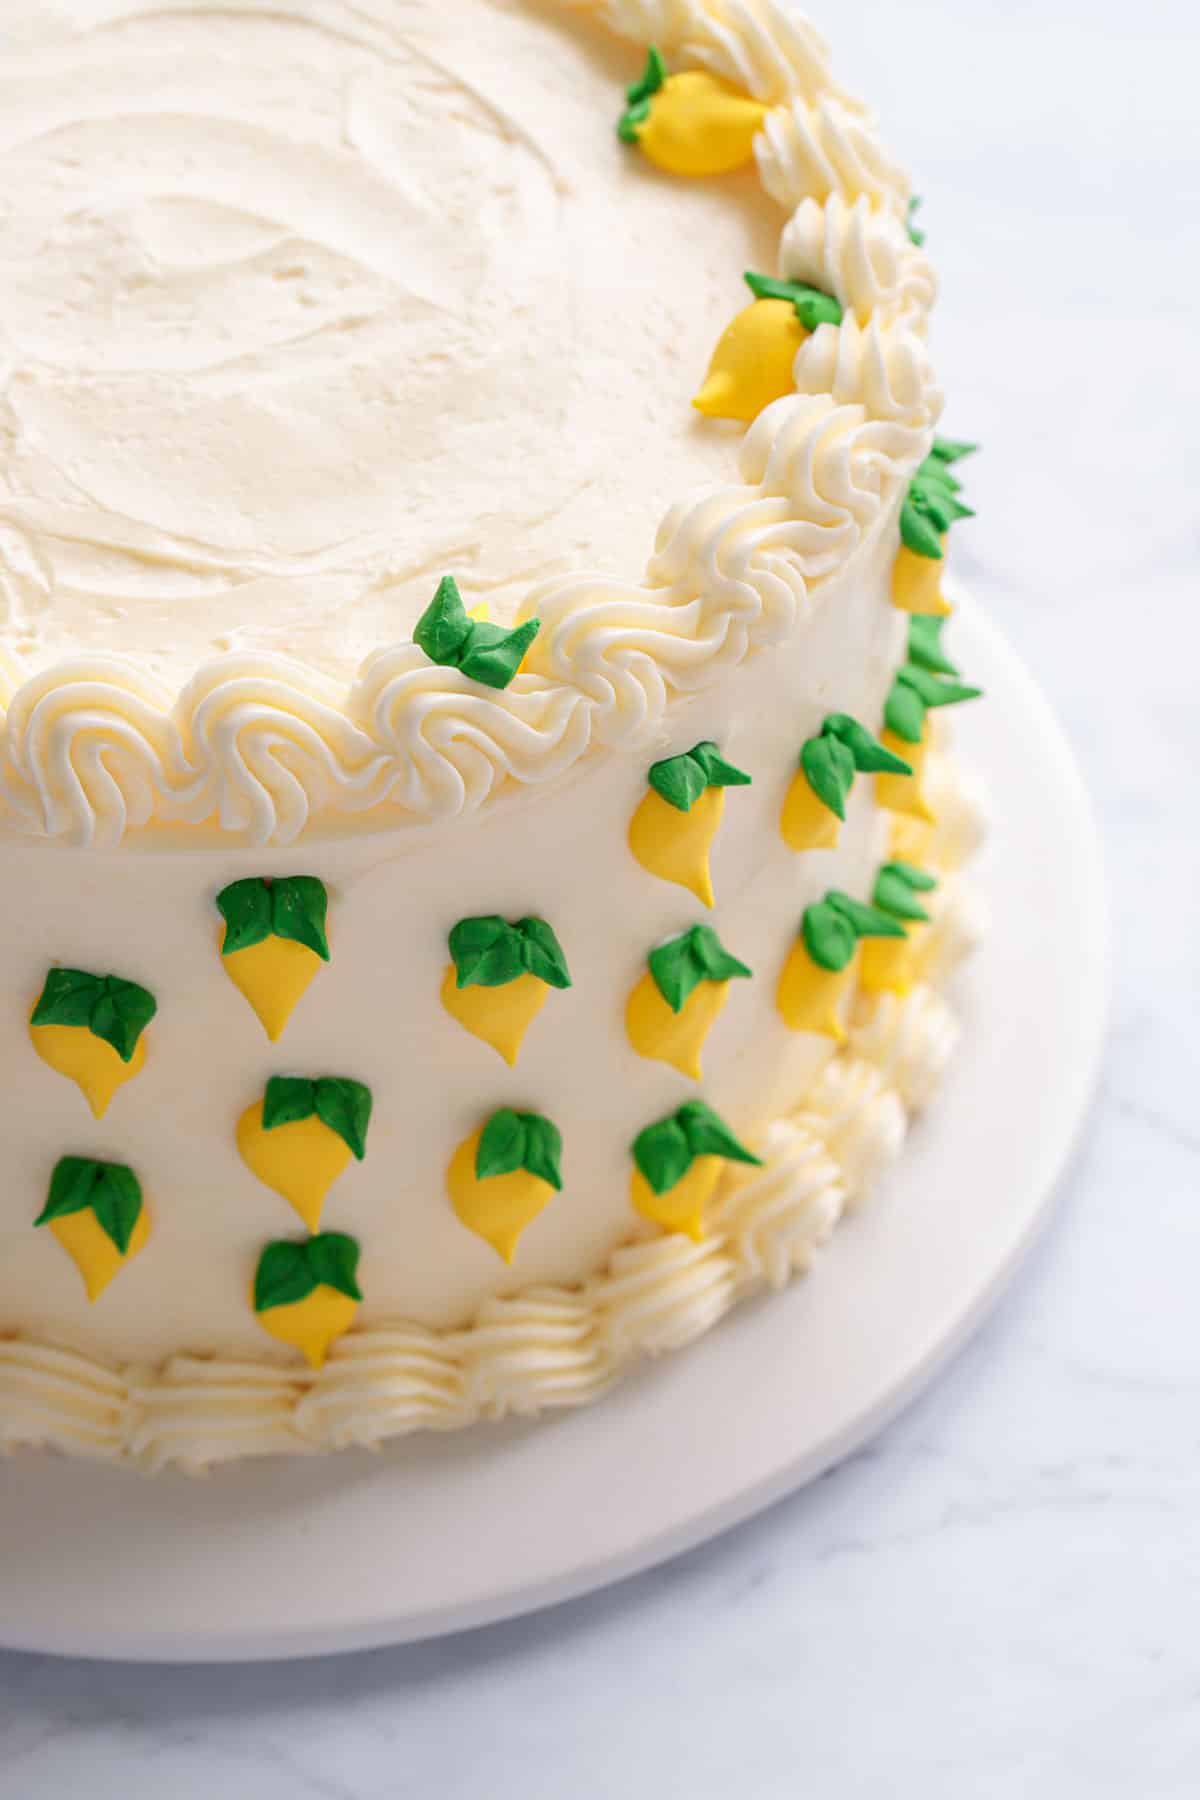
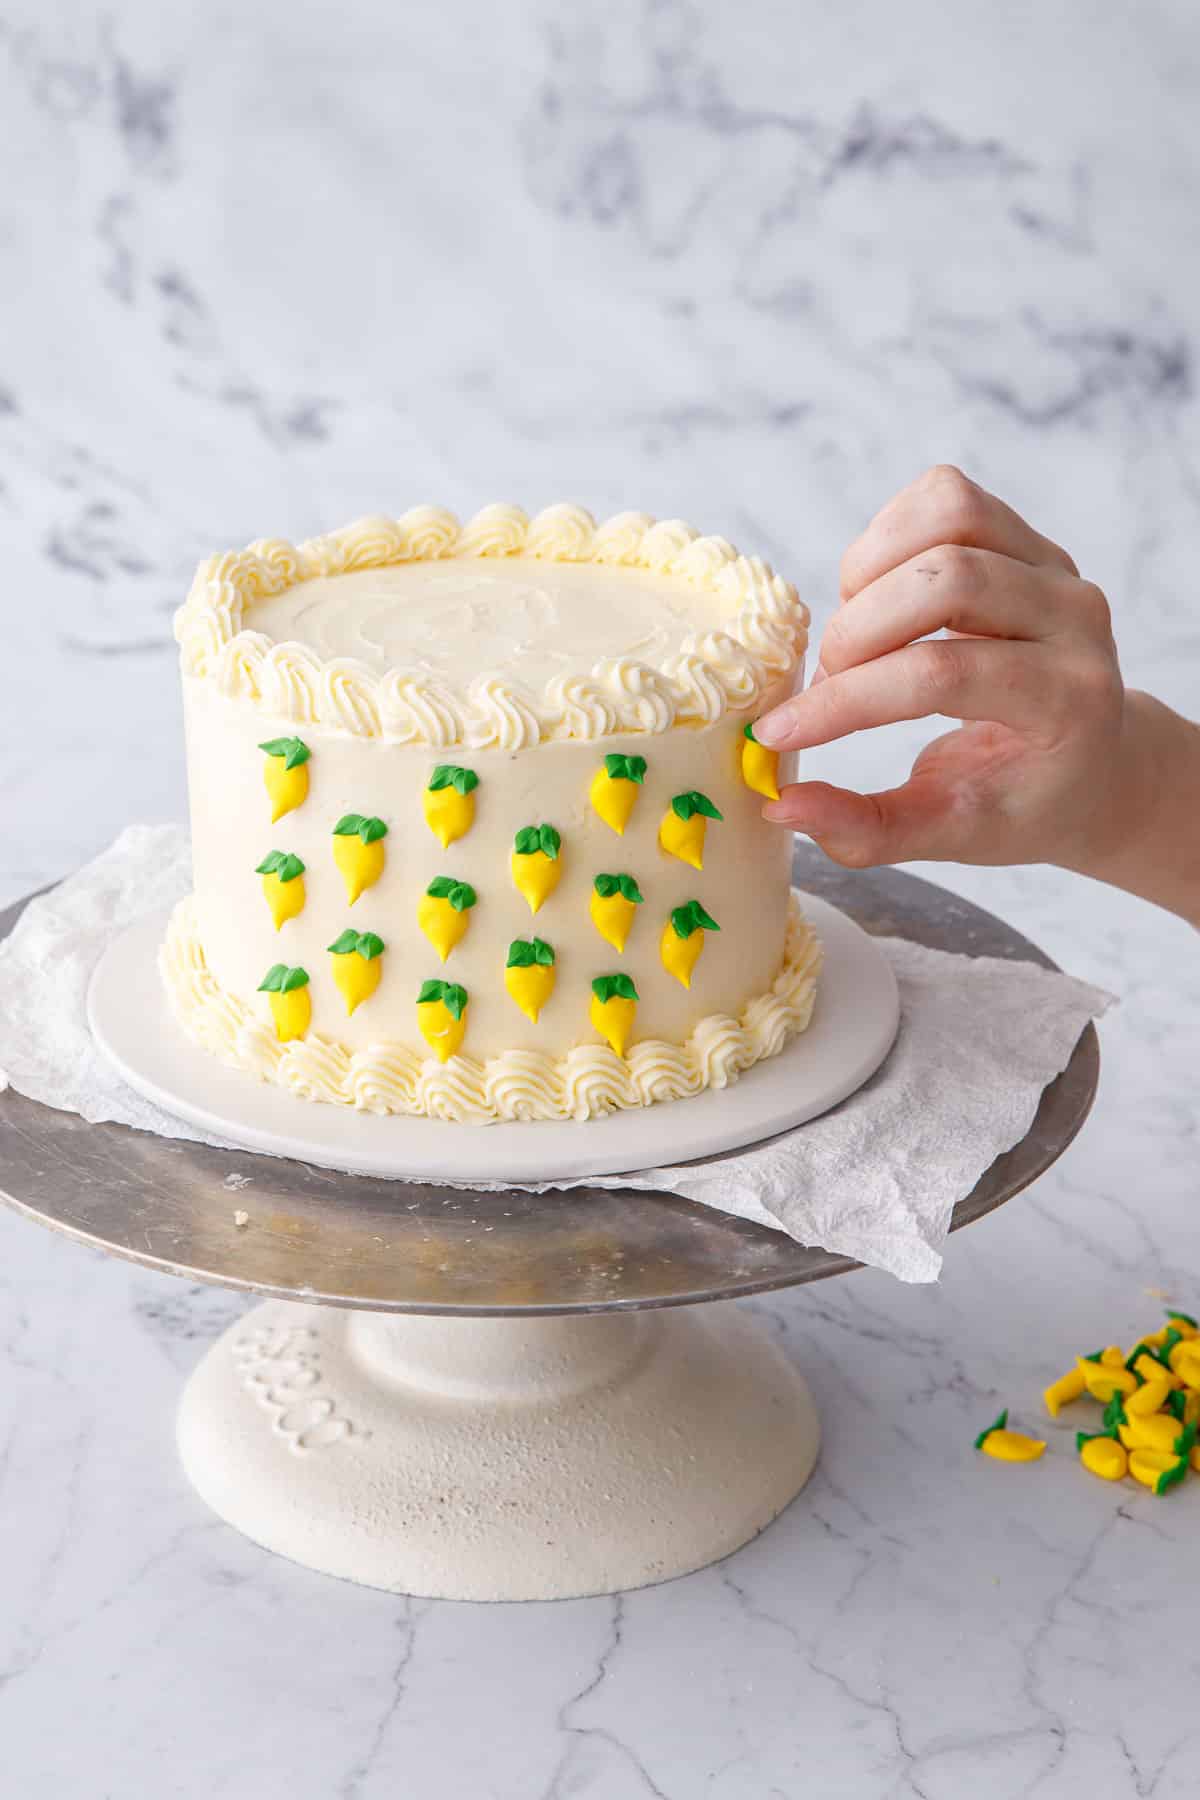 Decorate by placing small royal icing lemons around the outside of the cake if desired.
The frosting borders were piped with a Wilton #2A round tip (about 1/2-inch round), and the decorative border was piped with a Wilton #21 star tip. I really don’t have the greatest piping skills when it comes to borders like this (maybe I was using the wrong tips? Or more likely I just need to practice more), but I think it looks better and more finished than the raw edges.
Finally, the icing on the icing on my cake, was these adorable royal icing lemons that I found on Etsy (you could certainly try to make them yourself but I’d already invested enough time in this cake I’m all for time-saving shortcuts). Pressed onto the sides of the cake in a evenly spaced pattern really finishes it off beautifully, and hints at the flavors to be found inside.
I also think this cake would look fabulous naked, with just a thin layer of buttercream scraped around the sides with some of the cake showing through. You could also assemble it Milk bar-style within a round of acetate, with the layers of cake, curd, and frosting all visible around the edges.
Make-Ahead Tips
All the components of this cake can be made ahead of time, though I recommend keeping the components separate until you are ready to assemble. Once assembled and frosted, the cake should be refrigerated (or press a layer of plastic or parchment onto the cut surface to prevent it from drying out for up to 3 days (it’s still good after that, just a bit on the dry side).
For slightly longer storage, you may want to give the cake layers a soak or syrup for some additional moisture to prevent it from drying out too much.
If you want to make the cake layers ahead of time, let cool, then wrap each layer in plastic wrap and place in a ziptop bag and freeze for up to a month. You can assemble and frost the cake layers straight from the freezer (in fact, frozen cakes are easier to work with so I often freeze the layers even if I made them just a day ahead), but let it come to room temperature before slicing and serving.
The lemon curd can be made up to a week ahead of time and refrigerated in an airtight container. You can technically freeze lemon curd as well, although I haven’t tried this personally.
The Swiss meringue buttercream can be made a few days ahead of time. Press a layer of plastic wrap down onto the surface of the frosting and then cover with a lid or second layer of plastic wrap (I left it in the mixing bowl since it needs to be re-whipped anyway).
To re-whip buttercream that has been refrigerated, let sit out for an hour or so to come up to room temperature, then beat with the paddle attachment for 3 to 5 minutes or until light and fluffy once again. If the frosting seems thicker than it should be, you can gently melt about 1/4 cup of the buttercream in the microwave (10-15 seconds on 50% power), then slowly drizzle the melted frosting into the bowl with the mixer on low. Once all the melted frosting has been added, increase the mixer speed and beat for 3 to 5 minutes more. The small amount of warmed buttercream will quickly bring the rest of the batch up to temperature, resulting in an ultra smooth and fluffy buttercream just like the day it was made!
Ingredient Notes & Substitutions
Cake Flour: Cake flour is lower protein and more finely milled than all-purpose flour, and it’s really necessary to achieve that cottony-soft cake texture. If you use AP flour with the reverse creaming method you risk overdeveloping the gluten, resulting in a tough, gummy cake. That said, if you want to attempt it, be sure you measure an equivalent amount of AP flour by weight, not volume (since cake flour is lighter than AP flour by quite a bit).
Meyer Lemons: Meyer lemons (a hybrid of lemons and mandarins) are sweeter and less tart than regular lemons. That said, you can use regular lemons, or use 75% lemon and 25% orange juice/zest to approximate the flavor of Meyer lemons.
Lemon curd: the recipe includes instructions for making your own lemon curd (a perfect way to use up whole eggs since the yolks go in the curd and the whites go in the buttercream). That said, you can use store bought curd instead, you’ll need about 1 cup (half for the frosting and half for filling). You can also replace the lemon curd filling with something else, all buttercream or even something like raspberry jam would be lovely in between the cake layers.
The curd is also the main flavoring element of the lemon buttercream, and cannot be replaced with lemon juice (it will make the frosting too thin). A little zest or lemon extract would work to add some mild lemon flavor, though you will have specks visible in your frosting from the zest. You can also just add a bit of vanilla extract instead and you’ll have yourself a lovely vanilla bean buttercream.
Cornstarch: The cornstarch in the curd is necessary to produce an extra-thick lemon curd (regular lemon curd made without cornstarch is often too loose and will not hold up well in between the cake layers). You can use tapioca starch instead of the cornstarch if you want, the texture will be a bit ‘stretchier’ but will still produce a nice thick curd.
Triple Lemon Layer Cake
Prep Time: 2 hours
Cook Time: 45 minutes
Total Time: 3 hours
Lemon lovers: this one’s for you! Layers of tender lemon cake filled with a bright lemon curd and a silky smooth lemon buttercream.
This recipe is written for one 6-inch round, three layer cake. Double the recipe for an 8-inch layer cake.
For lemon curd:
▢ ⅔ cup / 133 g granulated sugar▢ 2 tablespoons Meyer lemon zest▢ 4 teaspoons / 8 g cornstarch▢ pinch fine sea salt▢ 4 large egg yolks▢ 1 large egg▢ ½ cup / 120 g freshly squeezed Meyer lemon juice▢ 3 tablespoons / 42 g unsalted butter, at room temperature, cut into cubesFor lemon cake:
▢ 1 cup / 200 g granulated sugar▢ 2 teaspoons Meyer lemon zest▢ 1 ½ cups / 170 g sifted cake flour▢ 1 ½ teaspoons baking powder▢ ½ teaspoon fine sea salt▢ 10 tablespoons / 141 g (1 ¼ sticks) unsalted butter, at cool room temperature, cut into cubes▢ 3 large eggs, at cool room temperature▢ ½ cup / 120 g whole milk, at cool room temperature▢ 2 tablespoons / 30 g freshly squeezed Meyer lemon juice▢ 1 teaspoon vanilla extractFor Swiss meringue buttercream:
▢ 4 / 120 g large egg whites▢ 1 ⅓ cups / 266 g granulated sugar▢ pinch fine sea salt▢ 22 tablespoons / 310 g (1 ¾ sticks) unsalted butter, at room temperature, cut tablespoon-sized pieces▢ ½ cup / 160 g lemon curd, at room temperatureMake lemon curd:
In a bowl, rub lemon zest into granulated sugar to release the flavorful oils. Whisk in cornstarch and salt until evenly incorporated.
Transfer to a medium, heavy-bottomed saucepan set over low heat. Whisk in eggs until smooth, then whisk in lemon juice.
Continue to whisk regularly over low heat until the mixture starts to thicken. You can switch to a spatula at any point if you like. Continue to cook until curd reaches 170ºF and thickens enough that you can swipe your spatula through it and it will not fill in for at least 3-5 seconds.
Remove from heat and whisk in butter, 1 cube at a time, whisking until fully melted and incorporated before adding the next.
Strain through a fine mesh sieve to remove the zest and any bits of cooked egg (this will give you a beautifully smooth texture). You should have about 1 cup of curd (half will be used to flavor the buttercream, the other half filling between the layers).
Let curd cool completely, or, if not using right away, press a layer of plastic wrap onto the surface of the curd and refrigerate overnight or for up to 5 days.
Make cake layers:
Preheat oven to 350ºF. Butter and line three 6-inch round baking pans with parchment paper; lightly butter parchment.
In a bowl, rub lemon zest into granulated sugar to release the flavorful oils. Add to large mixing bowl or stand mixer bowl along with flour, baking powder, and salt; mix briefly to combine.
Sprinkle butter pieces over top of flour mixture, then mix with the paddle attachment until butter is broken up into pea-sized or smaller pieces and mixture seems sandy.
With mixer running on low, drizzle in lemon juice, followed by 1/4 cup of milk. Increase mixer to medium-high and beat for a solid 3 to 4 minutes until liquid is fully incorporated and batter is very light and fluffy. Scrape down the sides of the bowl.
Meanwhile, whisk eggs and vanilla into remaining 1/4 cup milk. With mixer running on low, add egg mixture in 2 to 3 additions, mixing well after each one, until batter is evenly mixed, scraping down the sides of the bowl as needed. The batter may appear slightly curdled, that's ok.
Divide evenly among prepared pans (approximately 250 grams of batter in each of the three 6-inch pans if you want to be precise).
Bake for 22 to 25 minutes (slightly longer if making a larger size cake or if making two layers instead of three), rotating the pans half way through, until a toothpick inserted in the center comes out clean. Remove from oven and place on a wire rack until cool enough to handle. Run a small knife around the edges of each pan, then gently invert onto wire racks. Cakes should come out cleanly. Allow to cool completely. Wrap cooled cake layers in plastic wrap and refrigerate at least an hour or overnight (since cold cakes are easier to work with).
Alternatively, the cake layers can be frozen until ready to use, up to 1 month. Simply wrap each layer individually in a double layer of plastic wrap and then store inside a large zip top bag.
Make Swiss meringue buttercream:
Combine egg whites, sugar and salt in a double boiler (or use a large, heat-proof mixing bowl set over a pot of gently simmering water–the bottom of the bowl should sit over, but not touch, the water below). Whisk vigorously until doubled in volume and sugar is completely dissolved (will read 160 degrees F on an instant-read thermometer).
Return bowl to stand mixer fitted with the whisk attachment. Beat on medium-high speed until meringue is about tripled in volume and forms stiff, glossy white peaks. At this point it should also feel cool to the touch (measuring 80ºF or below) – this is the most important thing to check, as your buttercream will curdle if the meringue is still too warm.
With the mixer running on medium speed, add 1 chunk of butter at a time, increasing speed and mixing until butter is completely incorporated before adding the next piece. Your buttercream will start to soften, going from stiff peaks to soft and almost soupy, but as you continue to add butter it will thicken up again. If at any point it begins to curdle, stop adding butter and increase mixer speed to high, beating until it comes together again before adding the remaining butter.
If frosting is still soupy after adding all the butter (very likely if your kitchen is on the warm side) pop it in the fridge for 15 to 20 minutes to firm it up a bit, then return to the mixer and beat on medium-high for a few minutes until thick, smooth, and fluffy.
On the other hand, if your frosting seems too thick and almost greasy, it's likely too cold. In which case, gently melt about 1/4 cup of the buttercream in the microwave (10-15 seconds on half power), then drizzle into mixer running on low. Increase speed to medium-high and beat for 2 to 3 minutes or until light and fluffy.
Switch over to the paddle attachment and add 1/2 cup of the lemon curd. Mix on low speed for a few more minutes until curd is fully incorporated (mixing on low speed will also help remove excess air bubbles).
Buttercream can be made ahead of time, refrigerate with a layer of plastic wrap pressed to the surface. Before frosting, let come to cool room temperature then return to the stand mixer and re-whip on medium-high speed for 3 to 5 minutes or until light and fluffy once again.
To Assemble:
To assemble, place one layer on a cake stand or serving platter. Pipe a ring of buttercream around the edge of the cake layer, then spoon or pipe about 1/4 cup of lemon curd in the middle of the ring. Repeat with the second layer, then top with final cake layer, pressing lightly to adhere.
Cover the entire cake with a thin layer of buttercream. This crumb coat will make frosting the cake easier. Refrigerate for about 15 minutes to allow this crumb coat to set.
Remove cake from refrigerator and frost with remaining buttercream, reserving some for piping decorative borders or details if desired.
Slice and serve immediately, or refrigerate until ready to serve (let cake sit at cool room temperature for up to 30 minutes before serving). Refrigerate leftovers in an airtight container (or press a piece of parchment/plastic to the cut sides to keep them sealed for up to 3 days.
All images and text ©
for Love & Olive Oil.
Let us know what you think! Leave a Review below or share a photo and tag me on Instagram with the hashtag #loveandoliveoil.
There may be affiliate links in this post. We are a participant in the Amazon Services LLC Associates Program, an affiliate advertising program designed to provide a means for us to earn fees by linking to Amazon.com and affiliated sites.


.jpg&h=630&w=1200&q=100&v=6e07dc5773&c=1)